
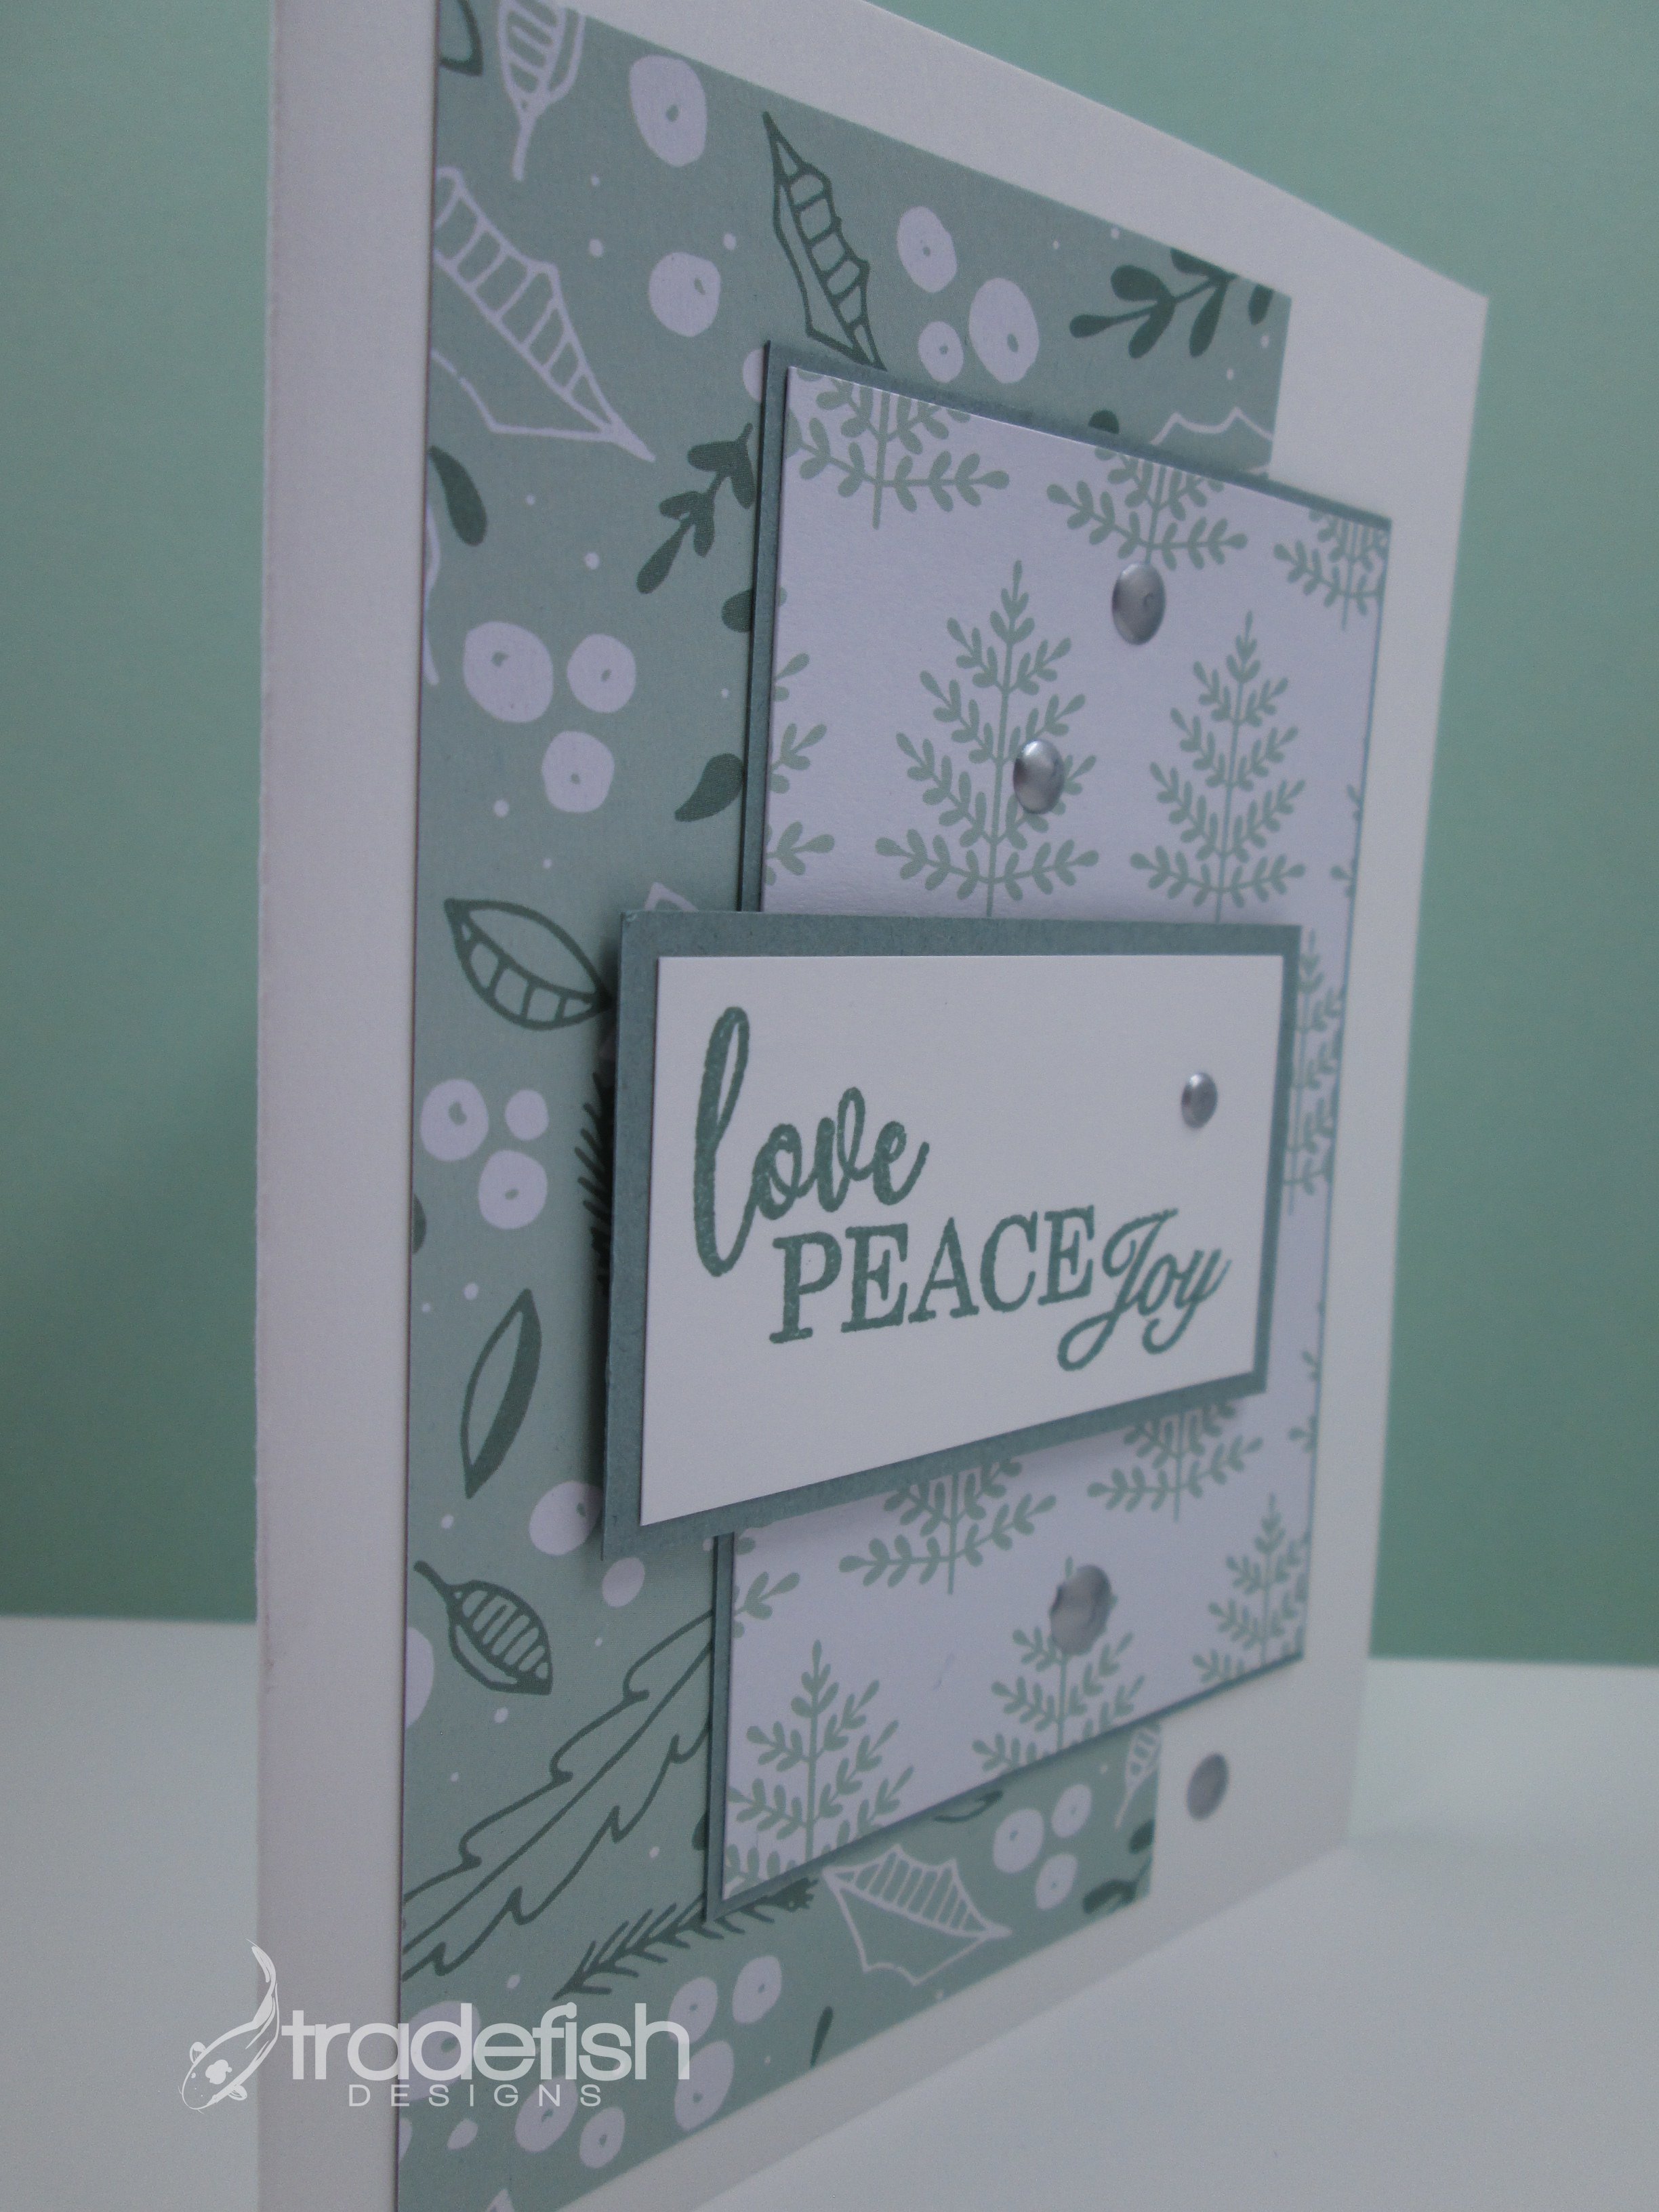
25 Days of Christmas Cards - Day 14
Day 14 of the 25 Days of Christmas using Close to My Heart’s Christmas Story Collection.
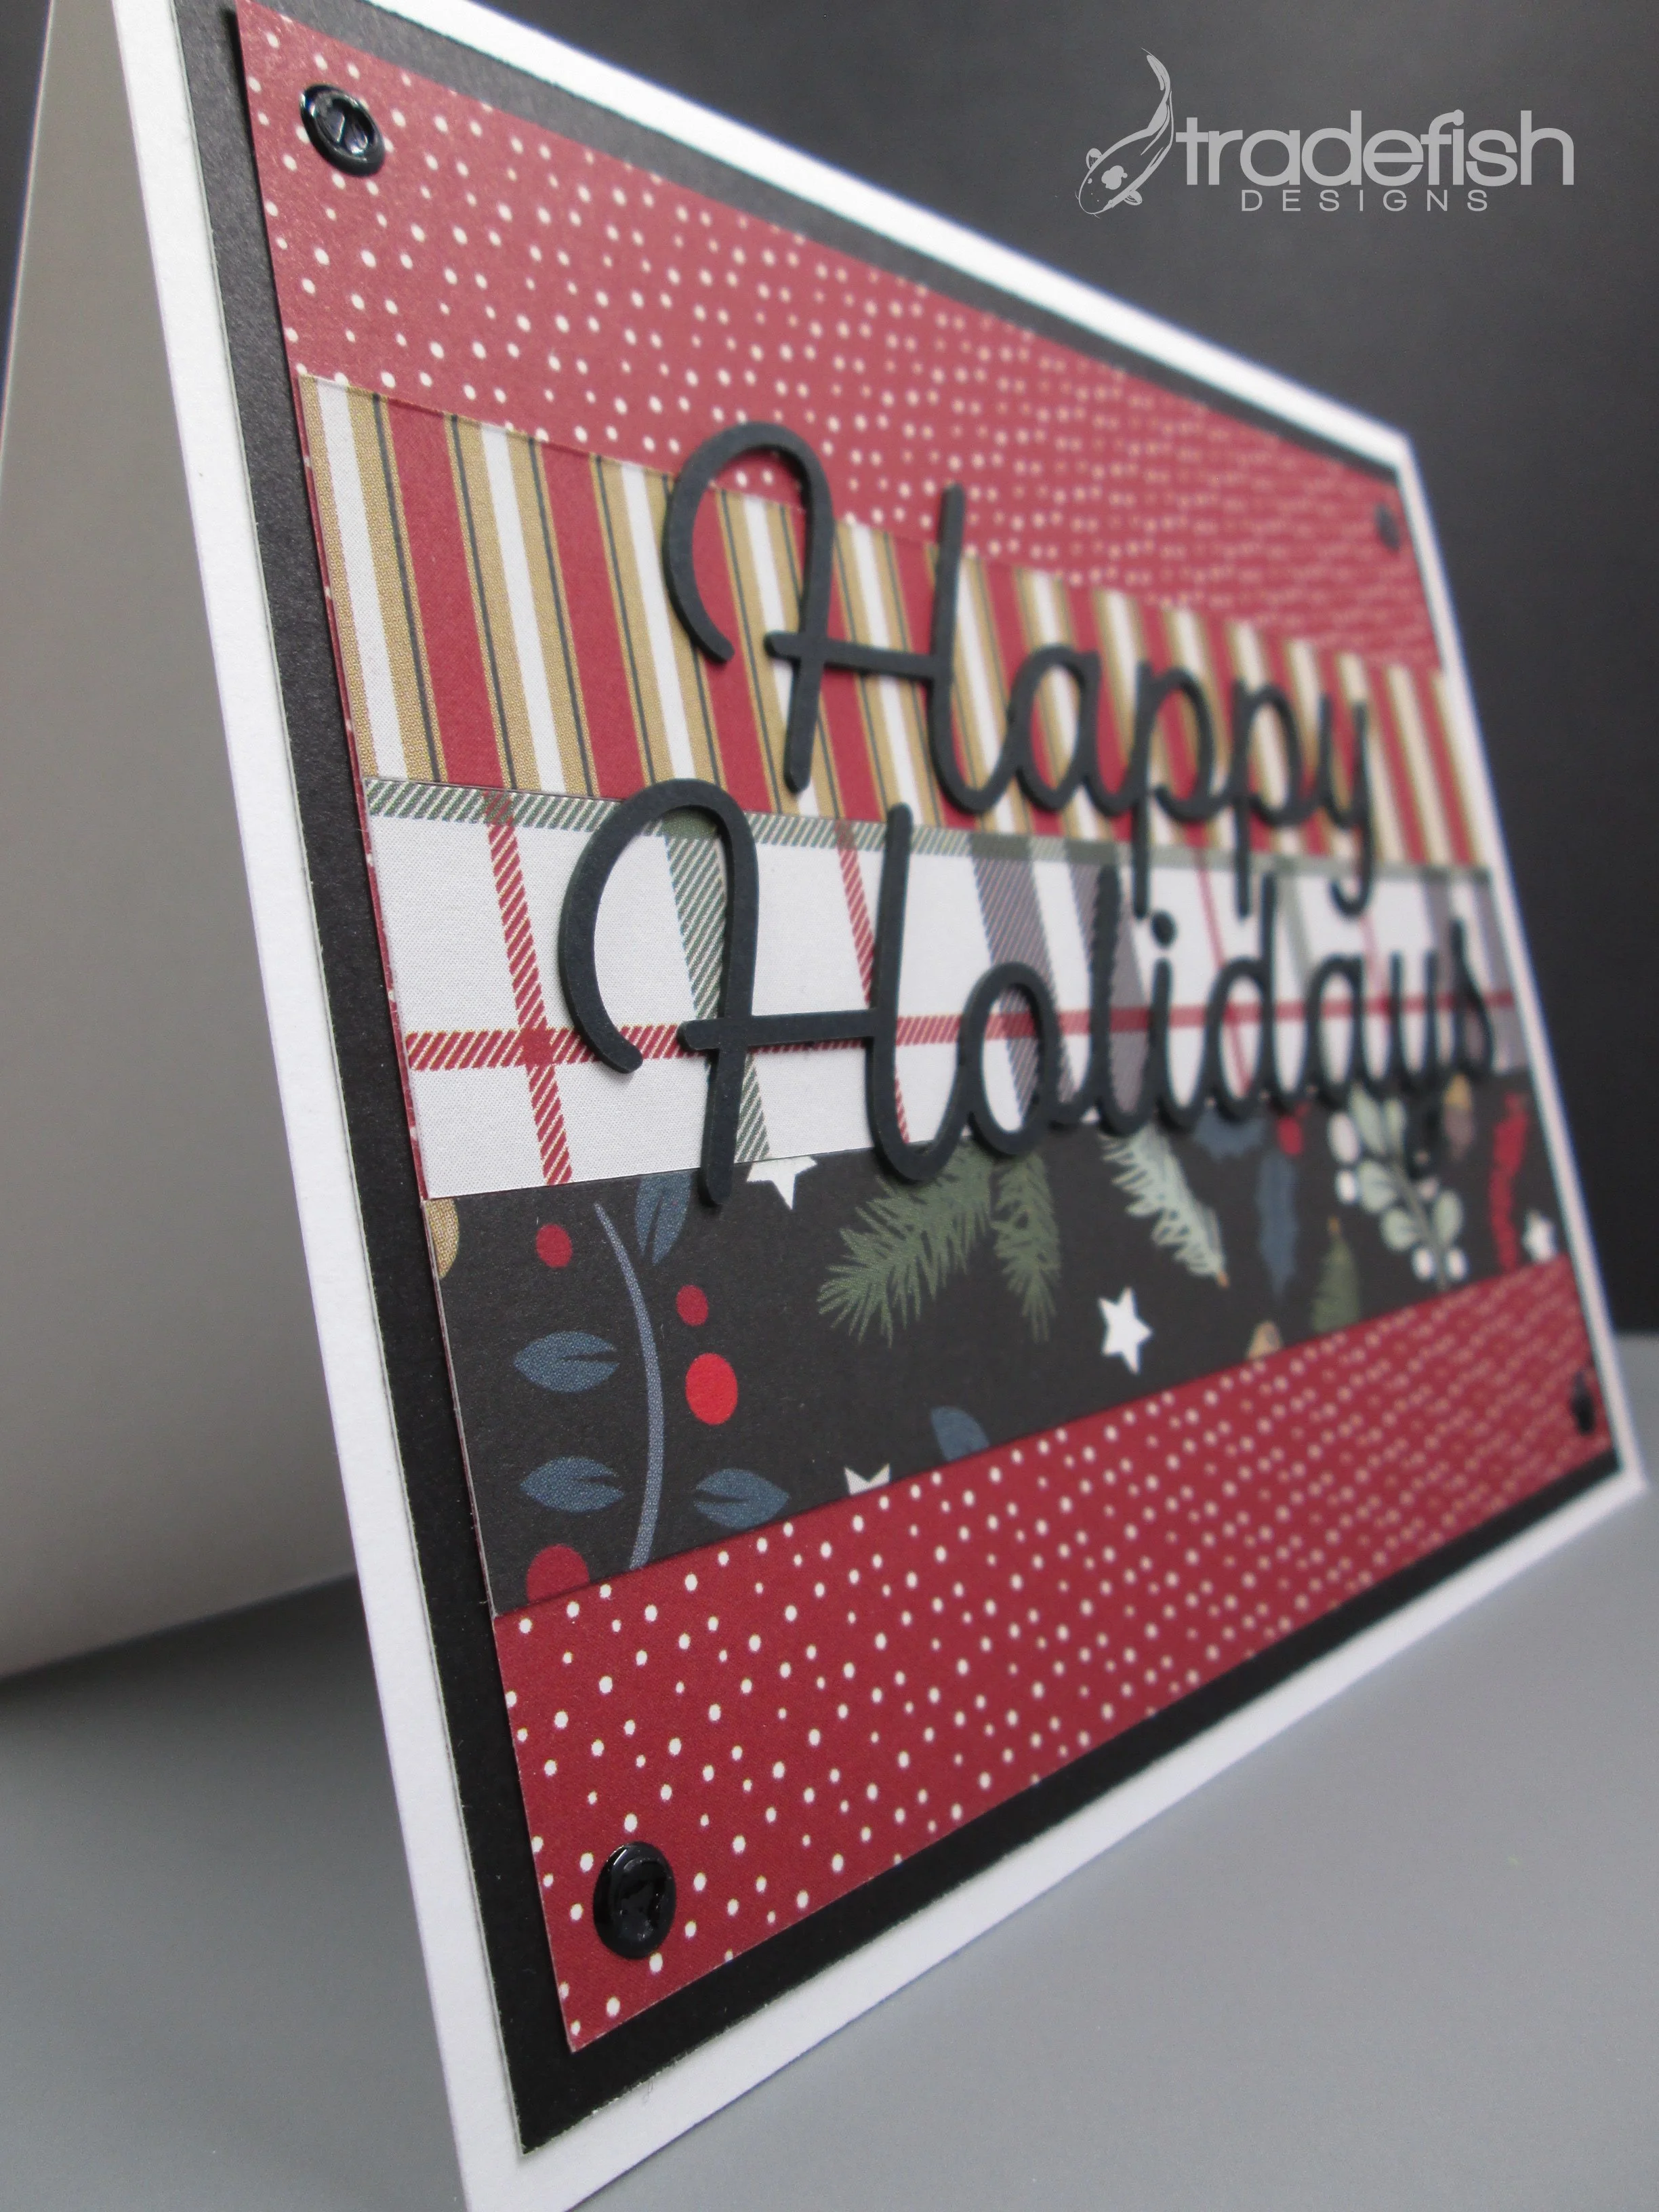
Welcome to Day 14 of the 25 Days of Christmas Cards! Todays card uses more “retired” paper and embellishments from the Close to My Heart Christmas Story collection. Here I use some strips to add interest and a foundation for the die cut sentiment Happy Holidays. I decided to cap off each corner with some Black Gloss Pops of Color. I must admit to being a bit addicted to the liquid drops to add dimension. I use the Pops of Color from Scrapbook.com the most because of the color collection I have amassed. I also like the Nuco Drops and the Metallic Enamel Effects by Stampin’ Up. I whole-heartedly endorse them all!

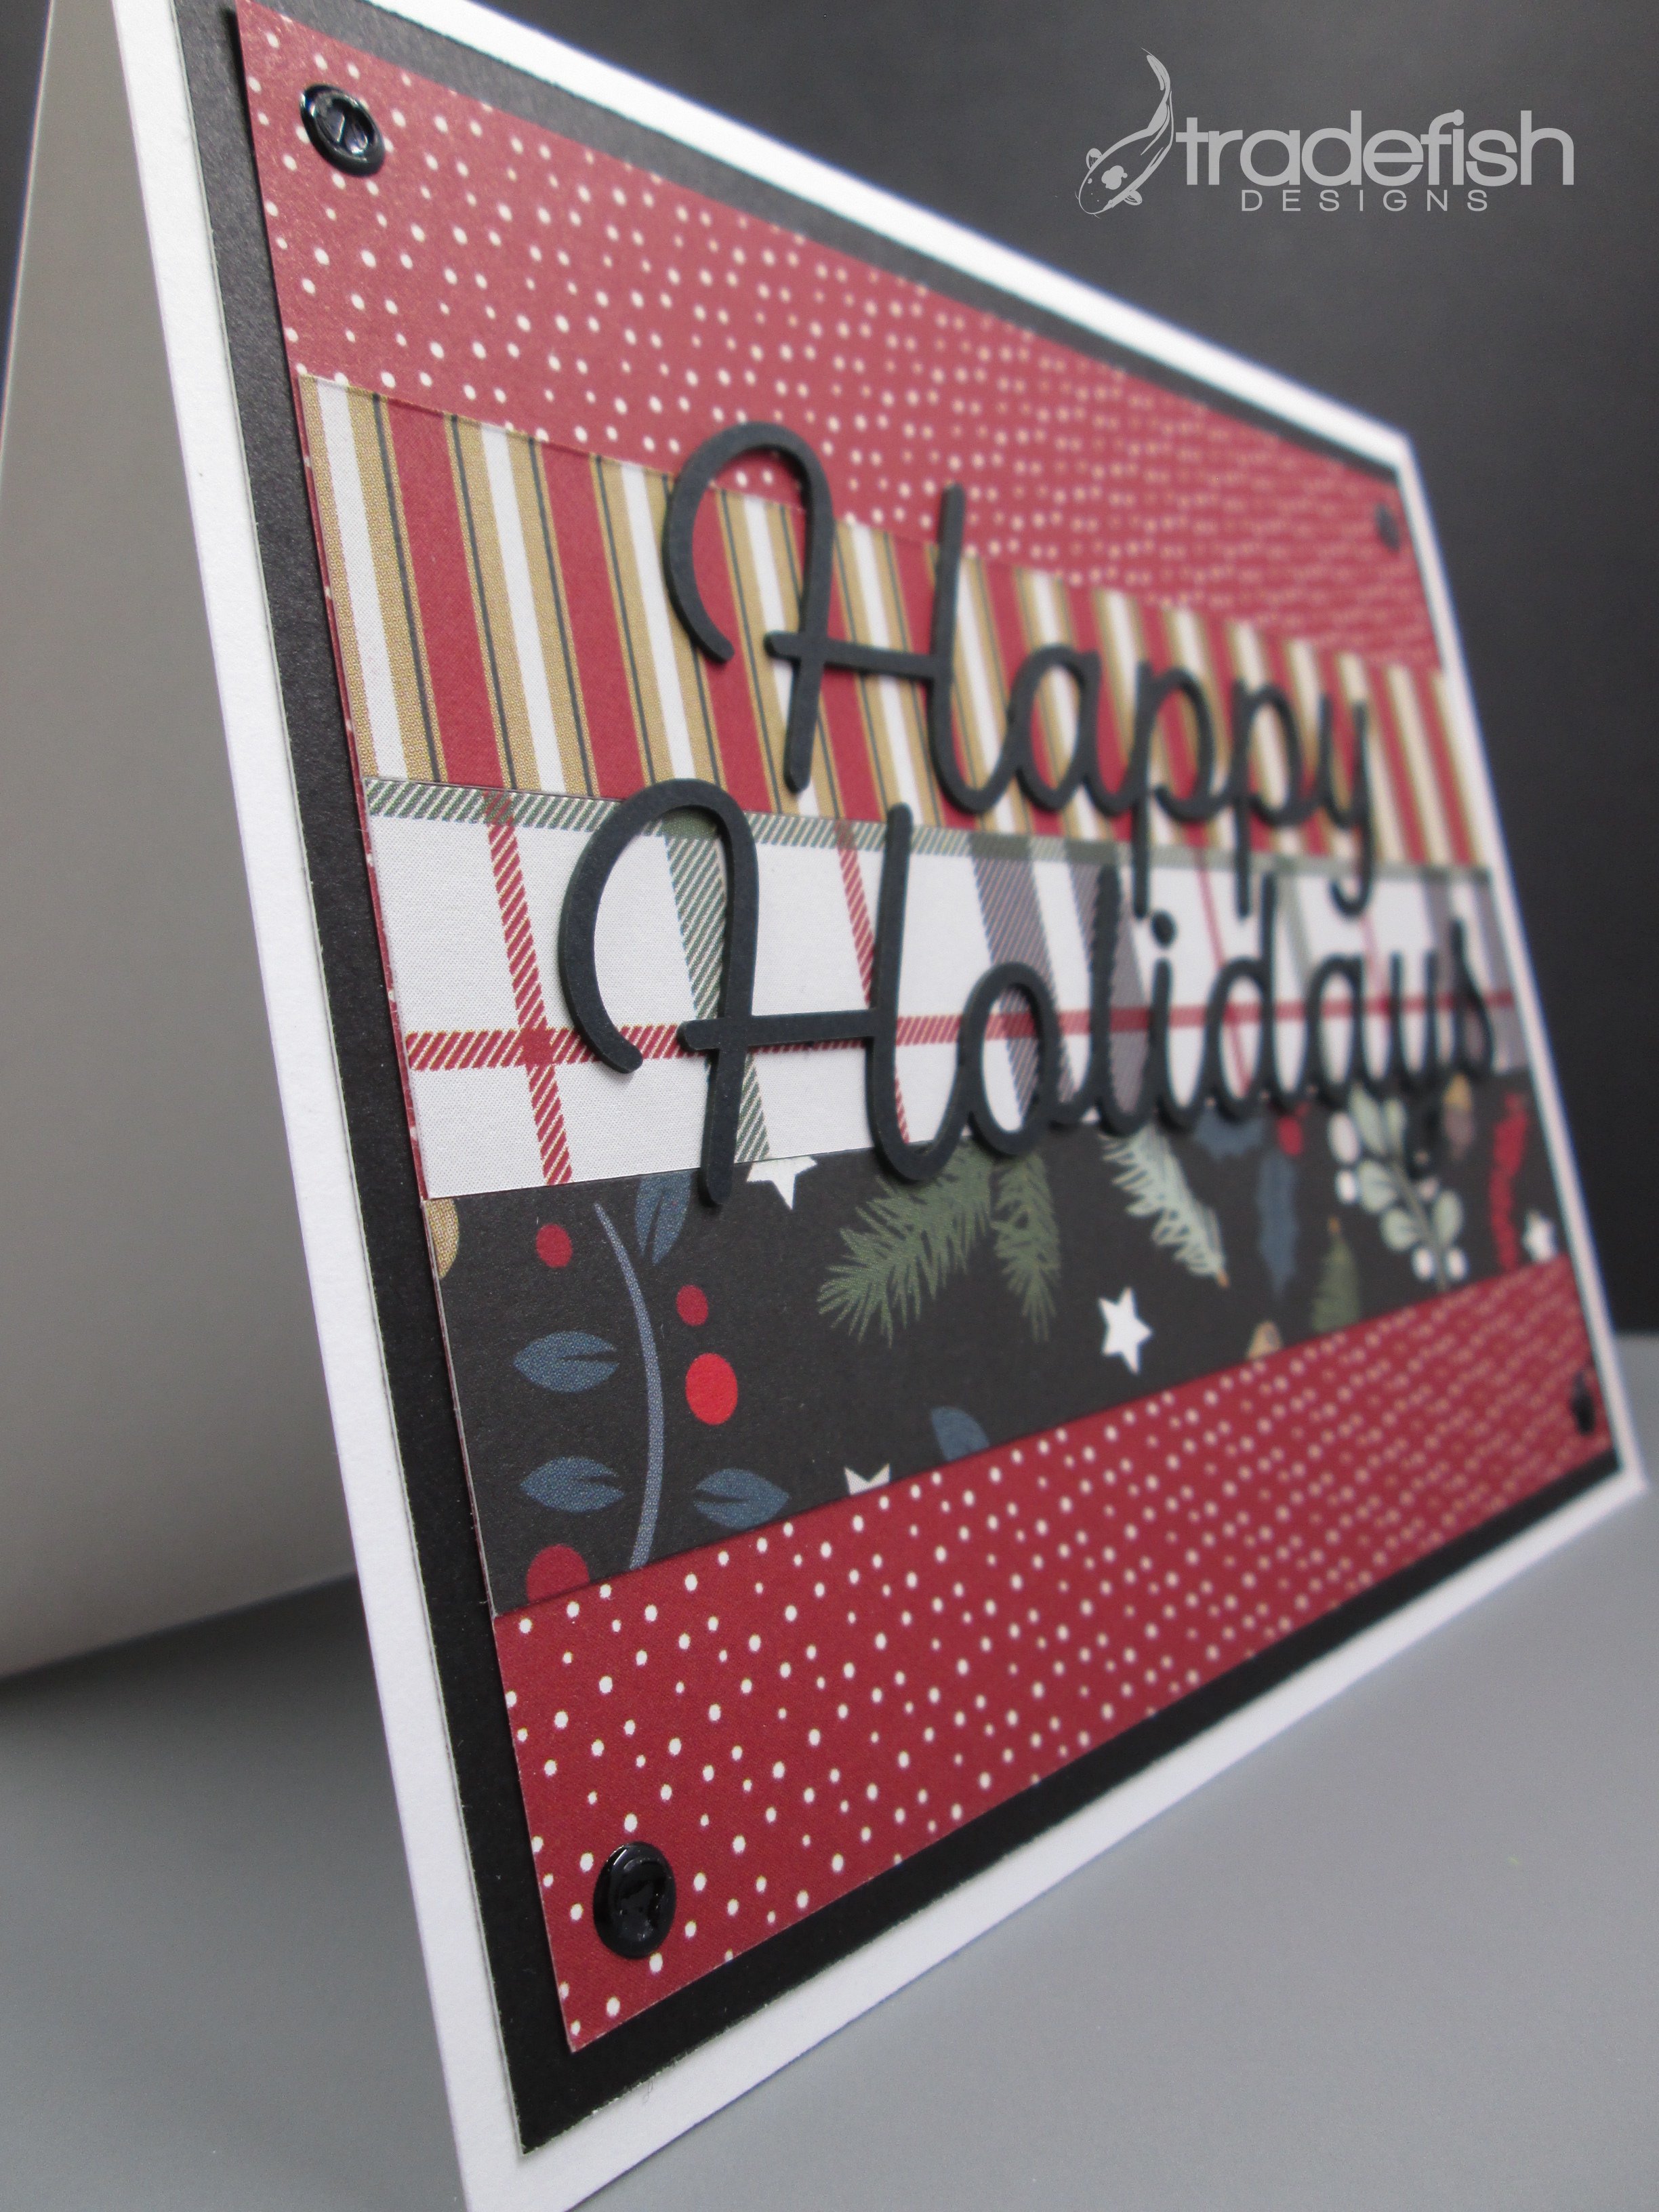
Notice there’s just a little dimension. Enough to make things interesting but not enough to impact postage…remember all these cards are going to get mailed…no holding cards people!
Supplies
Paper: Christmas Story (CTMH), Basic White and Black (Stampin’ Up)
Embellishments: Black Gloss Pops of Color (Scrapbook.com)

Keep it crafty my friends!
25 Days of Christmas Cards - Day 11
11th Day of the 25 Days of Christmas Cards
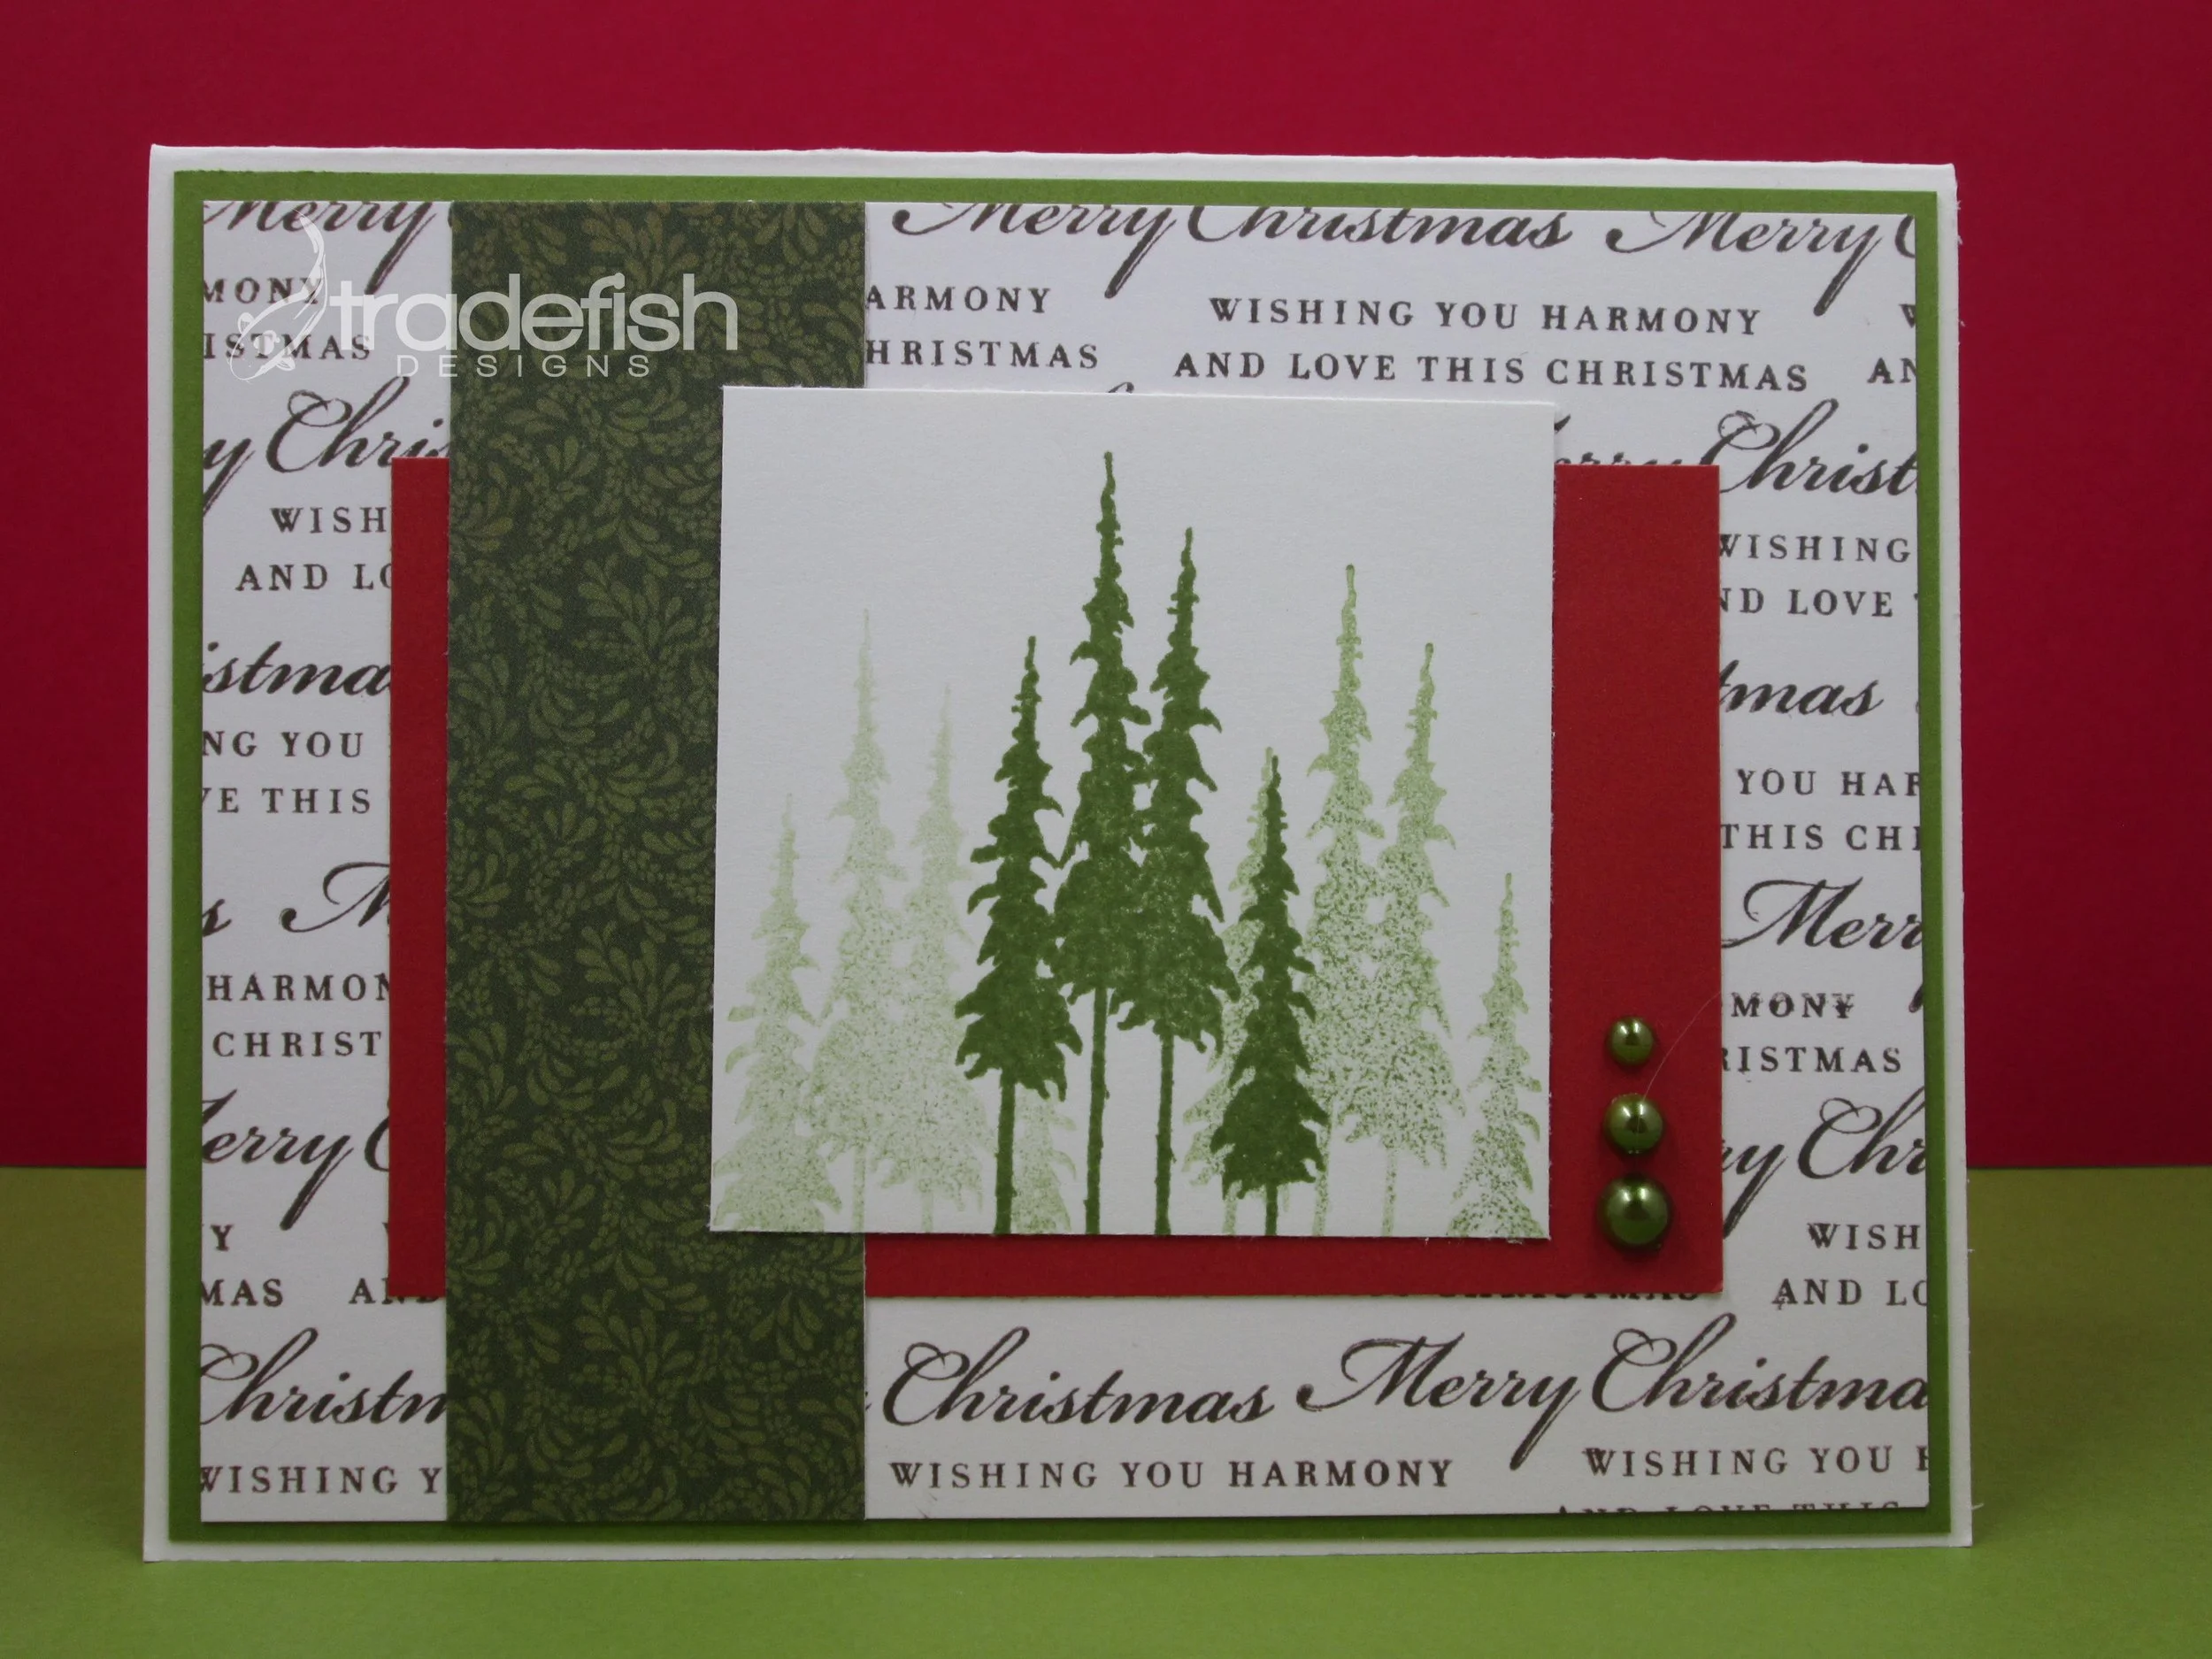
Welcome to the 11th day of the 25 Days of Christmas Cards. Today’s card uses some old Stampin’ Up designer series paper with some tree stamps. The colors are Old Olive and Real Red (class Stampin’ Up colors) and has a lot of layers but not extra mats that would add bulk. I did use some random olive colored pearls along the side to mimic the shapes of the trees. I also used a technique called generational stamping. I stamped the original trees in the Old Olive in the center and then continued to stamp the trees without adding more ink on either side of my original stamp. It creates the illusion of depth to the trees. Notice there is no sentiment stamped on the card because the Designer Series Paper in background says it all.

Supplies
Stamps: Misc (Stampin’ Up)
Ink:Old Olive (Stampin’ Up)
Paper: Misc DSP, Very Vanilla, Real Red, Old Olive (Stampin’ Up)
Embellishments: Misc olive green pearls

Keep it crafty my friends!
25 Days of Christmas Cards - Day 10
Day 10 of the 25 Days of Christmas Cards
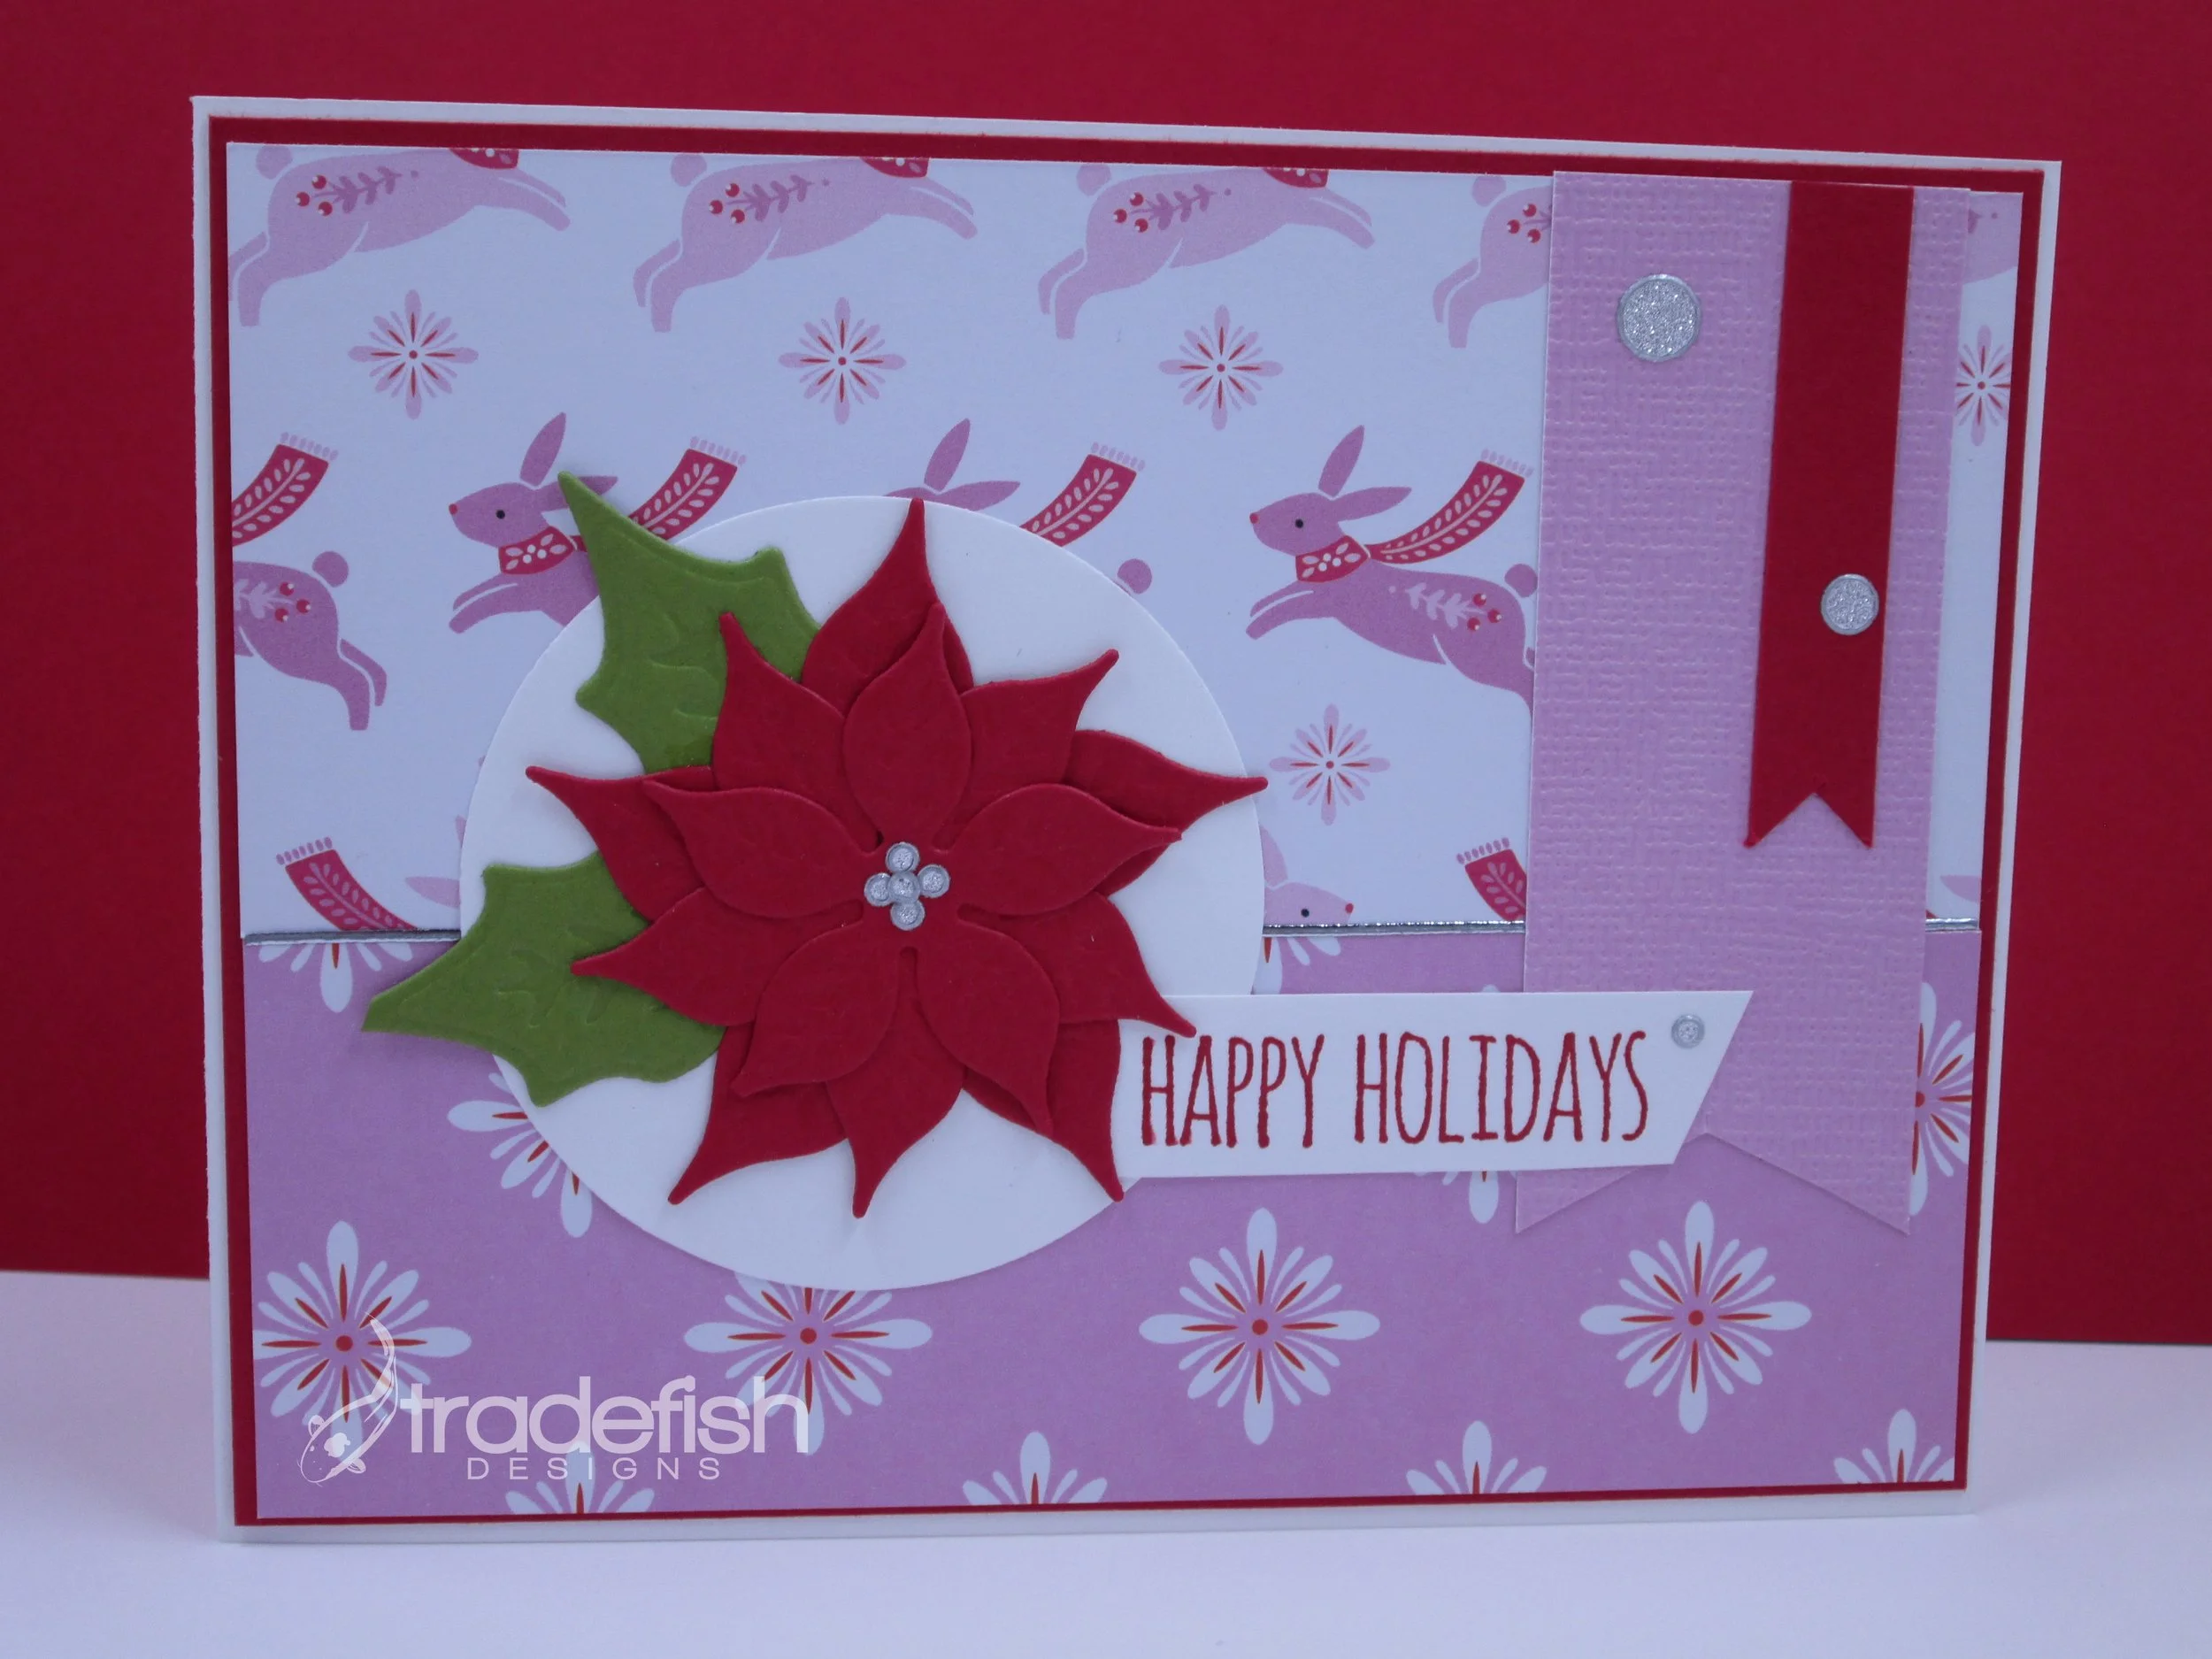
Welcome to Day 10 of the 25 Days of Christmas Cards. Today’s card showcases some fun poinsettia dies with rabbits and sparkling silver dots. The supplies are listed below but I do want to showcase how you can mix things from so many different companies to get a cohesive looking card. Special Shout Out to my Love From Lizi peel-offs . I just love them. Here I’ve used them for the center of my poinsettia, as random spots around the card as well as a stripe down the middle. The peel-offs add a lot if sparkle and the look of dimension but no real thickness that would impact my ability to mail this card without extra postage. I call that a win!

Supplies
Stamps: Scribbly Christmas (Tim Holtz)
Ink: Real Red (Stampin’ Up)
Paper: Real Red, Garden Green, Basic White (Stampin’ Up), Peppermint (Scrapbook.com)
Dies: Nesting Circles (Waffle Flower), Mini Botanical Dies (Anna Griffin)
Embellishments: Peel-Off Silver Circles (Love from Lizi)

Keep it crafty my friends!
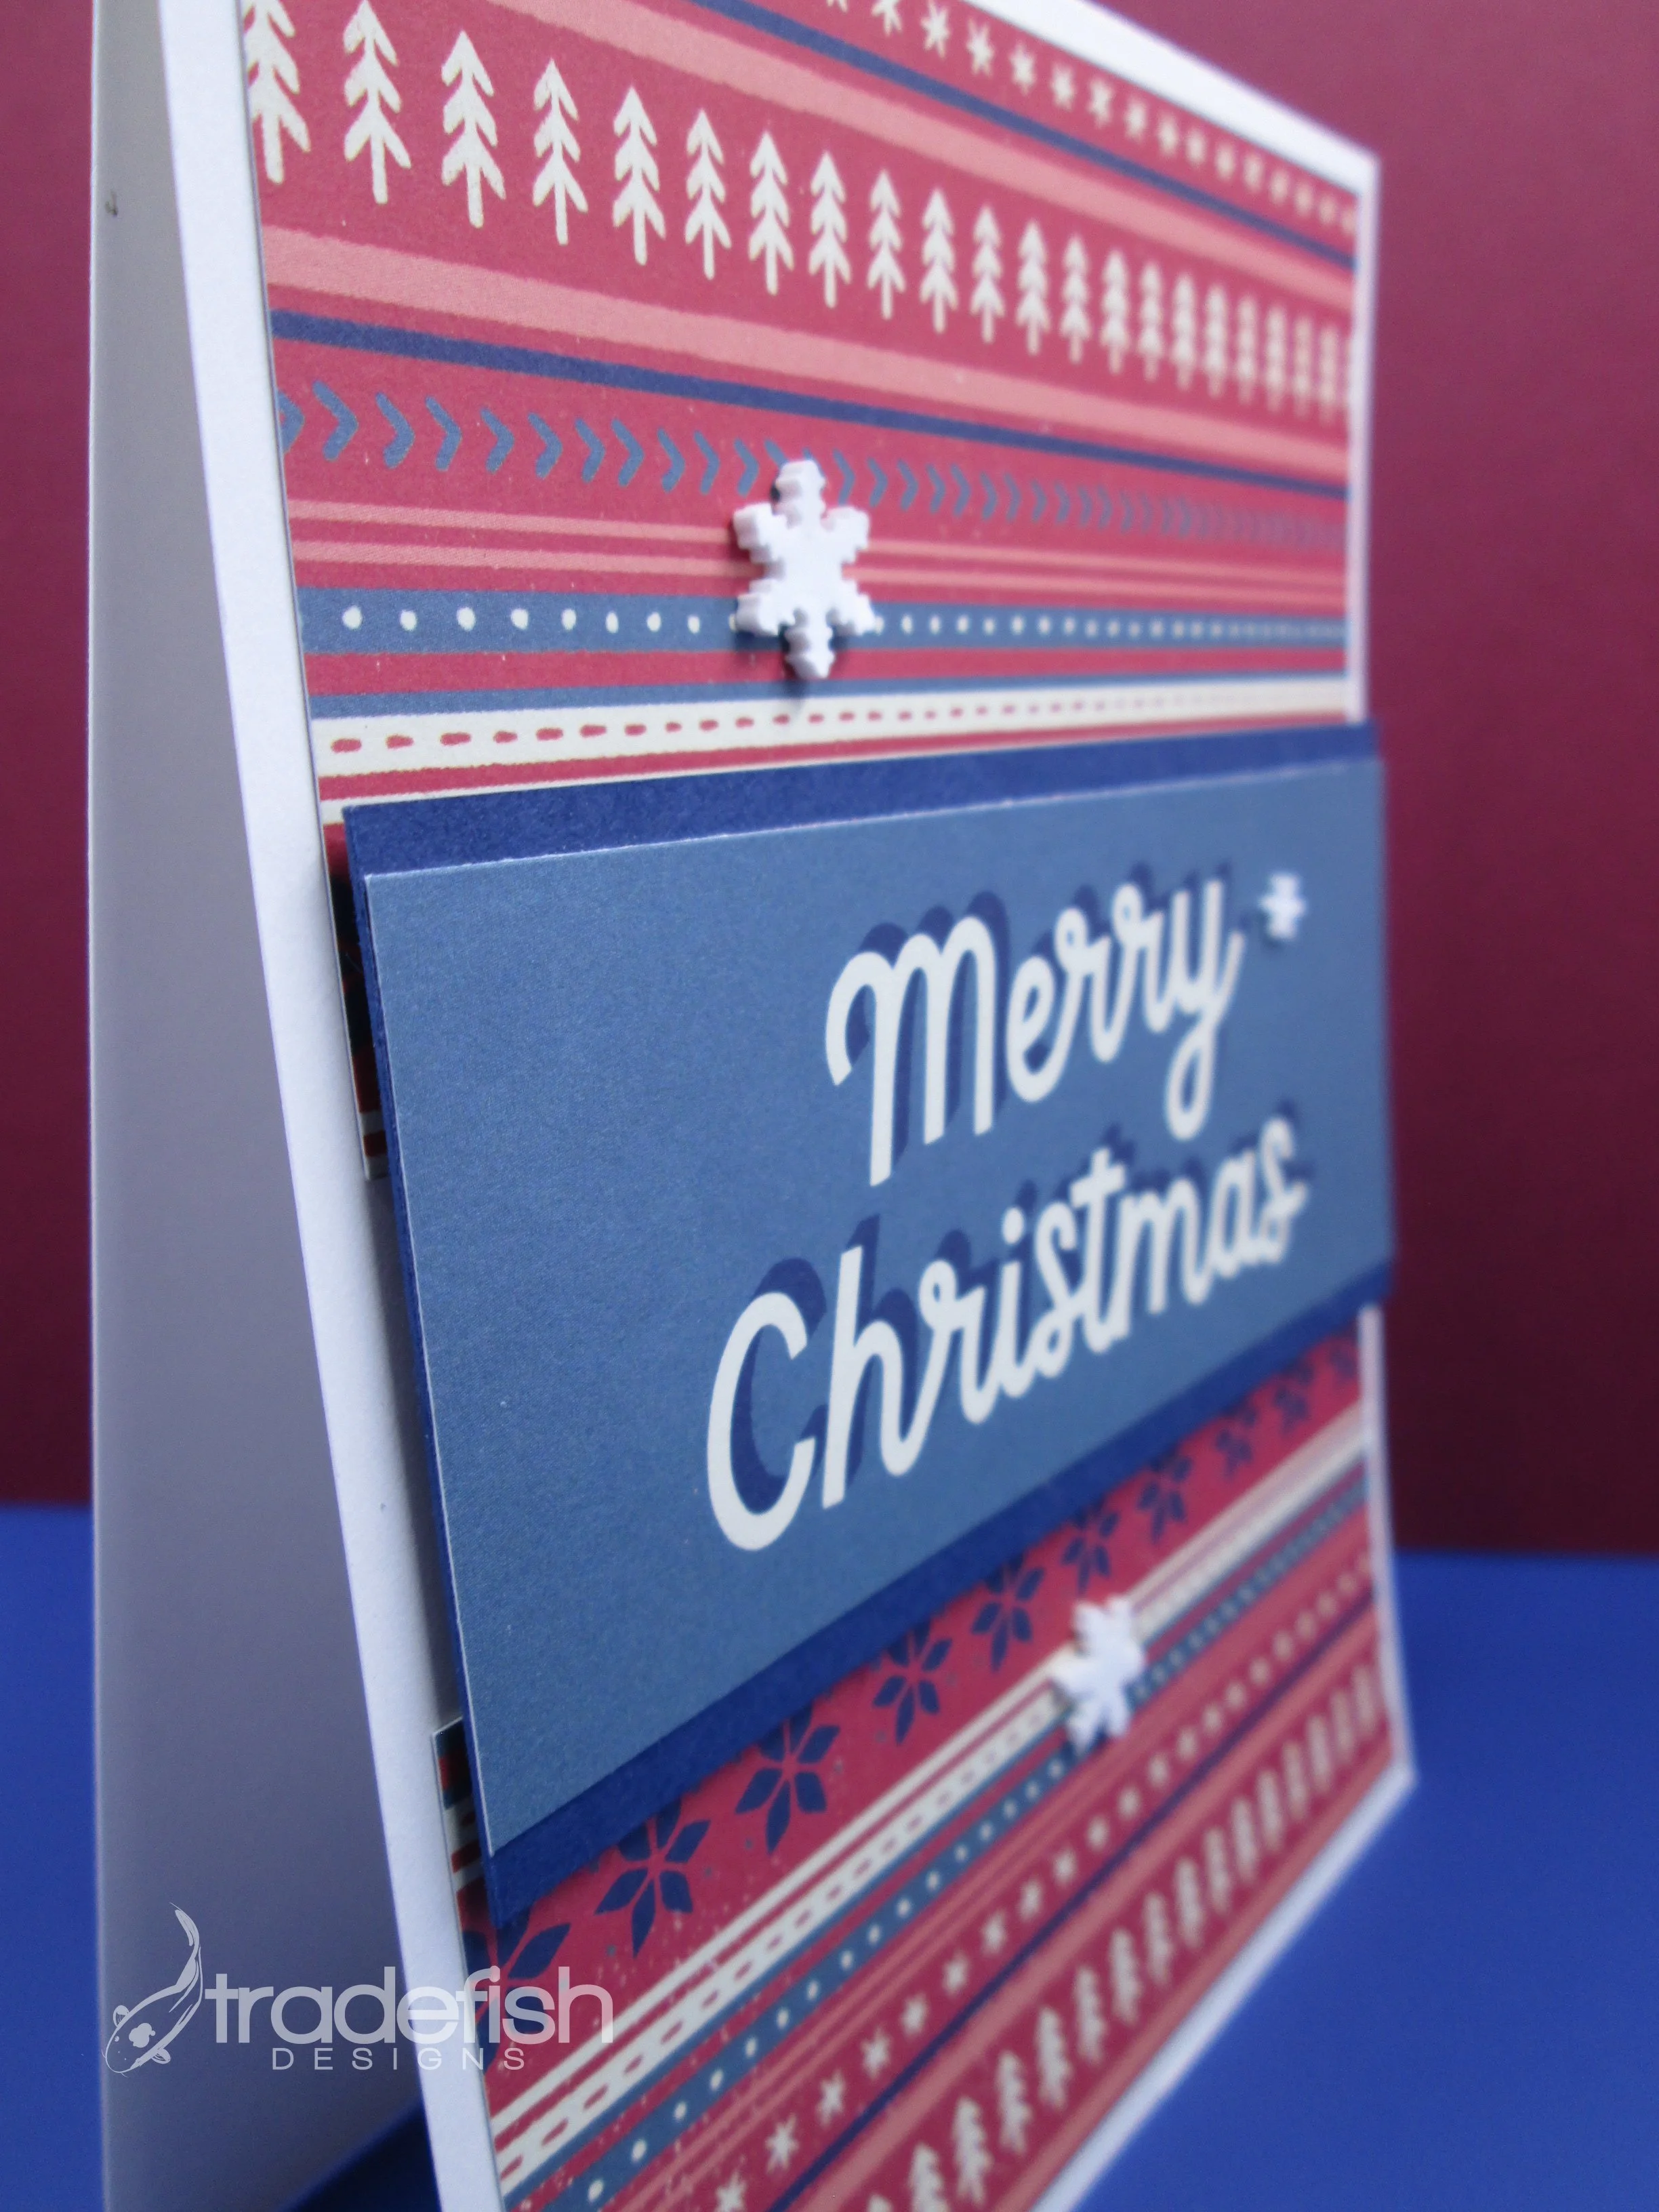
25 Days of Christmas Cards - Day 9
Day 9 of the 25 Days of Christmas Cards
Welcome to Day 9 of the 25 Days of Christmas Cards! Today’s card uses some paper from the Peppermint Paper Pad from Scrapbook.com and some basic paper that coordinates from Stampin’ Up. I added some fun silver drops from Stampin’ Up and this cards was done. A very simple use of some layered rectangles with a sentiment and some drops of silver make this an easy card with dimension but will not add extra postage when it is mailed.


Supplies
Stamps: Misc (Crafter’s Companion)
Ink: Mint Macaron (Stampin’ Up)
Paper: Peppermint (Scrapbook.com), Basic White & Mint Macaron (Stampin’ Up)
Embellishments: Metallic Enamel Effects Basics Silver (Stampin’ Up)

Keep it crafty my friends!
25 Days of Christmas Cards - Day 7
25 Days of Christmas Cards - Day 7
Welcome to Day 7 of the 25 days of Christmas Cards. Today’s card takes advantage of a Memories & More kit from Stampin’ Up. I added some of my favorite embellishments from Tailored Expressions…snowflakes. I hope you enjoy!

Supplies
Paper: Stampin’ Up (Memories & More)(Basic White & Night of Navy)
Embellishments: Tailored Expressions (Snowflakes)

25 Days of Christmas Cards - Day 6
Day 6 of the 25 Days of Christmas Cards
Welcome to Day 6 of the 25 days of Christmas Cards. Today’s card is from a paper pad from my stash. I paired it with some Mossy Meadow cardstock from Stampin’ Up that I embossed with the Pine Bough folder from the 3D Wintry set. To add a little sparkly I added a gold peek[off strip courtesy of Love from Lizzie. I hope you enjoy it!


Supplies
Paper: Misc, Stampin’ Up (Basic White, Mossy Meadow)
Dies: Waffle Flower (Nested Circles)
Embellishments: Love from Lizzie (Gold Peel-Off strip)
Embossing Folder: Stampin’ Up (Pine Bough from Wintry 3D)

Keep it crafty friends!
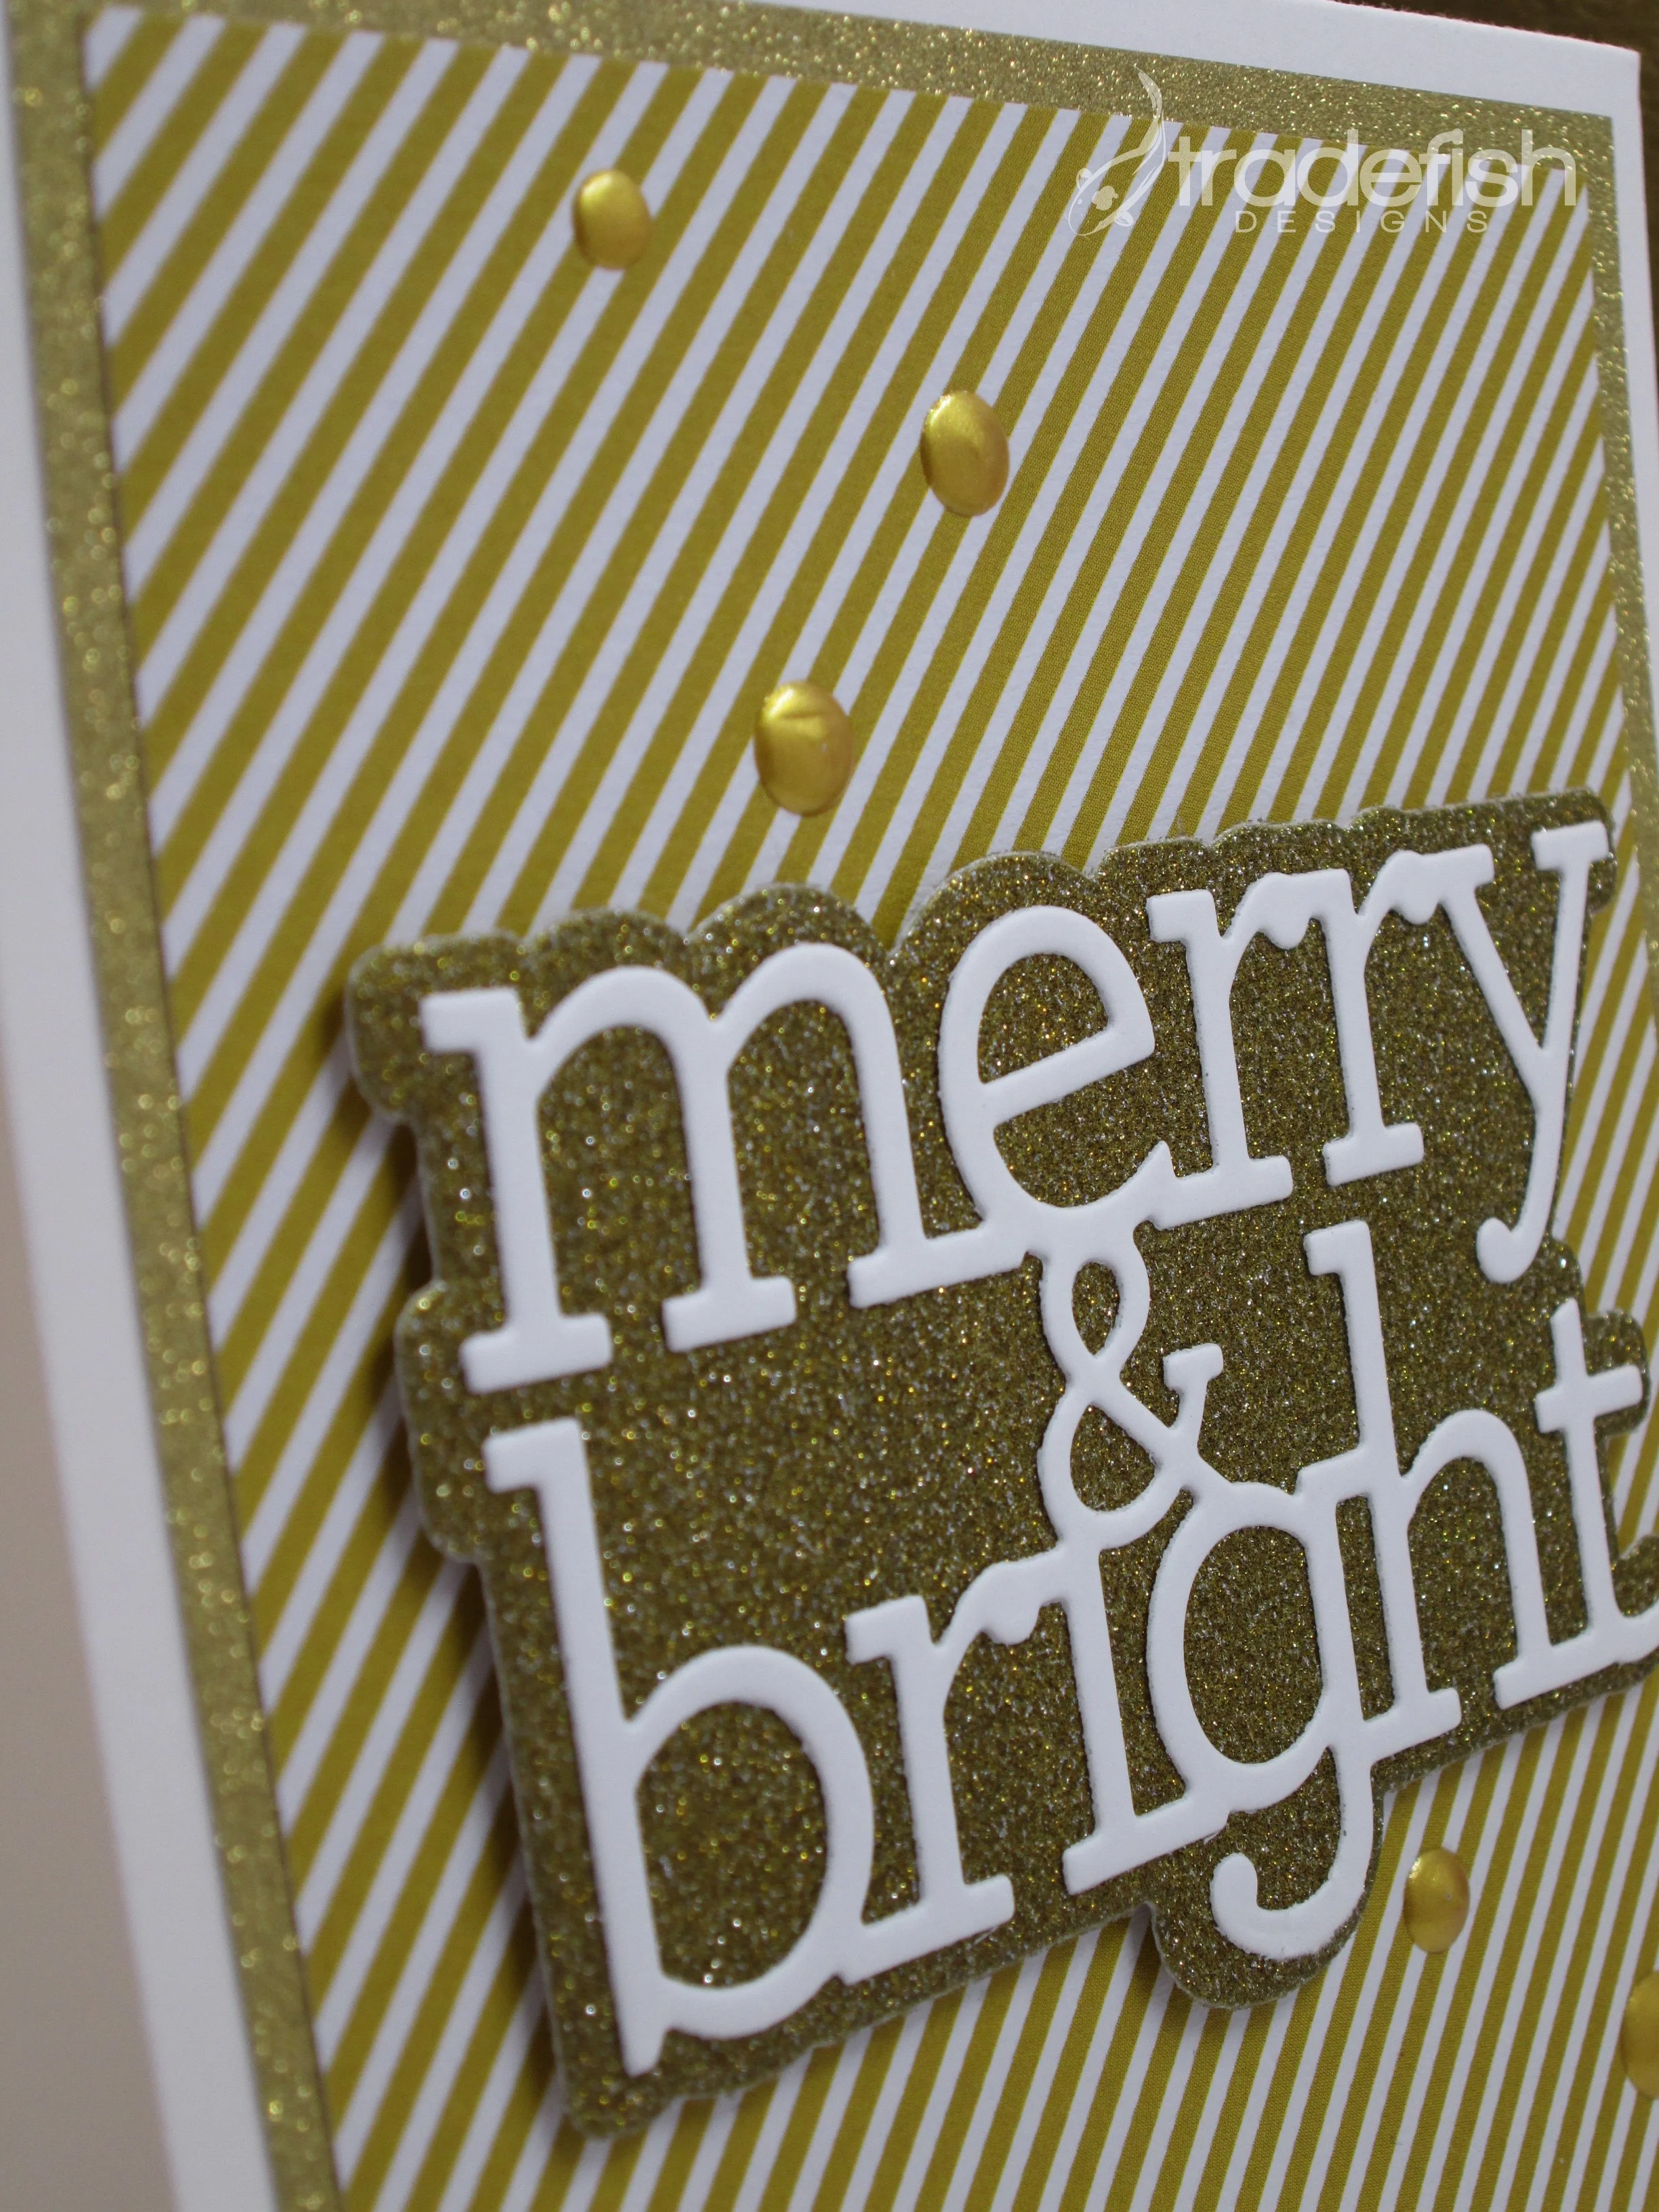
25 Days of Christmas Cards - Day 5
25 Days of Christmas Cards - Day 5
Welcome to Day 5 of the 25 days of Christmas Cards. Today’s card is sparkly but also clean and simple. I used some glitter paper I had from Crafter’s Companion and paired it with some miscellaneous gold striped paper to form a bright and cheery base. Then I added CZ Designs Merry & Brights sentiment in white cardstock and used more gold glitter paper for the shadow layer. To finish it off I created some dimension using Stampin’s Up’s Metallic Enamel Effects Basics in gold. I hope you enjoy it!


Supplies
Paper: Crafter’s Companion (gold glitter), Stampin’ Up (white), Misc. (striped)
Dies: CZ Designs (Merry & Bright)
Embellishments: Stampin’ Up (Metallic Enamel Effects Basics - Gold)

Keep it crafty my friends!
25 Days of Christmas Cards - Day 2
25 Days of Christmas - Day 2
Hello and welcome back to my 25 days of Christmas Cards. Day 2 features some old colorful cardstock, vellum, dies and some cute snowflake embellishments.

Supplies
Paper: Close to My Heart, Stampin’ Up (Vellum)
Dies: Diamond Press (Holiday Sentiments)
Embellishments: Tailored Expressions (Snowflakes)
Tune in tomorrow for Day 3!

Keep it crafty my friends!
25 Days of Christmas Cards - Day 1
Hello and Happy Holidays to everyone!
Today is the beginning of my 25 days of Christmas (Holiday) cards. I hope you enjoy this series.
My first card is made using my Tailored Expressions stamps/dies and some of my Stampin’ Up ink and papers.


Supplies
Stamps/Dies: Tailored Expressions (Bright Lights), Stampin’ Up (Peace & Joy)
Ink: Stampin’ Up
Paper: Stampin’ Up
Tune in for Day 2 tomorrow!

Keep it crafty my friends!
Peaceful Poppies Birthday Card
I love the new poppies products in the new Stampin’ Up Mini Catalog. I’m using a bunch of the products here. Take a look and let me know what you think!

I like to dress up the envelope flap with coordinating paper.

I added a coordinating stamp to the front of the envelope.

Here’s a close up showing off the rhinestones, birthday sentiment and punches.

Don’t forget the inside of the card too!

Keeping it crafty!
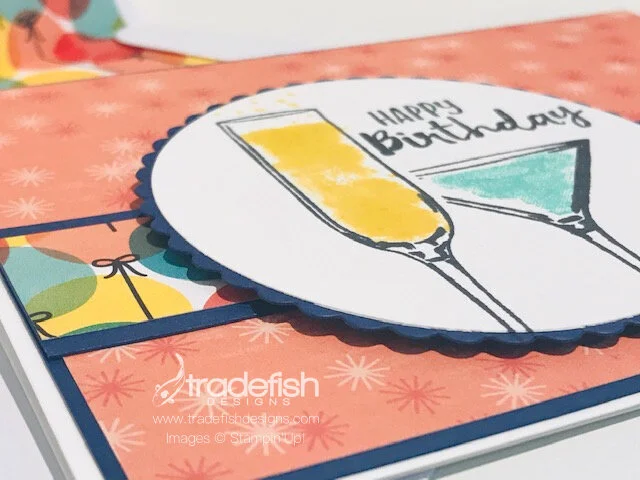
Happy Birthday...celebrate with a refreshing drink!
I hope you enjoy this card. It’s never to early to start getting your stash of birthday cards done. Here’s a cute adult birthday card. I hope this card inspires you. If you like Stampin’ Up and are interested in any of the products considering checking out my online store HERE. Otherwise, please know that you can always use what you already have to create something similar.

Consider decorating the inside of your envelopes with paper that coordinates with the card and/or stamps used on the card…

I just love what a few dimensionals can do to a card…

Don’t forget to decorate the inside of your cards when you get a chance. I little scrap of paper can make all the difference tying it all together…
Supplies: (1) Stamps: Sip Sip Hooray, Sending You Thoughts. (2) Ink: Memento Black, So Saffron, Coastal Cabana. (3) Paper: Whisper White, Night of Navy, Birthday Bonanza Designer Series Paper (DSP). (4) Dies: Layered Circles.
Directions: Front of Card - (1) Use a piece of Whisper White cardstock for a A2 card base. (2) Cut Night of Navy cardstock to 4-1/8” x 5-3/8”. (3) Cut a piece of Birthday Bonanza DSP to 4” x 5-1/4”. (4) Layer Birthday Bonanza DSP on top of Night of Navy cardstock. (5) Attach the base layer (#4) to the white A2 card base. (6) Cut a piece of Night of Navy scrap to 1” x 5-3/8”. (7) Cut a piece of Birthday Bonanza DSP to 3/4” x 5-3/8”. (8) Attached the Birthday Bonanza DSP strip to the Night of Navy strip. (9) Attach the strip (#8 )to the bottom half of the card. (10) Use the Layered Circle dies circle (you choose the size) and corresponding scalloped circle to cut the plain circle with some Whisper White cardstock scrap and the scalloped circle in Night of Navy cardstock scraps. (11) Stamp the champagne and martini glasses to the white circle in Momento Black Ink. (12) Stamp the drinks liquid in So Saffron (champagne) and Coastal Cabana (martini). (13) Stamp the “Happy Birthday” sentiment inside the circle. (14) Layer the white stamped circle to the Night of Navy scalloped circle die and adhere to the card front with Stampin’ Dimensionals.
Directions: Inside of Card - (1) Copy the steps in #6, 7 and 8 above and adhere to the bottom of the inside of the card. (2) Stamp the sentiment (“Another Sensational Year of You”) in Momento Black Ink above the strip adhered in step #1.

Keep it crafty friends!
I'll Drink to That!
Welcome to a new year at Tradefish Designs. I hope this #SimpleStamping project inspires you to start getting crafty for 2020.

Remember to consider stamping the front and/or back of your envelope to give the recipient a hint at what’s inside!
Here is my first card of the year. I combine two stamp sets in a simply stamping (#SimpleStamping) project. I love have clean and clear it is…all the details are below (along with more fun photos).


I hope you’ve enjoyed my card. I have a photo of the stamp sets used below as well as a full list of supplies and directions to make the card yourself. I hope you all have a wonderful and craft new year!!!
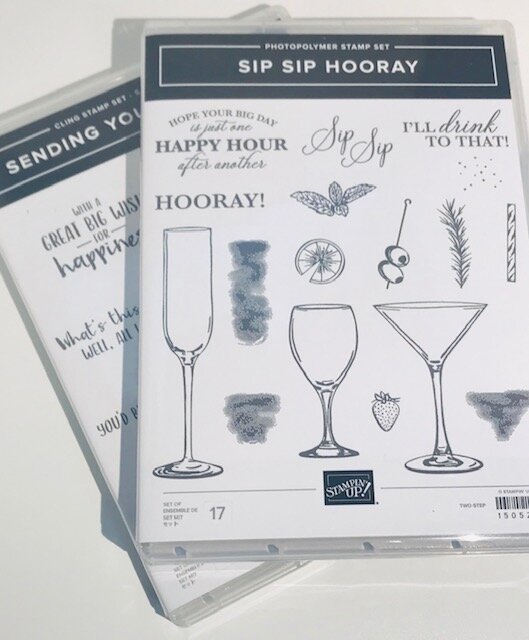
Supplies: (1) Stamps: Sip Sip Hooray (“I’ll Drink to That”), Sending You Thoughts (“Congratulations”). (2) Paper: Whisper White, Balmy Blue. (3) Ink: Momento Black, Balmy Blue, Pear Pizzazz. (4) Stampin’ Blends: Light Olive. (5) Dies: Sip Sip Hooray dies - olives on skewer. All the supplies used in this project are from Stampin’ Up. If you are interested in purchasing any of them feel free to shop at my STORE or reach out to me via email at tradefishdesigns@gmail.com.
Directions: Card Front - (1) Use a Whisper White A2 card base. (2) Cut Balmy Blue cardstock to 4-1/8” x 5-3/8”. (3) Cut Whisper White cardstock to 4”x5-1/4”. (4) Stamp martini glass, olive pick and sentiment in Momento Black Ink. (5) Stamp the drink liquid with Balmy Blue. (6) Stamp the greenery in Pear Pizzazz Ink. (7) Color the olives with light olive Stampin’ Blend. (8) Adhere what cardstock with stamped images to the Balmy Blue cardstock. (9) Adhere the white/balmy blue layers to the card base with Stampin’ Dimensionals.
Directions: Inside Card - (1) Stamp “Congratulations” inside the card with Moment Black Inc. (2) Stamp the olive skewer in Momento Black Ink on a scrap piece of paper. (3) Color the olives in using the Light Olive Stampin’ Blend marker. (4) Using a die cut machine, die cut the olives on a skewer with the dies that coordinate with the stamp set. (5) Adhere the olive die cut inside the card next to the sentiment.

Happy New Years Crafters!
May the warmth of Christmas fill each corner of your heart and home...
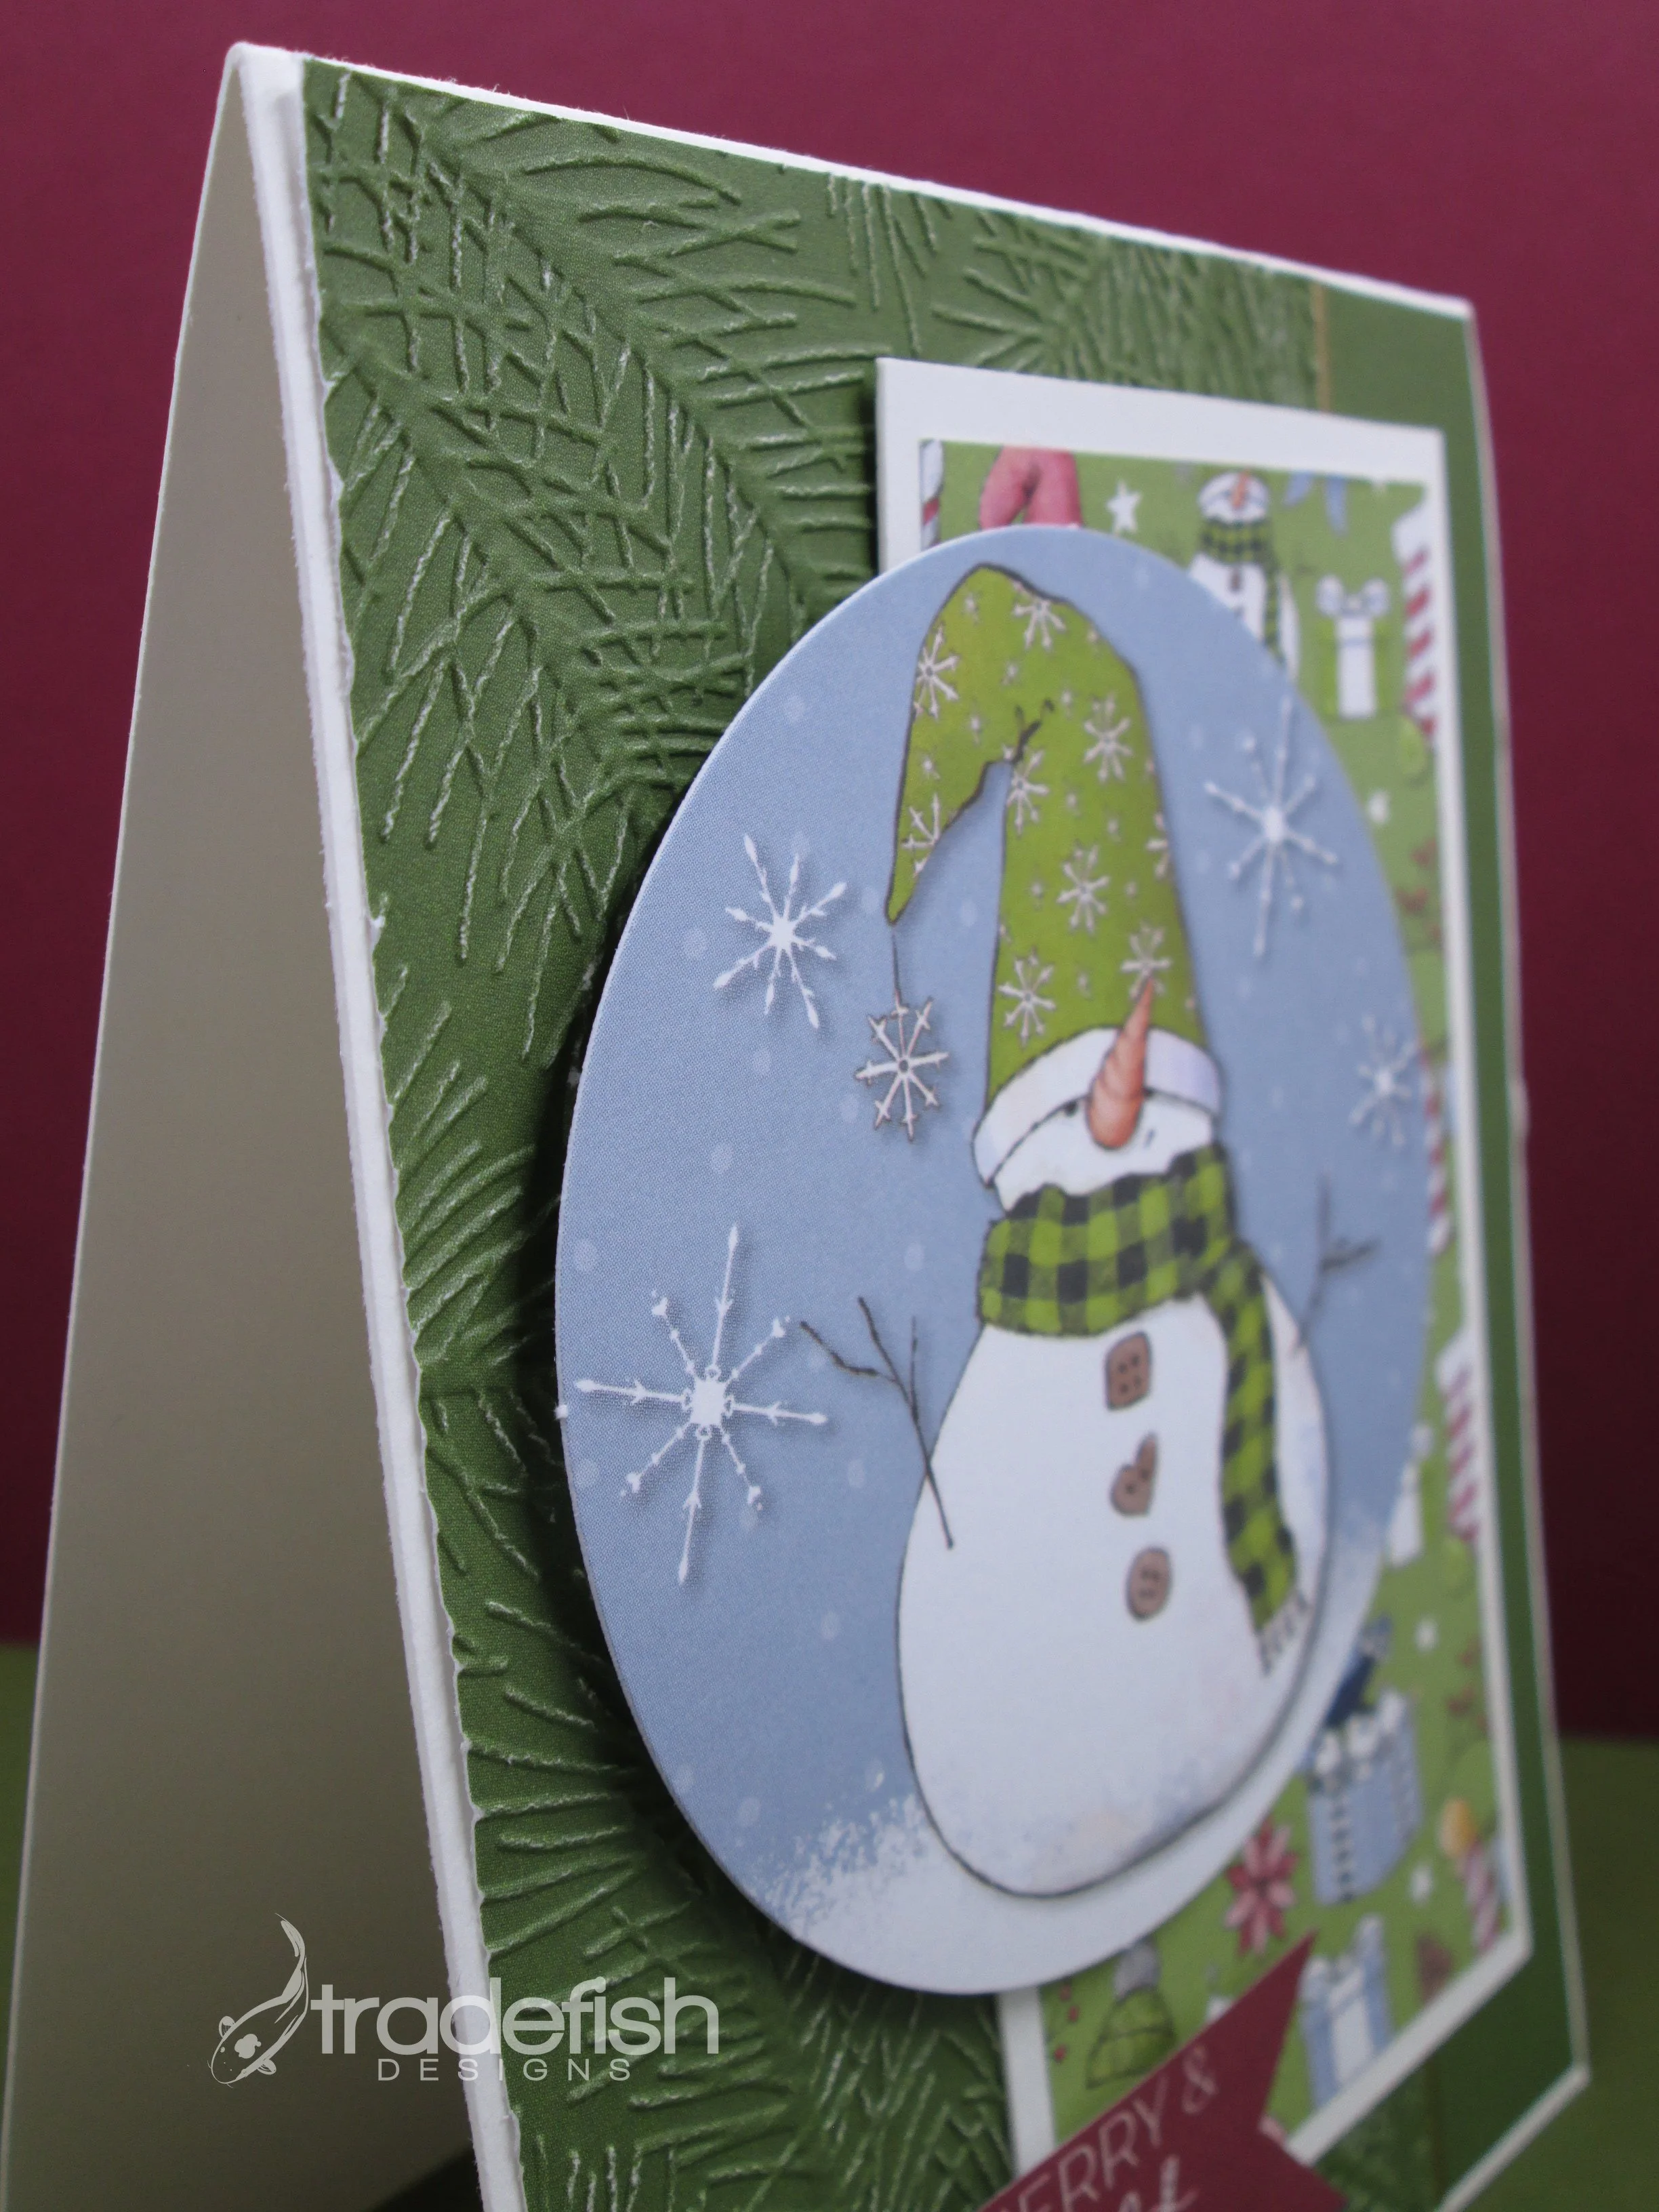
Hello Crafters,
I have a Christmas card that I made at a crop event at the beach in November. I make MANY Christmas cards each year. I make them for a charitable organization to thank large donors for their support throughout the year. I also design and make our family Christmas cards. Finally, I make an assortment of cards for my husband to distribute to his team at work. This year I also made an assortment of cards just for fun. This card is one of them…enjoy!

This card uses a bunch of my Stampin’ Up supplies. The stamp set is retired but if you want to recreate thes card design you can substitute any holiday sentiment you already have in your stamp stash. The designer paper is Night Before Christmas from the current Holiday Catalog. The Holiday Catalog is only good through January 2nd so it you see something you like please don’t wait to place an order!

Here’s a close up at an angle so you can see the textures and dimension of the card. I hope you enjoy this simple card and come back tomorrow for another holiday card.
What Stampin’ Up products I used to make this card…
IF you want to purchase any of the items ABOVE please feel free to visit MY WEBSITE and use the following host code: 3XGZA7HB
If you place an order you can use the Host Code above in the Special Offers section of the shopping bag. Please only use this code if your order is under $150. If your order is above $150 you can select hostess benefits on your order.

Happy Crafting!