
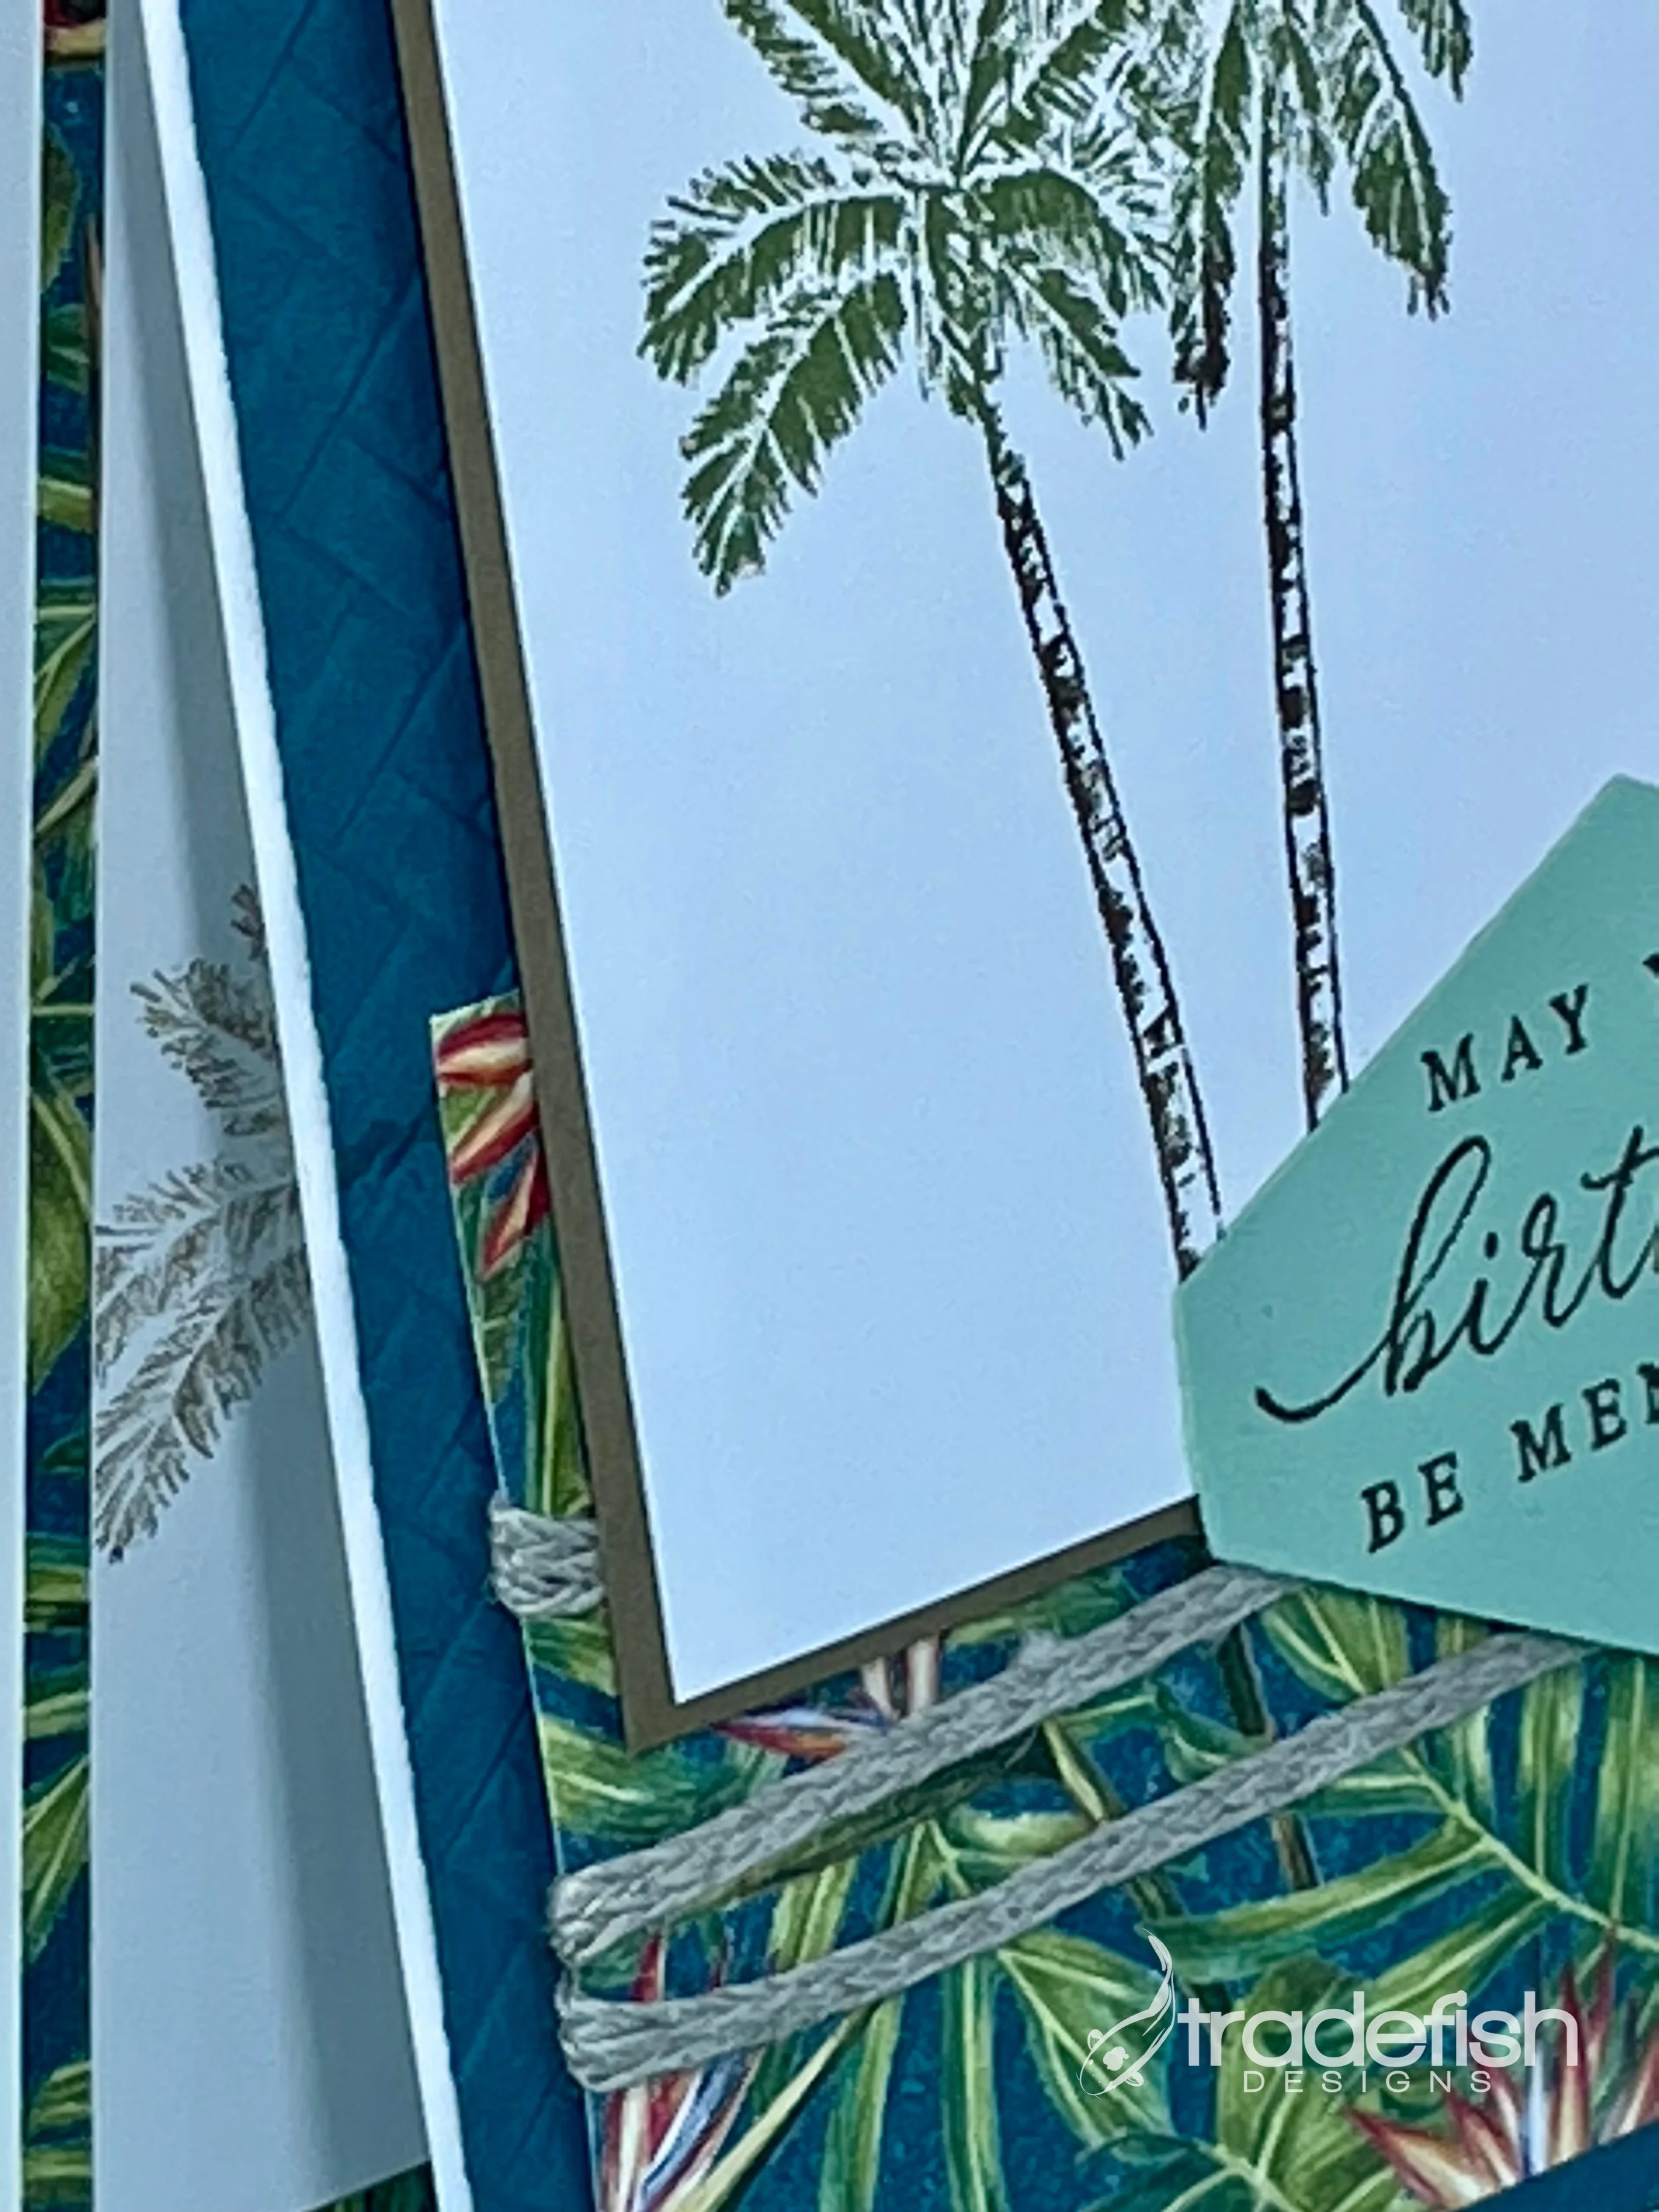
Tropical birthday wishes...
May your birthday be memorable…

No naked envelopes!

Embossing creates texture plus burlap ribbon.

Bling it up.
Supplies used: (all supplies Stampin’ Up unless otherwise mentioned)
Stamps: Timeless Tropical
Ink: Old Olive, Soft Suede, Mint Macaron
Paper: White, Tropical Oasis, Pretty Peacock, Soft Suede
Embossing: Coastal Wave Embossing Folder
Punch: Tailored Tag
Embellishments: Noble Peacock Rhinestones and Braided Linen Trip

Keep it crafty!
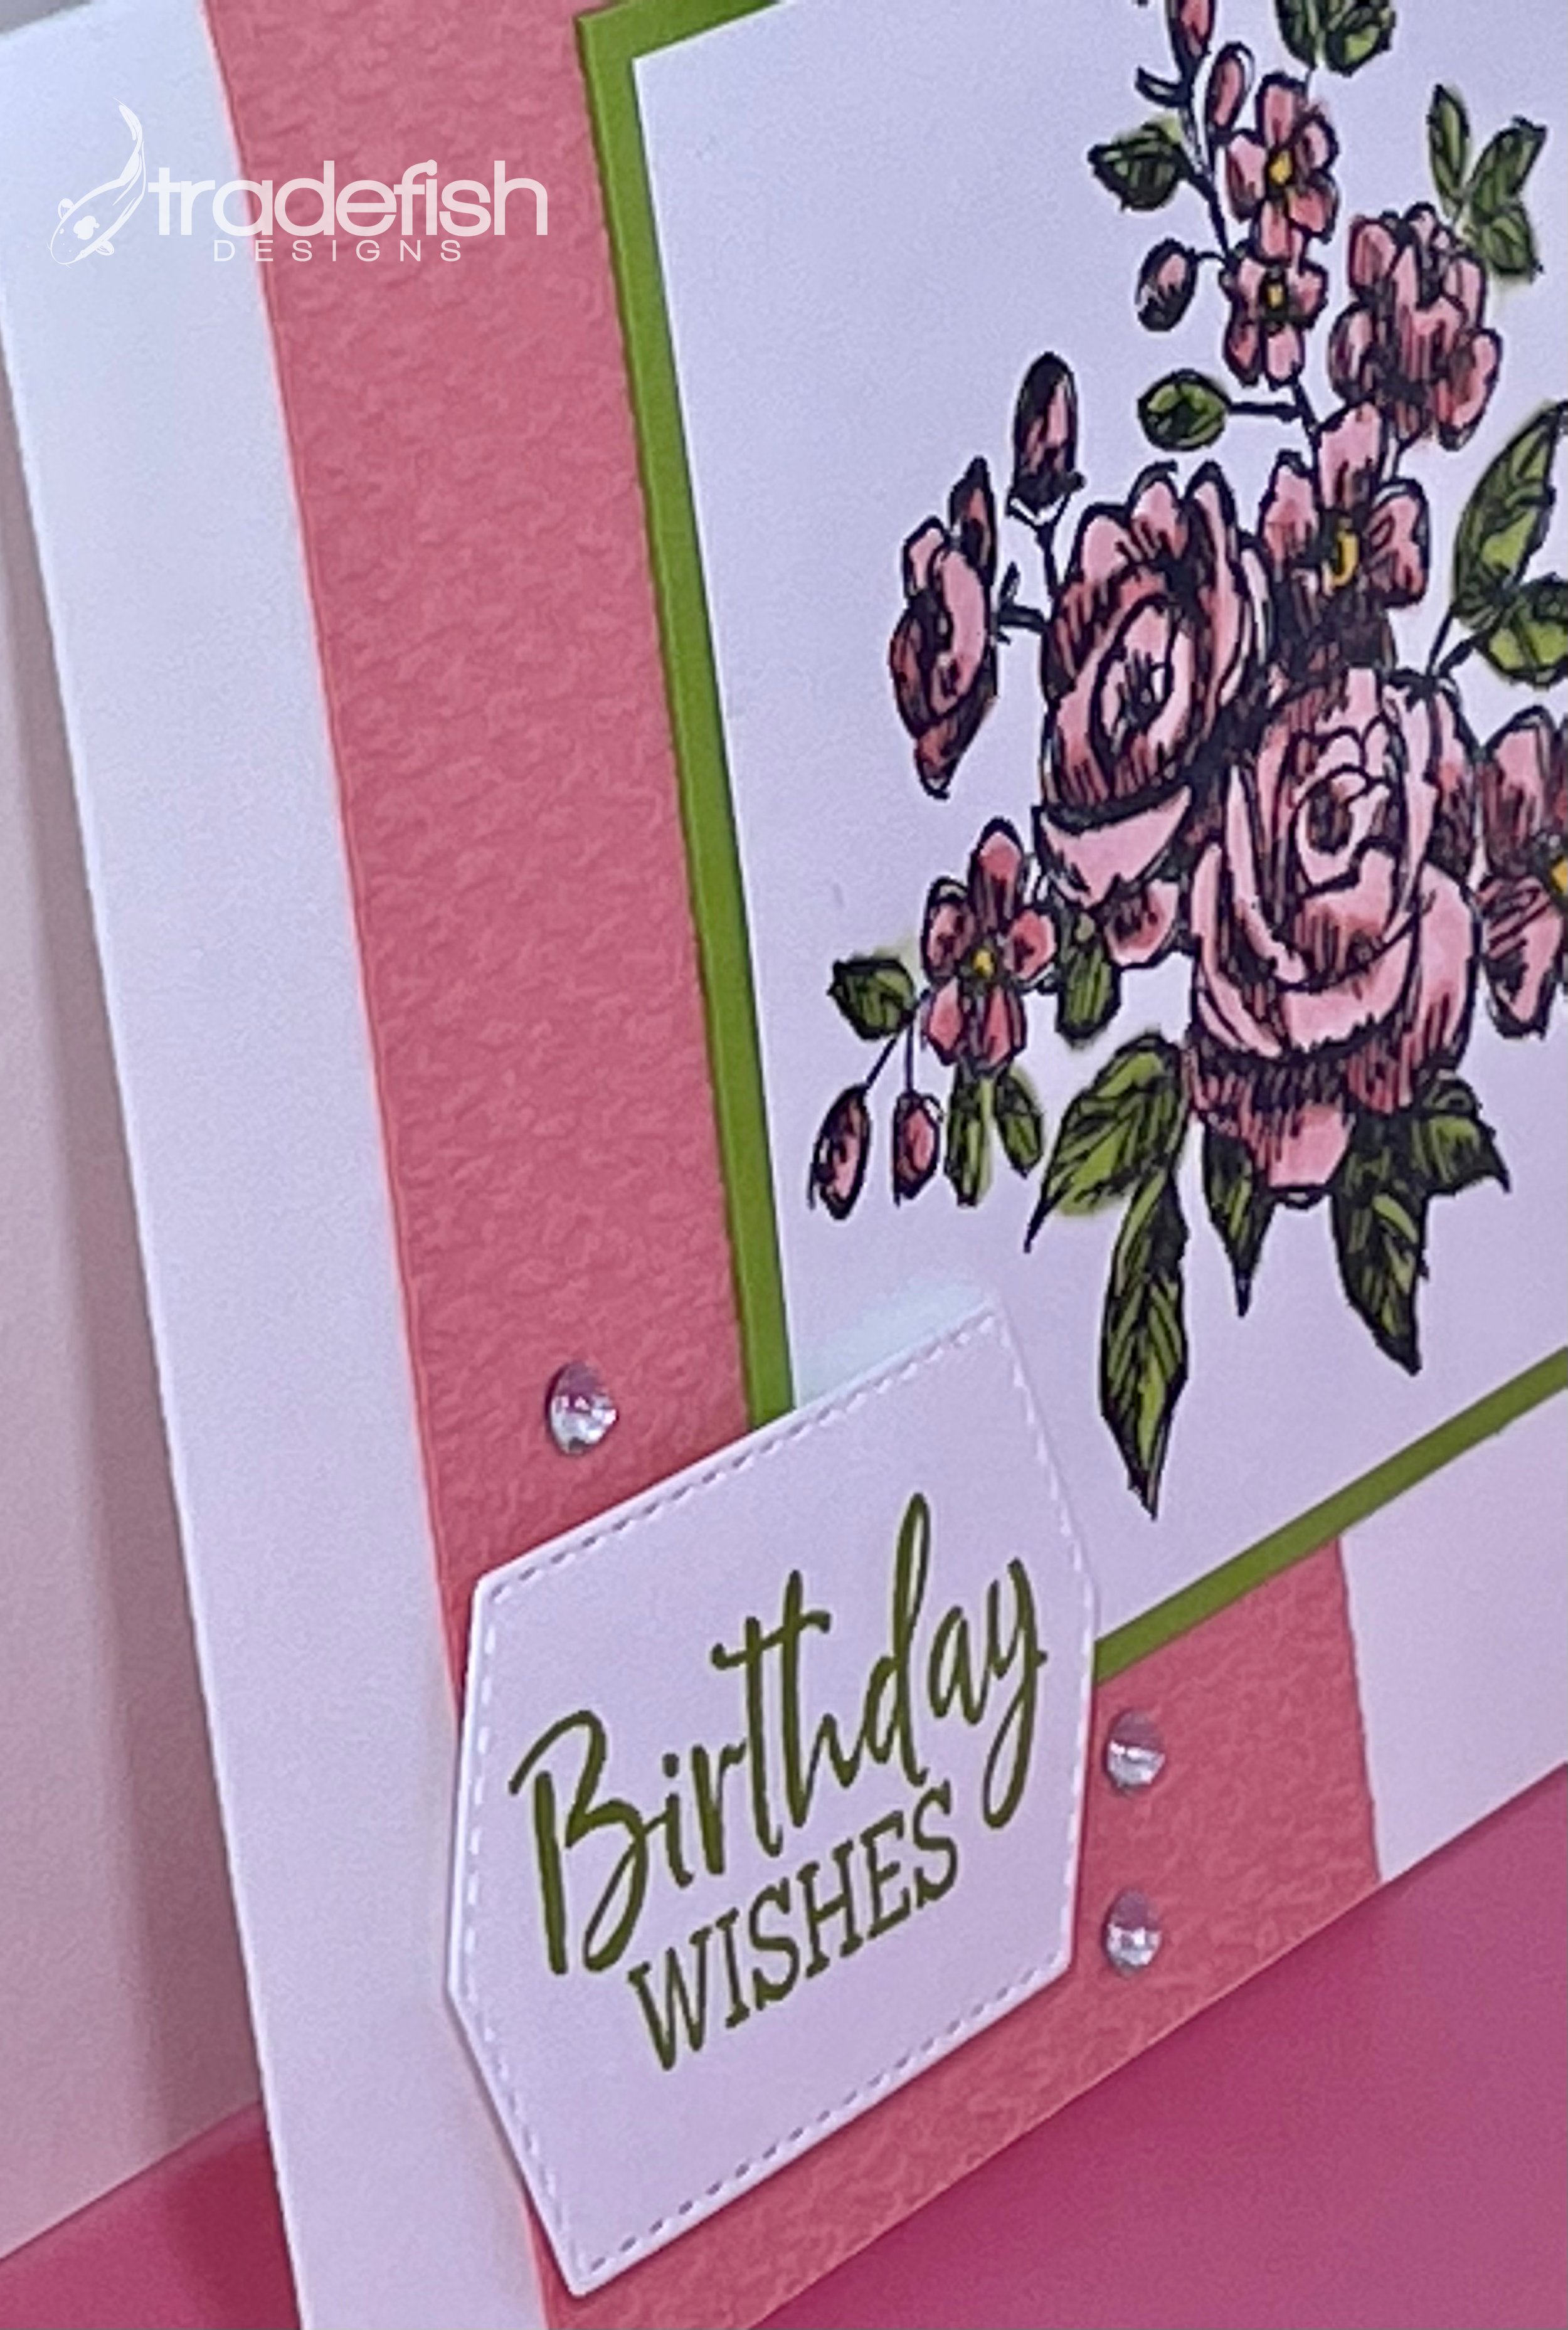
Birthday Wishes
A favorite birthday card. Love the stamp set and the fun colors.


Supplies used: (all supplies Stampin’ Up unless otherwise noted)
Stamps: Fancy Phrases
Ink: Granny Apple Green, Memento Tuxedo Black
Paper: Granny Apple Green, Flirty Flamingo, White
Dies: Stitched So Sweetly
Markers: Granny Apple Green, Flirty Flamingo
Embossing: Tasteful Texture Embossing Folder
Embellishments: Basic Rhinestones

Keep it crafty!
October 15, 2021 - Just Saying Hello
A card about just saying hello featuring the Tasteful Touches stamp set from Stampin’ Up.

Technique: creating background paper with watermark ink


No naked envelopes.
Supplies used:
Stamps: Tasteful Touches (SU)
Ink: Versamark, Memento Tuxedo Black
Paper: Bumblebee, Just Jade, Highland Heahter (SU), Black and White
Dies: Tasteful Labels
Embellishments: Clear Epoxy Drops

Keep it crafty!
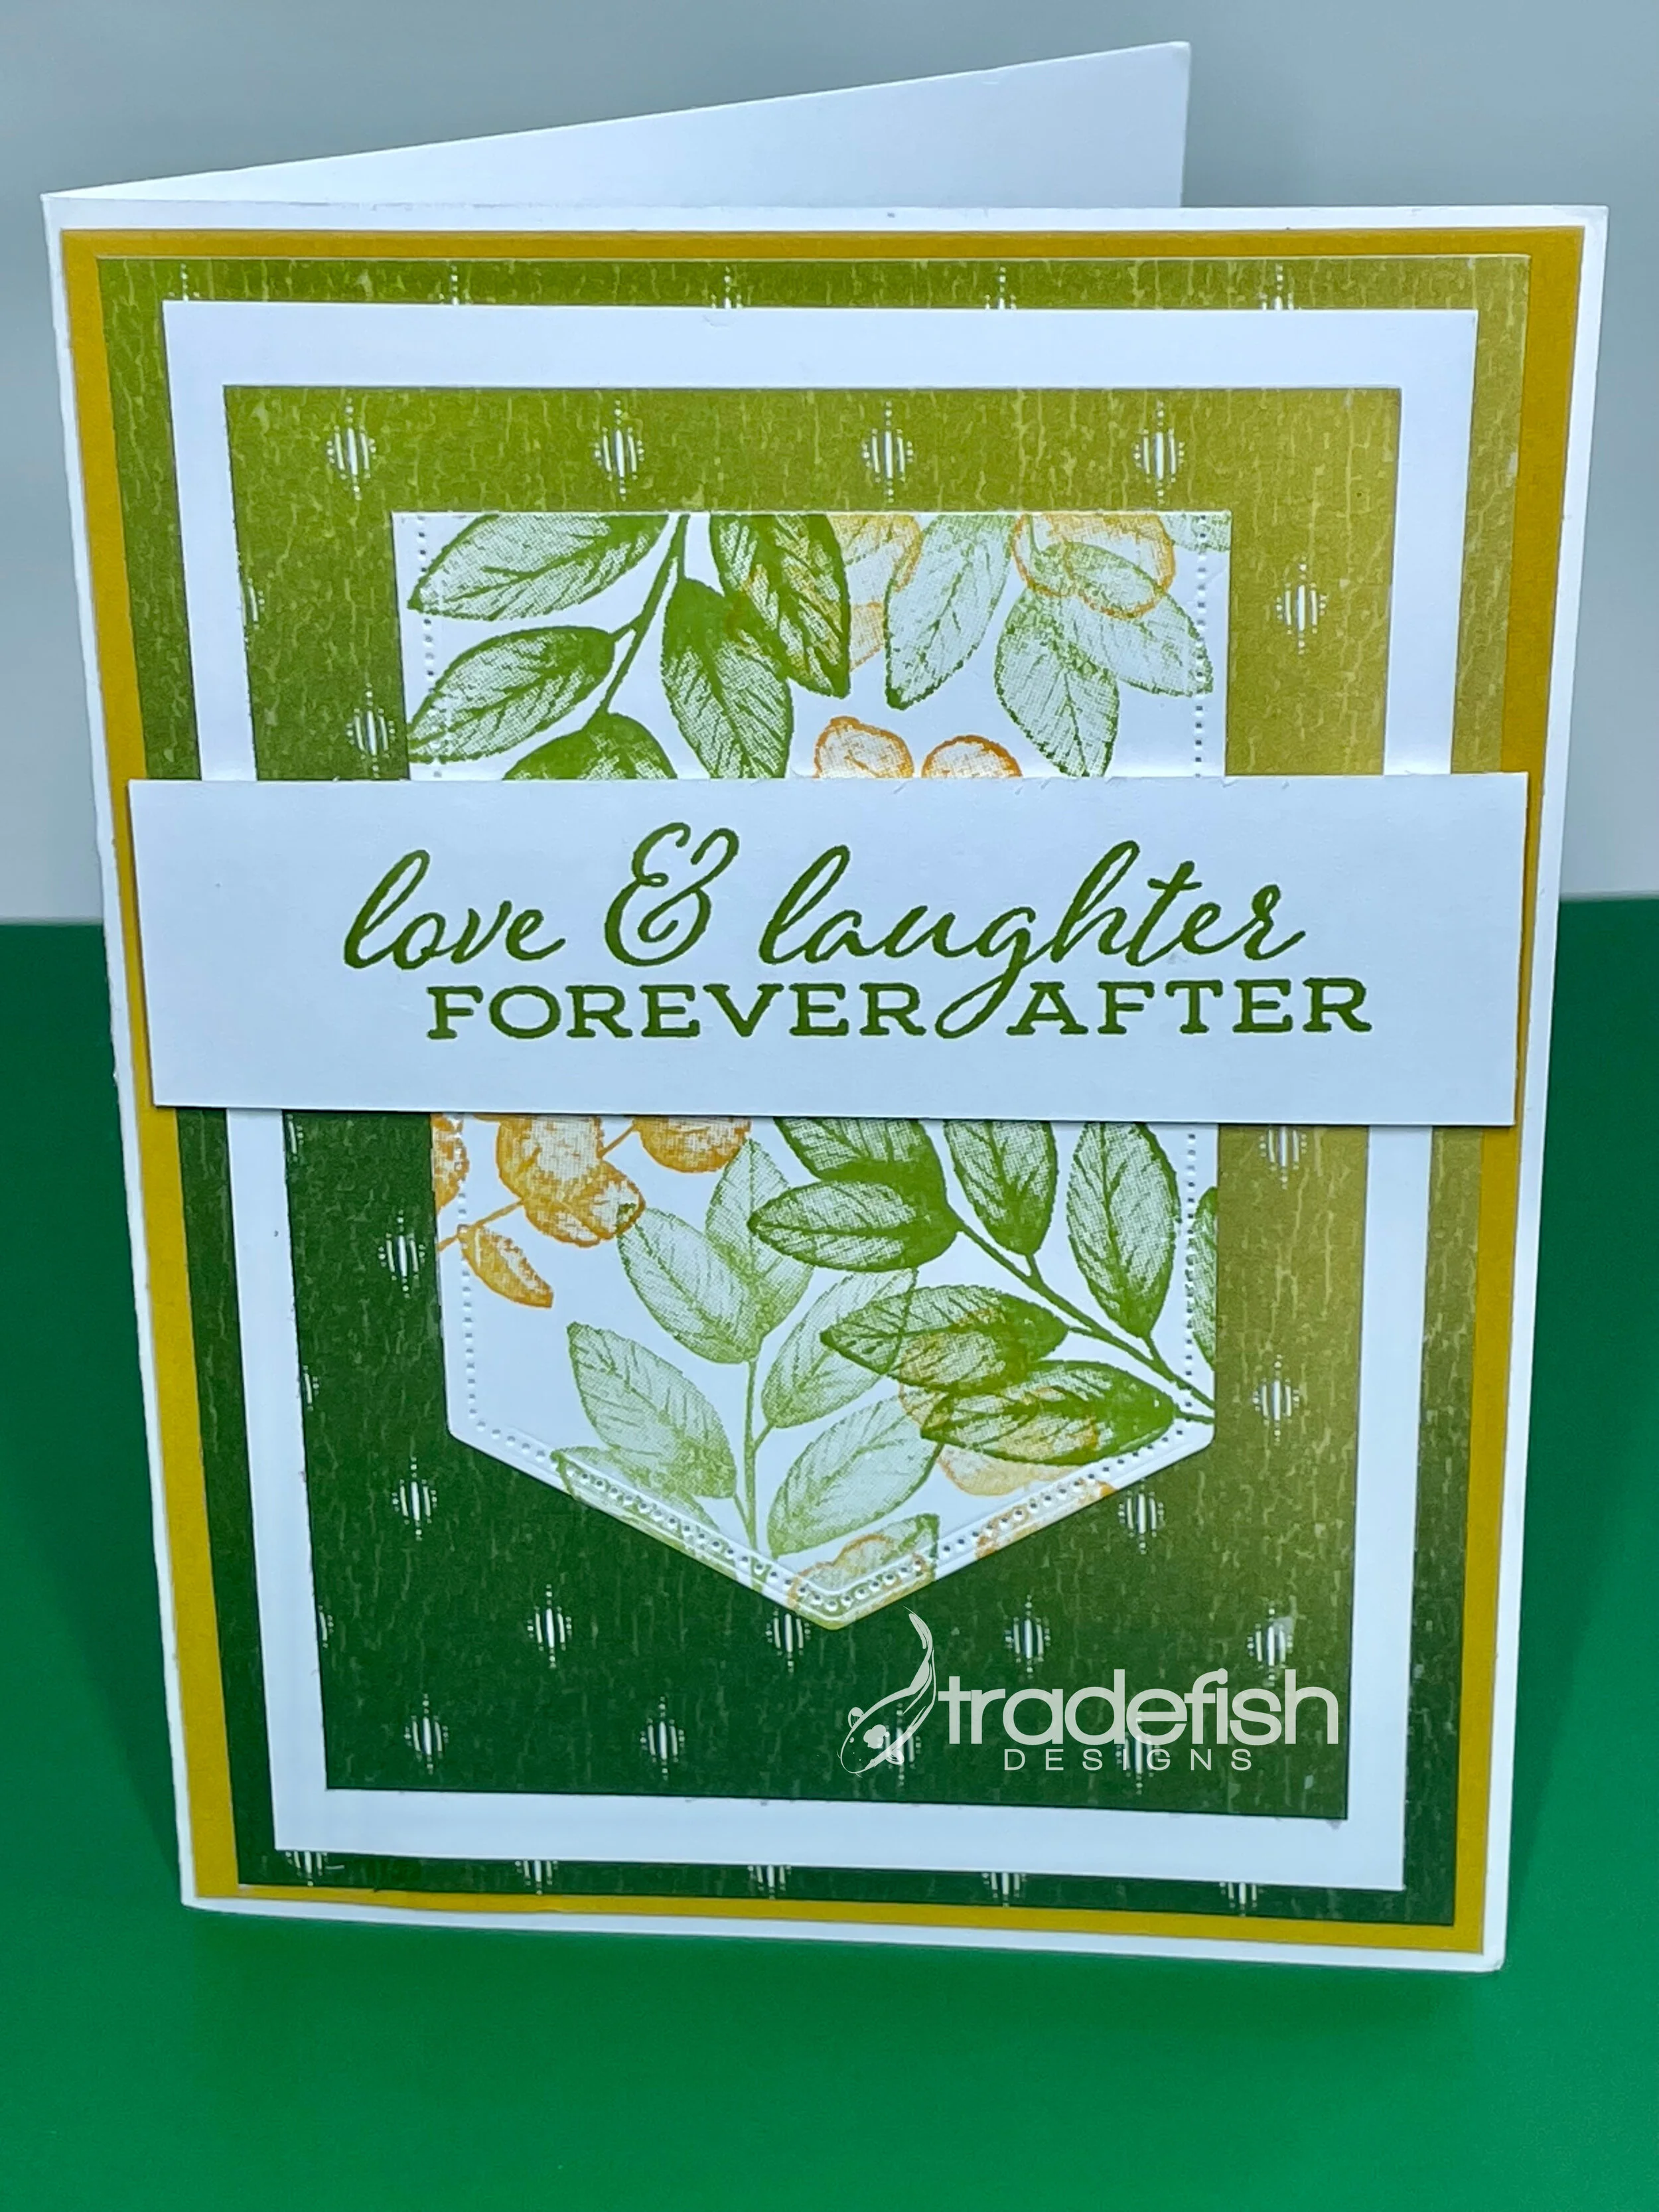
October 13, 2021 - Love & Laughter Ever After
A card featuring the Forever Form stamp set from Stampin’ Up.


No naked envelopes.
Supplies used:
Stamps: Forever Fern (SU)
Ink: Granny Apple Green, Mango Melody (SU)
Paper: Artistry Blooms, Bumblebee (SU), White
Dies: Stitched Nested Labels (SU)

Keep it crafty!
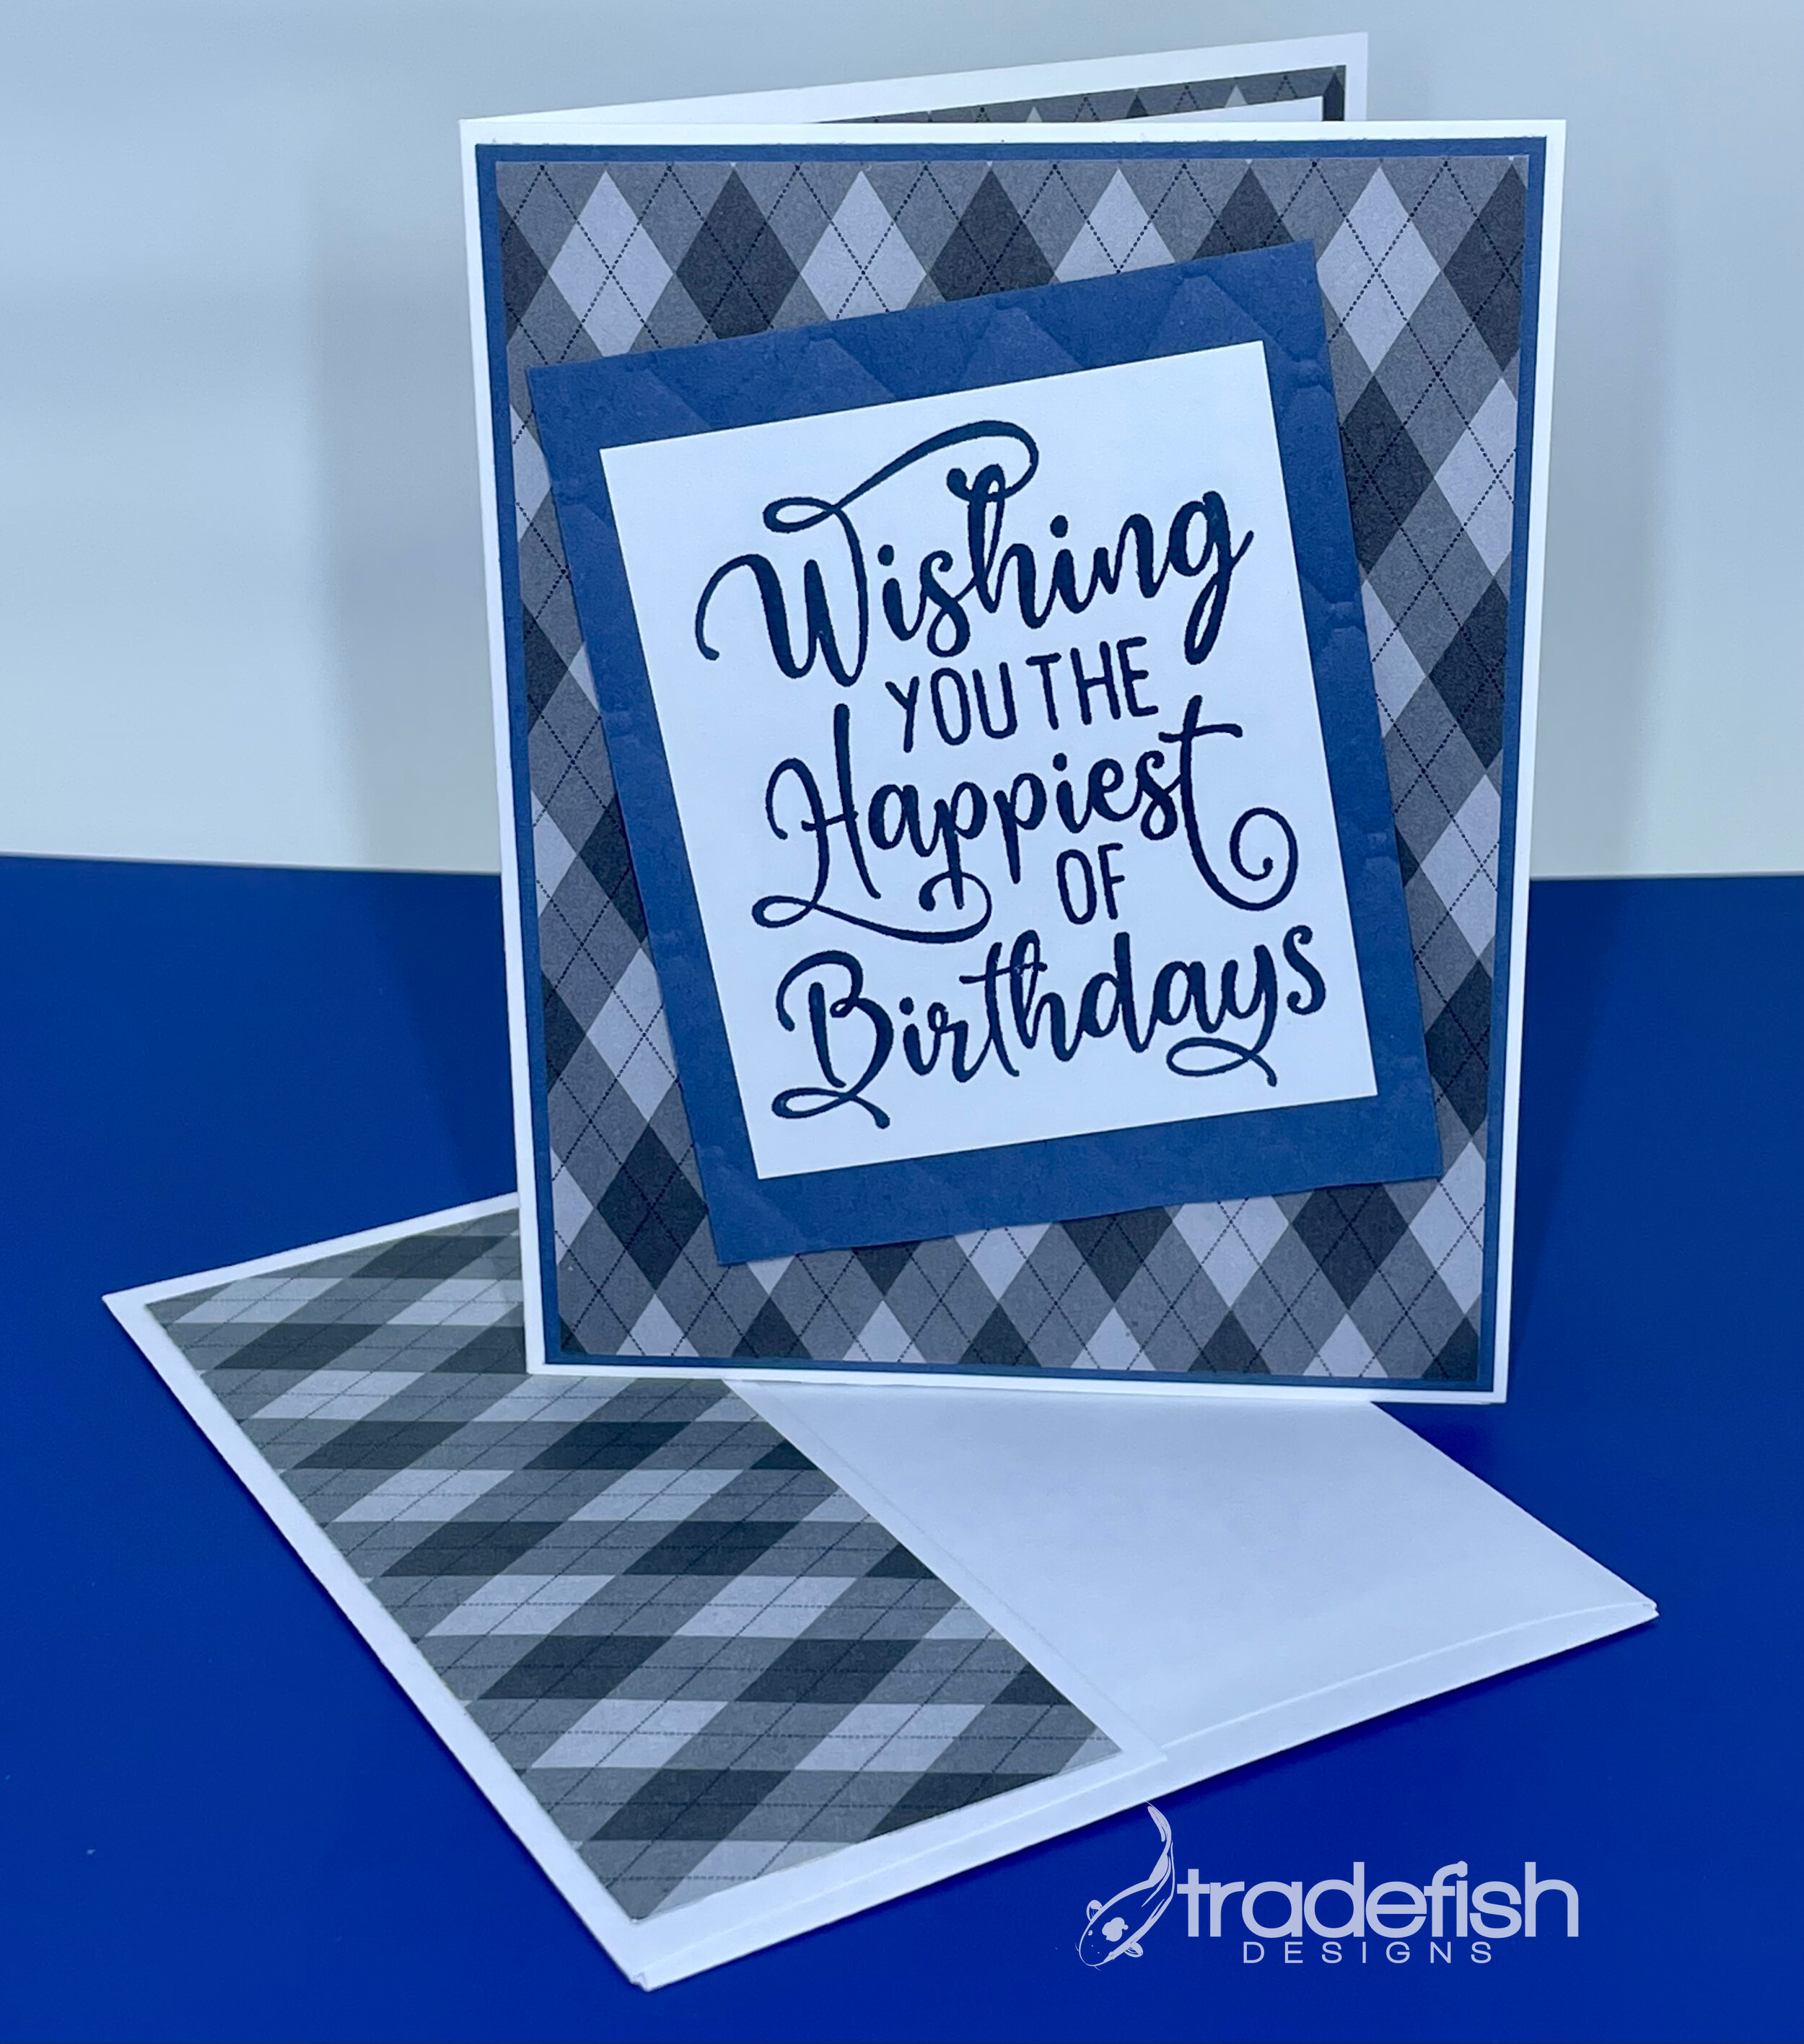
October 11, 2021 - Wishing you the Happiest of Birthdays
Birthday card featuring Happiest of Birthday stamp set by Stampin’ Up.

No naked envelopes.

Supplies used:
Stamps: Happiest of Birthdays
Ink: Misty Moonlight
Paper: Country Club, Misty Moonlight (SU), White
Tools/Embossing Folder: Tufted (SU)

Keep it crafty!
October 8, 2021 - May Your Birthday Be Memorable
A birthday card featuring the Timeless Tropical stamp set from Stampin’ Up.

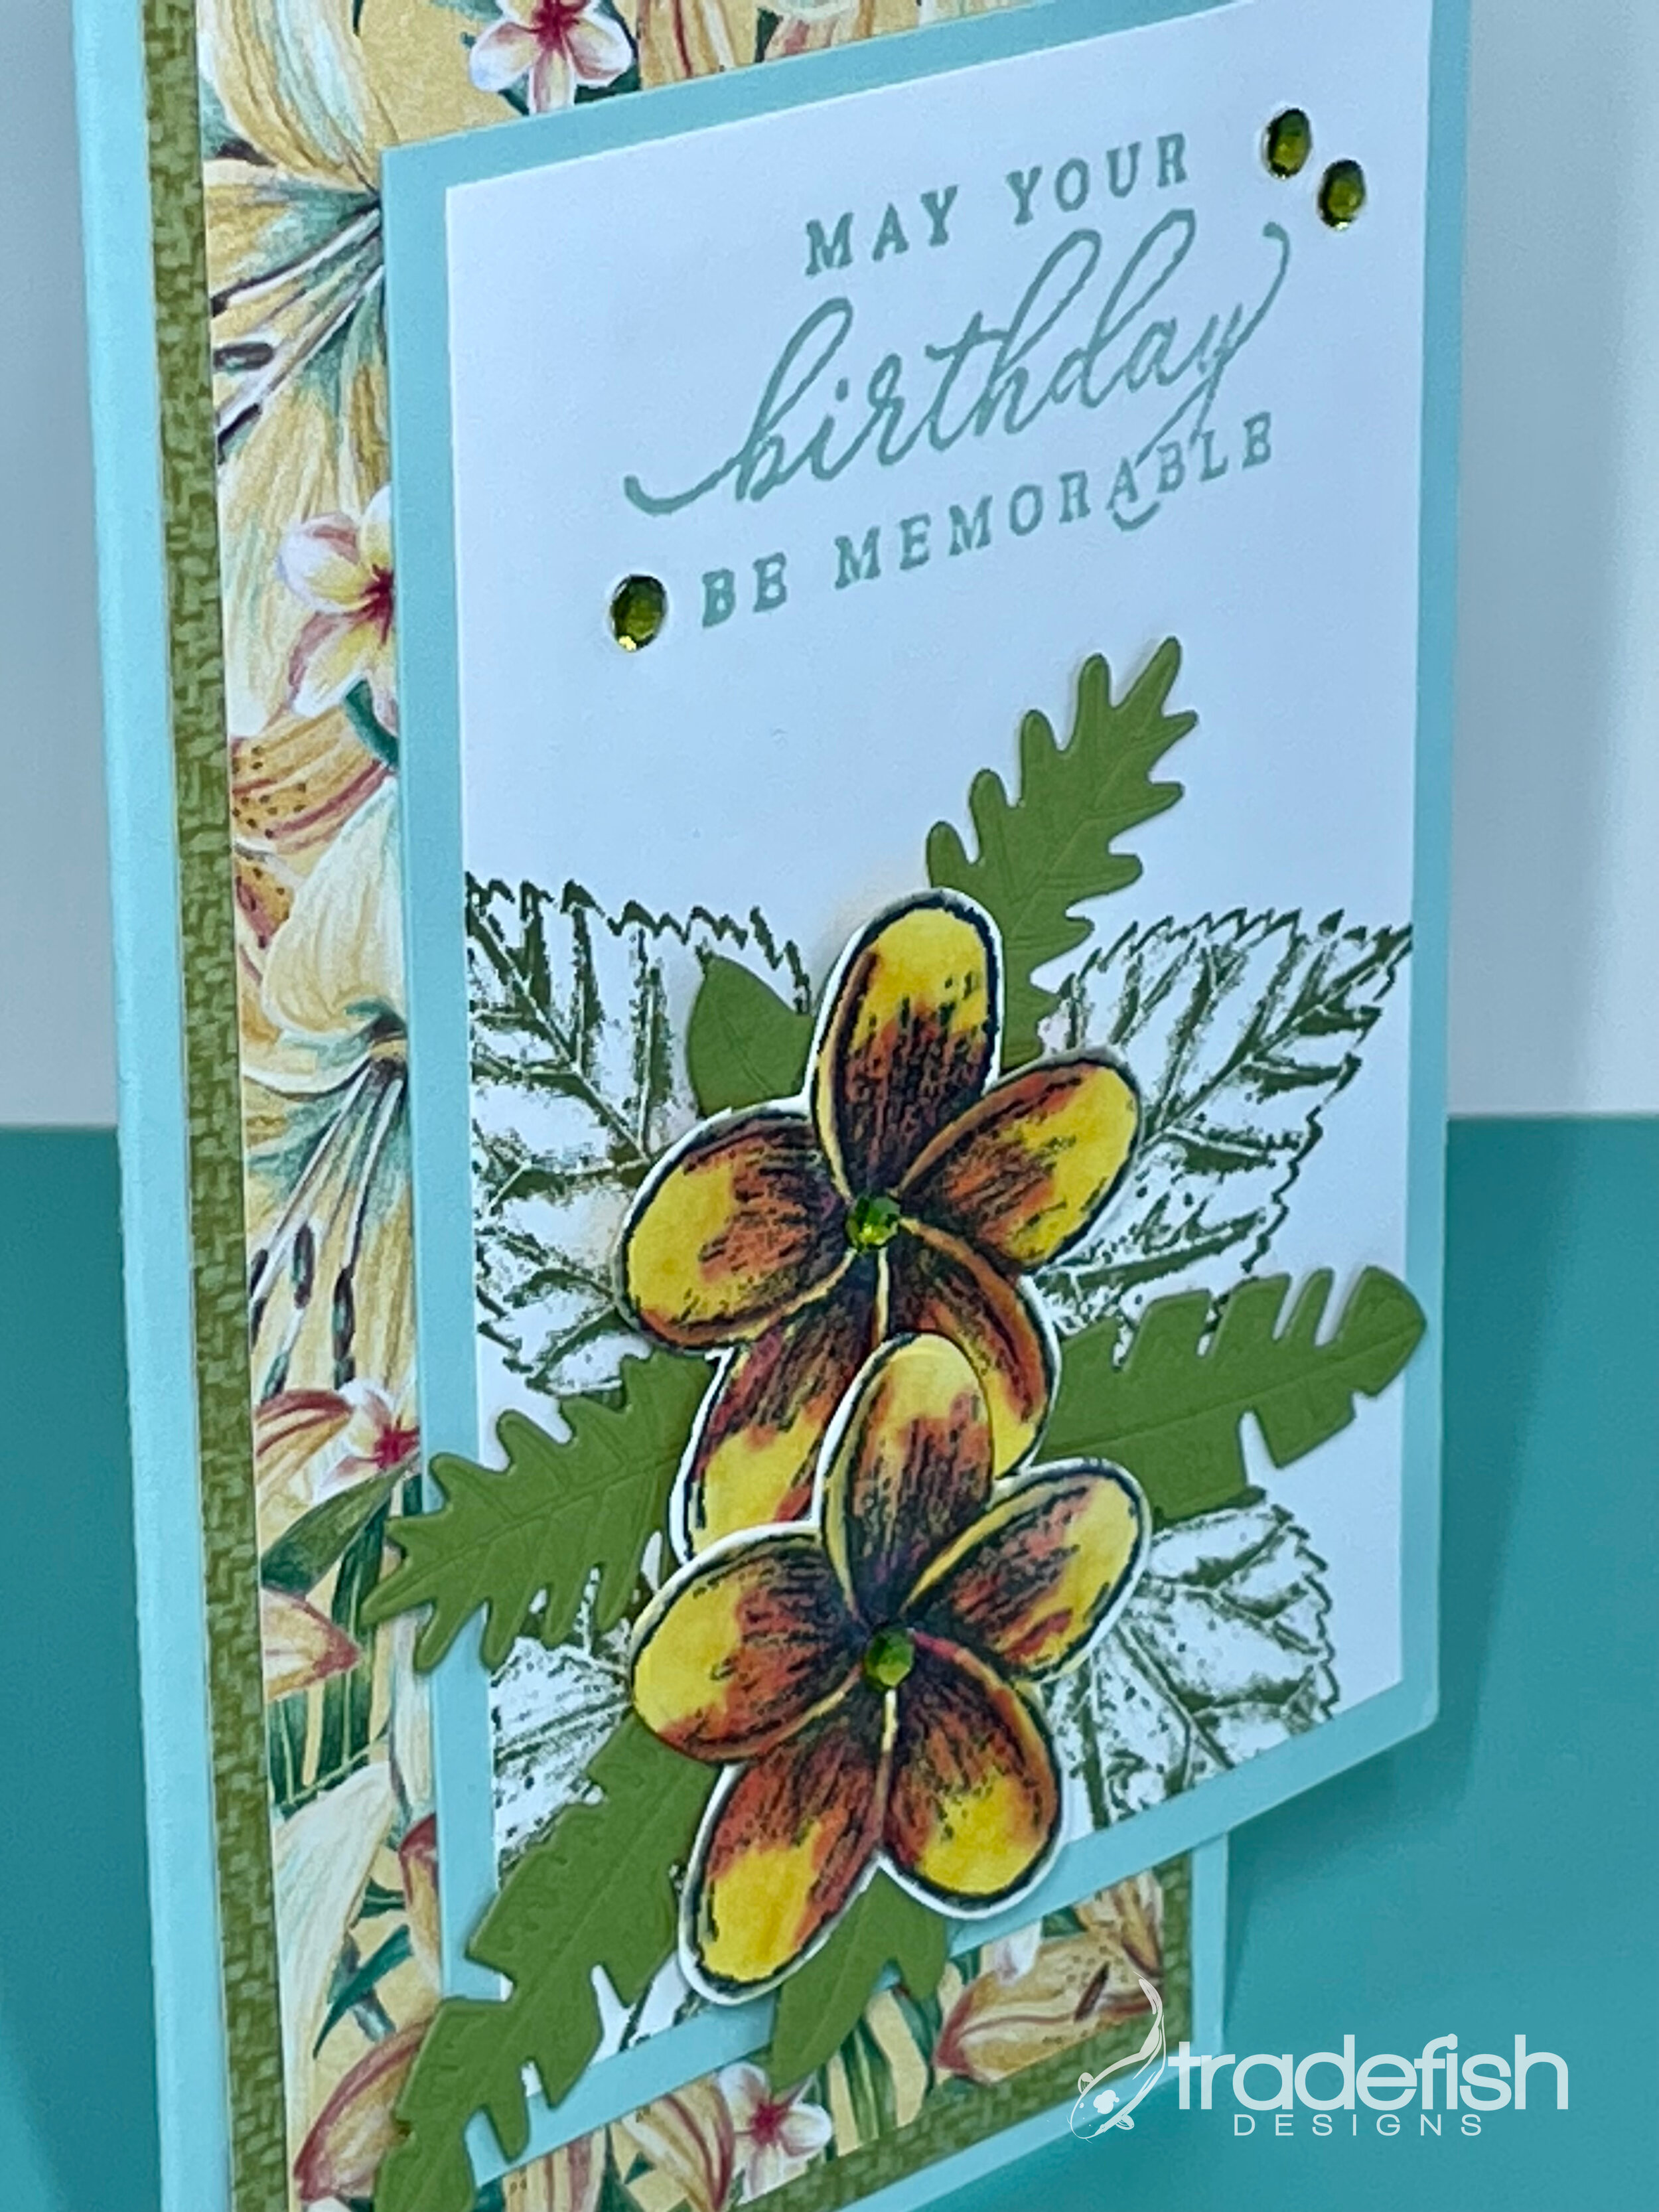
Technique: Alcohol Markers


No naked envelopes!
Supplies used:
Stamps: Timeless Tropical (SU)
Ink: Old Olive, Pool Party (SU) and Memento Tuxedo Black
Paper: Tropical Oasis, Pool Party and Old Olive (SU), white
Tools/Markers: Real Red, Mango Melody and Daffodil Delight Stampin’ Blends (SU)
Embellishments: Noble Peacock Rhinestones (SU)

Keep it crafty!
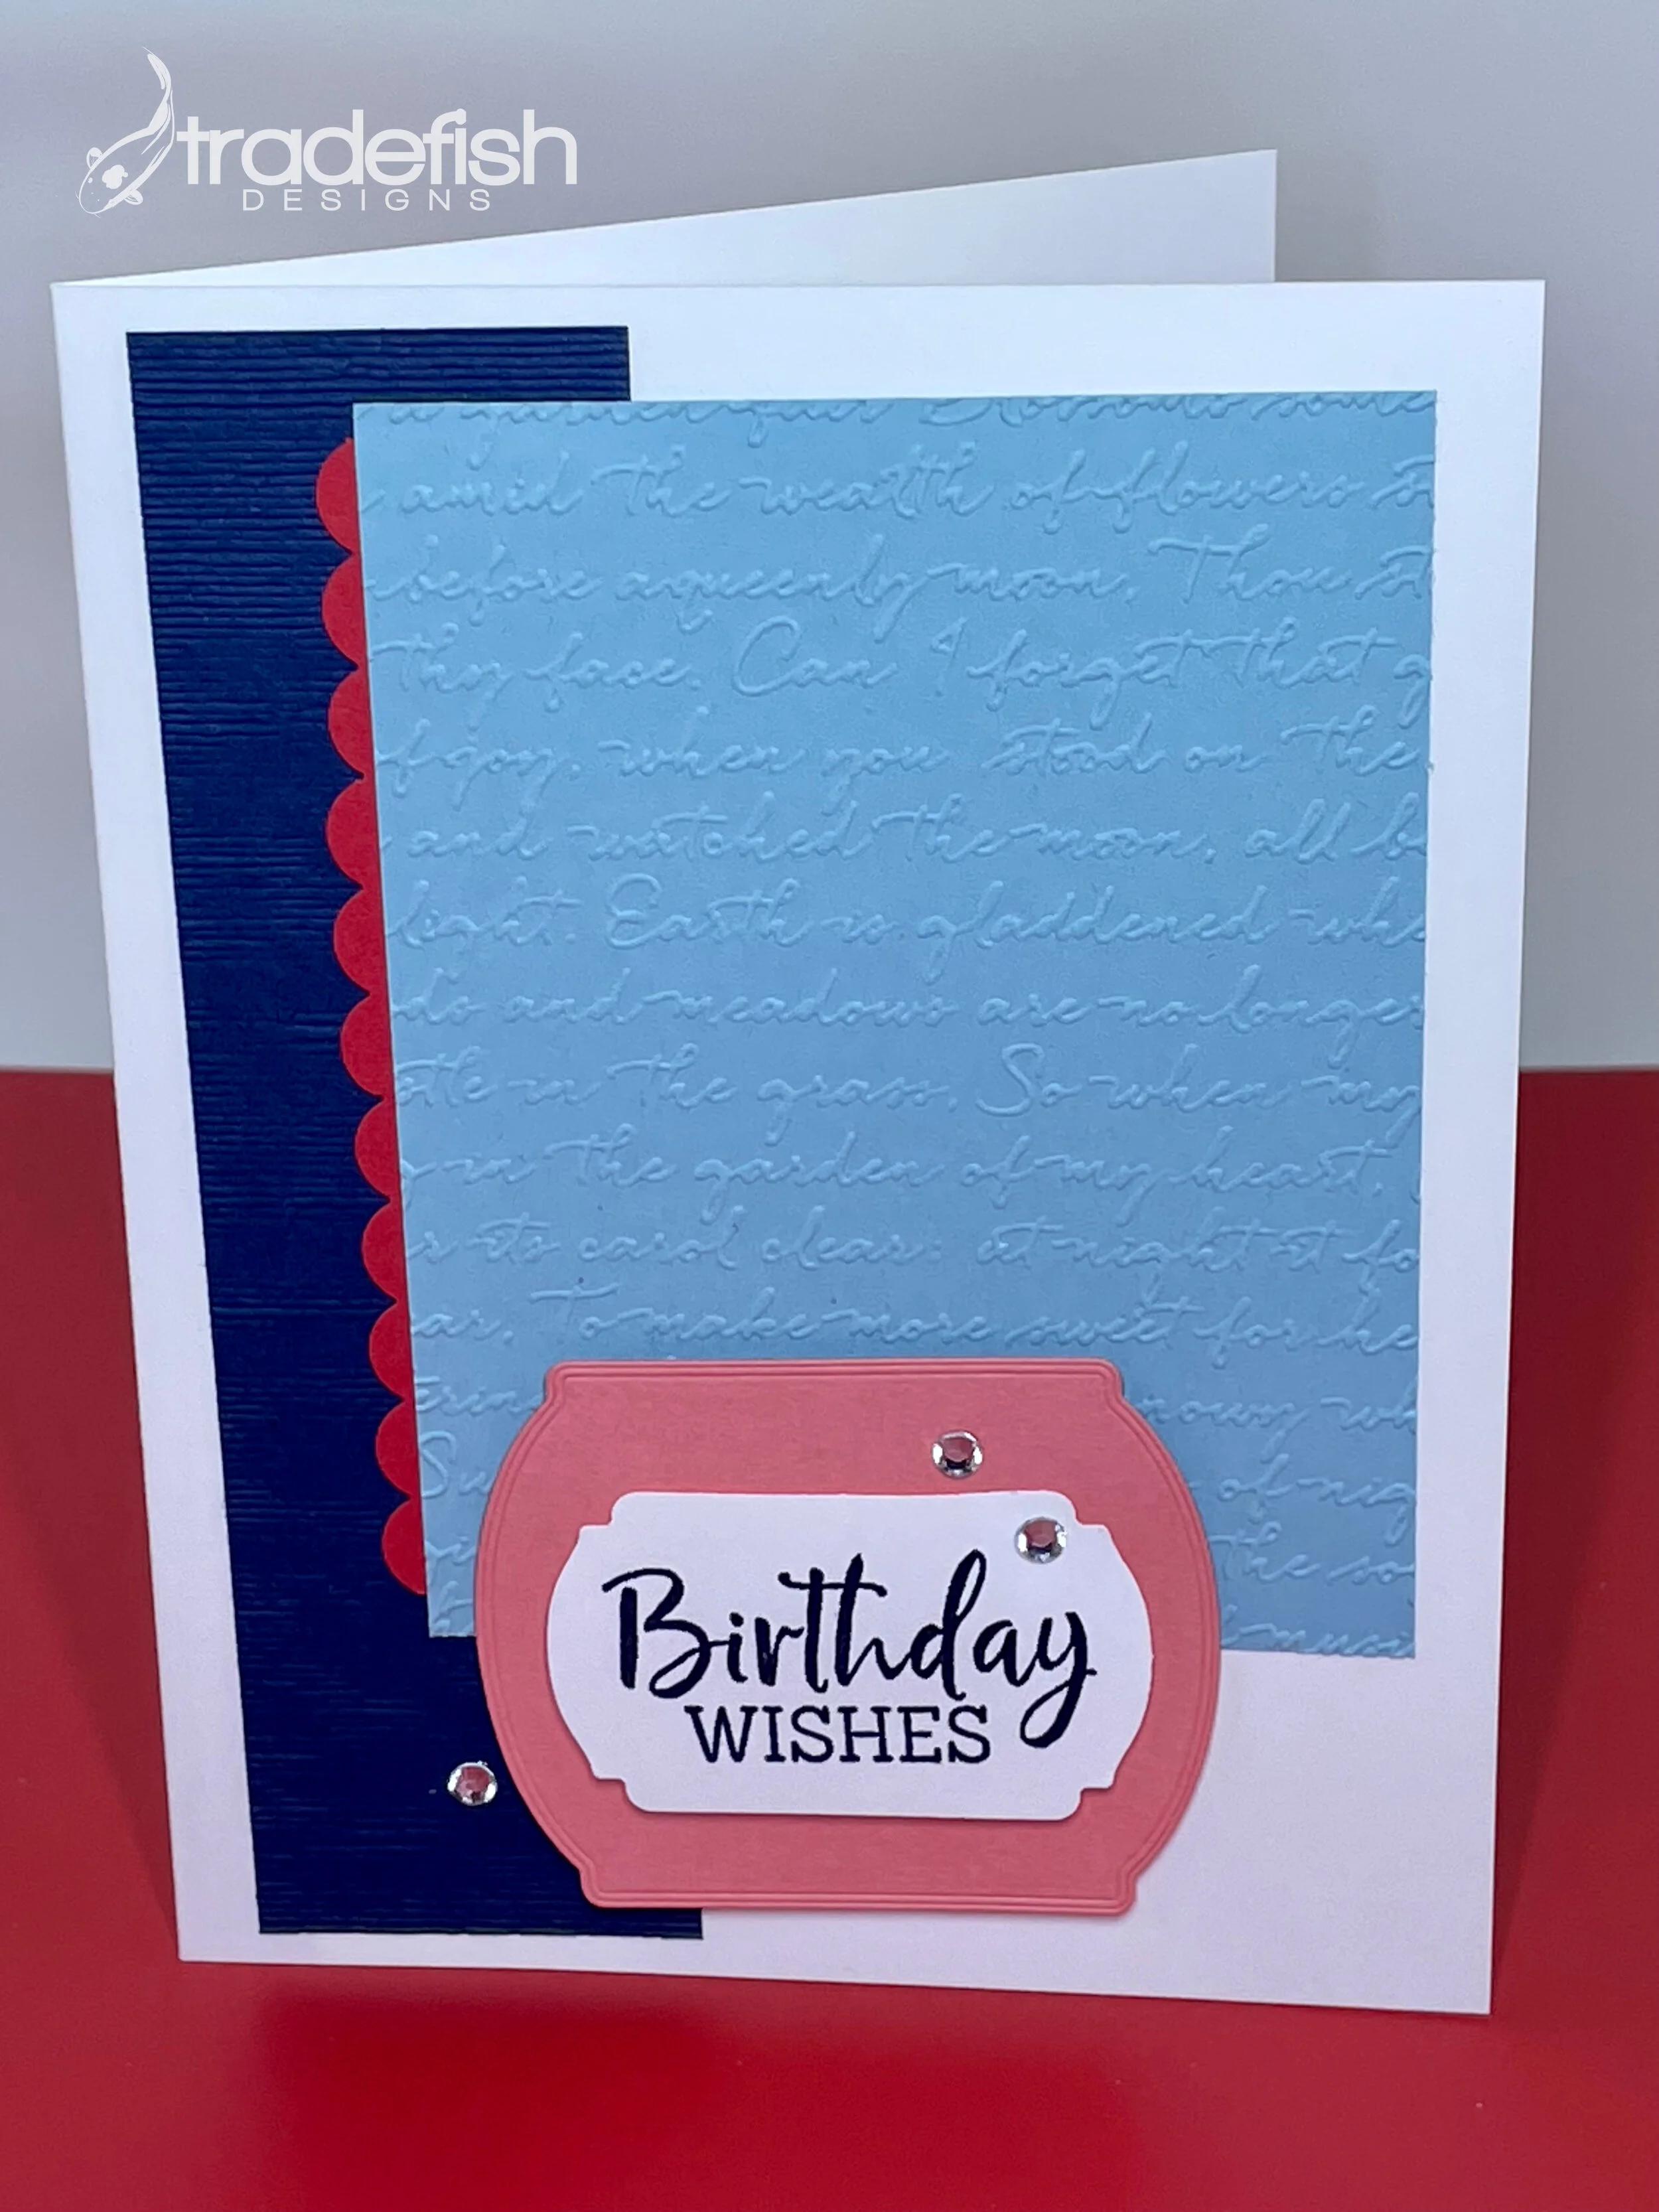
October 6, 2021....Birthday Wishes
Birthday card featuring the Fancy Phrases stamp set bu Stampin’ Up


Technique: Embossing

Supplies used:
Stamps: Fancy Phrases (SU)
Ink: Night of Navy (SU)
Paper: Night of Navy, Poppy Parade, Balmy Blue, Flirty Flamingo (SU), White
Dies: Tasteful Labels (SU)
Tools/Punch: Scalloped and Label Me Fancy (SU)
Tools/Embossing Folder: Scripty and Subtle (SU)
Embellishments: Basic Rhinestone (SU)

Keep it crafty!
October 4, 2021 - Happy Birthday
Birthday card featuring Here’s a Card stamp set by Stampin’ Up.

No naked envelopes!


Supplies used:
Stamps: Here’s a Card (SU)
Ink: Night of Navy (SU)
Paper: Country Club DSP, Night of Navy (SU)
Tools (Punches): Label Me Fancy, Label Me Lovely (SU)
Embellishments: Clear Epoxy Drops (SU)

Keep it crafty!
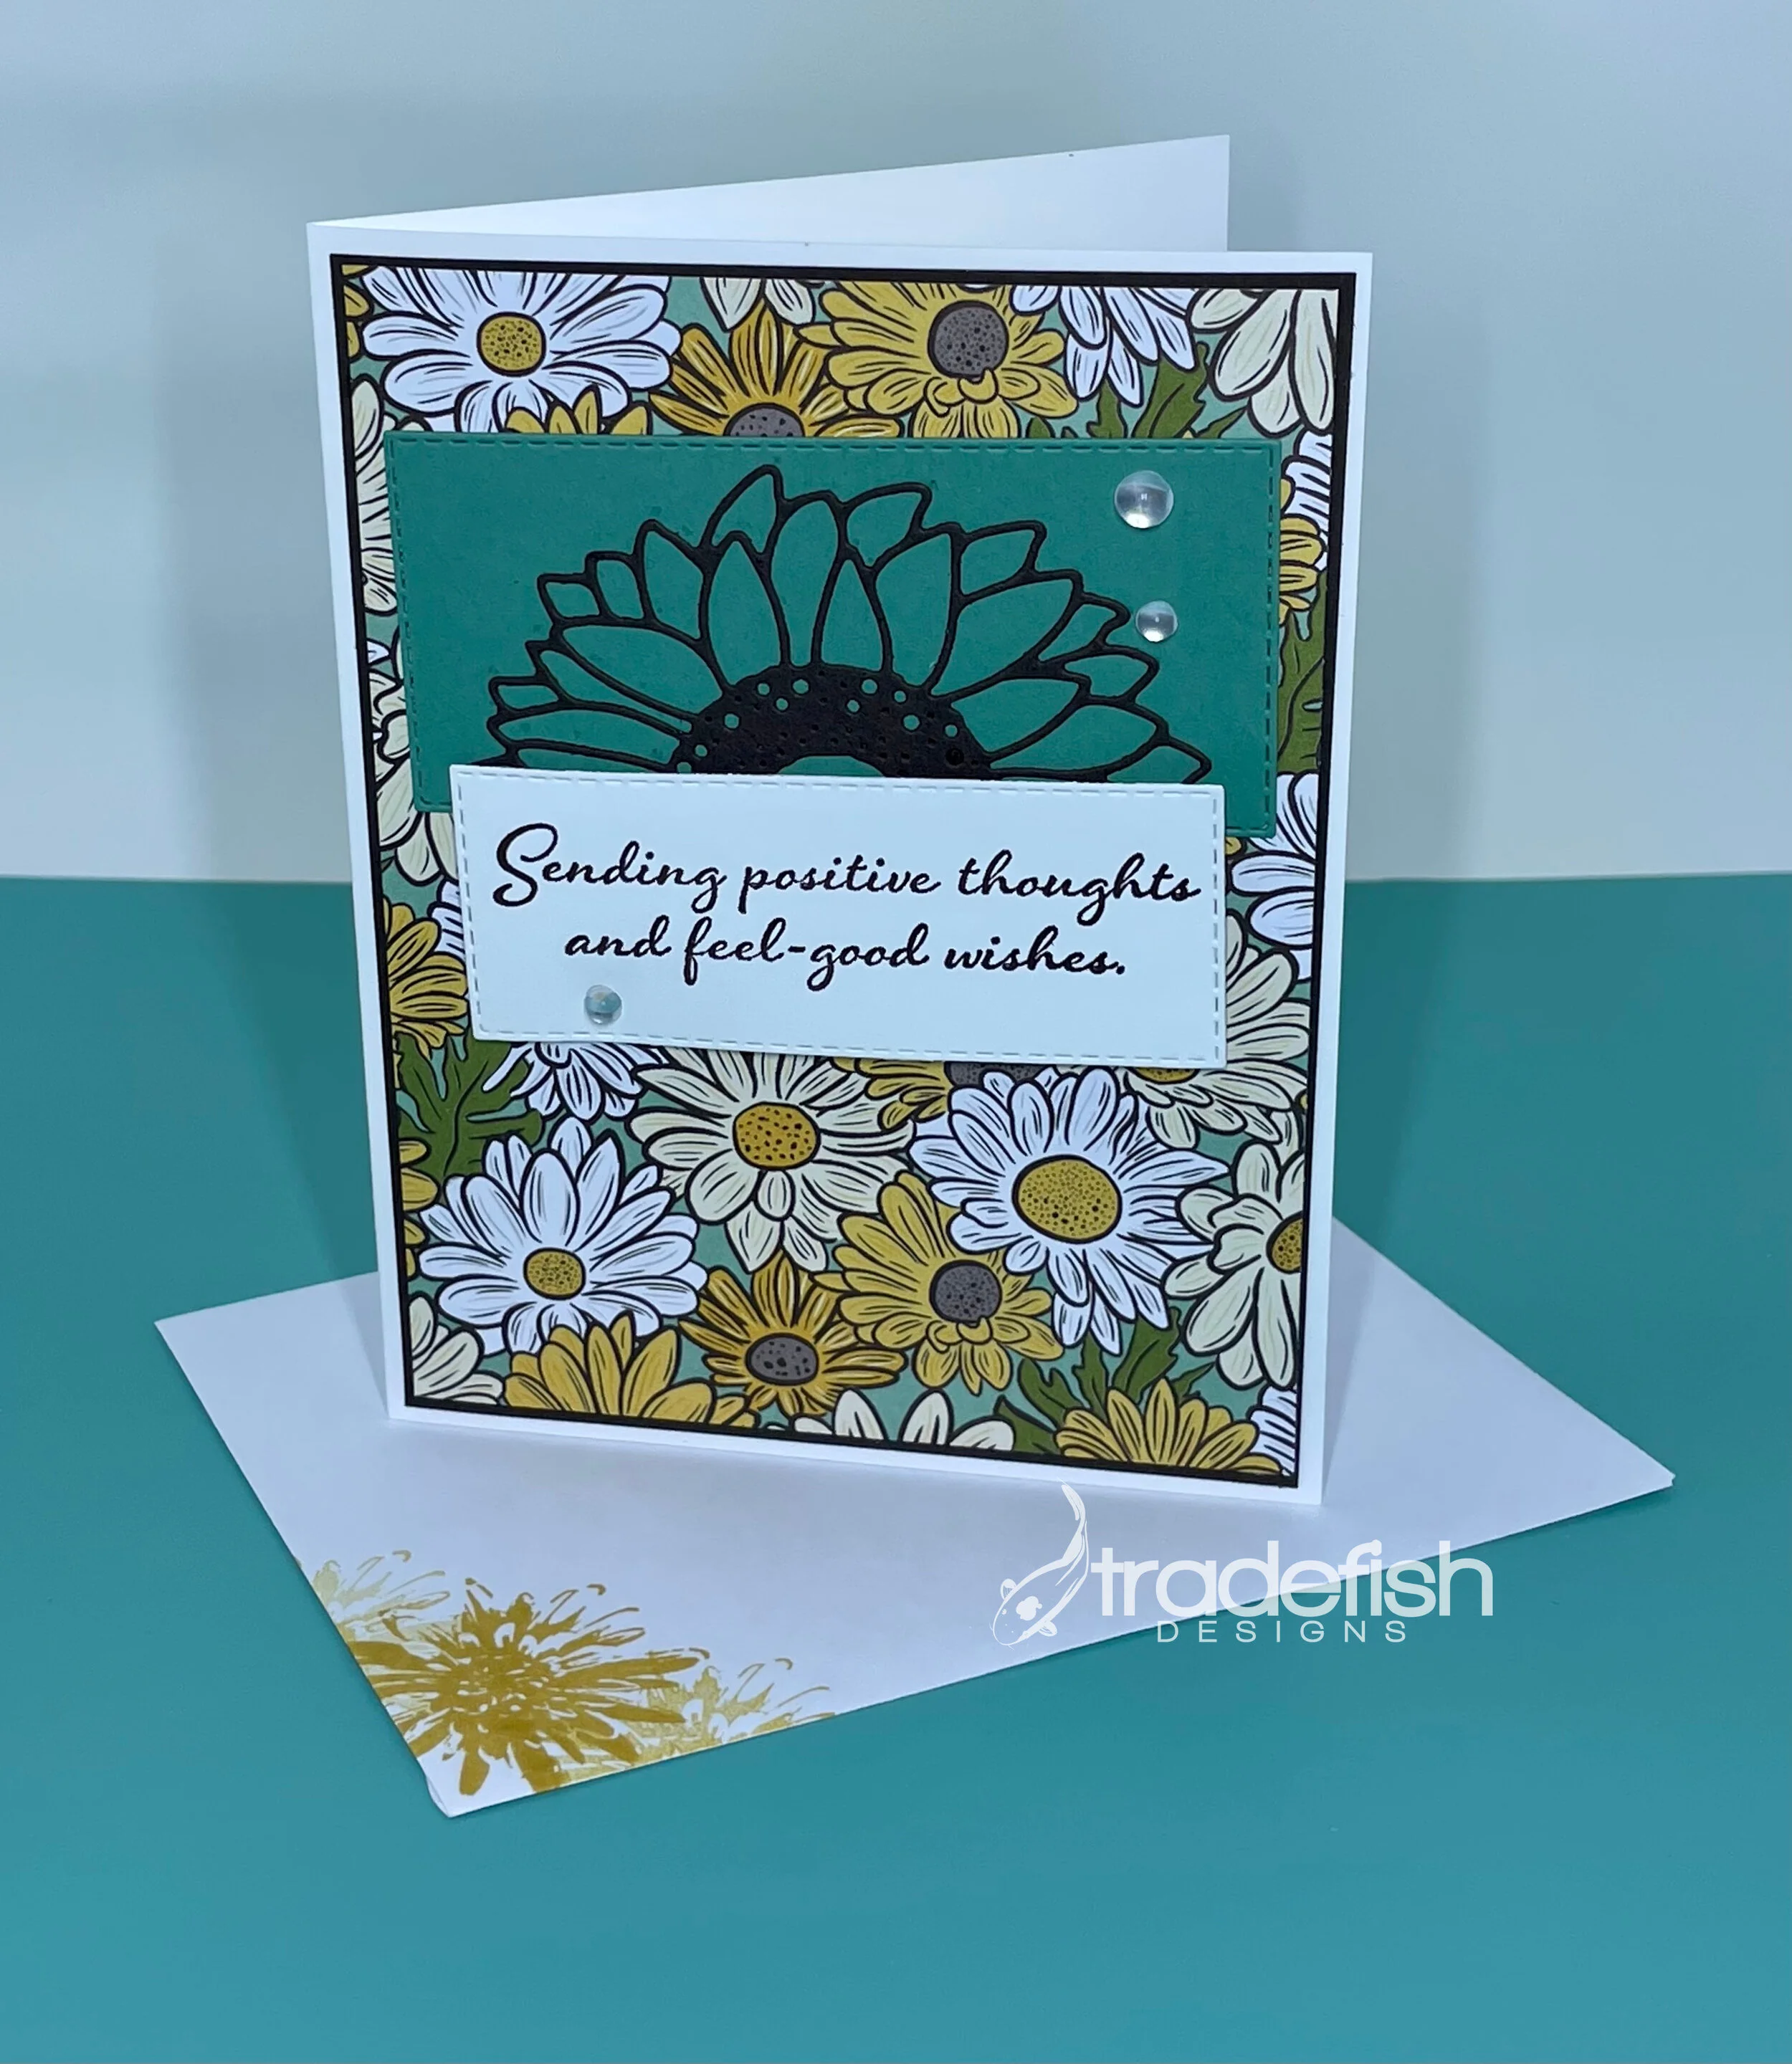
Sending positive thoughts with flowers
Here’s a simple way to tone down some very busy designer paper. I added two blocks of sold cardstock in complementary colors. The sunflower is a die cut which is then cut in half and layered over the Just Jade cardstock.

No naked envelopes!
The second piece of solid cardstock has the sentiment. By placing both the die and the sentiment in the middle it breaks up the busy daisy pattern paper.
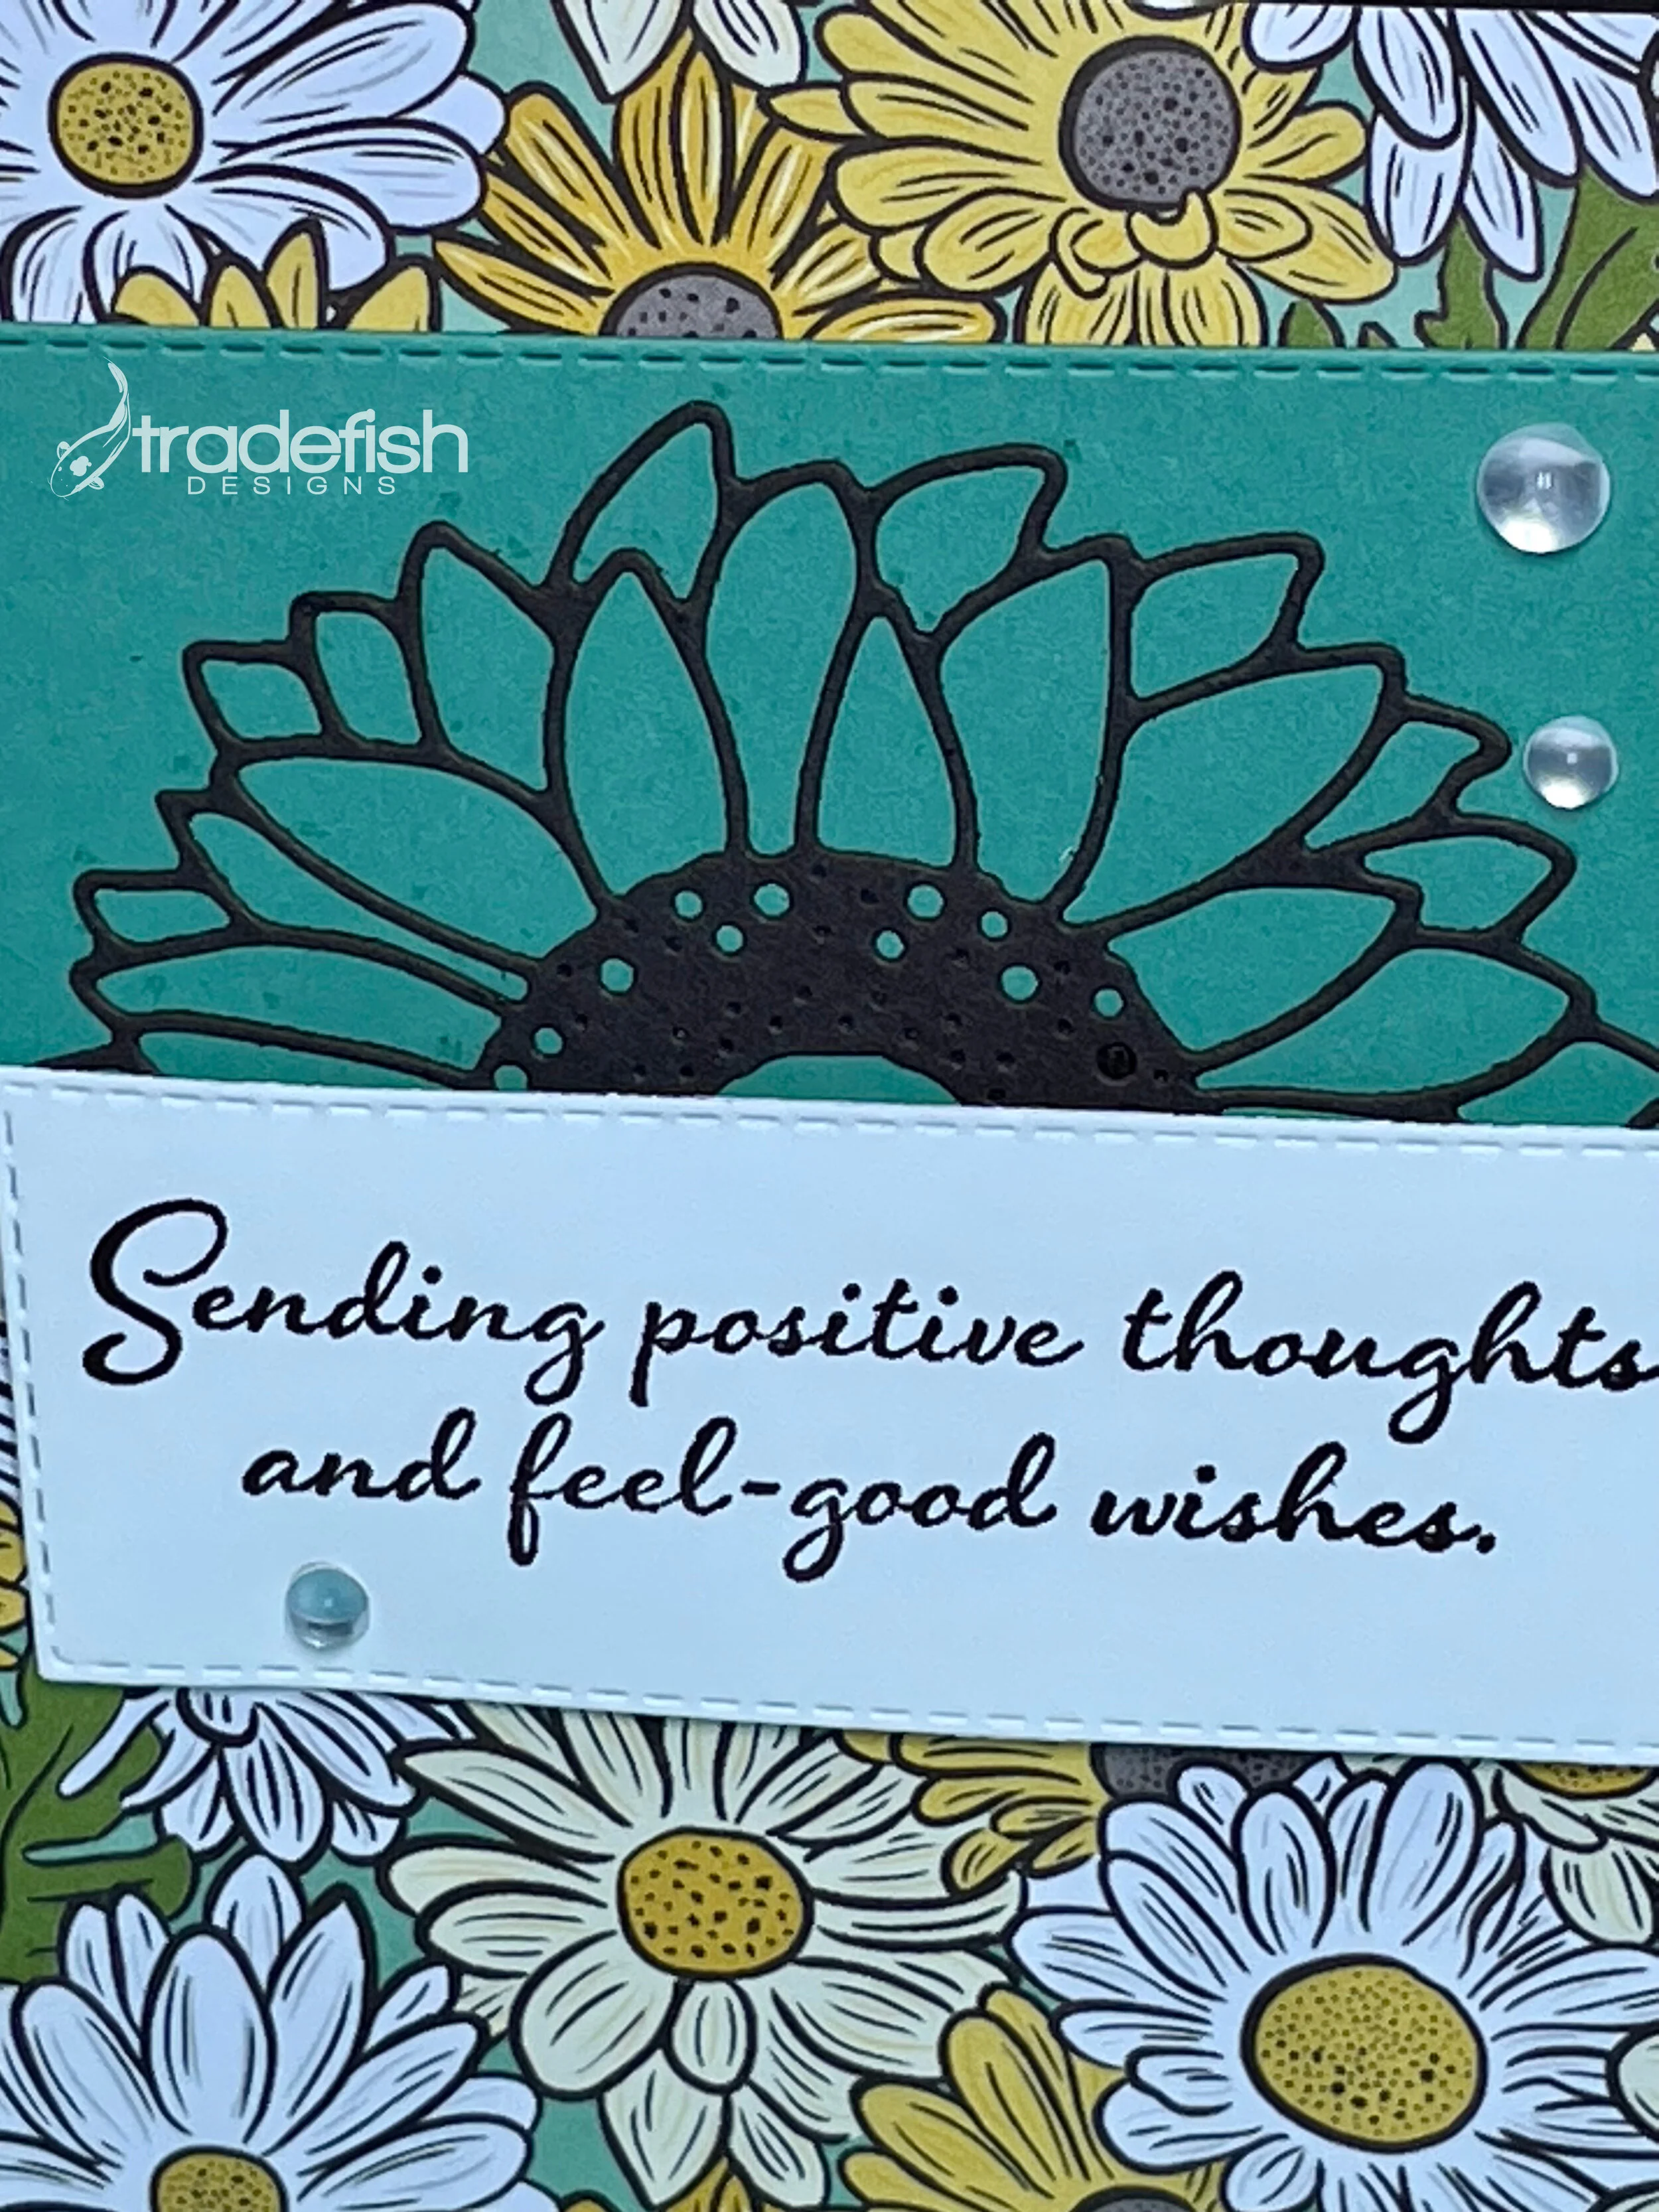
Love some epoxy drops!
I always try to pull something from the front of the card to the inside of the card. Here I used the same stamp set to add a colorful image with a sentiment over the top. The contrast between the busy front and the quieter inside is fun for the eyes.

Supplies used: All supplies are Stampin’ Up
Stamps: Positive Thoughts
Ink: Early Espresso, Bumblebee
Paper: Whisper White, Early Espresso, Just Jade, Ornate Gardens DSP
Dies: Stitched Rectangles
Embellishments: Epoxy Drops
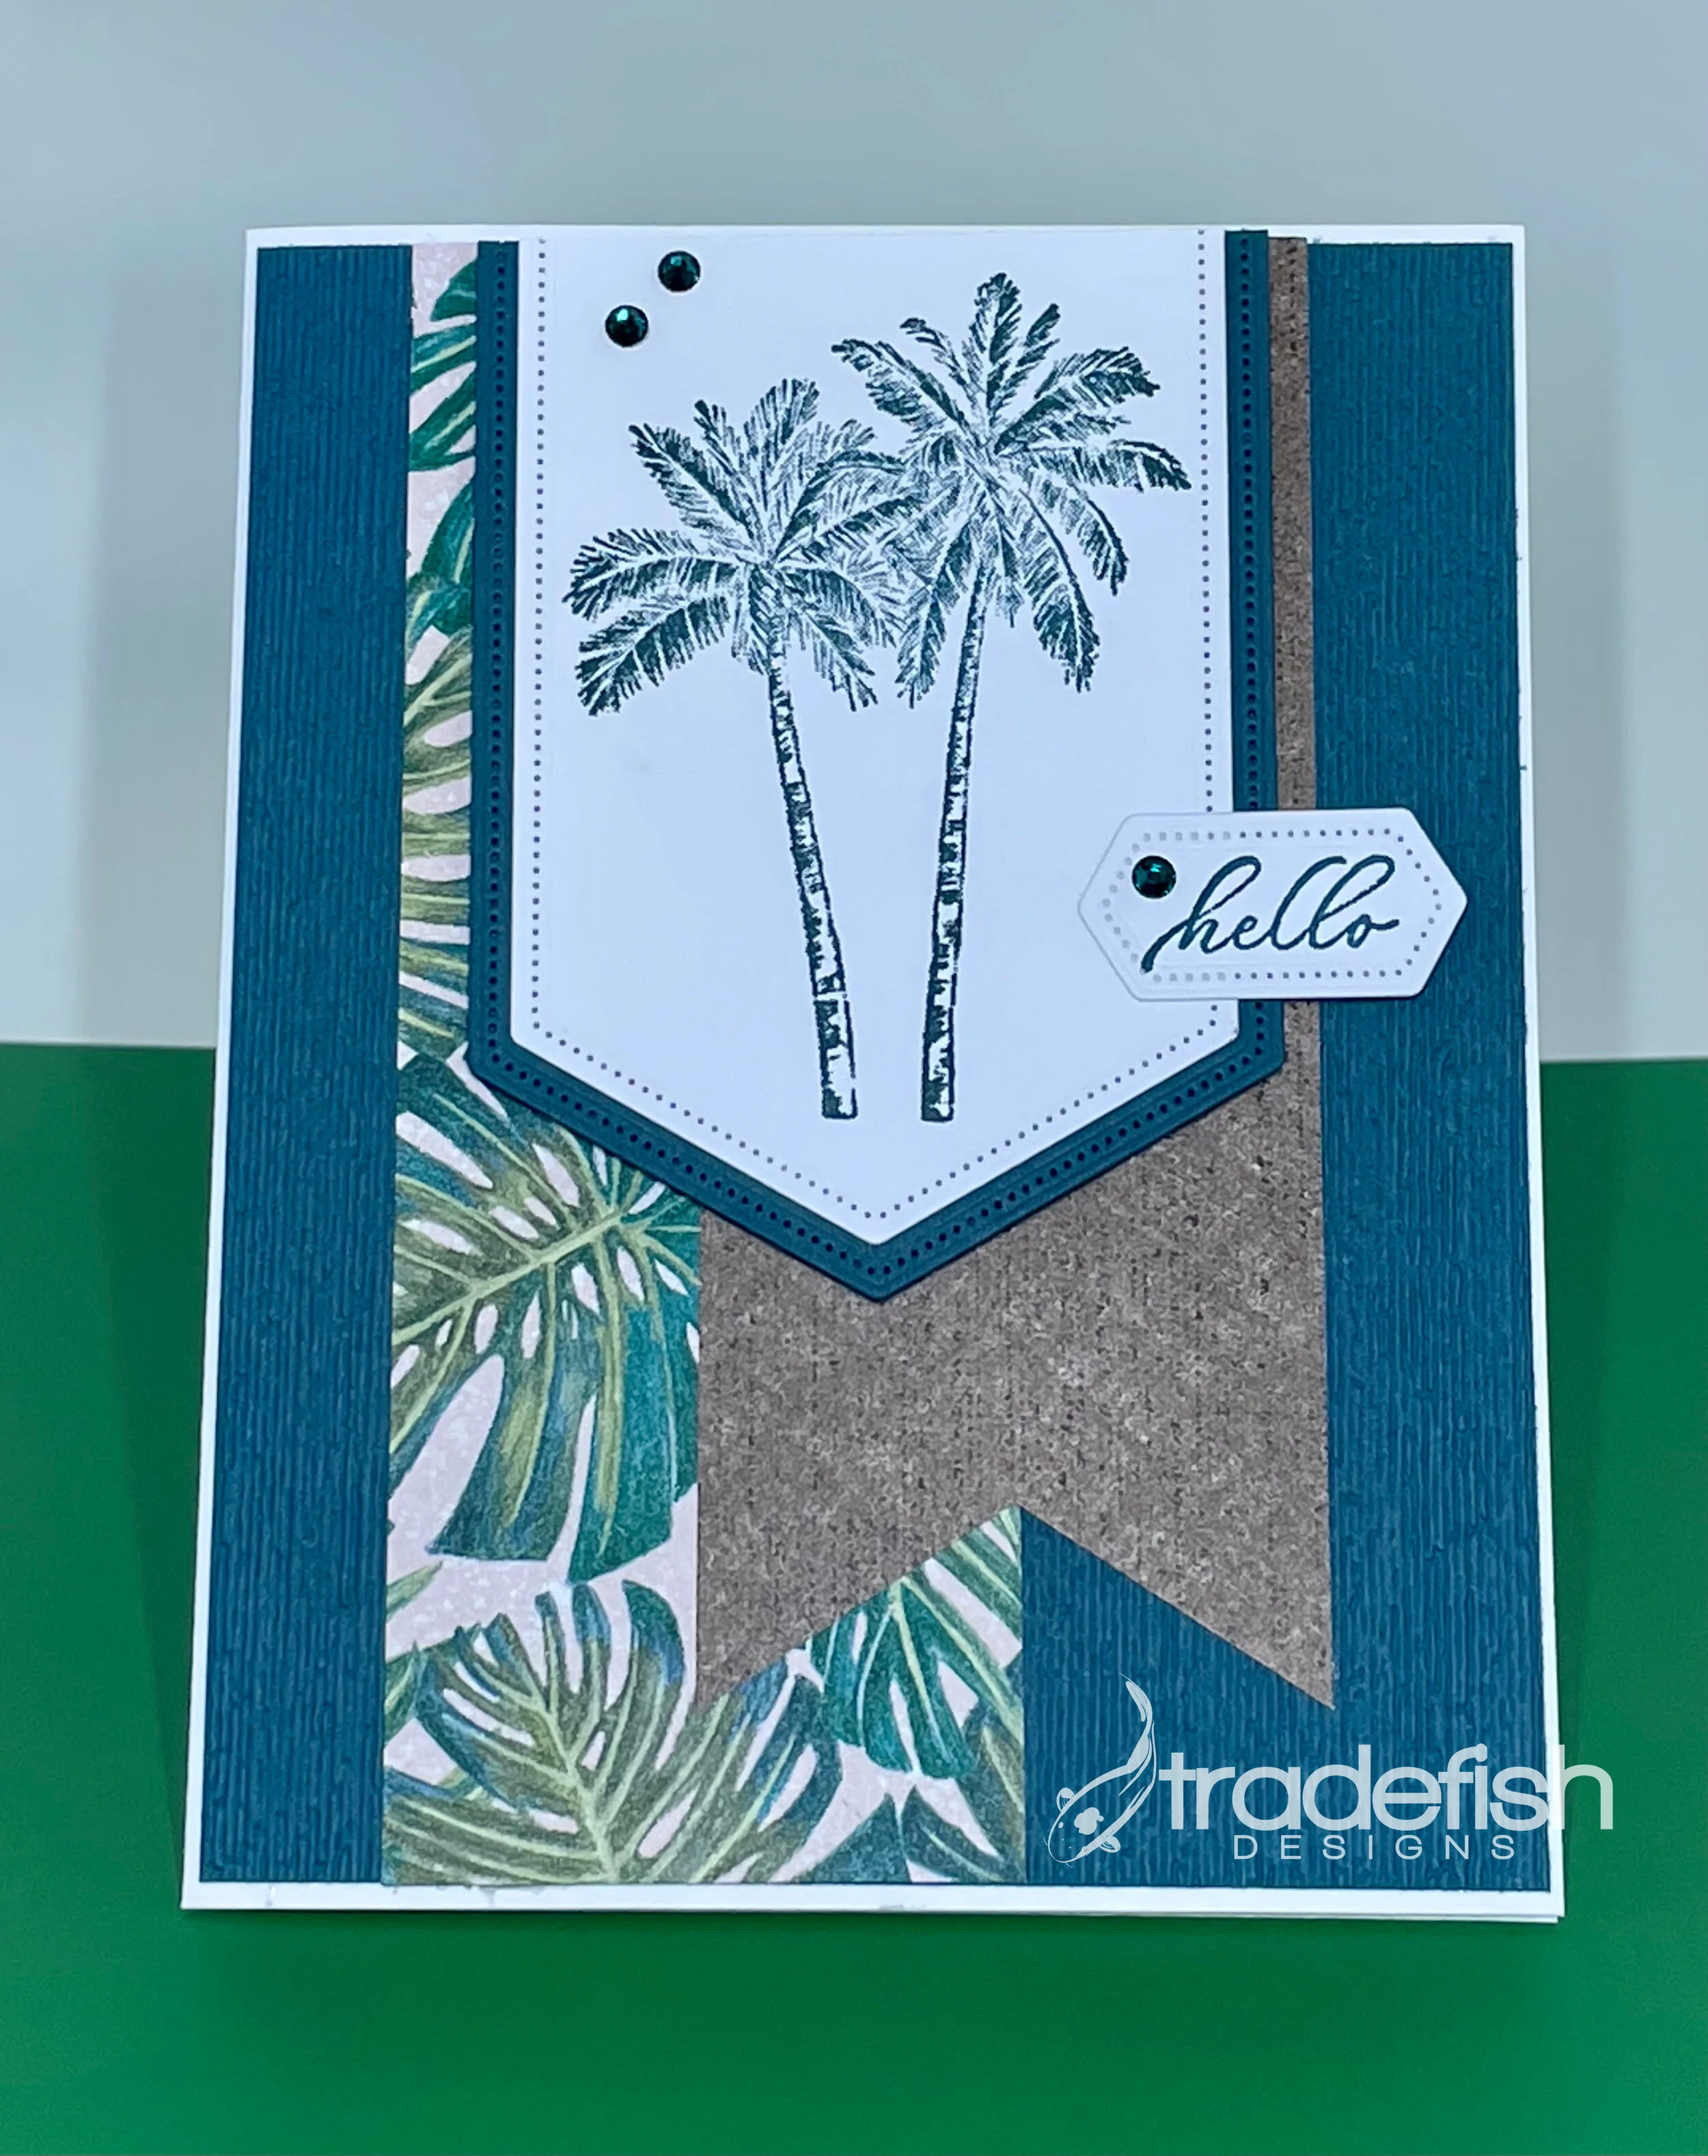
A tropical hello!
One of my favorite colors from Stampin’ Up was Pretty Peacock. It was an In-Color which lasted only two years (and has since retired) but I used as much as I would with this card. I tried to fill this card with texture even though there’s not a lot of dimension. I created the texture with the designer paper and embossing the colored cardstock. The stitching in the nested label dies also adds a bit of texture.


Supplies used: All supplies from Stampin’ Up.
Stamps: Timeless Tropical
Ink: Pretty Peacock
Paper: Whisper White, Pretty Peacock & Tropical Oasis DSP
Dies: Nested Labels
Embossing Folder: Subtle
Embellishments: Noble Peacock Rhinestones

A crafty hello!
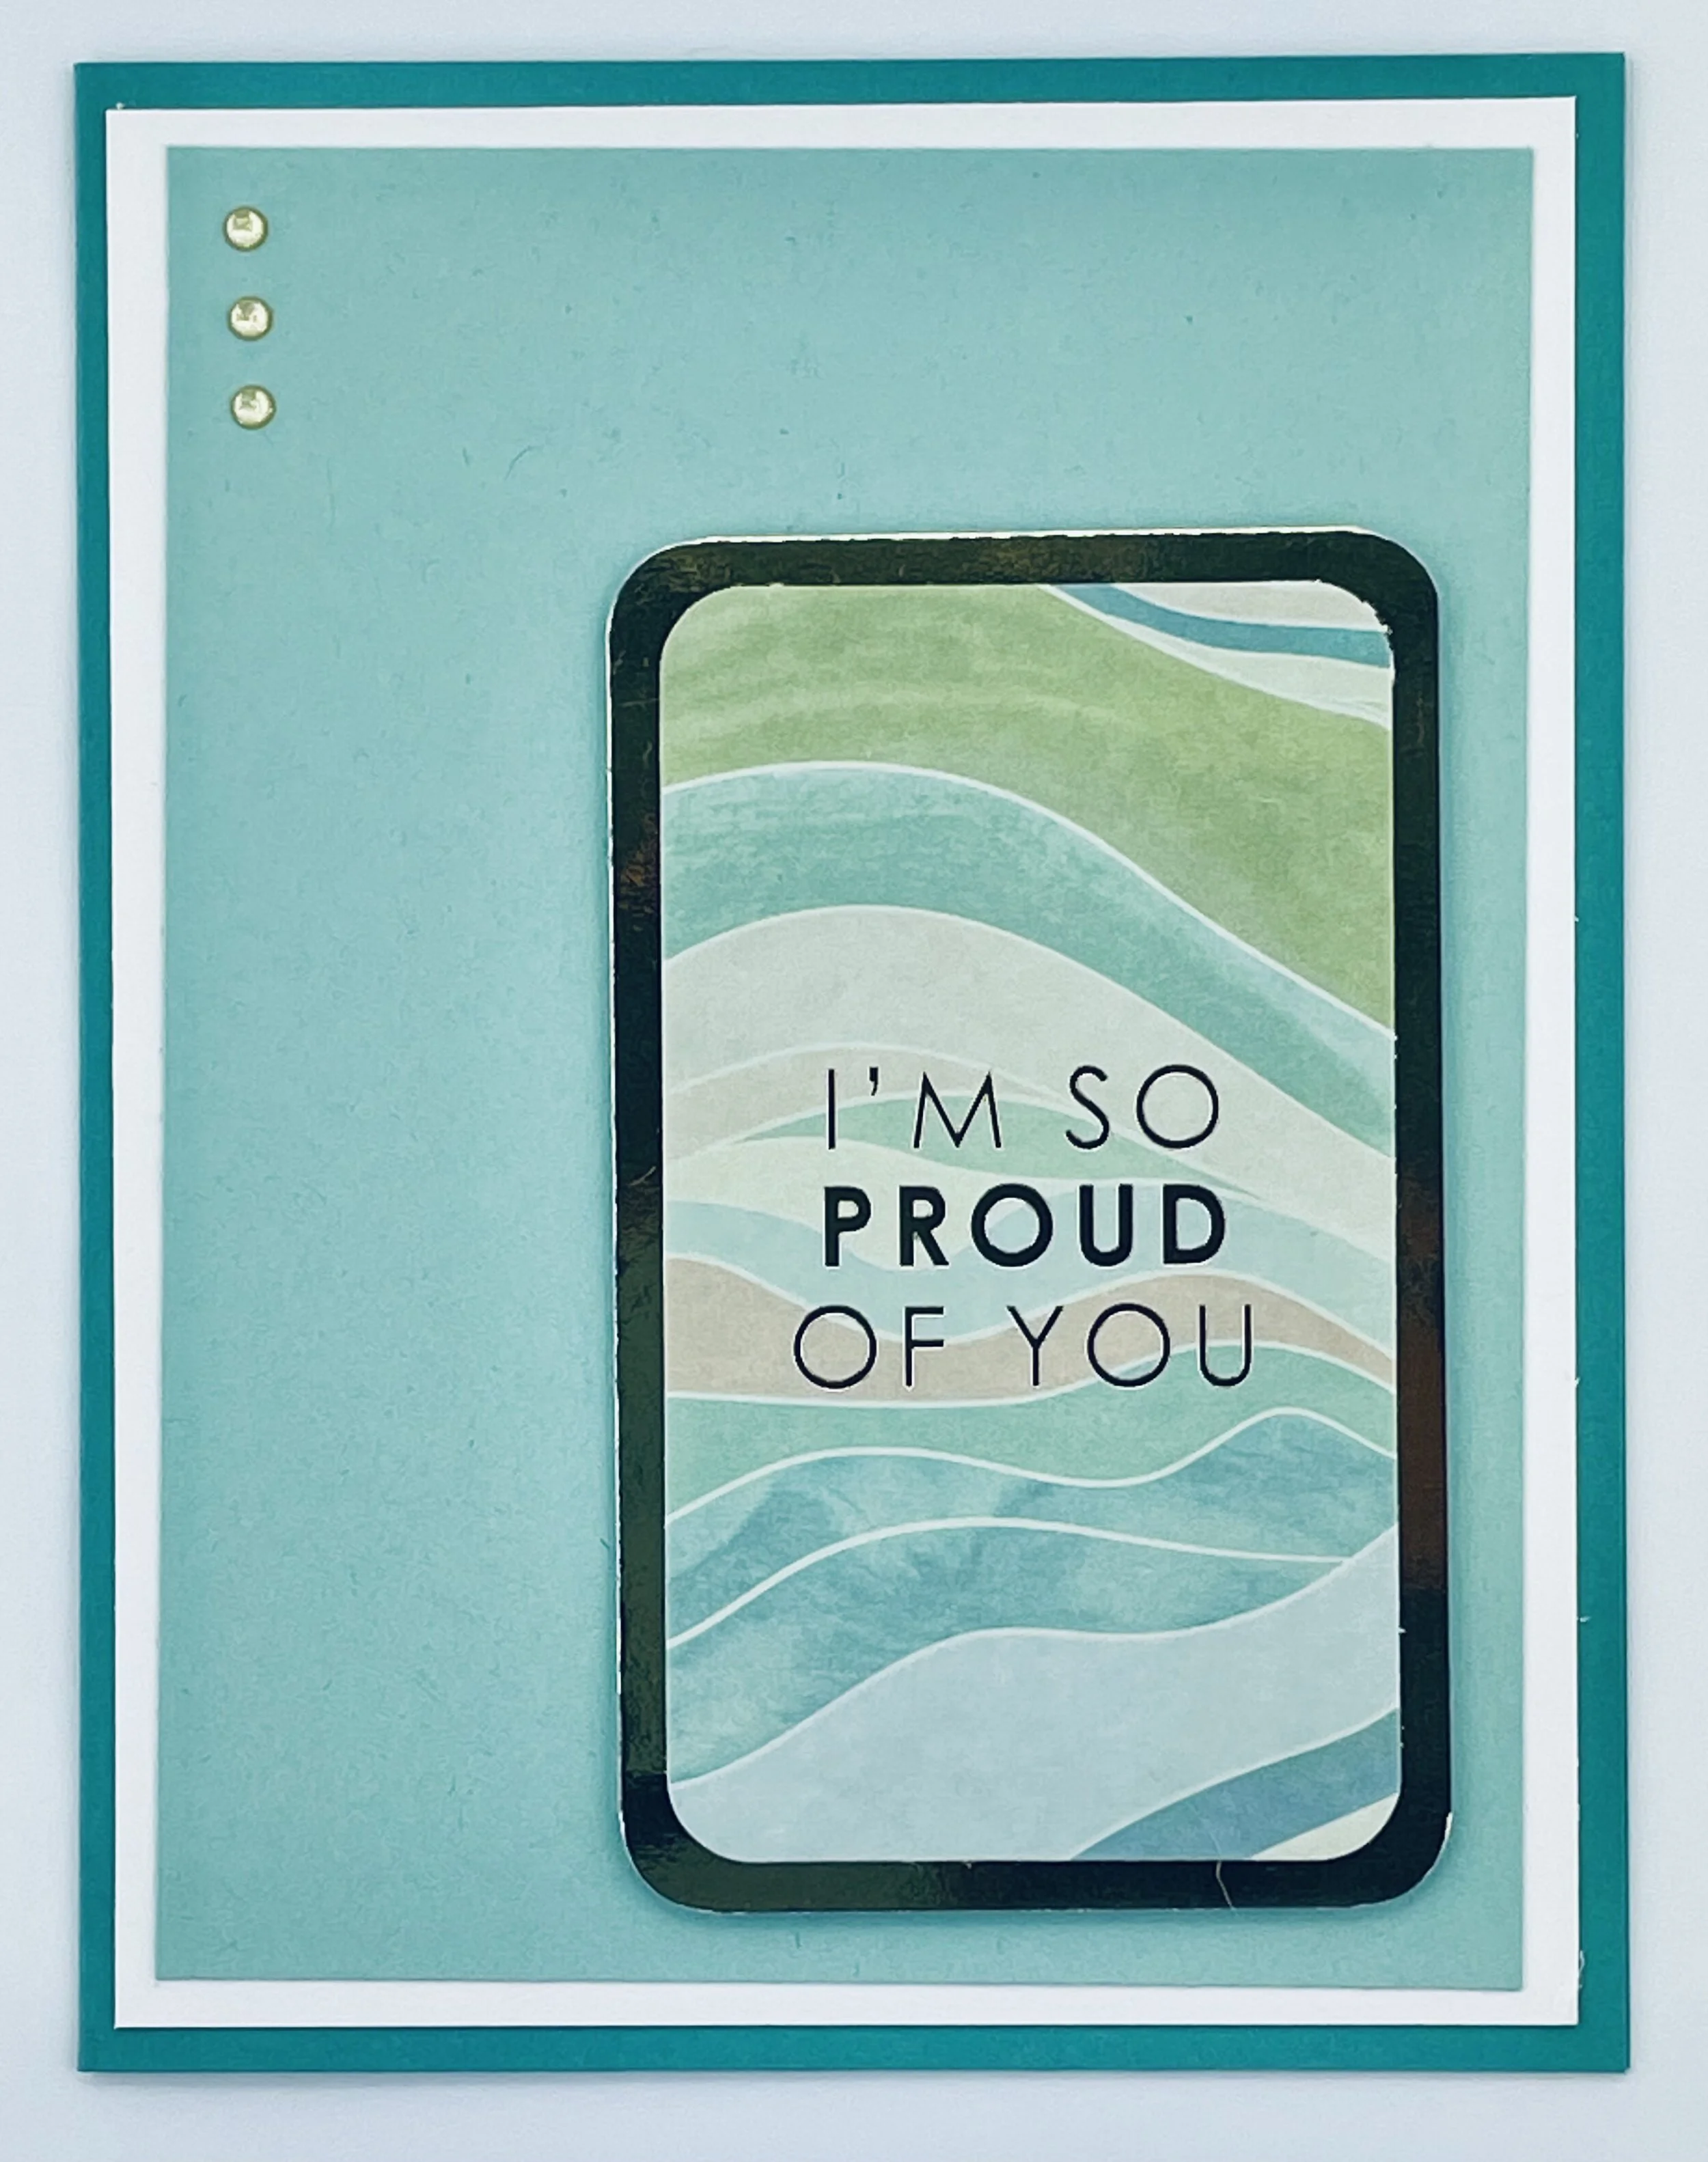
Using a cute tag...and a corner punch.
This card project involves using some cute inspirational tags I received with an online order and using an old punch - a corner rounder to bring a simple card to life. These cards are clean and simple. The first card has the tag popped up for dimension with a few gold glitter enamel dots.

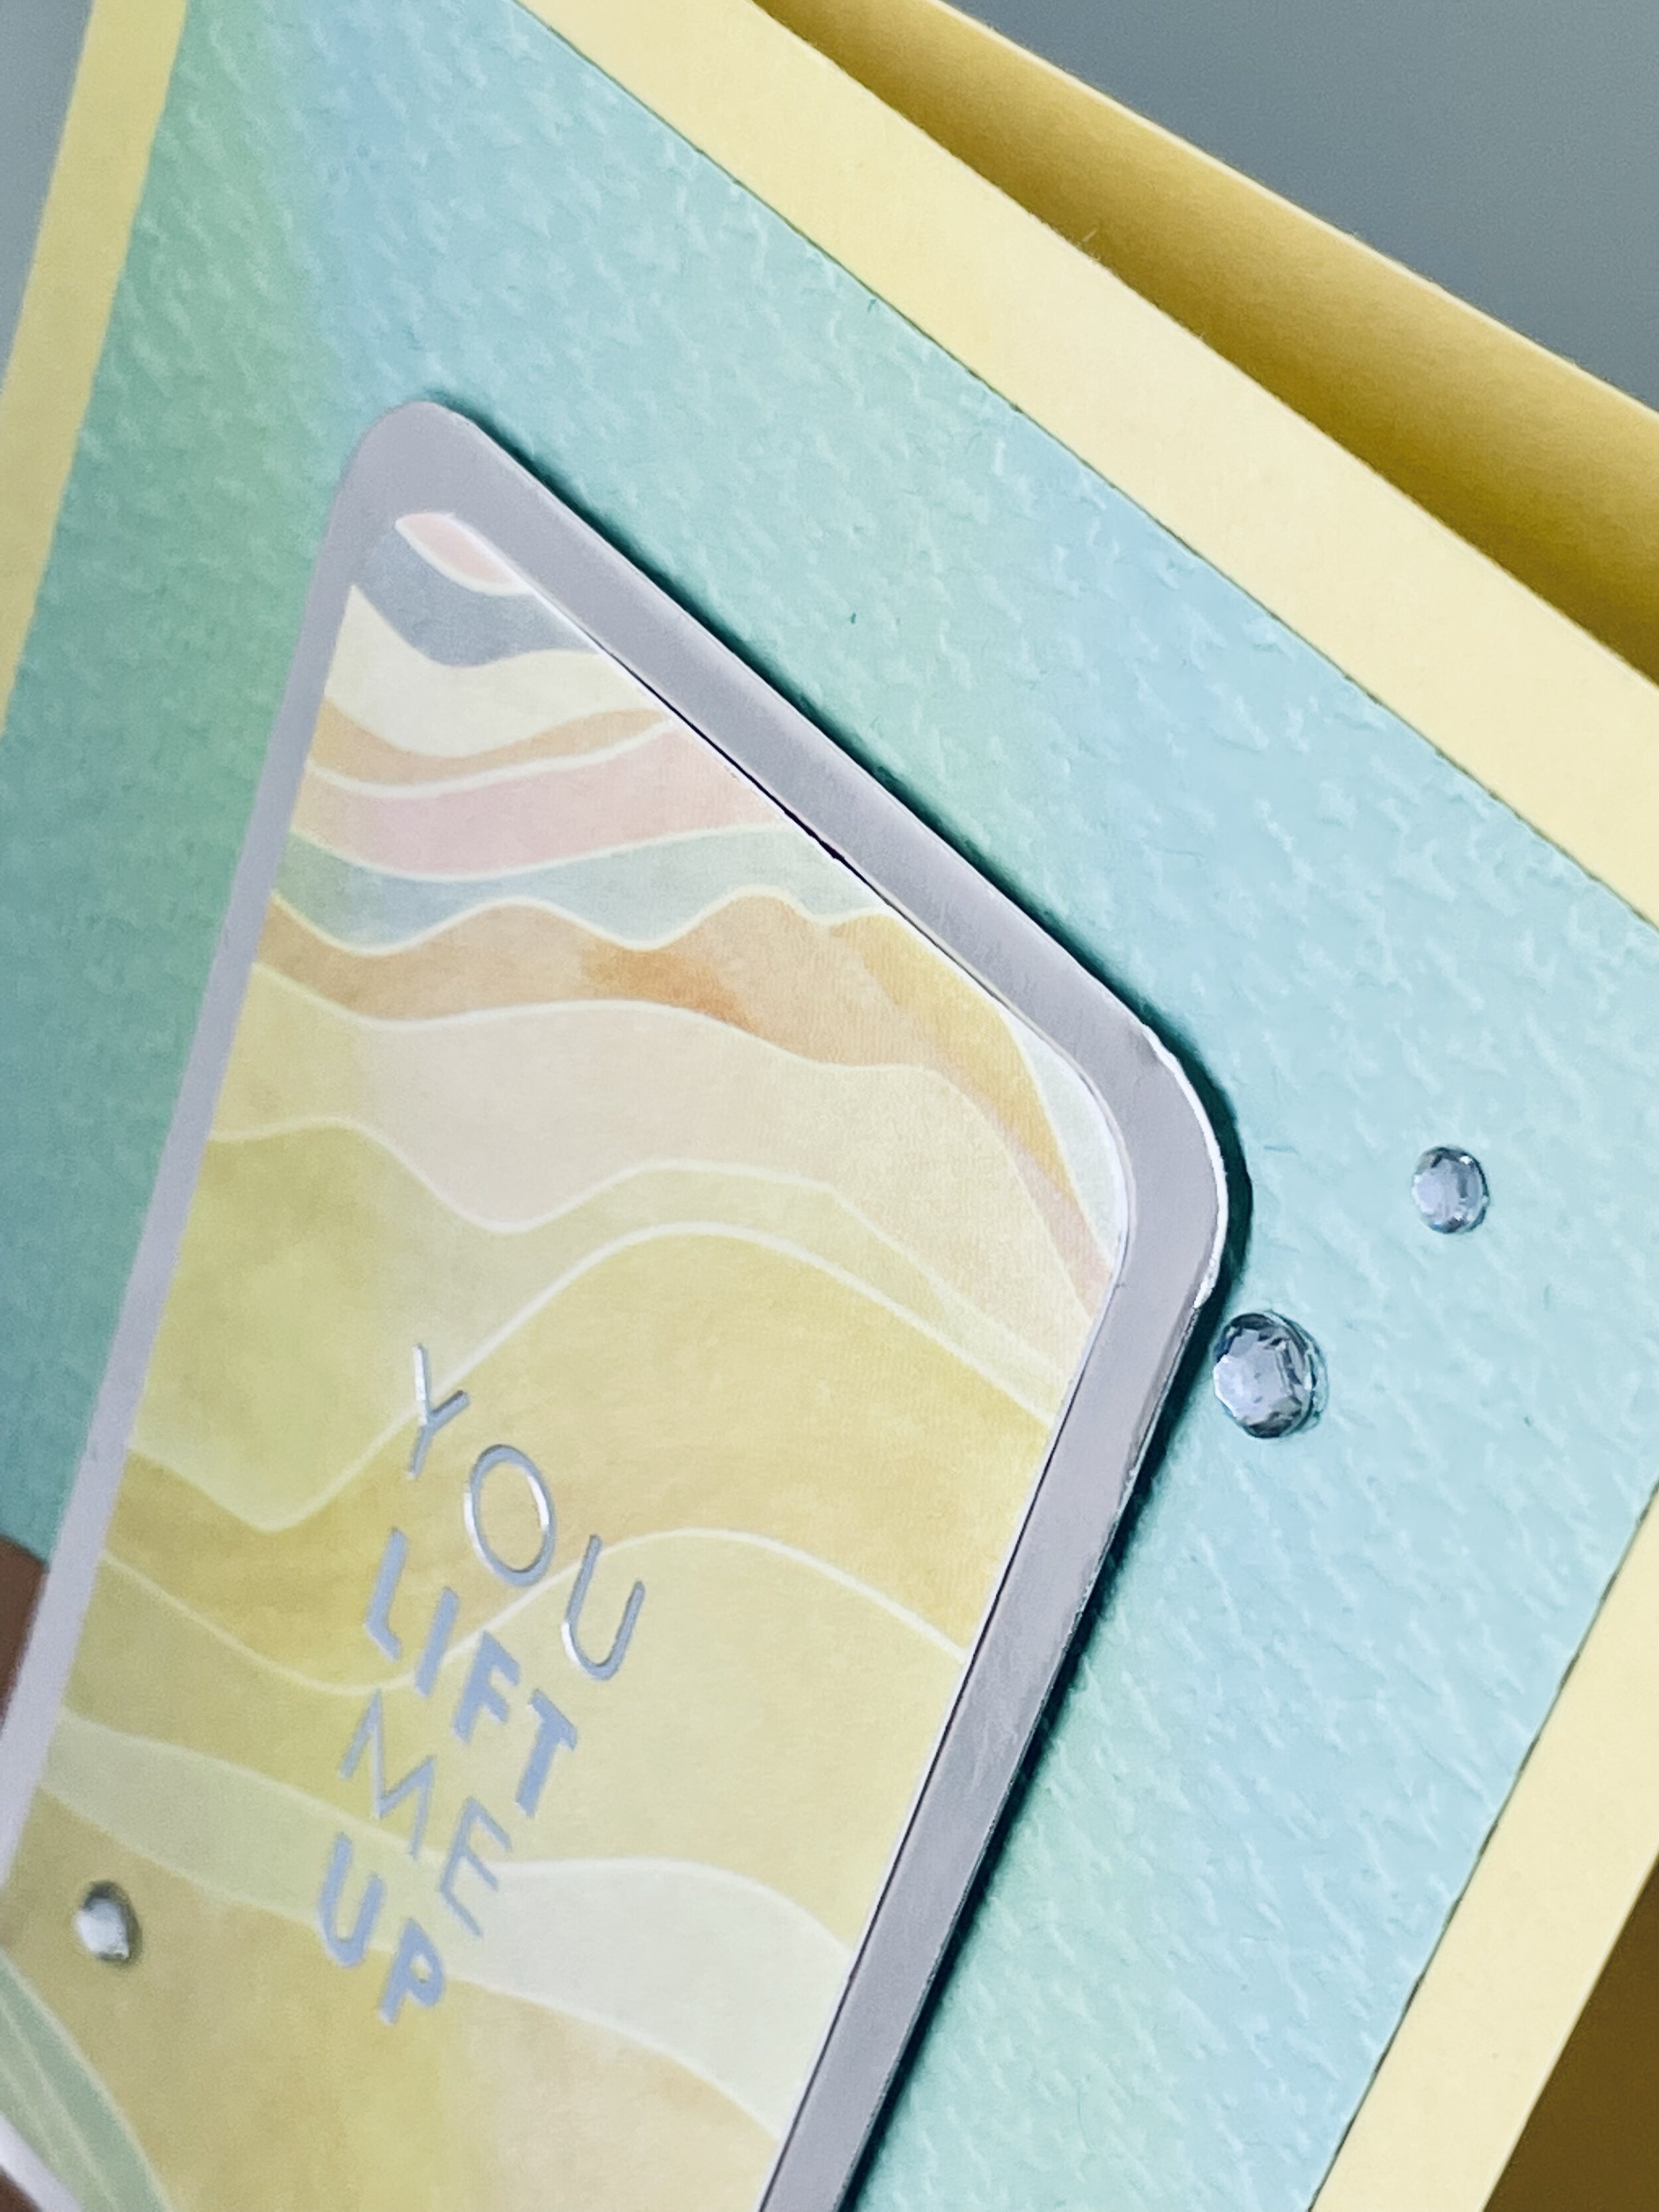
The close up shows off the embellishments and the dimension of the tag. I love the soft greens with the gold.

This card keeps most of the same color scheme but shifts to silver with the rhinestones (with a pop of Cinnamon Cider paper). I added a bit of dimension by adding the embossing to the Mint Macaron paper. I also decided to minic the shape of the tag in the card base by using my Corner Chomper to round off each corner.

The close up gives you a good look at the Tasteful Textile embossing folder. It’s very subtle but still impactful. Next time you get a cute inspiration tag on a gift or in packaging consider using up cycling it in a card and share with someone.
I hope you enjoyed these simple cards using some cute tags!
Supplies used:
Paper: Very Vanilla, Mint Macaron, Just Jade, So Saffron, and Cinnamon Cider (SU)
Embellishments: Basic Rhinestones & Gold Glitter Enamel Dots (SU)
Embossing Folder: Tasteful Textiles (SU)
Tools: Corner Chomper (WRMK)
Misc: tags from Erin Condren (EC)

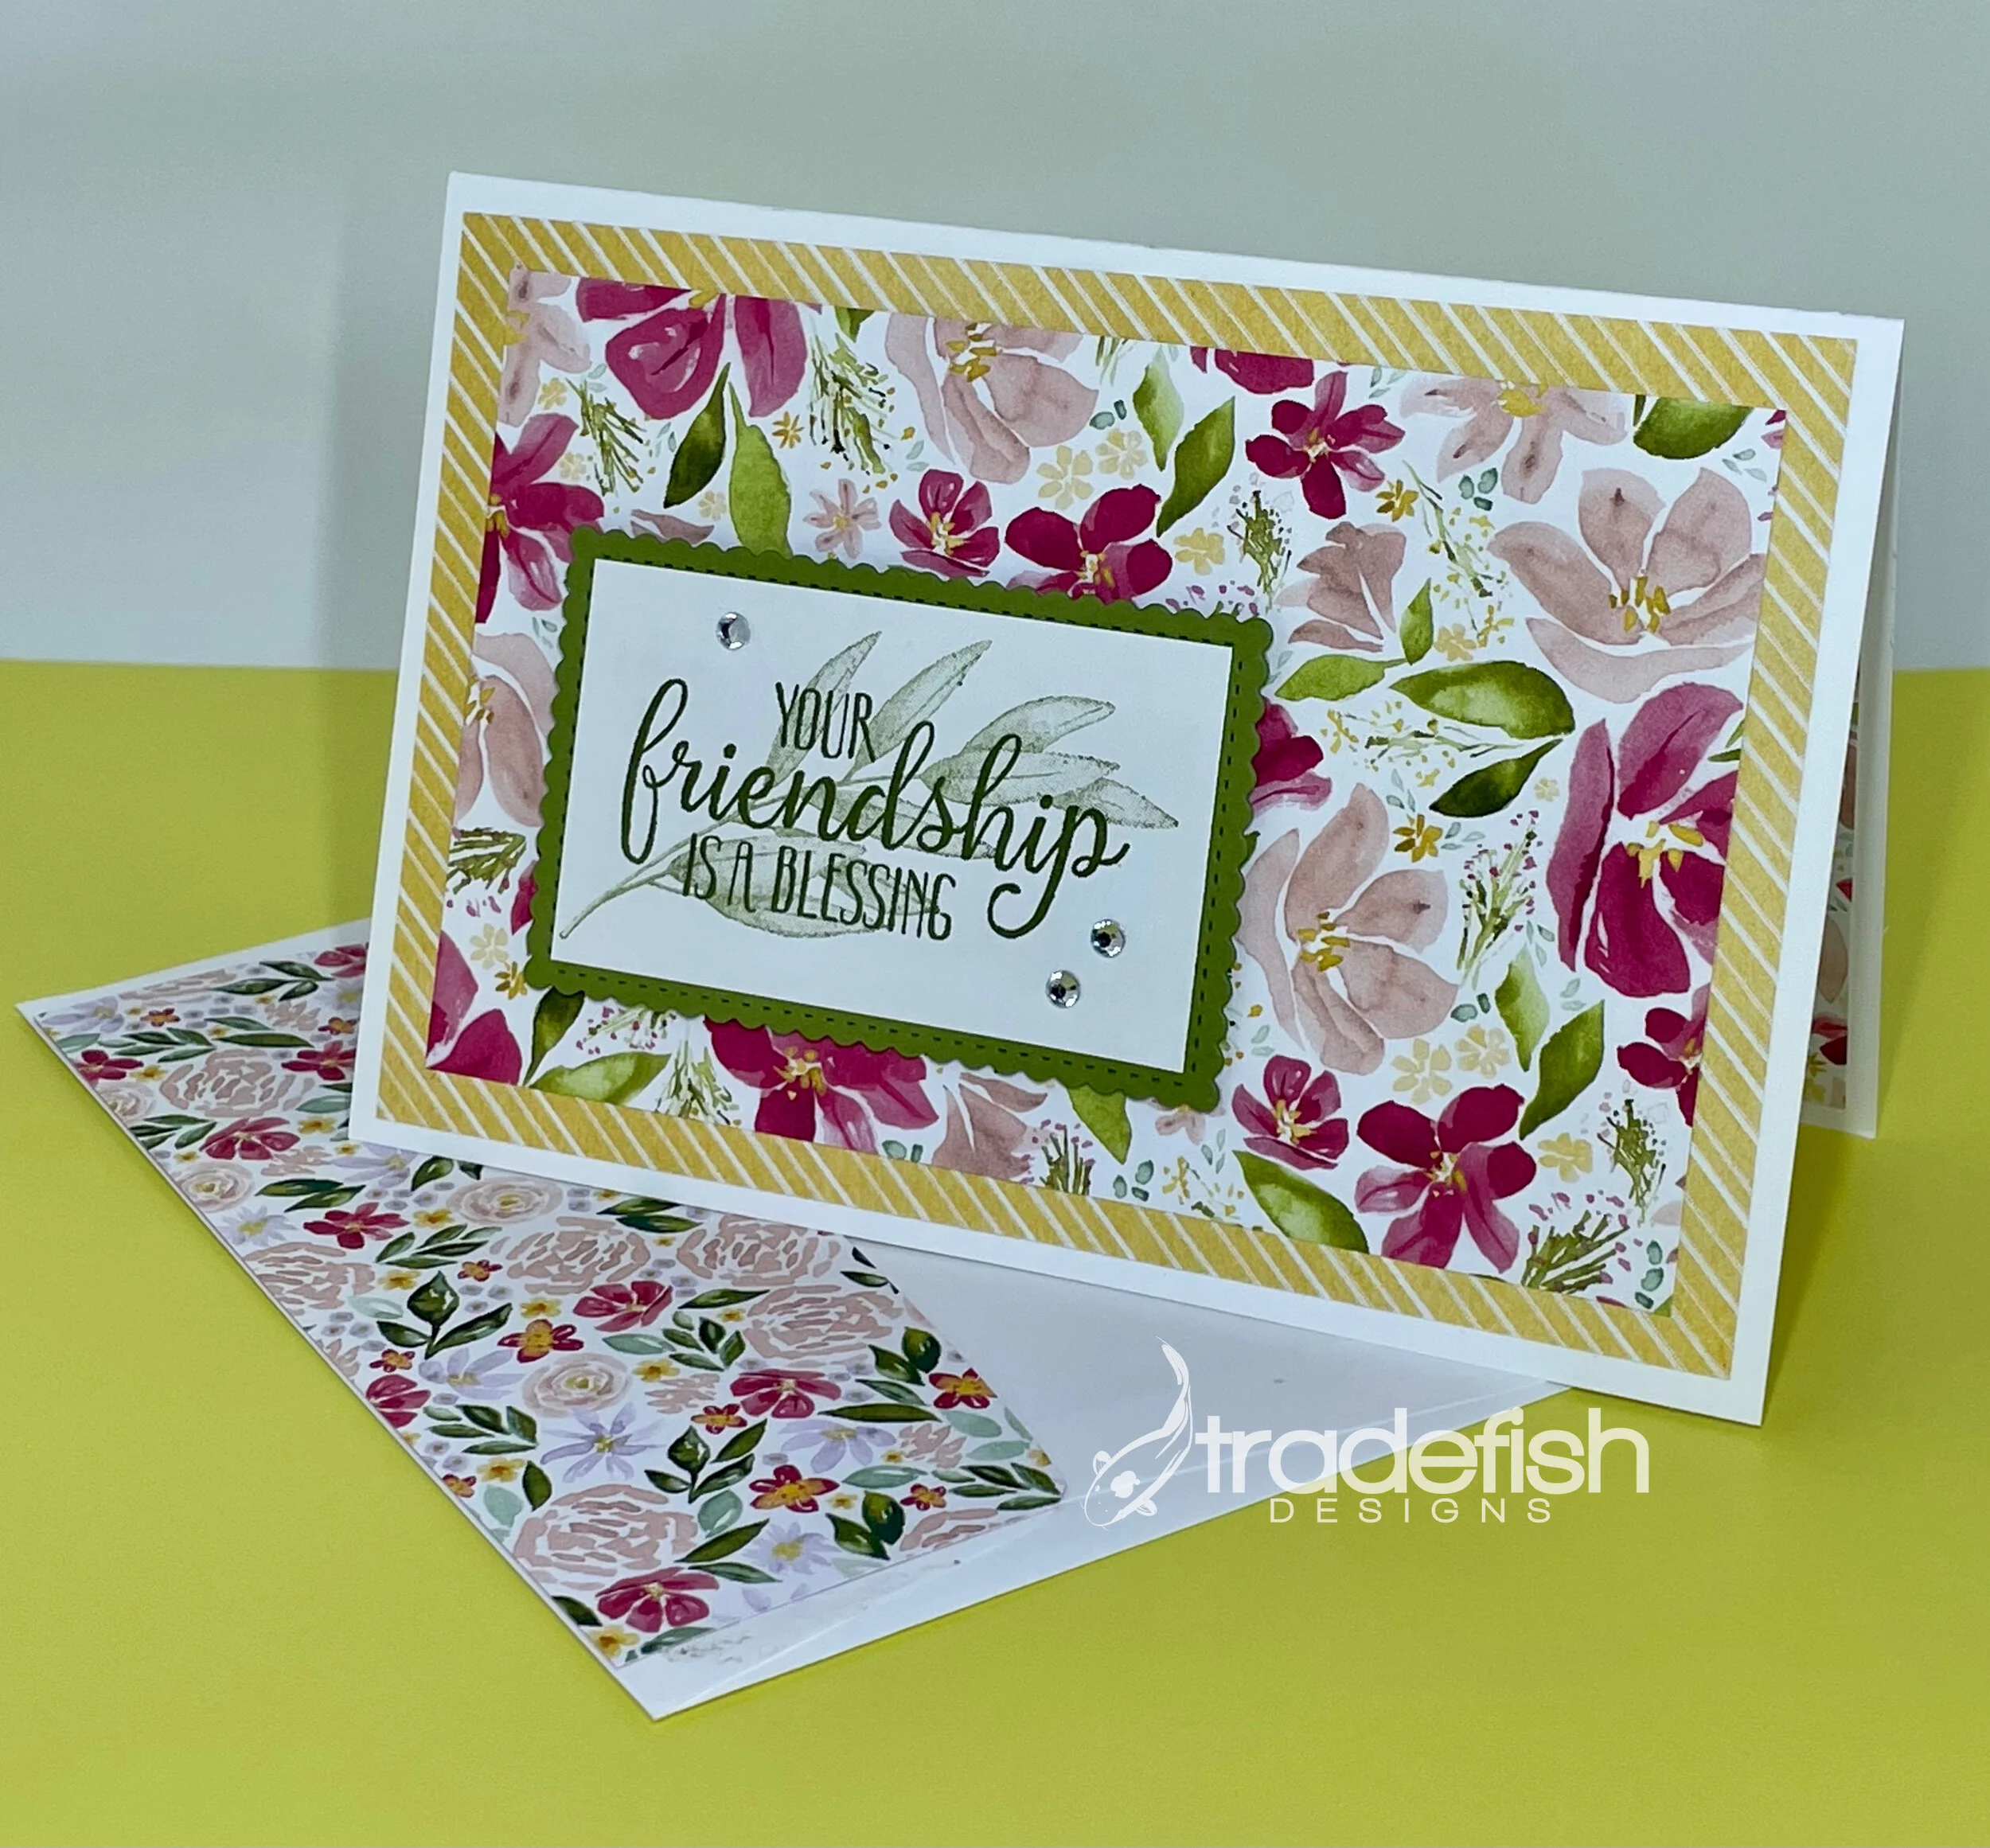
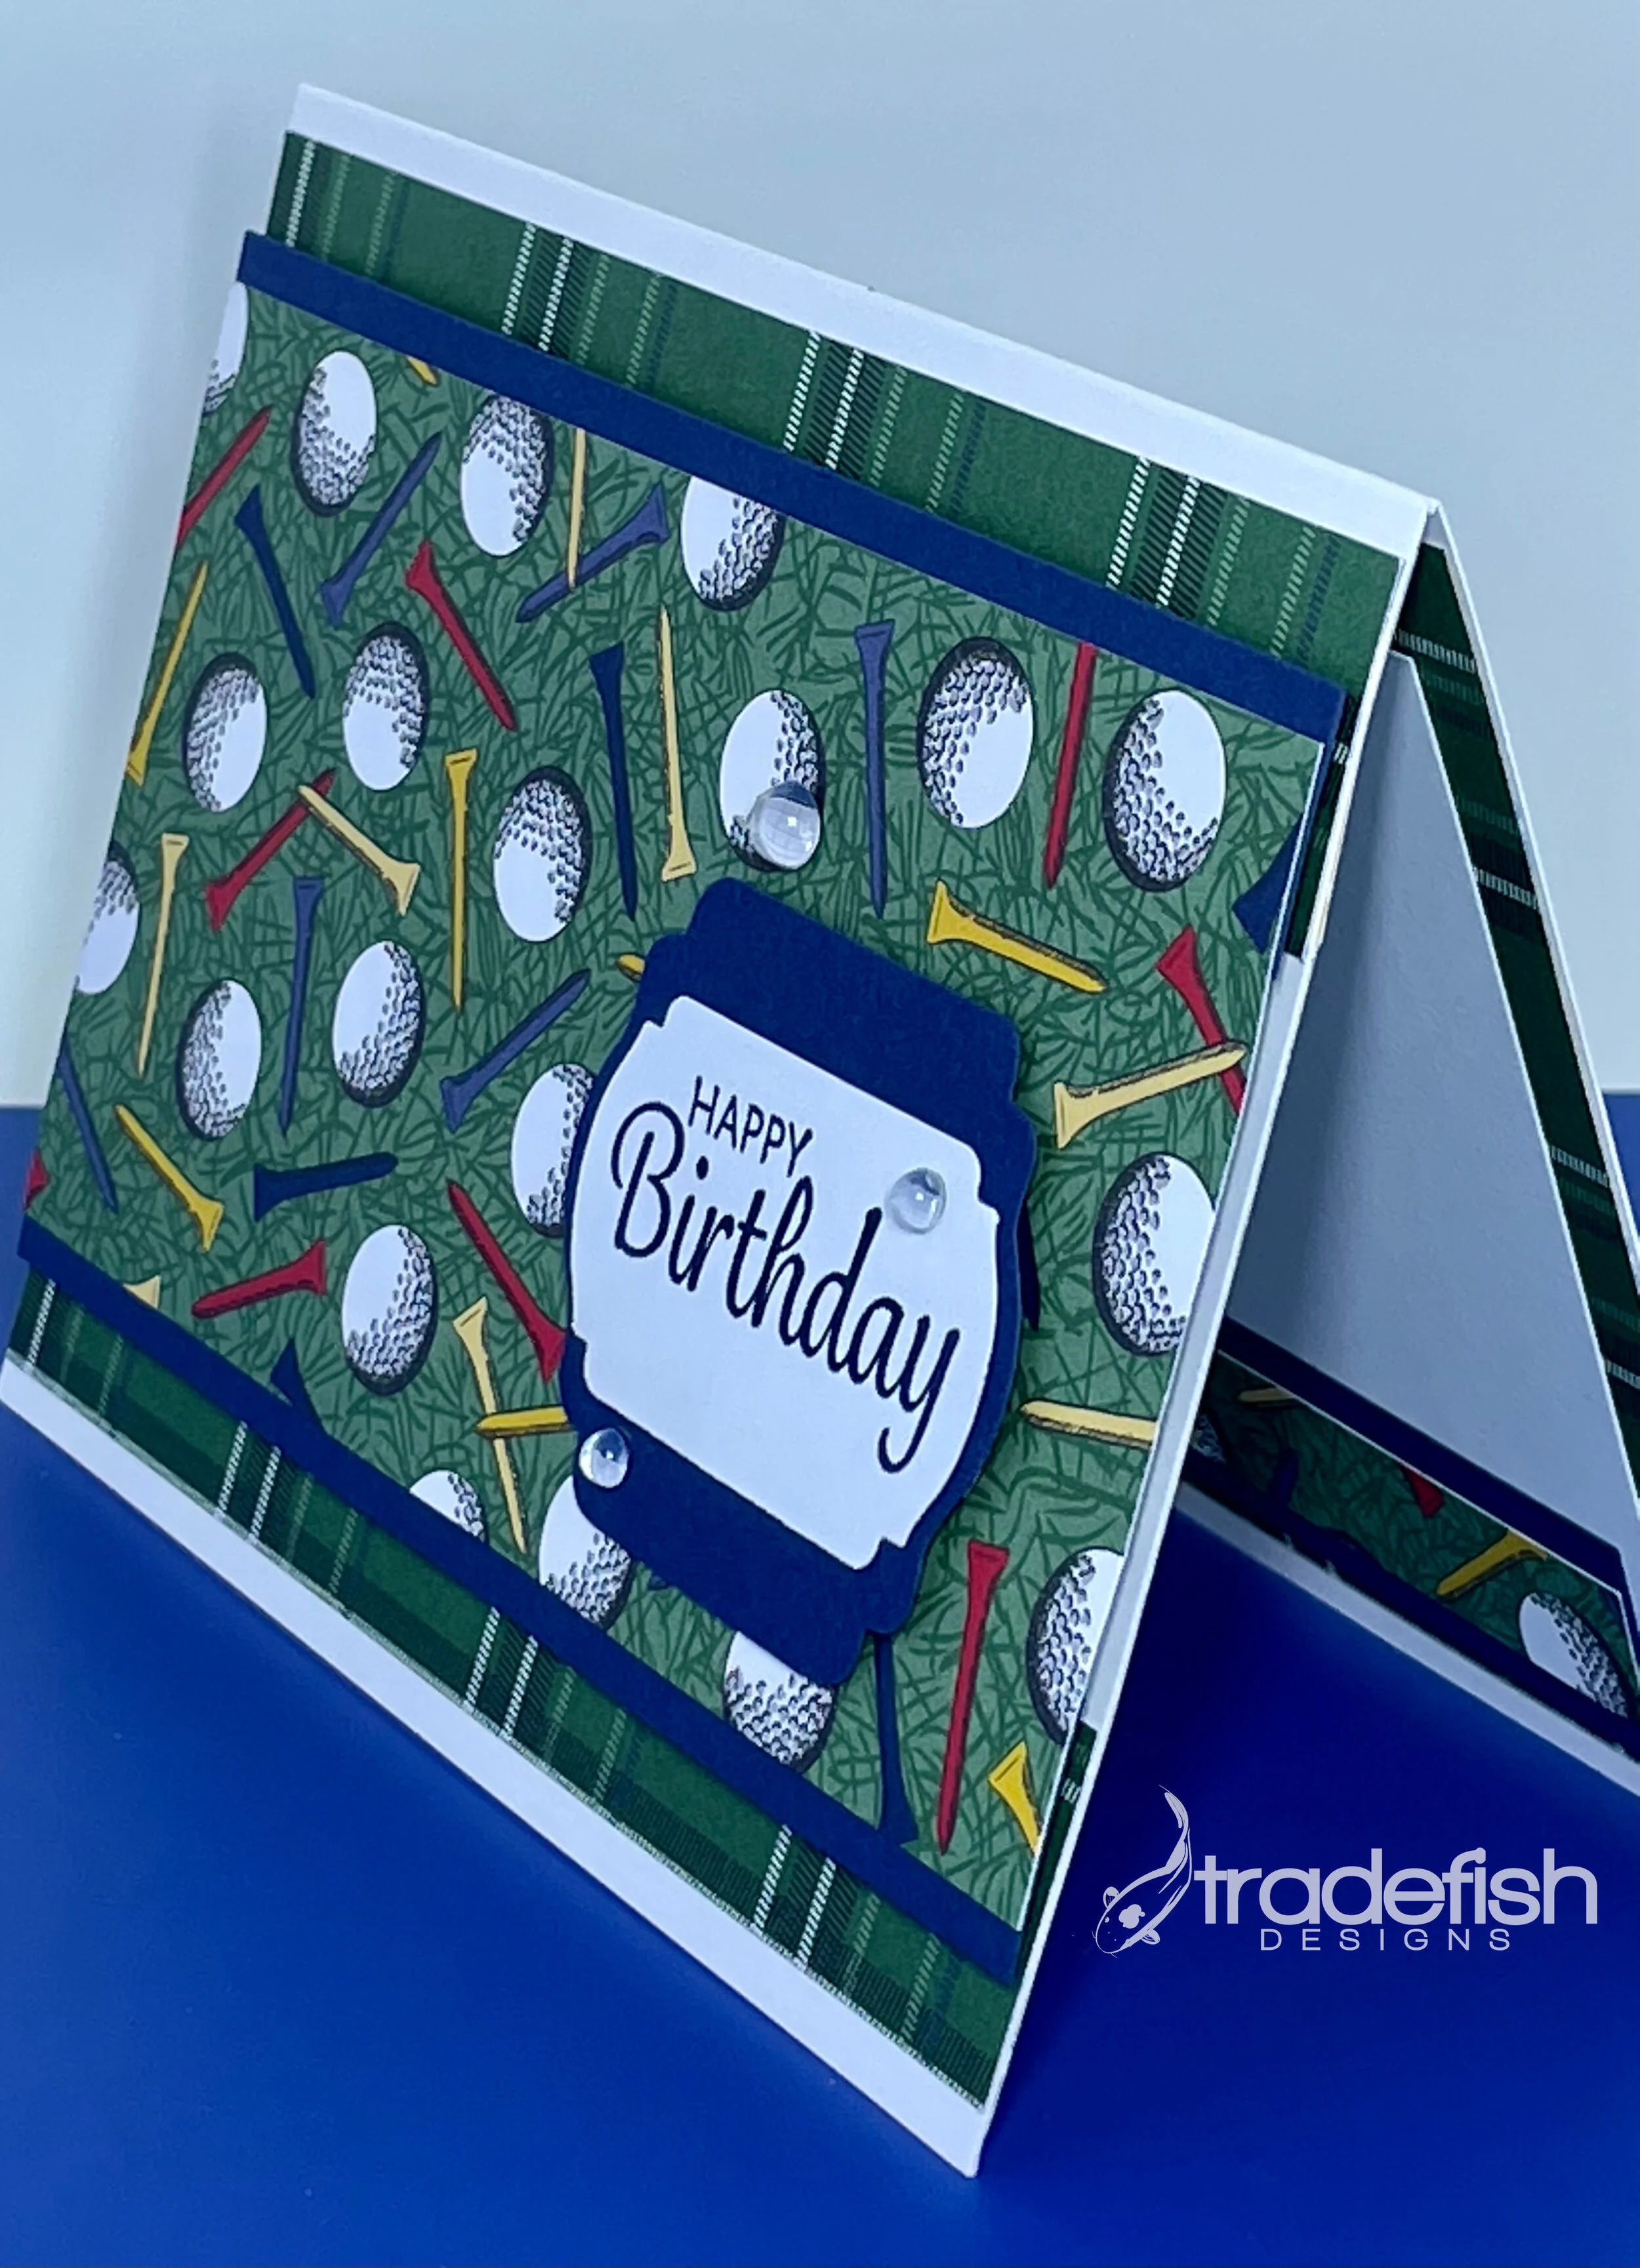
Your Friendship Is A Blessing
Don’t be afraid to mix patterns. This card takes a coordinated suite of paper and brings a floral and diagonal stripe together. You make sure you combine a a busy pattern with a not-so-busy pattern. Here, the color yellow ties the two prints together. The diagonal stripes complement the busy floral pattern.
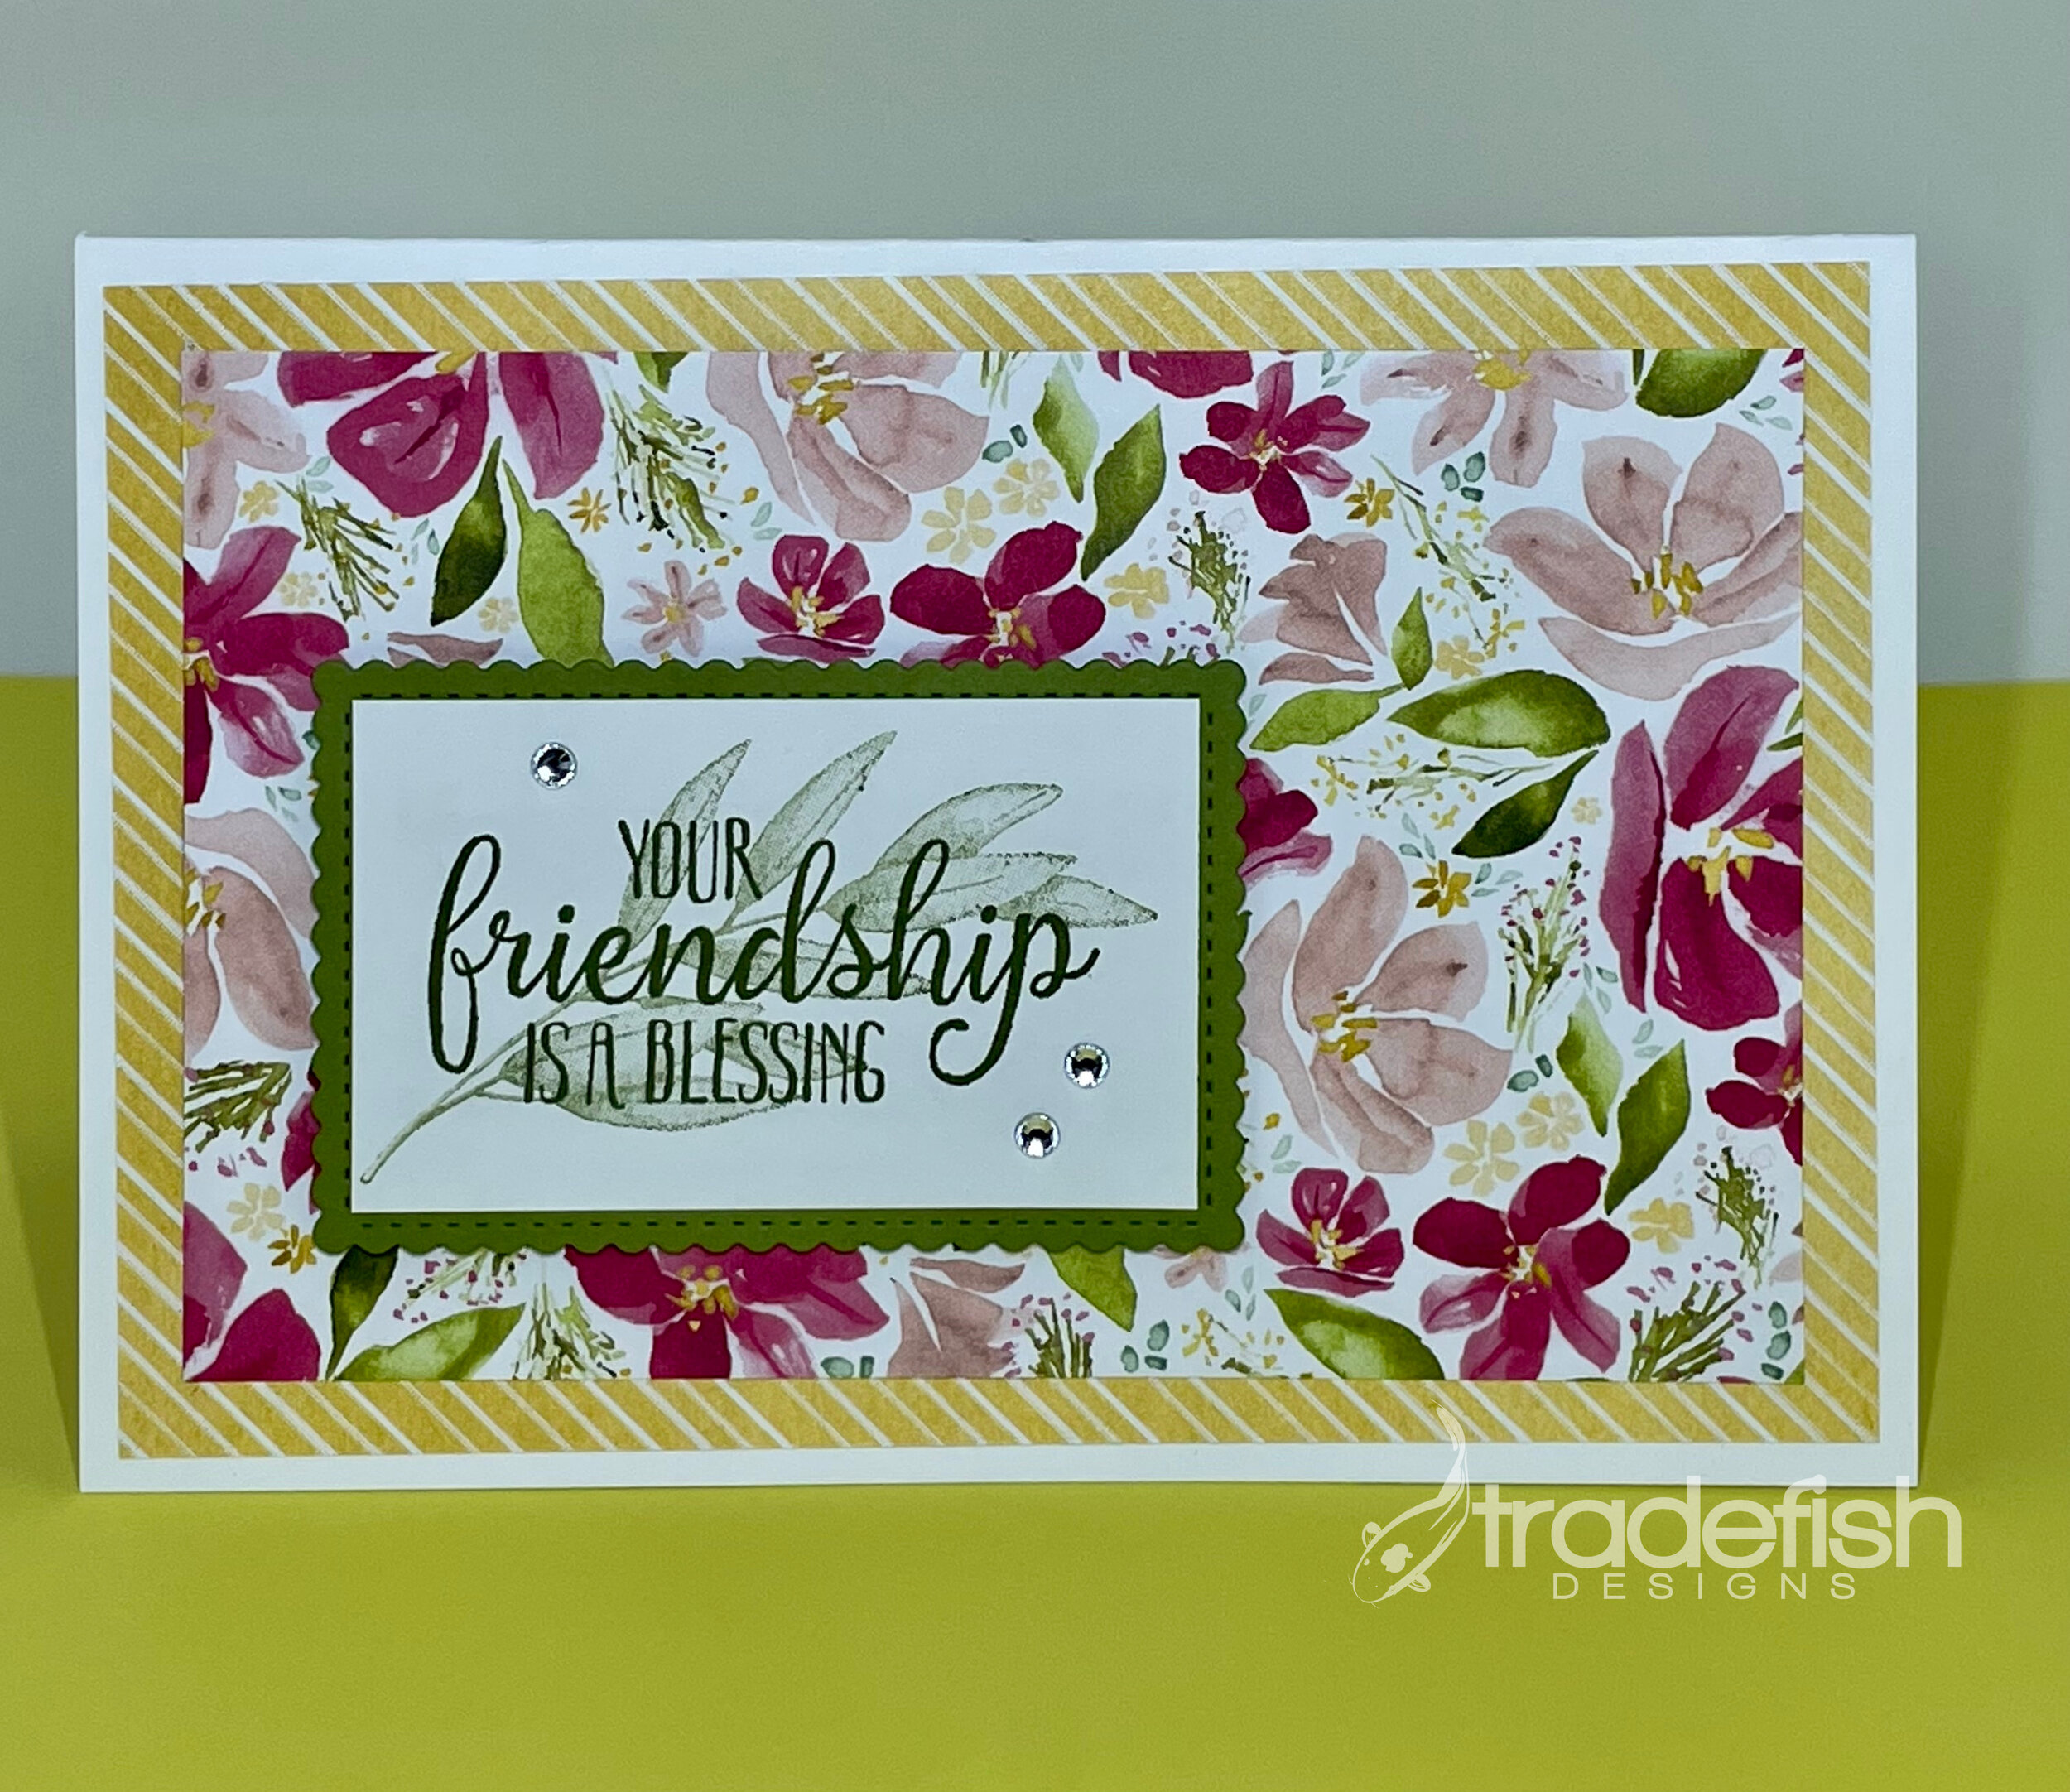
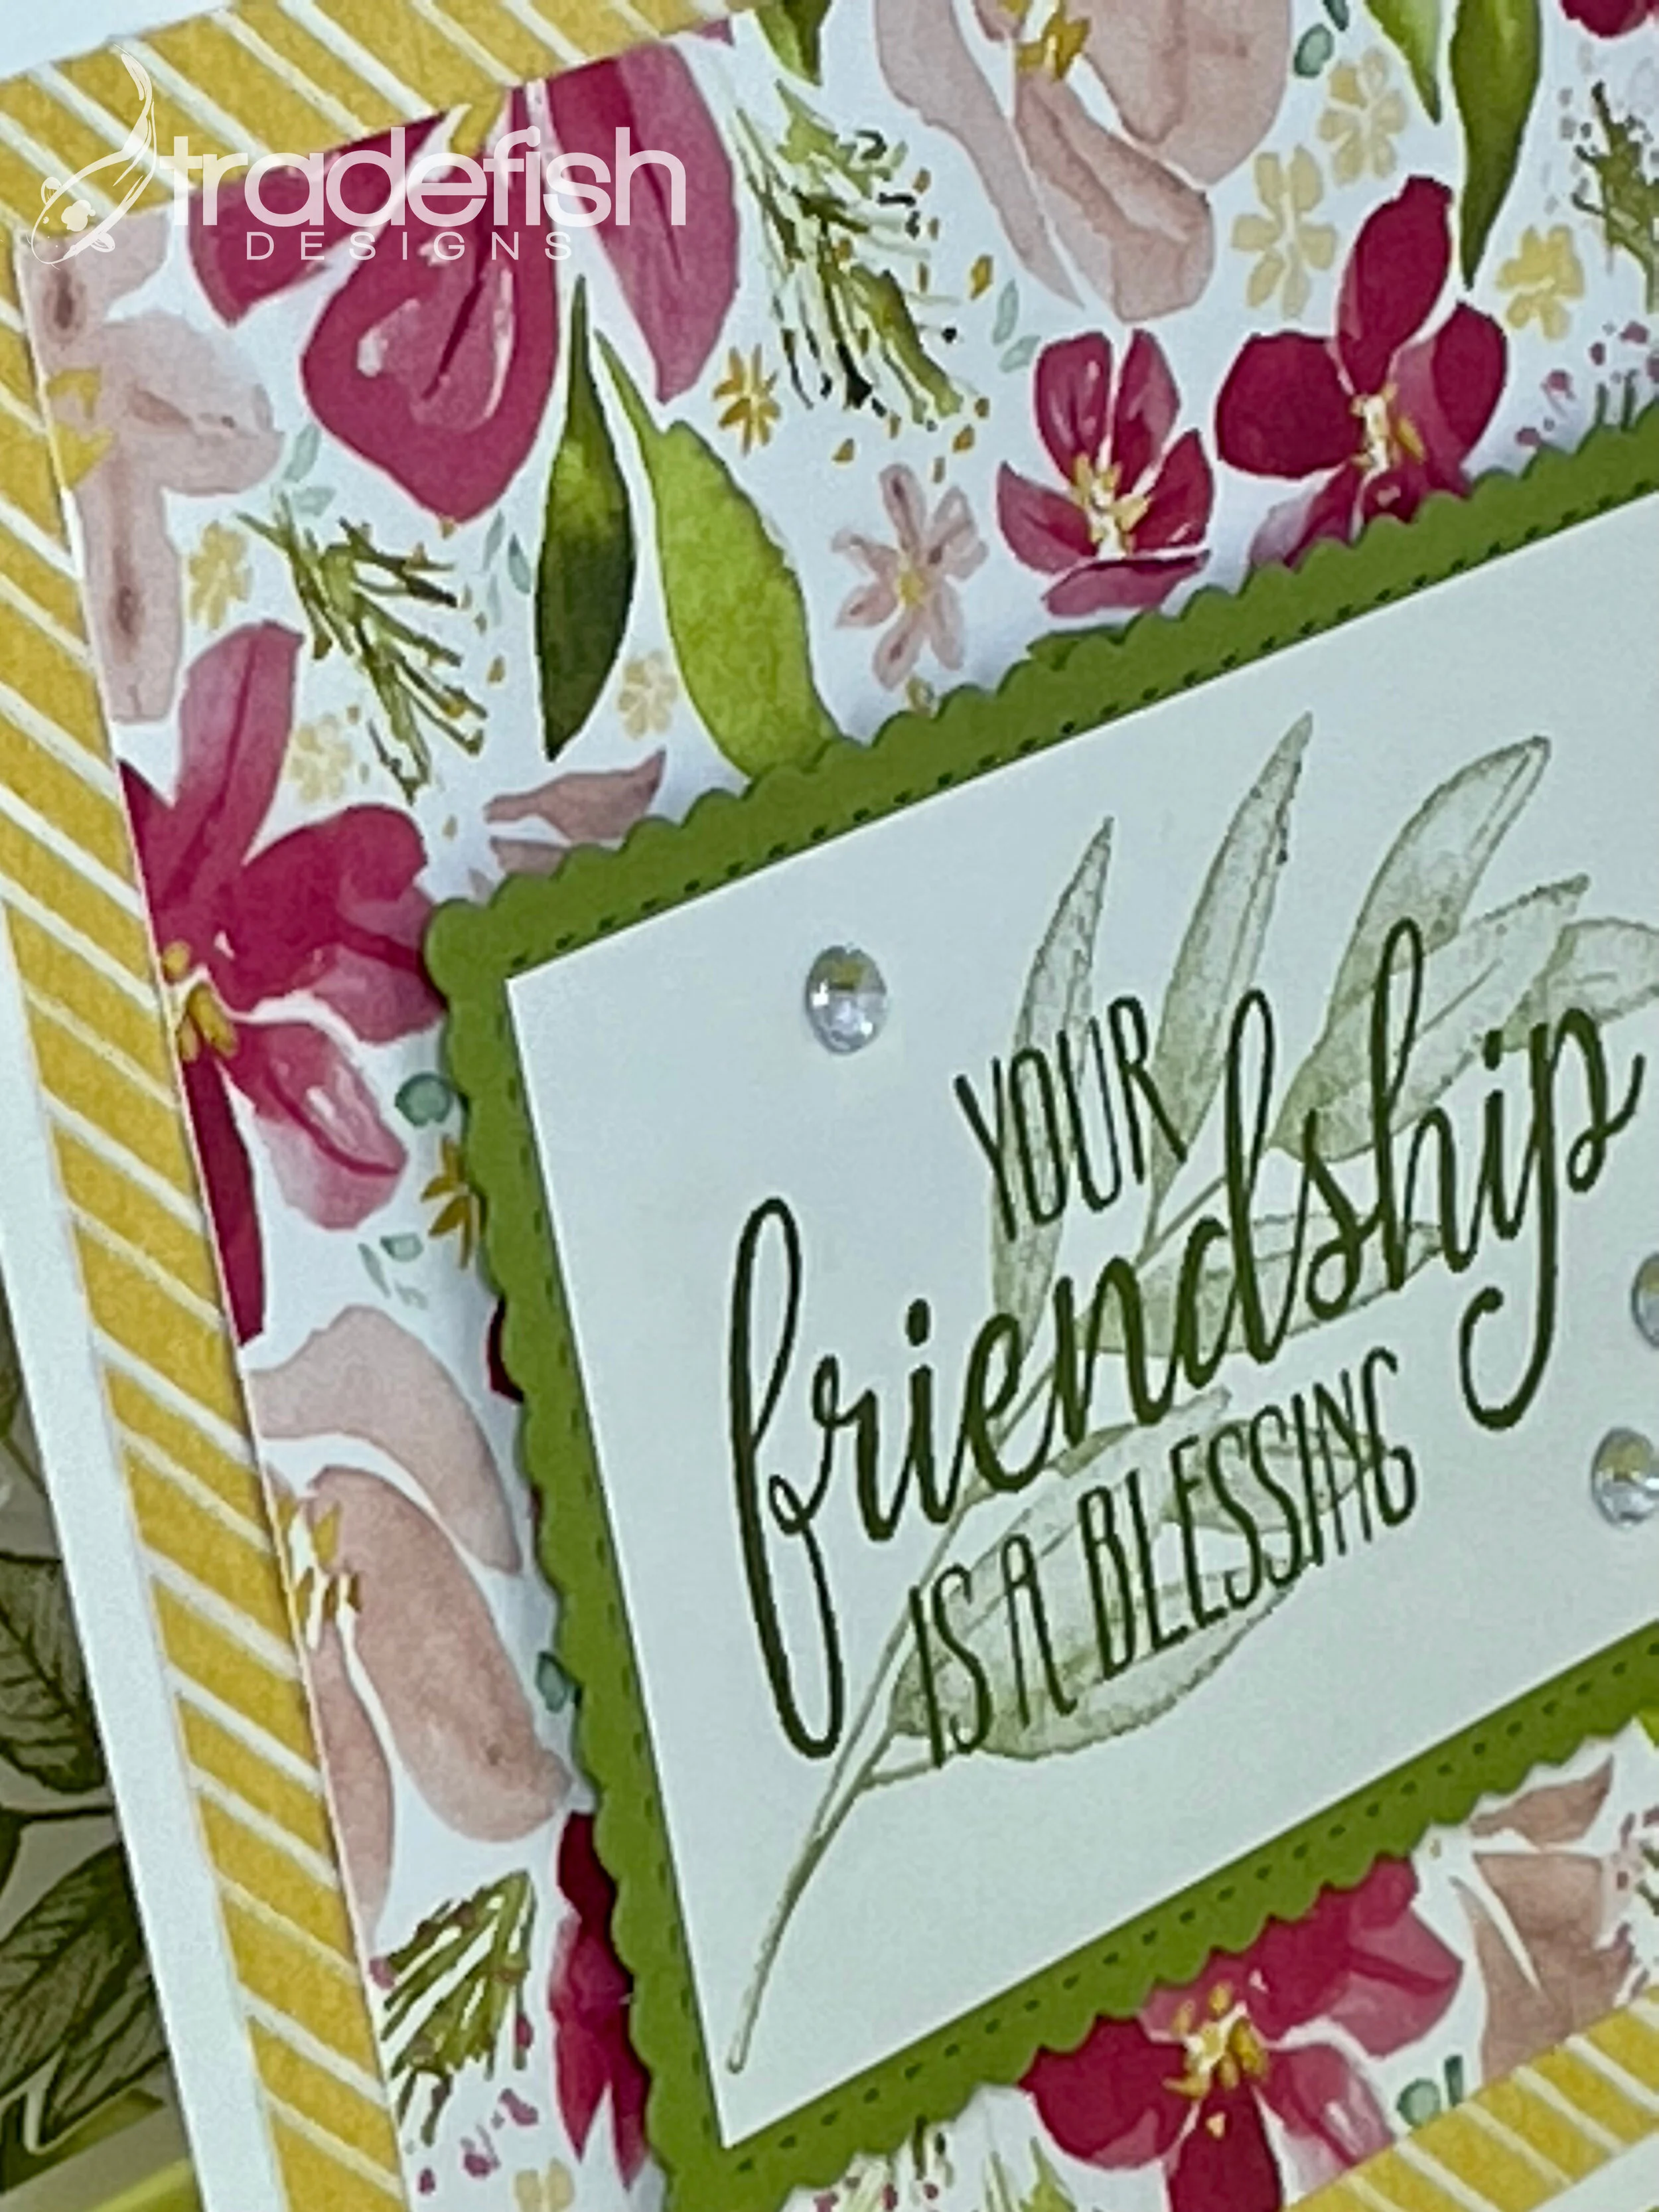
Second generation stamping. You can use the same color and stamp it twice (without reinking) to get the effect of two different colors. Here, the sentiment is the first generation (darkest) and the leaves behind it are the second generation of the same color making it appear lighter. It offers a great effect while also tying the leave image into the designer background paper.
The power of odd numbers and triangles. I always work in uneven numbers as it is more pleasing to the eye. You would think even numbers would feel more balanced but it doesn’t. I always need to add just one more. I also use an imaginary triangle shape when laying down embellishments, like these rhinestones, because it keeps your eyes moving around the card. It doesn’t need to be a perfect triangle, in fact, I find the more unusual the triangular formation the more interesting the effect.
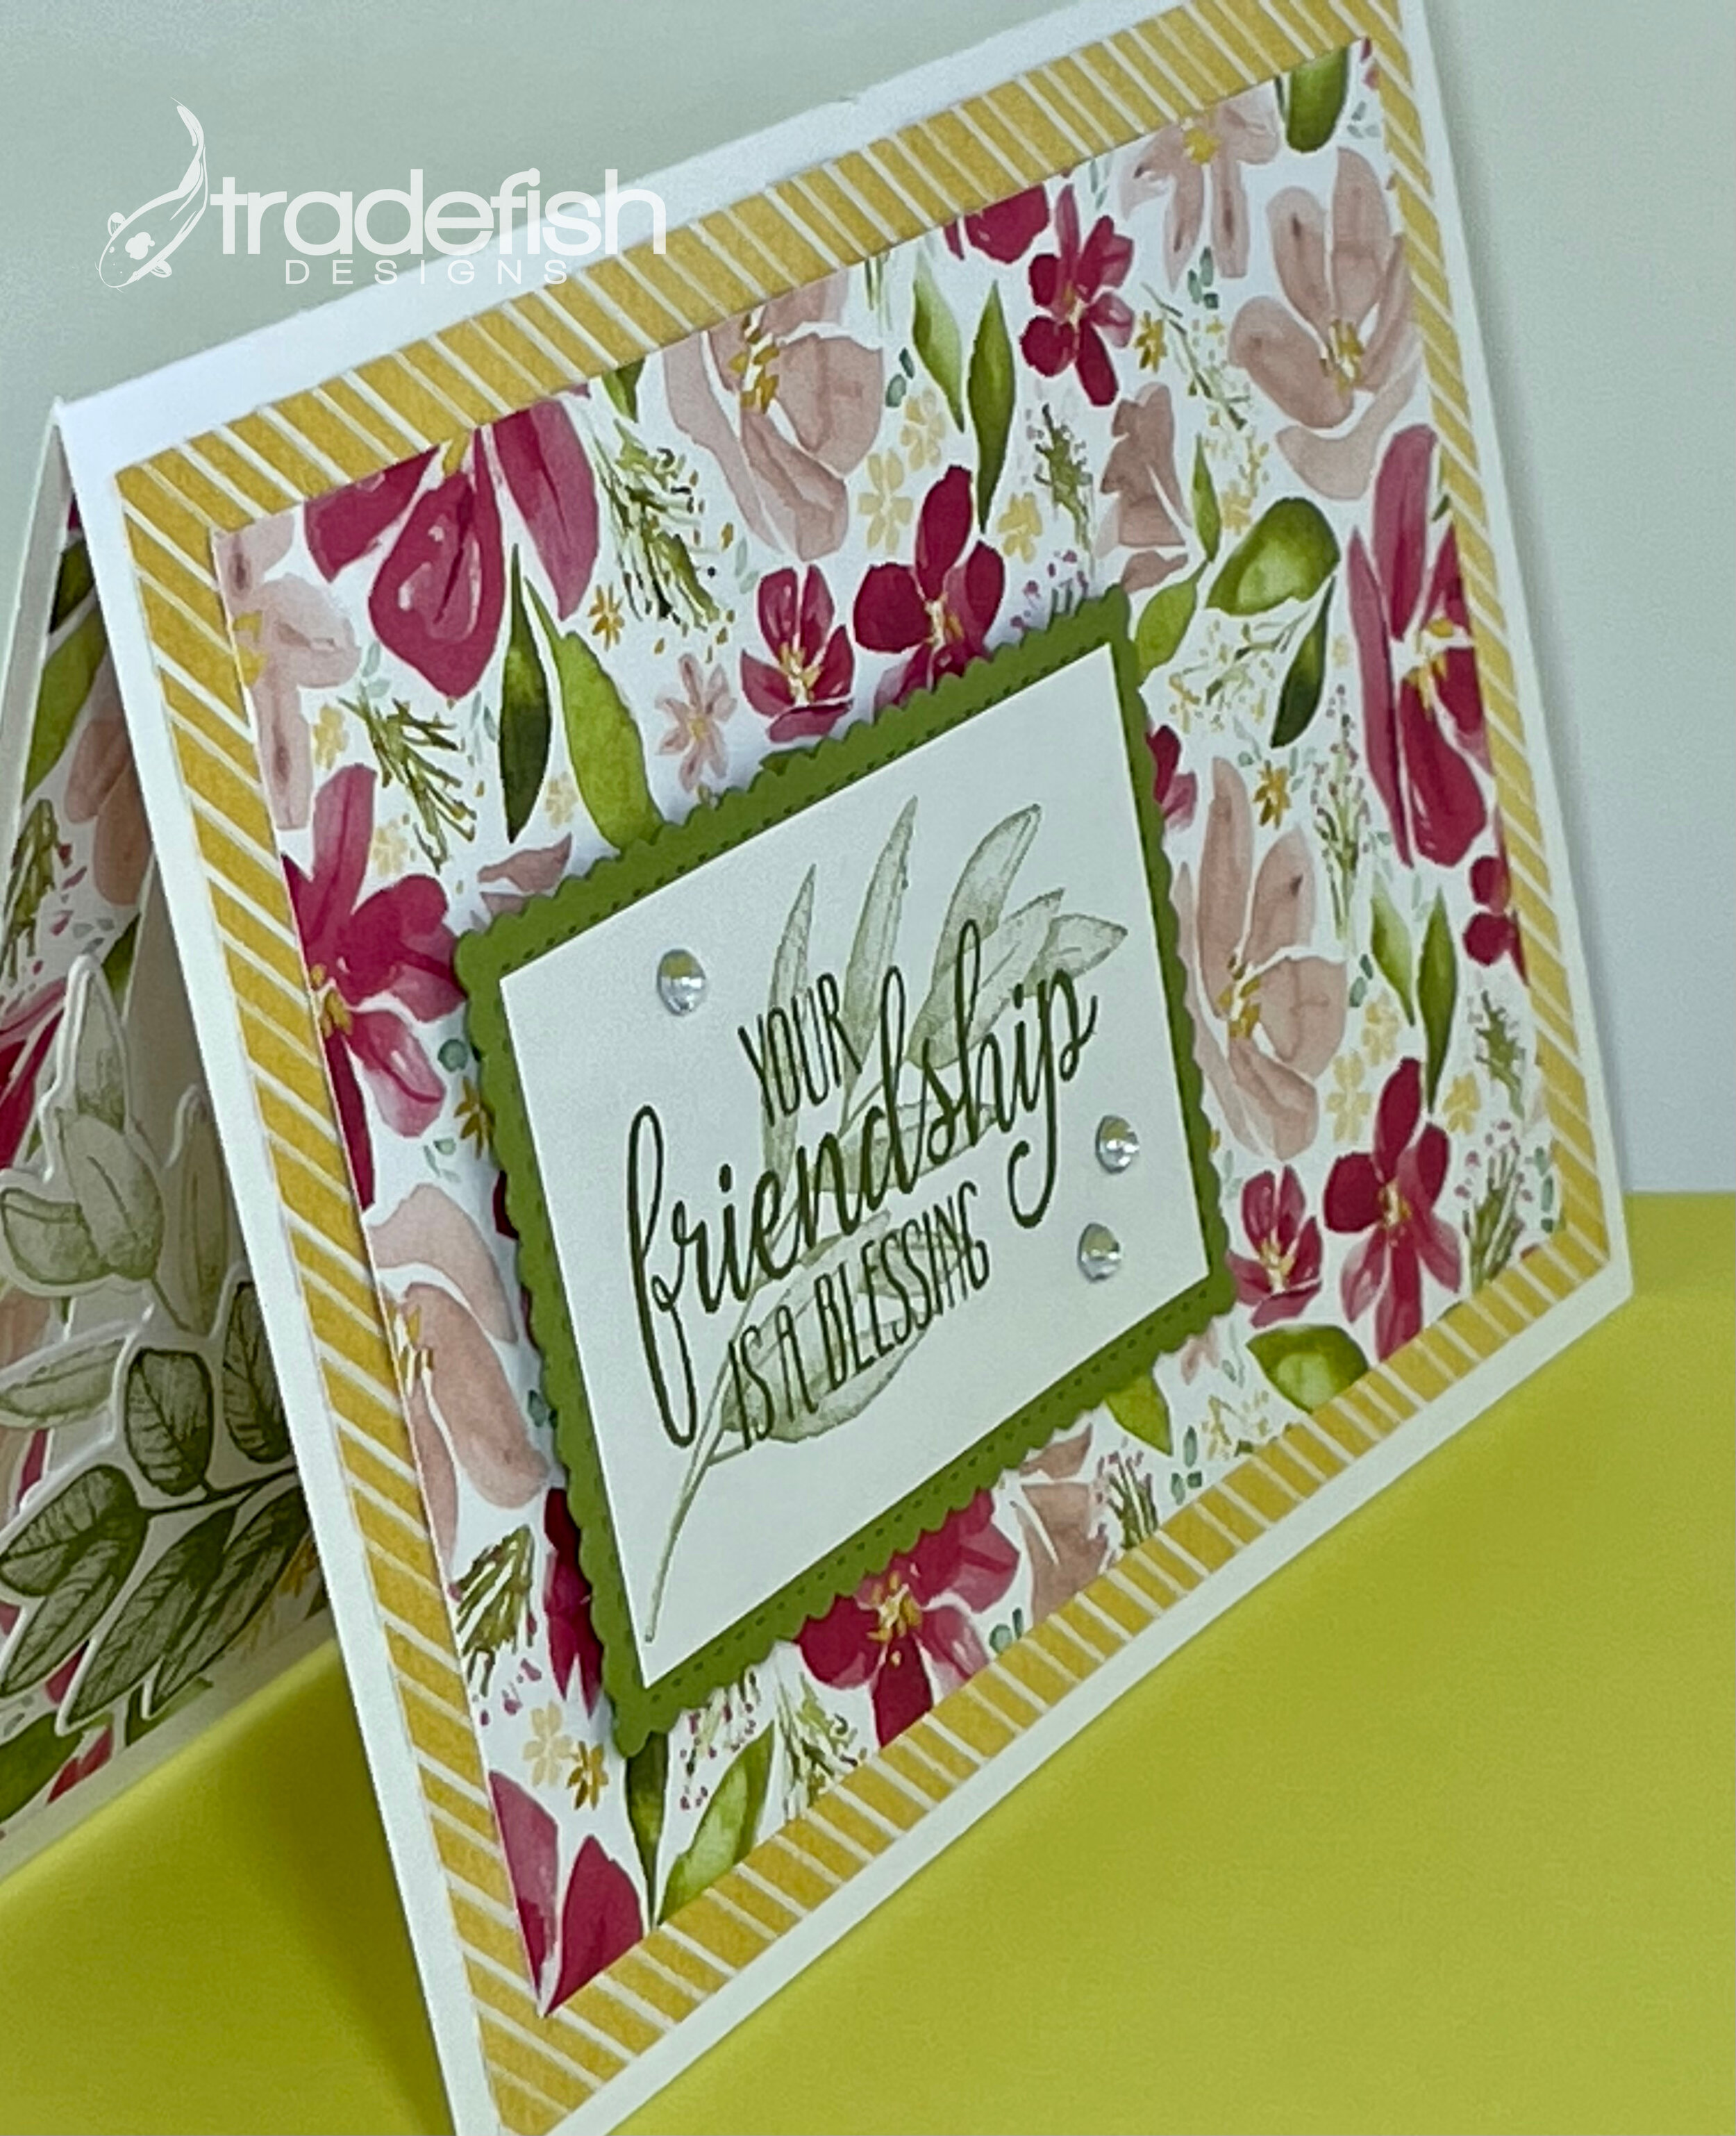
Don’t forget the inside. Sometimes I do a little and sometimes I do a lot on the inside. If you have extra paper that matches why not consider filling in more of the card and add interest to the white space. Here I also add some die cut leaves to coordinate with the stamped images on the front of the card.

What about the envelope? You don’t have to settle for just a plan boring envelope. You can stamp a coordinating image on the front or use some extra coordinating paper and cover the flap on the envelope. If you do add paper to the envelope make sure it is stuck in place firmly as it will often go through machines at the post office and you don’t want it to get stuck and damage the envelope and risk the card not being delivered.

I hope you enjoyed this card and maybe use some of my tips on your own cards. Happy crafting friends!
Supplies: (All supplies Stampin’ Up unless otherwise stated)
Stamps: So Sentimental, Forever Fern
Ink: Old Olive
Paper: Best Dressed DSP, Old Olive & Pear Pizzaz
Dies: Stitched So Sweetly, Forever Fern
Embellishments: Rhinestones
DESIGN: 20200628

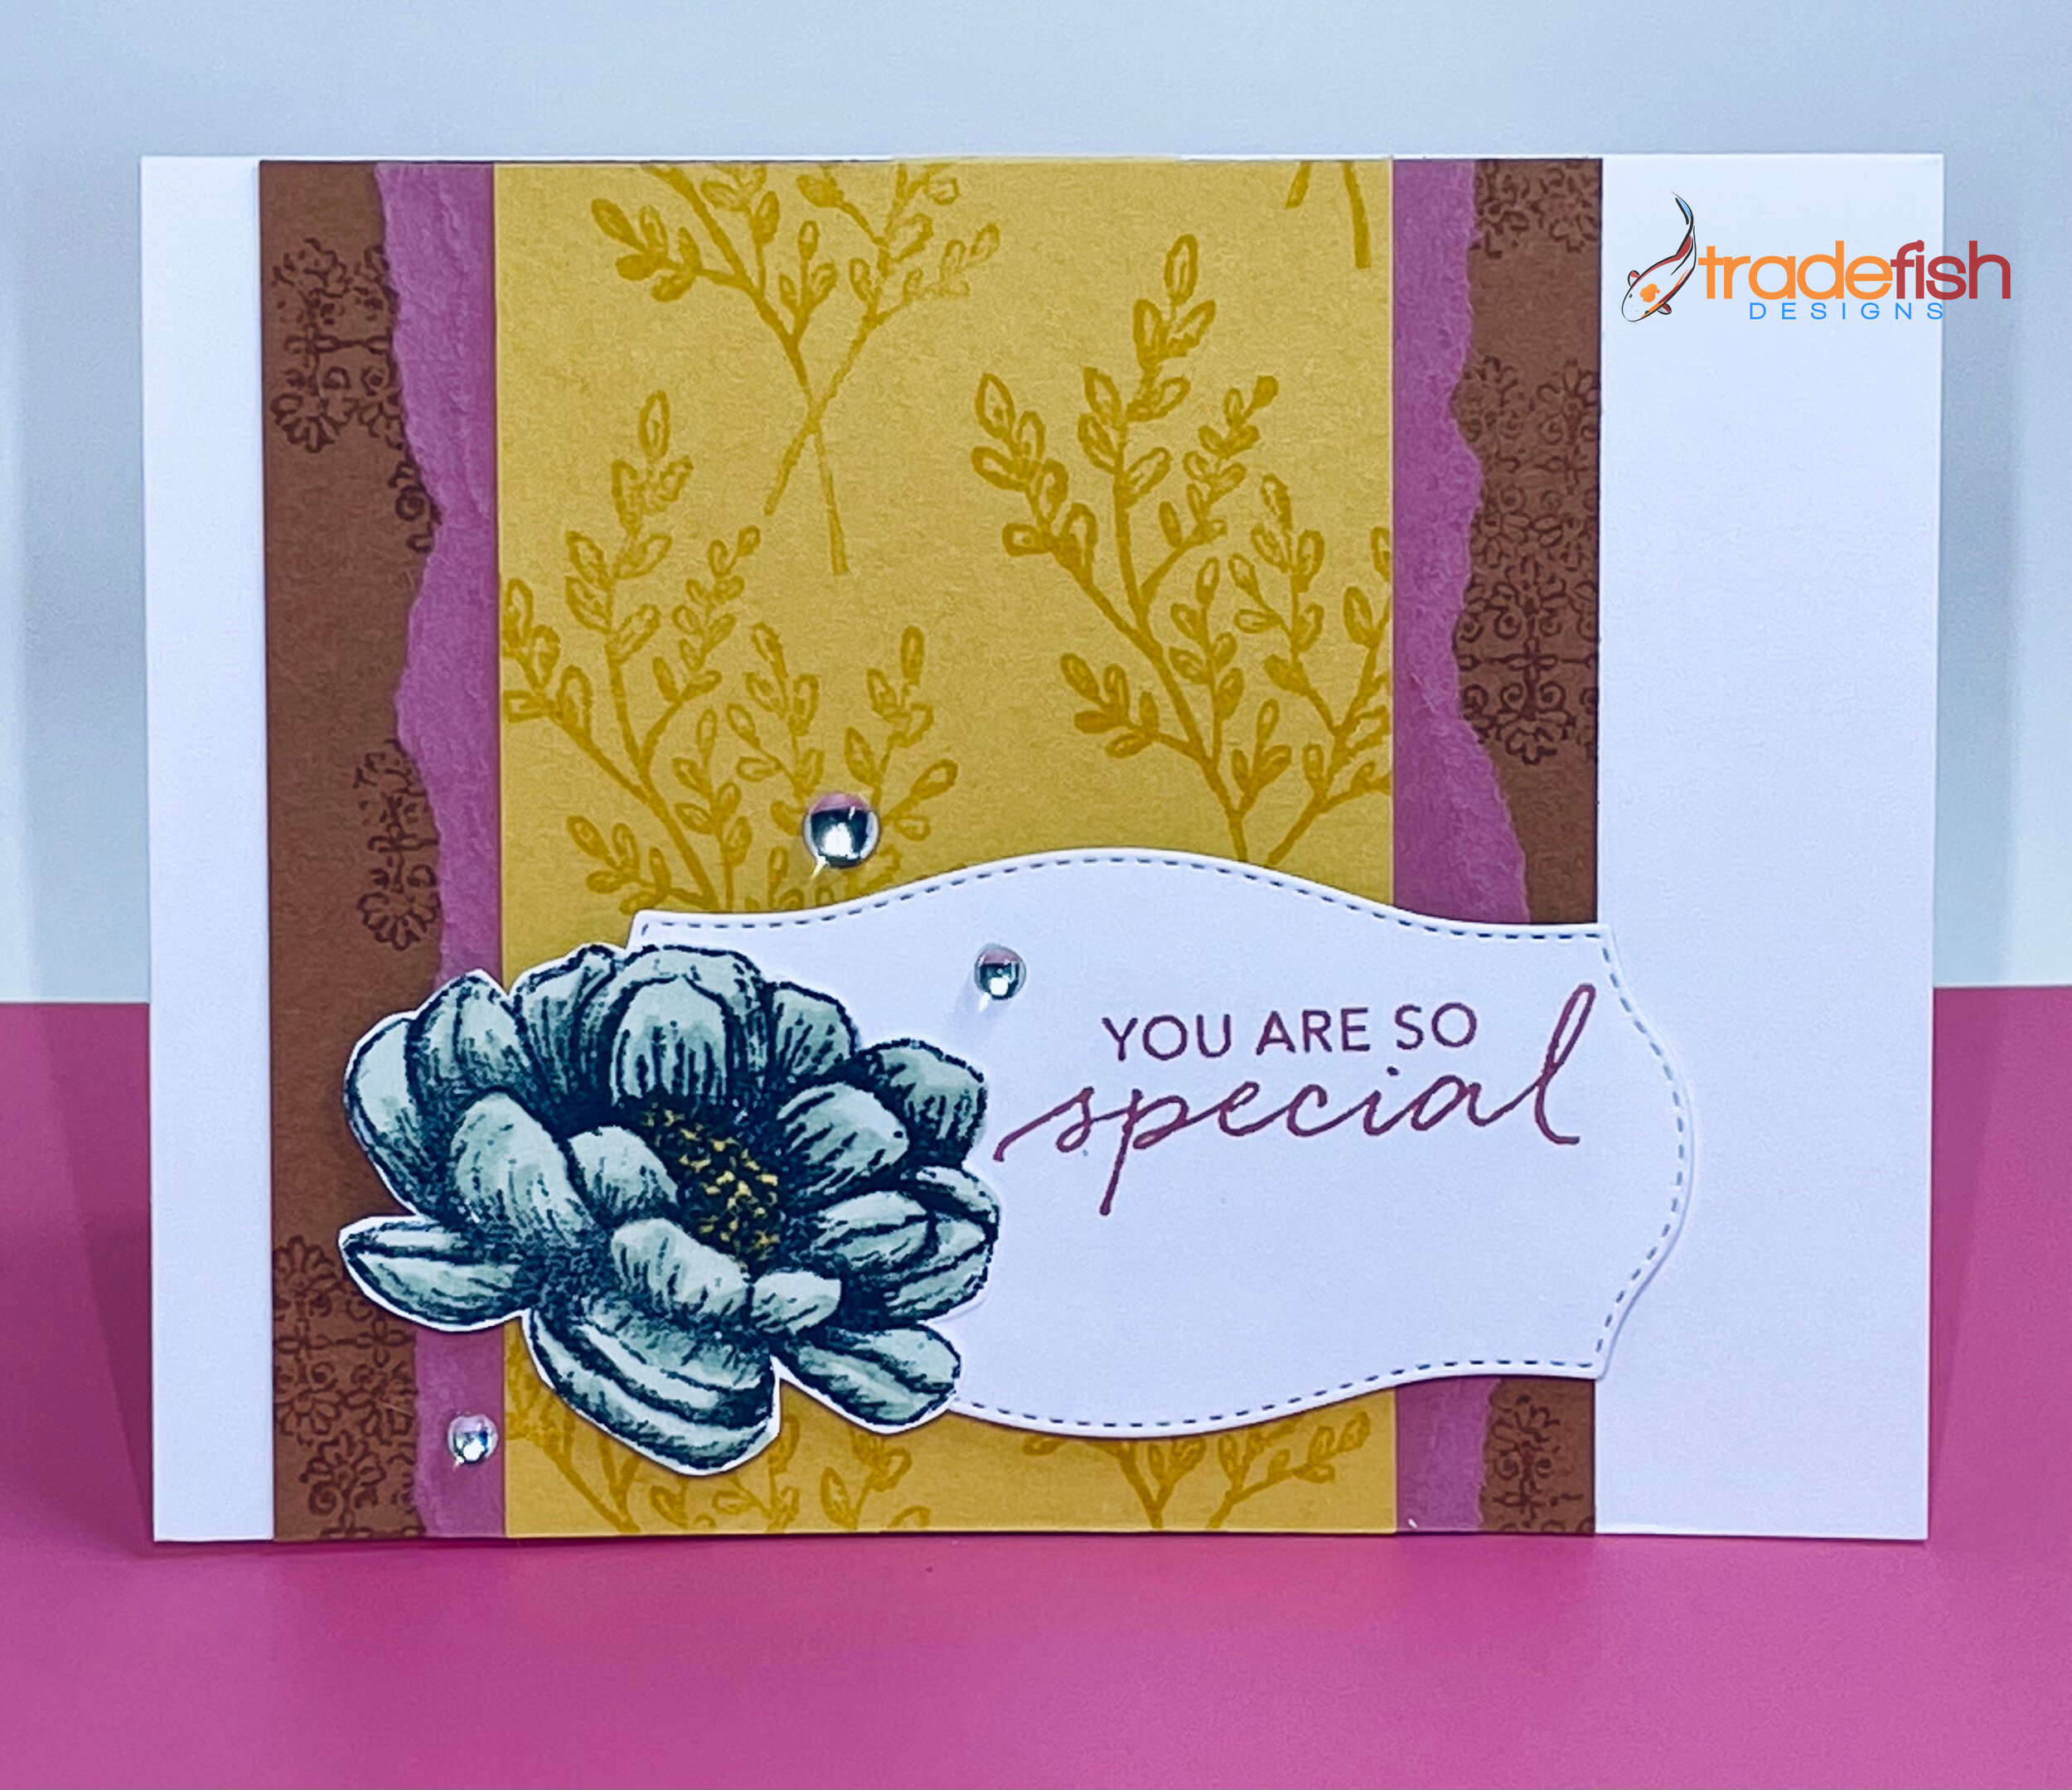
It's been a while...you are so Special
I have been off the blogging scene for a while now but I would like to work my way back. I have a serious backlog of cards to post. I think I will post every other day for a while to clear out my cards. I hope you enjoy them!

I used a couple of older techniques on this card. The first one was making my own background paper using the Veramark inkpad. It’s a great way to stamp images on paper using an “clear” ink that give you the look of a watermark.

Close up of front of card.
This card uses an old technique of torn edges with the Rococo Rose paper layered in between background paper made with stamps from the Tasteful Touches stamp set. This close up gives you a great look at the sentiment on the die cut with the nice stitching around the edge.
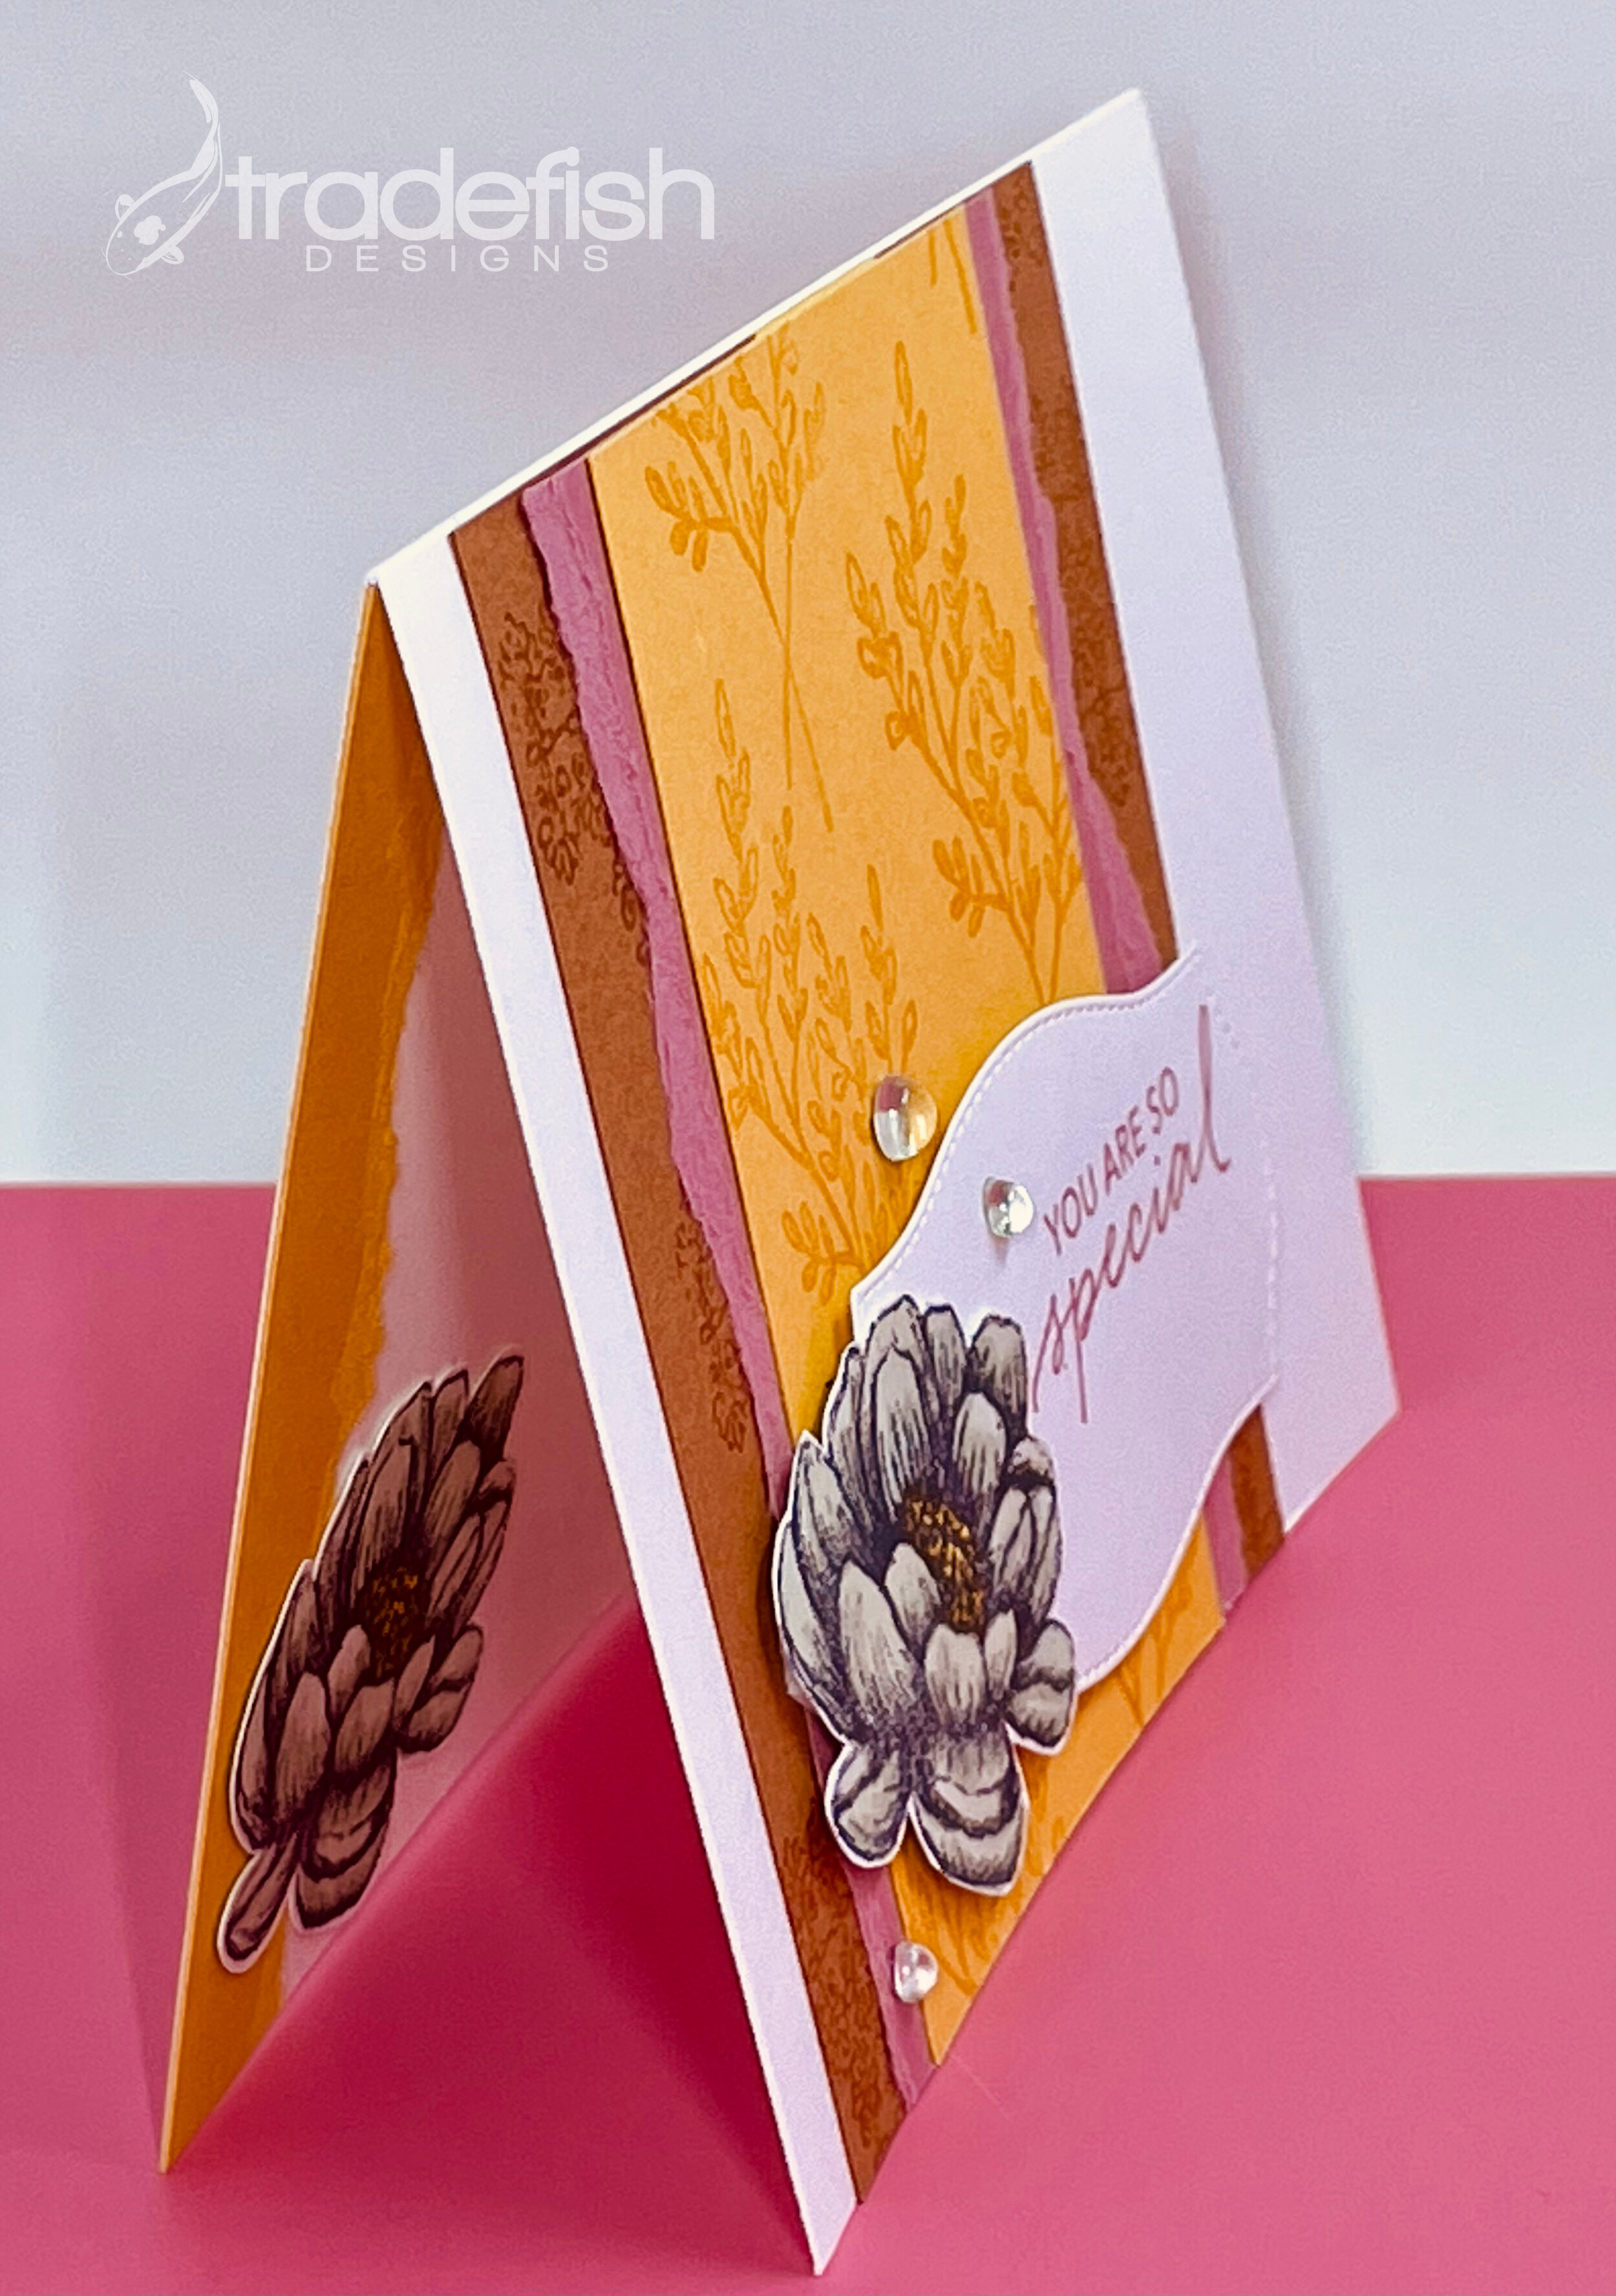
Angle shot.
The angle shot shows off the dimension in the card with the added embellishments. It also gives you a sneak peak at the surprise inside.

Inside of card.
I always try to make sure that there is something inside the card that pulls from the front of the card. Sometimes it’s stamp and sometimes it’s coordinated paper.
Supplies include: (All items below are from Stampin’ Up)
Stamps: Tasteful Touches
Ink: Rococo Rose, Versamark & Memento Tuxedo Black
Paper: Bumblebee, Rococo Rose, Cinnamon Cider & Whisper White
Dies: Tasteful Labels
Blends: Mint Macaron and Daffodil Delight
Embellishments: Epoxy Drops

You are so special!
Blind Spot Animal Sanctuary and Printing Center USA
Charity begins at home with Christmas cards and calendars for Blind Spot Animal Sanctuary using Printing Center USA!
Hello everyone! Today I’m taking a break from showing off may latest card designs to share more about me and what I’m passionate about…
As I have mentioned in the past, I am proud to be on the Board of a farm animal sanctuary located in Rougemont, North Carolina. The sanctuary is called the Blind Spot Animal Sanctuary and Rescue. Blind Spot is home to over 100 neglected and homeless farm animals. The goal of the Sanctuary is to educate, rehabilitate, raise awareness and find loving homes for these forgotten animals. One of the ways I give of my time is to create homemade Christmas cards to send to anyone who has donated over $25 in the year to the Sanctuary as a thank you for donating and supporting their work. Last year I sent out over 500 Christmas cards. This year, I have created 750 homemade cards to send out! Now you know why I post Christmas cards on my blog throughout the year…because I’m making them all year round to keep up! I will post this year’s card below. If you want a chance to get one, go online using the link HERE and make a donation right away!
What you may not know is that for the past 3 years I’ve created a calendar as part of an annual fund raiser for the Sanctuary and to get this done I have partnered up with Printing Center USA. They print everything from flyers to books and have an amazing customer service department that is always ready to help.
I am in the middle of working on our 4th calendar for 2021 and want to promote this wonderful company. As I said, we’ve create calendars that were 8-1/2” x 11” inches with saddle stitching for 3 years. The calendar started out pretty simple with just photos. Then I added stories to go along with the photos. This year I’m working to create a 12” x 12” calendar with multi-photo layouts and stories. It will be the biggest and best yet.
Each year I’ve gotten better at designing the calendar and their tools have improved year over year making it possible for me, a full-time attorney, to use what little free time I do have to create something so important. Not only that, they are one of the best deals around for fundraisers and anyone interested in designing a good quantity of calendars. We usually get at least 100 calendars but they can do much more. If you are looking for a great resource for all your printing needs and were considering creating a calendar for fundraising I encourage you to check them out! Check them out HERE!
I’ll let you know when the calendars are in and ready for purchase! In the meantime, go to Blind Spot and make a donation of $25 or more to get a Christmas card from me…tell them Cecilia sent you!!!

Here’s a sneak peek at what you could receive from me for making a donation of $25 or more!

Keep it charitable my crafty peeps! Donate if you can…
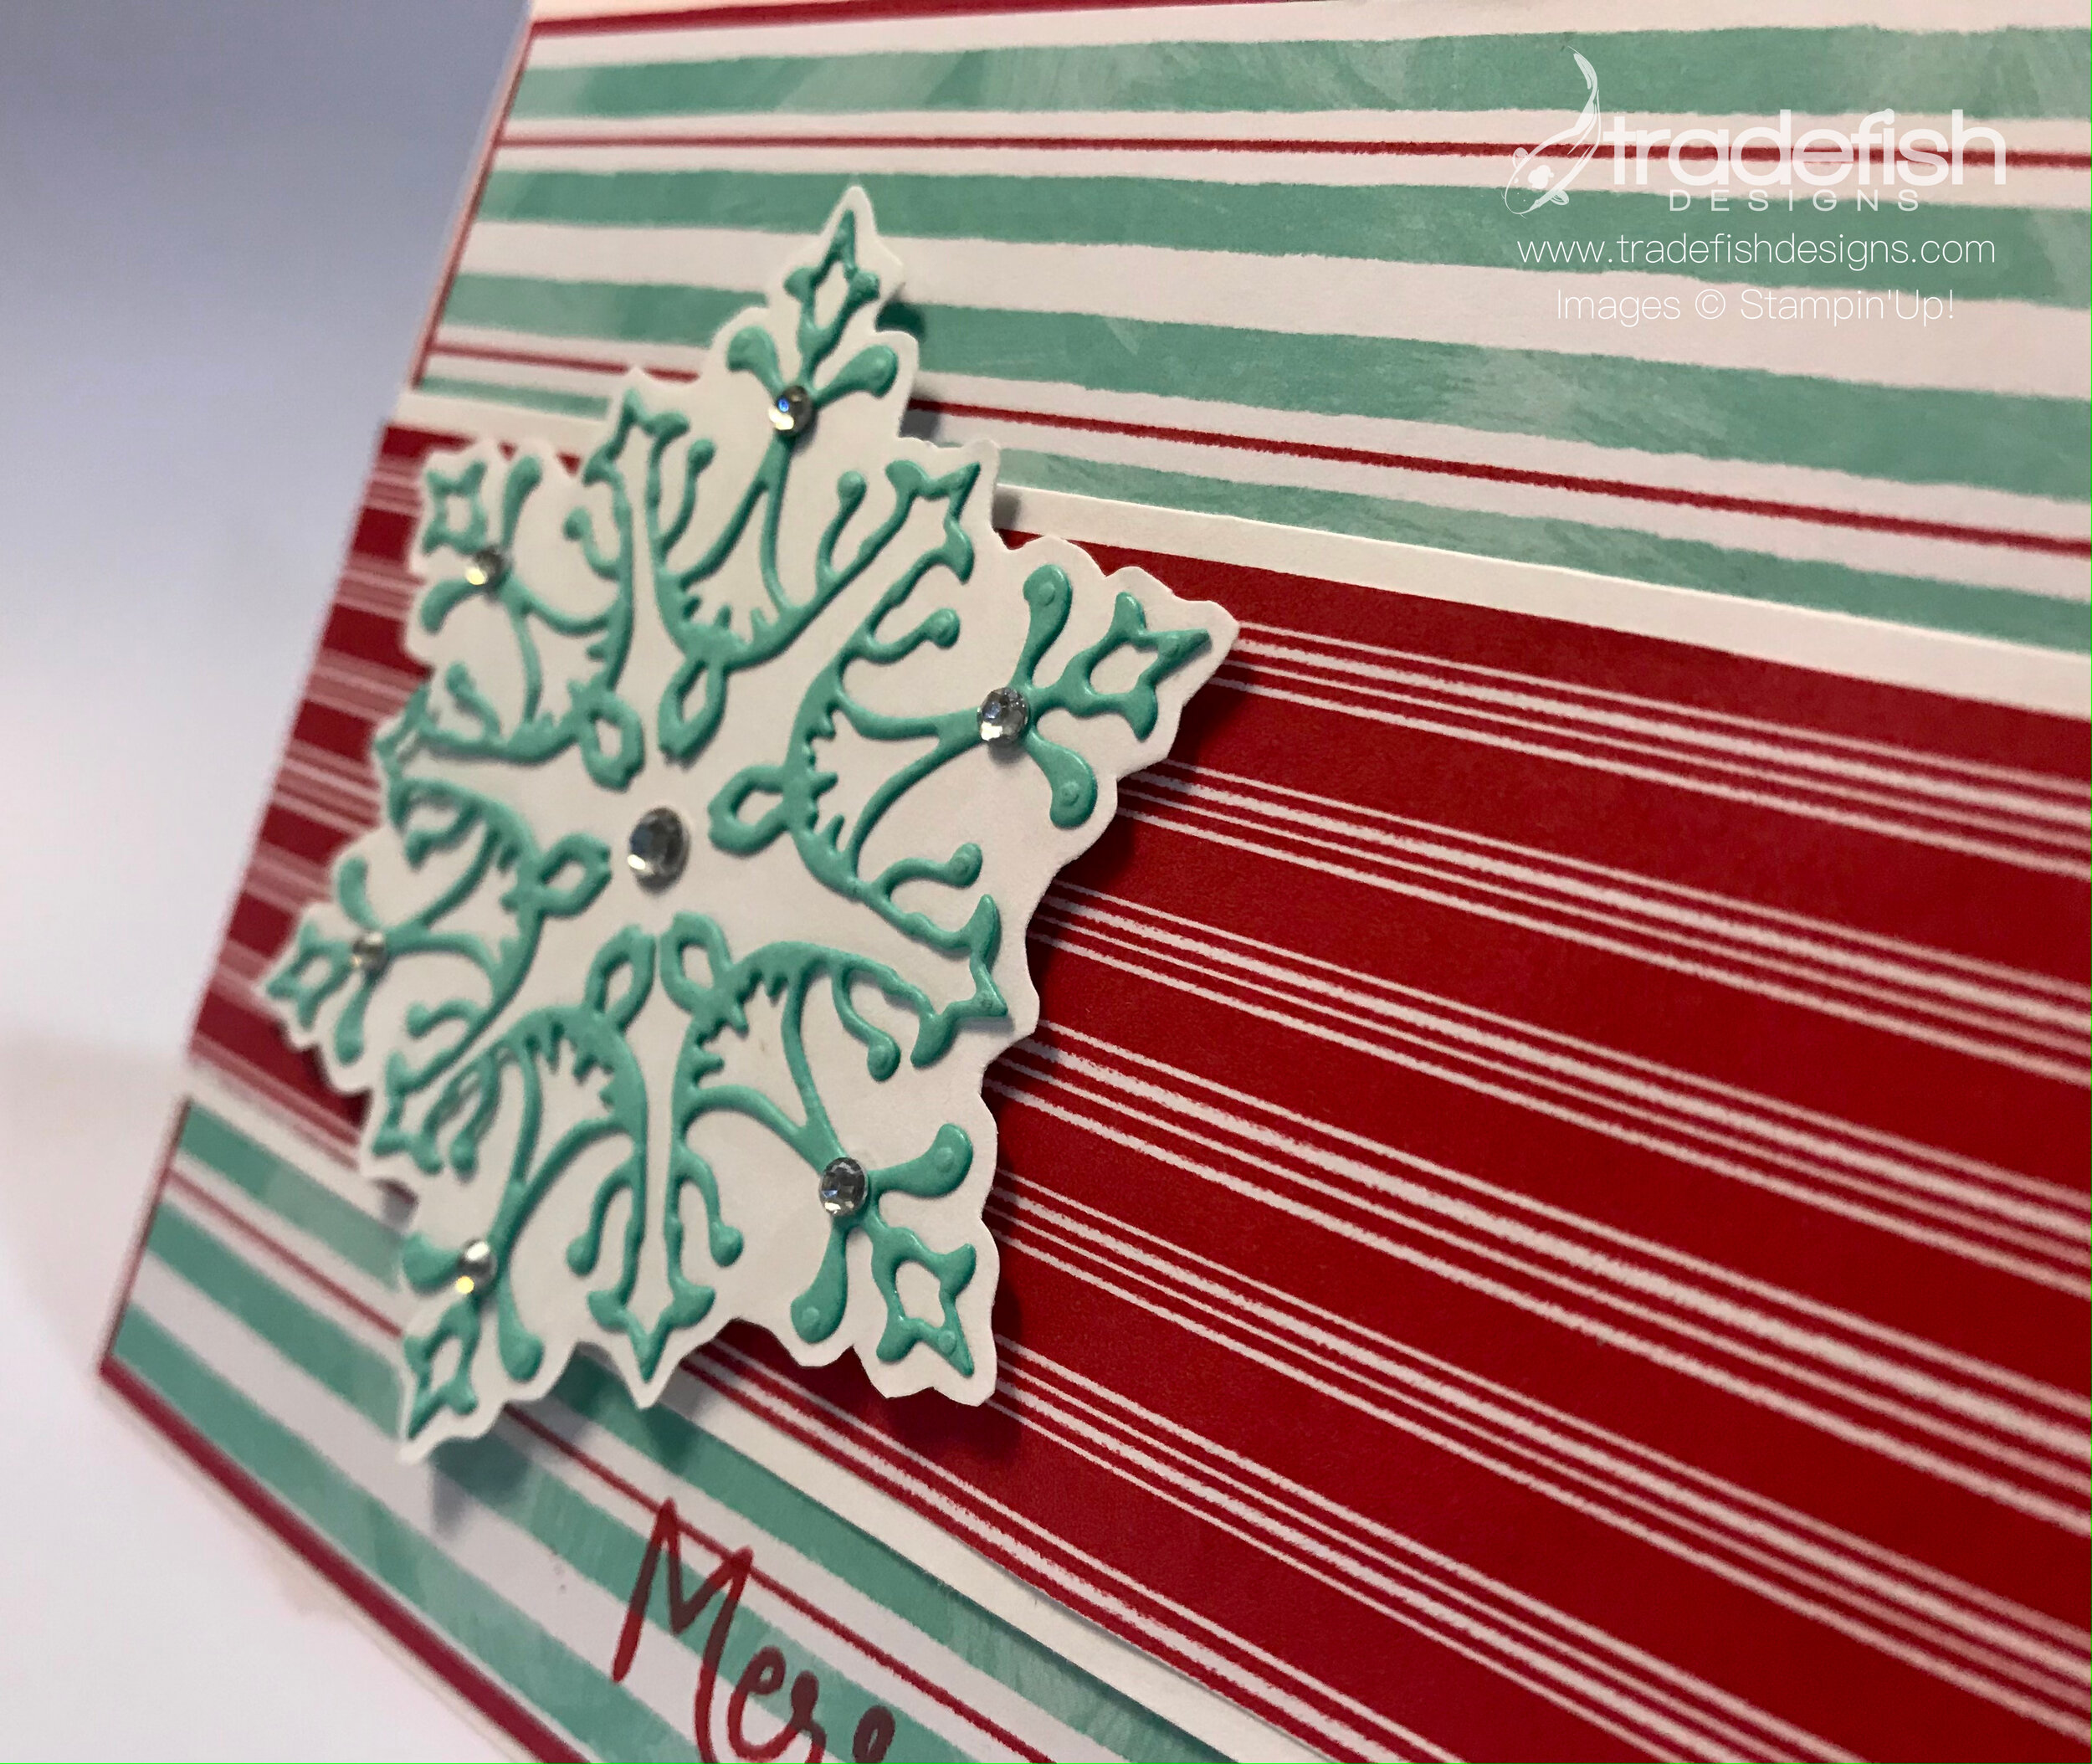
A Merry Christmas Snowflake
A Merry Christmas Snowflake card using Snowman Season and Let It Snow DSP showcasing fussy cutting and using your scrap designer paper.
Here’s a snowflake Christmas card. I used an Operation Write Homes Sketches #09 and some basic rhinestones and I was done. A few paper laters and voila, a fun Christmas card with a non-traditional color scheme.


I hope you enjoyed my card today. If you are interested in any of the items I used in this project please check out the Product List below. Pleases note that some items may be no longer available depending upon when you see this post – if that’s the case, feel free to substitute items you may already have in your craft stash. Keep it crafty friends!

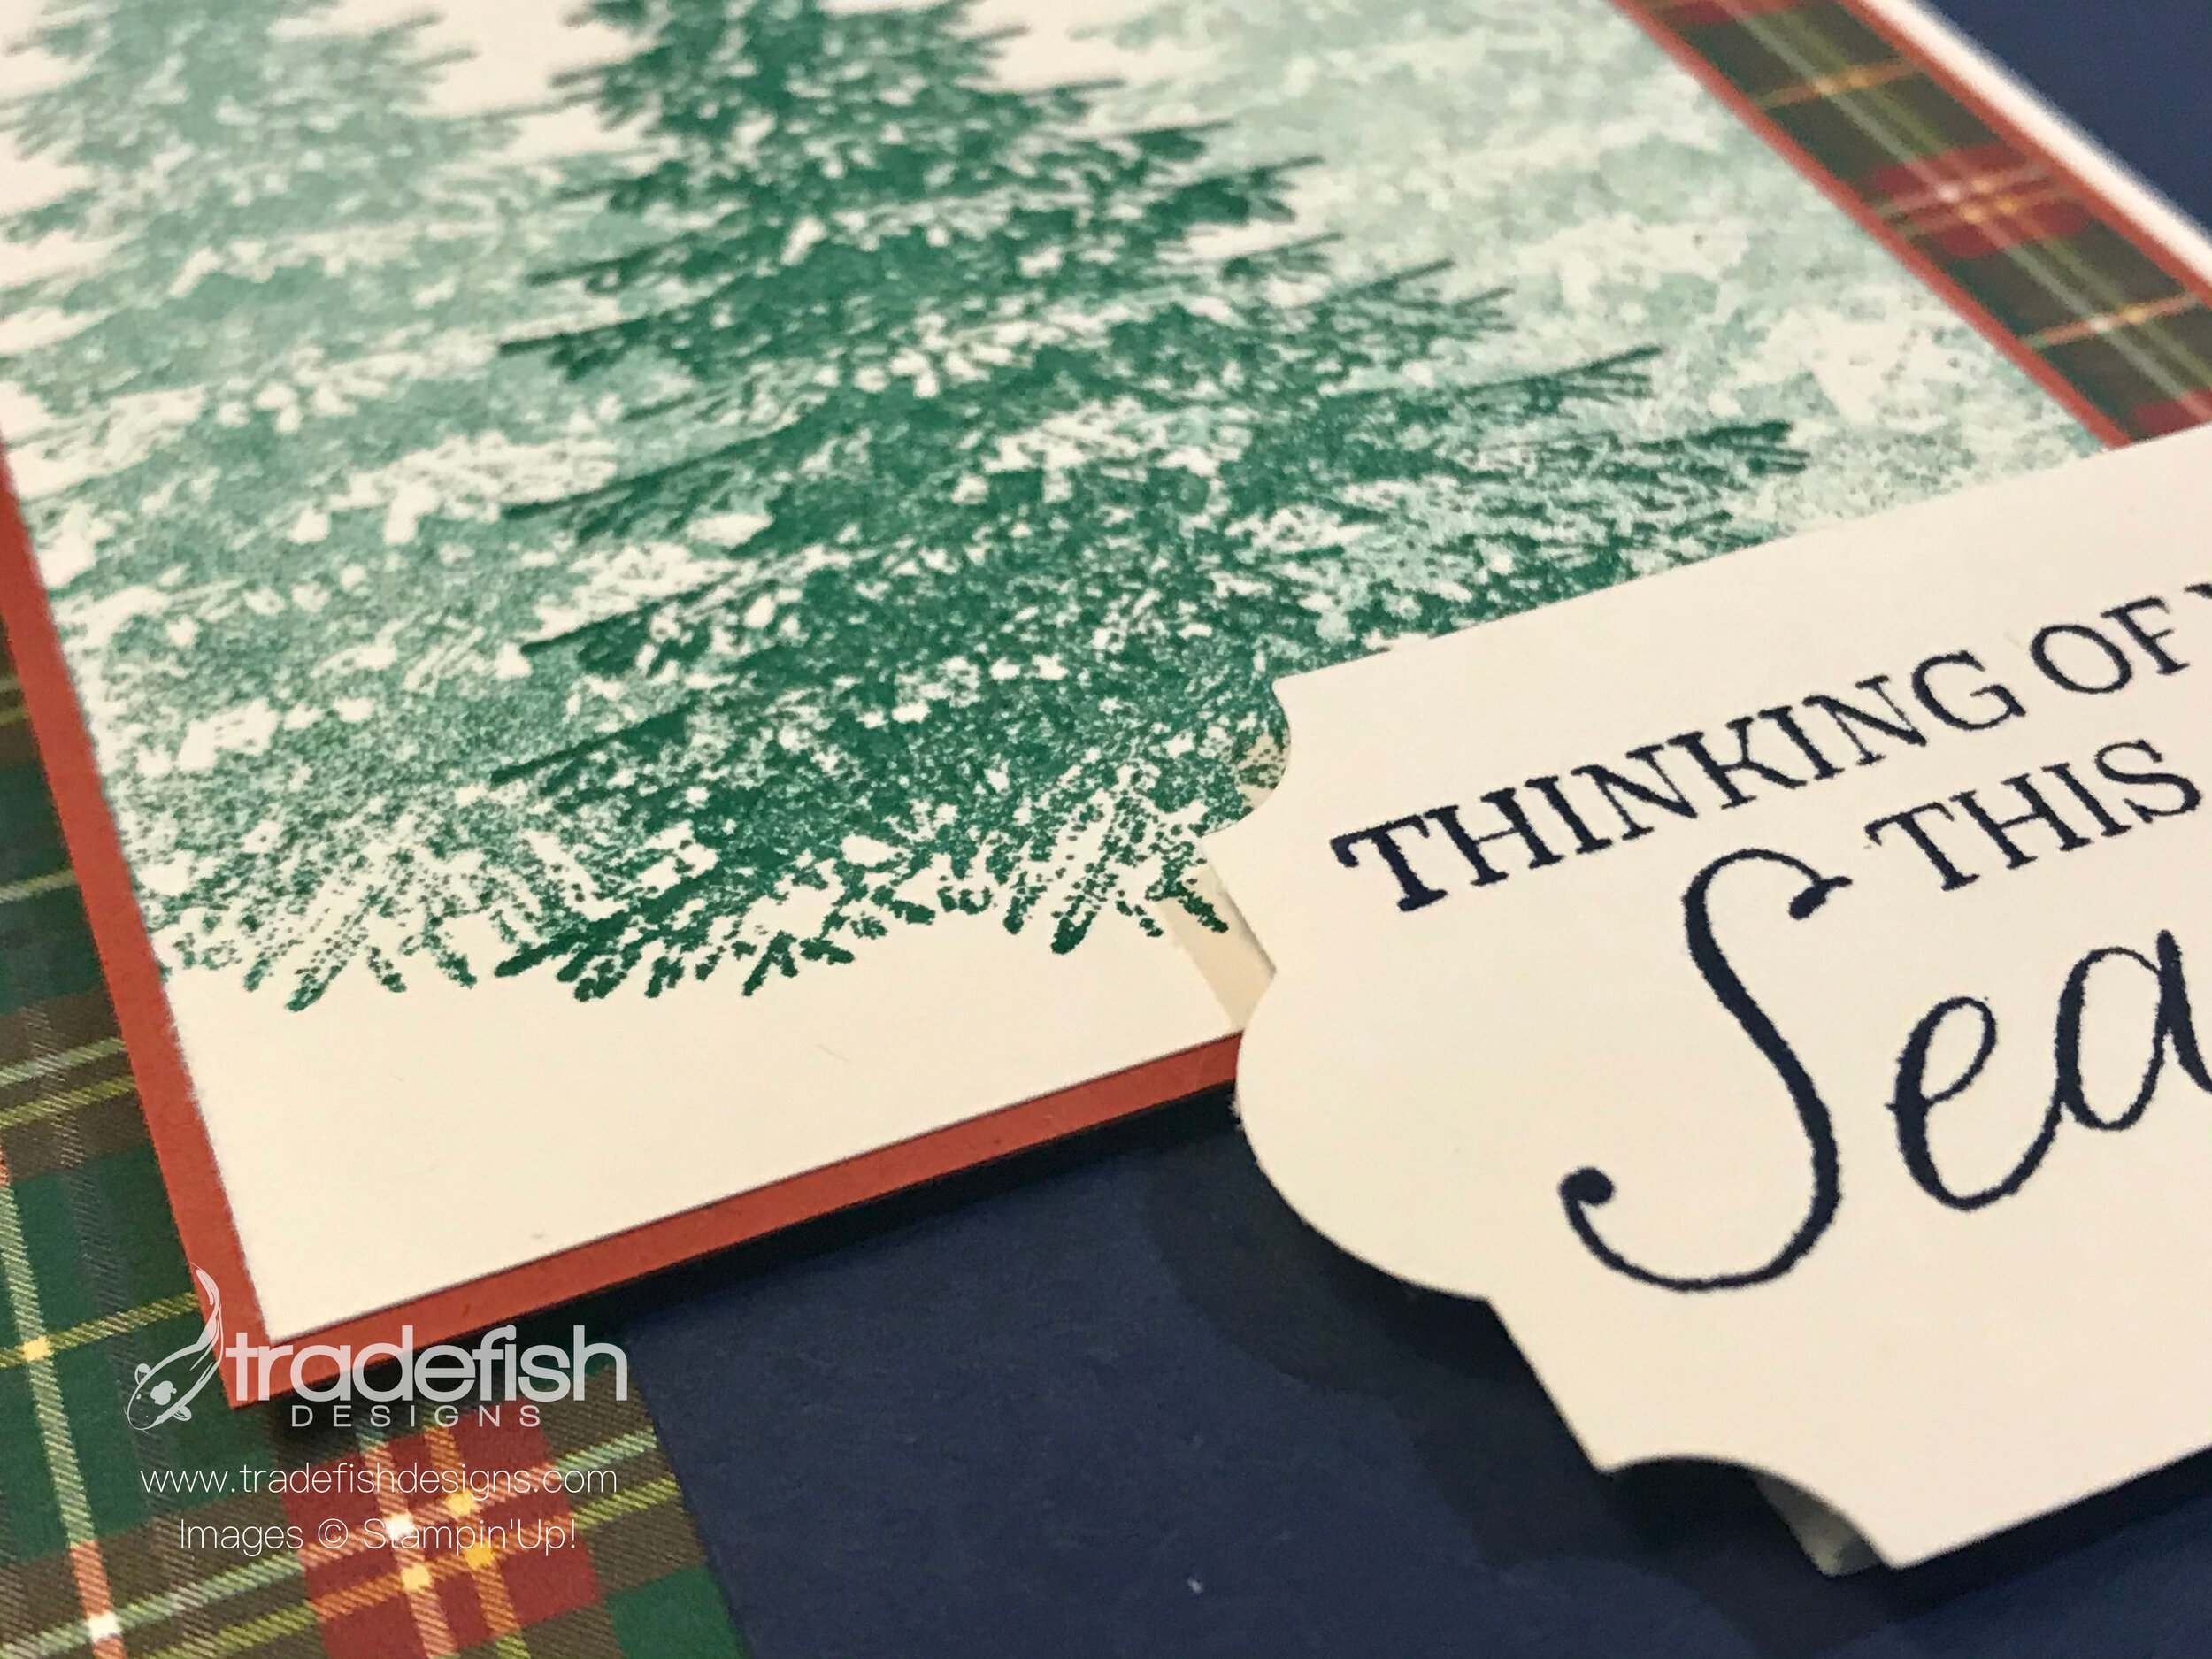
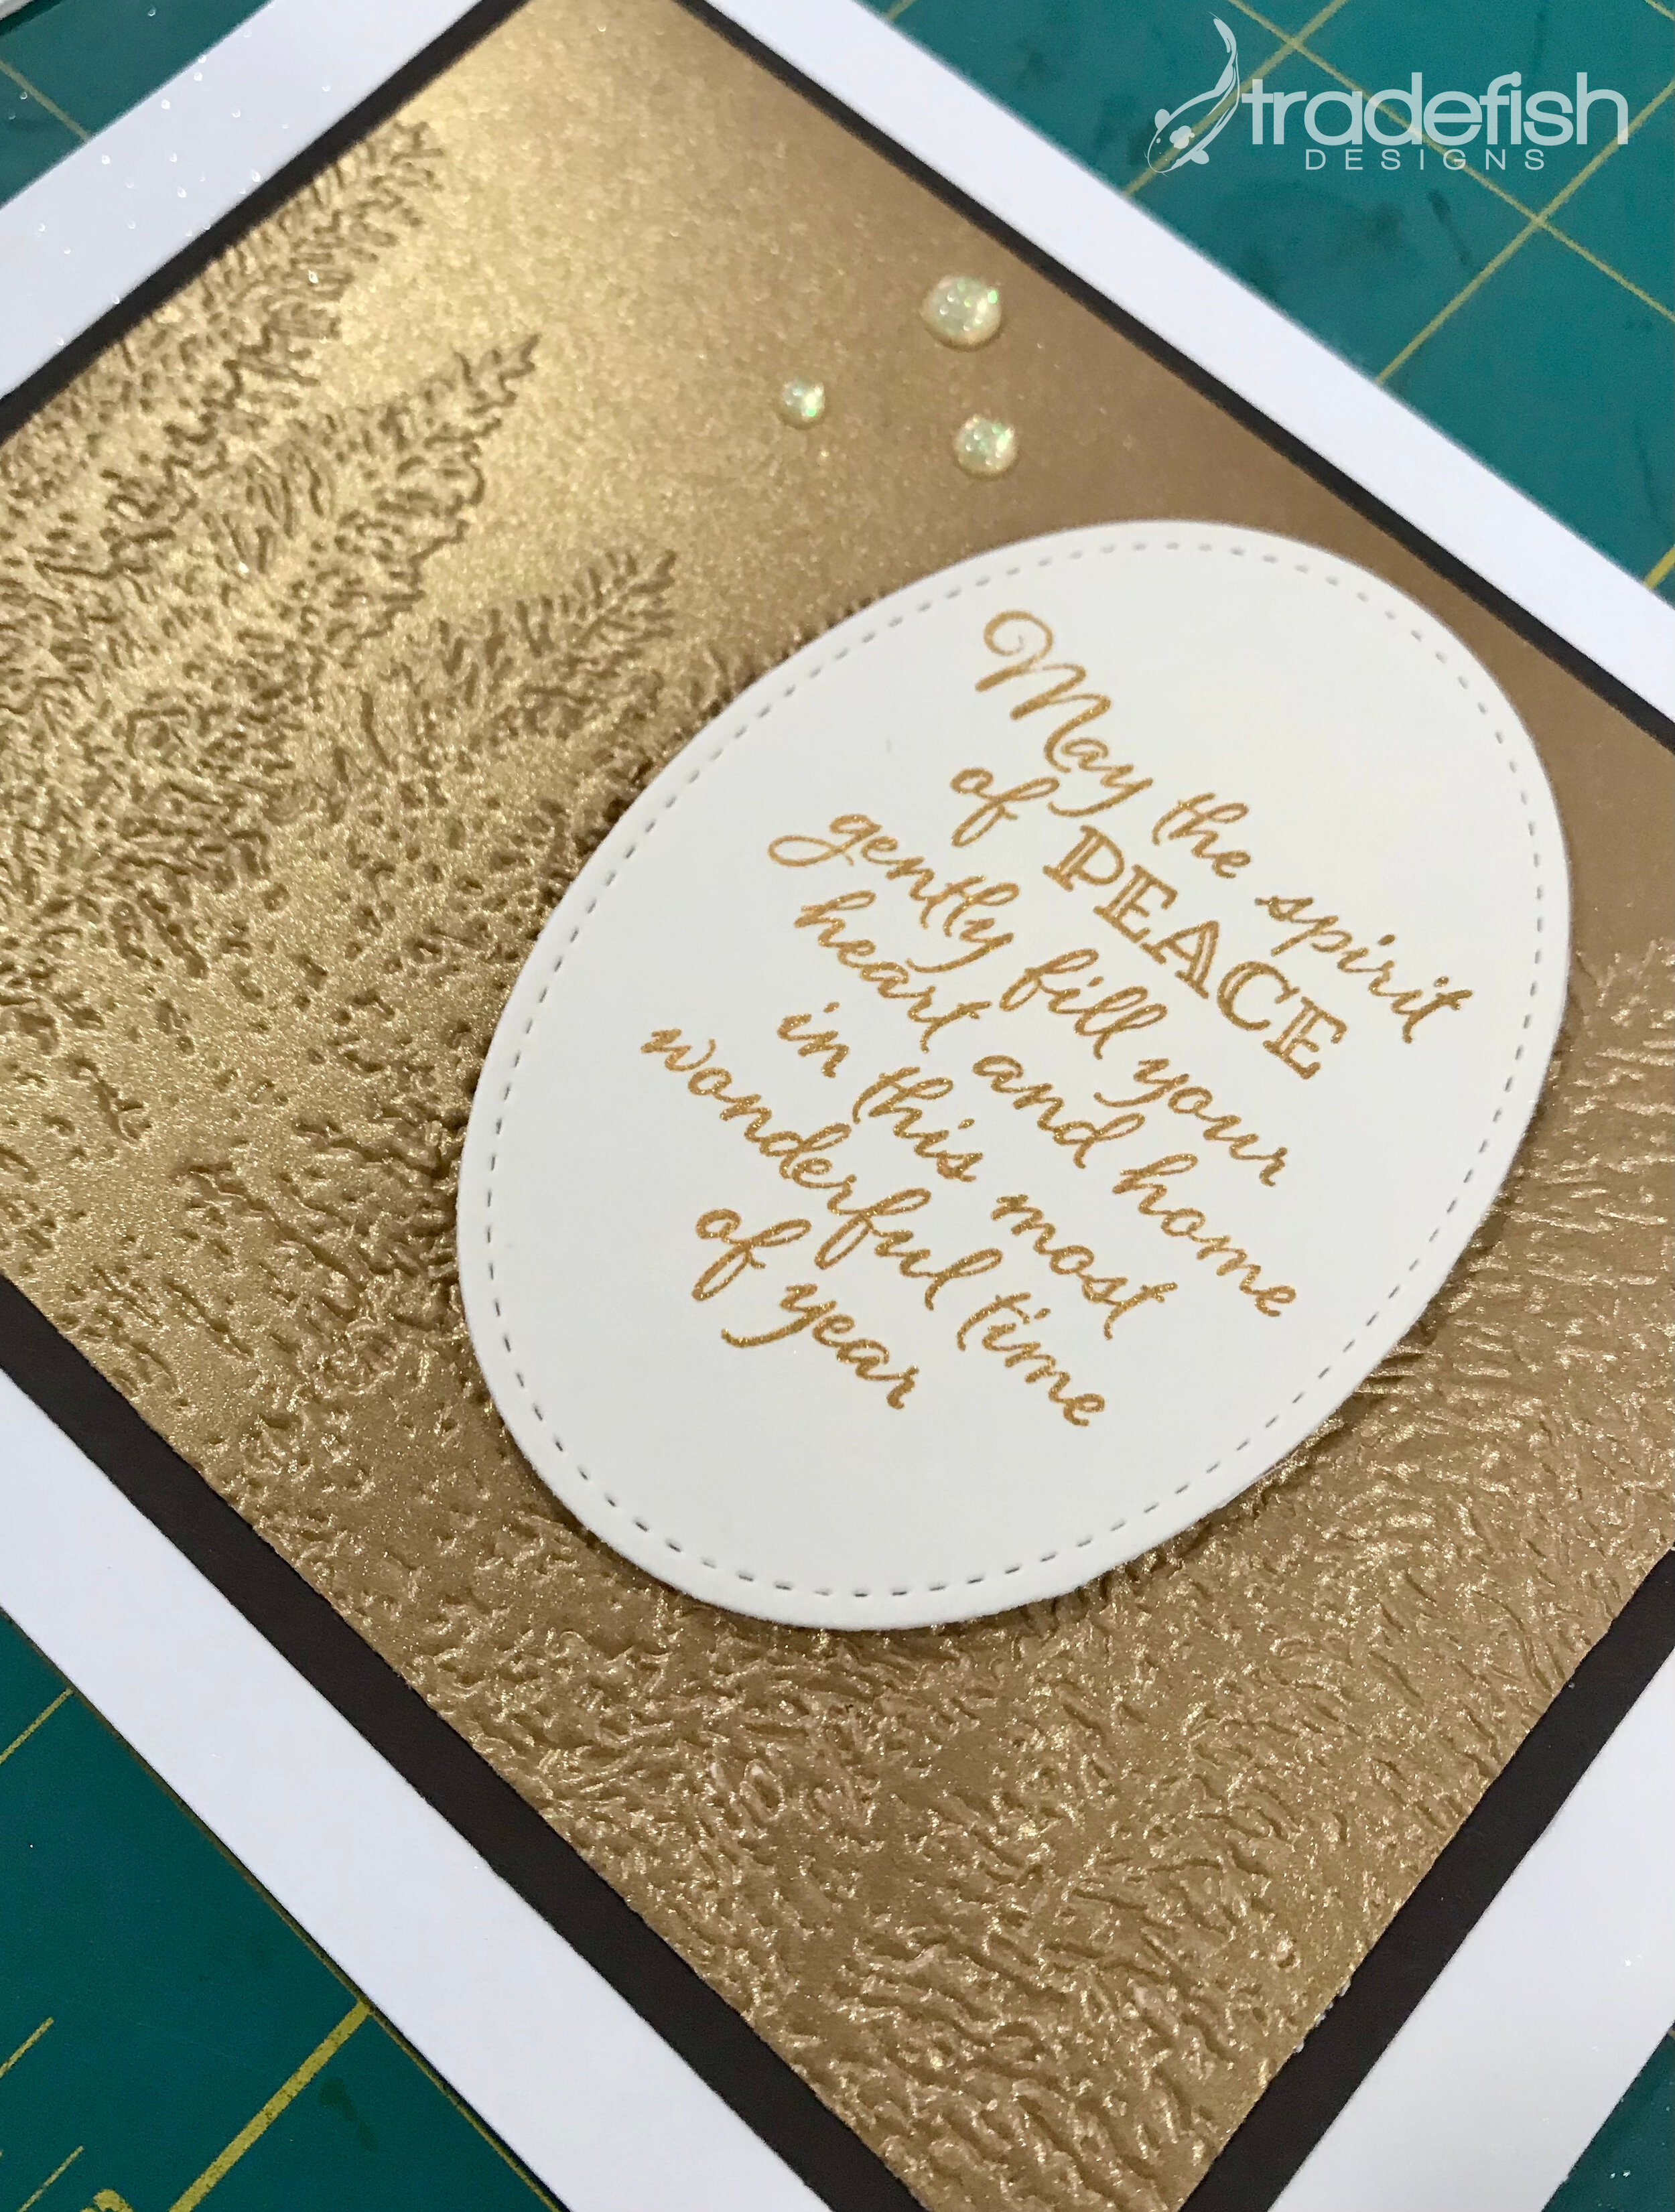
Thinking of You This Season
Thinking of You This Season with Stampin’ Up’s Plaid Tidings Designer Series Paper and Winter Woods stamp set.
Oh Christmas Tree, Oh Christmas Tree…I love a card with trees. Here’s a card front using the Winter Woods stamp set and 3 generations of stamping to achieve a layered look to my tree. I inked up the block with some Shaded Spruce ink and stamped in the center (1st generation), then I stamped again - without reining to the lest of my original tree (2nd generation) and the final tree was stamped again, without inking to the right of the original tree (3rd generation). One ink pad creates three color ways.

The angle shot shows the lift I get to the layers using dimensional adhesive. You also get a close up look at the sentiment and punch. It’s a simple card in that there is some basic stamping but a lot of layers in color cardstock and Designer Series Paper. No bling on this one so it would be a great candidate for the men on your Christmas list.

I hope you enjoyed my card today. If you are interested in any of the items I used in this project please check out the Product List below. Pleases note that some items may be no longer available depending upon when you see this post – if that’s the case, feel free to substitute items you may already have in your craft stash. Keep it crafty friends!
 | ||||
 |  |  |
 Designer Series Paper")


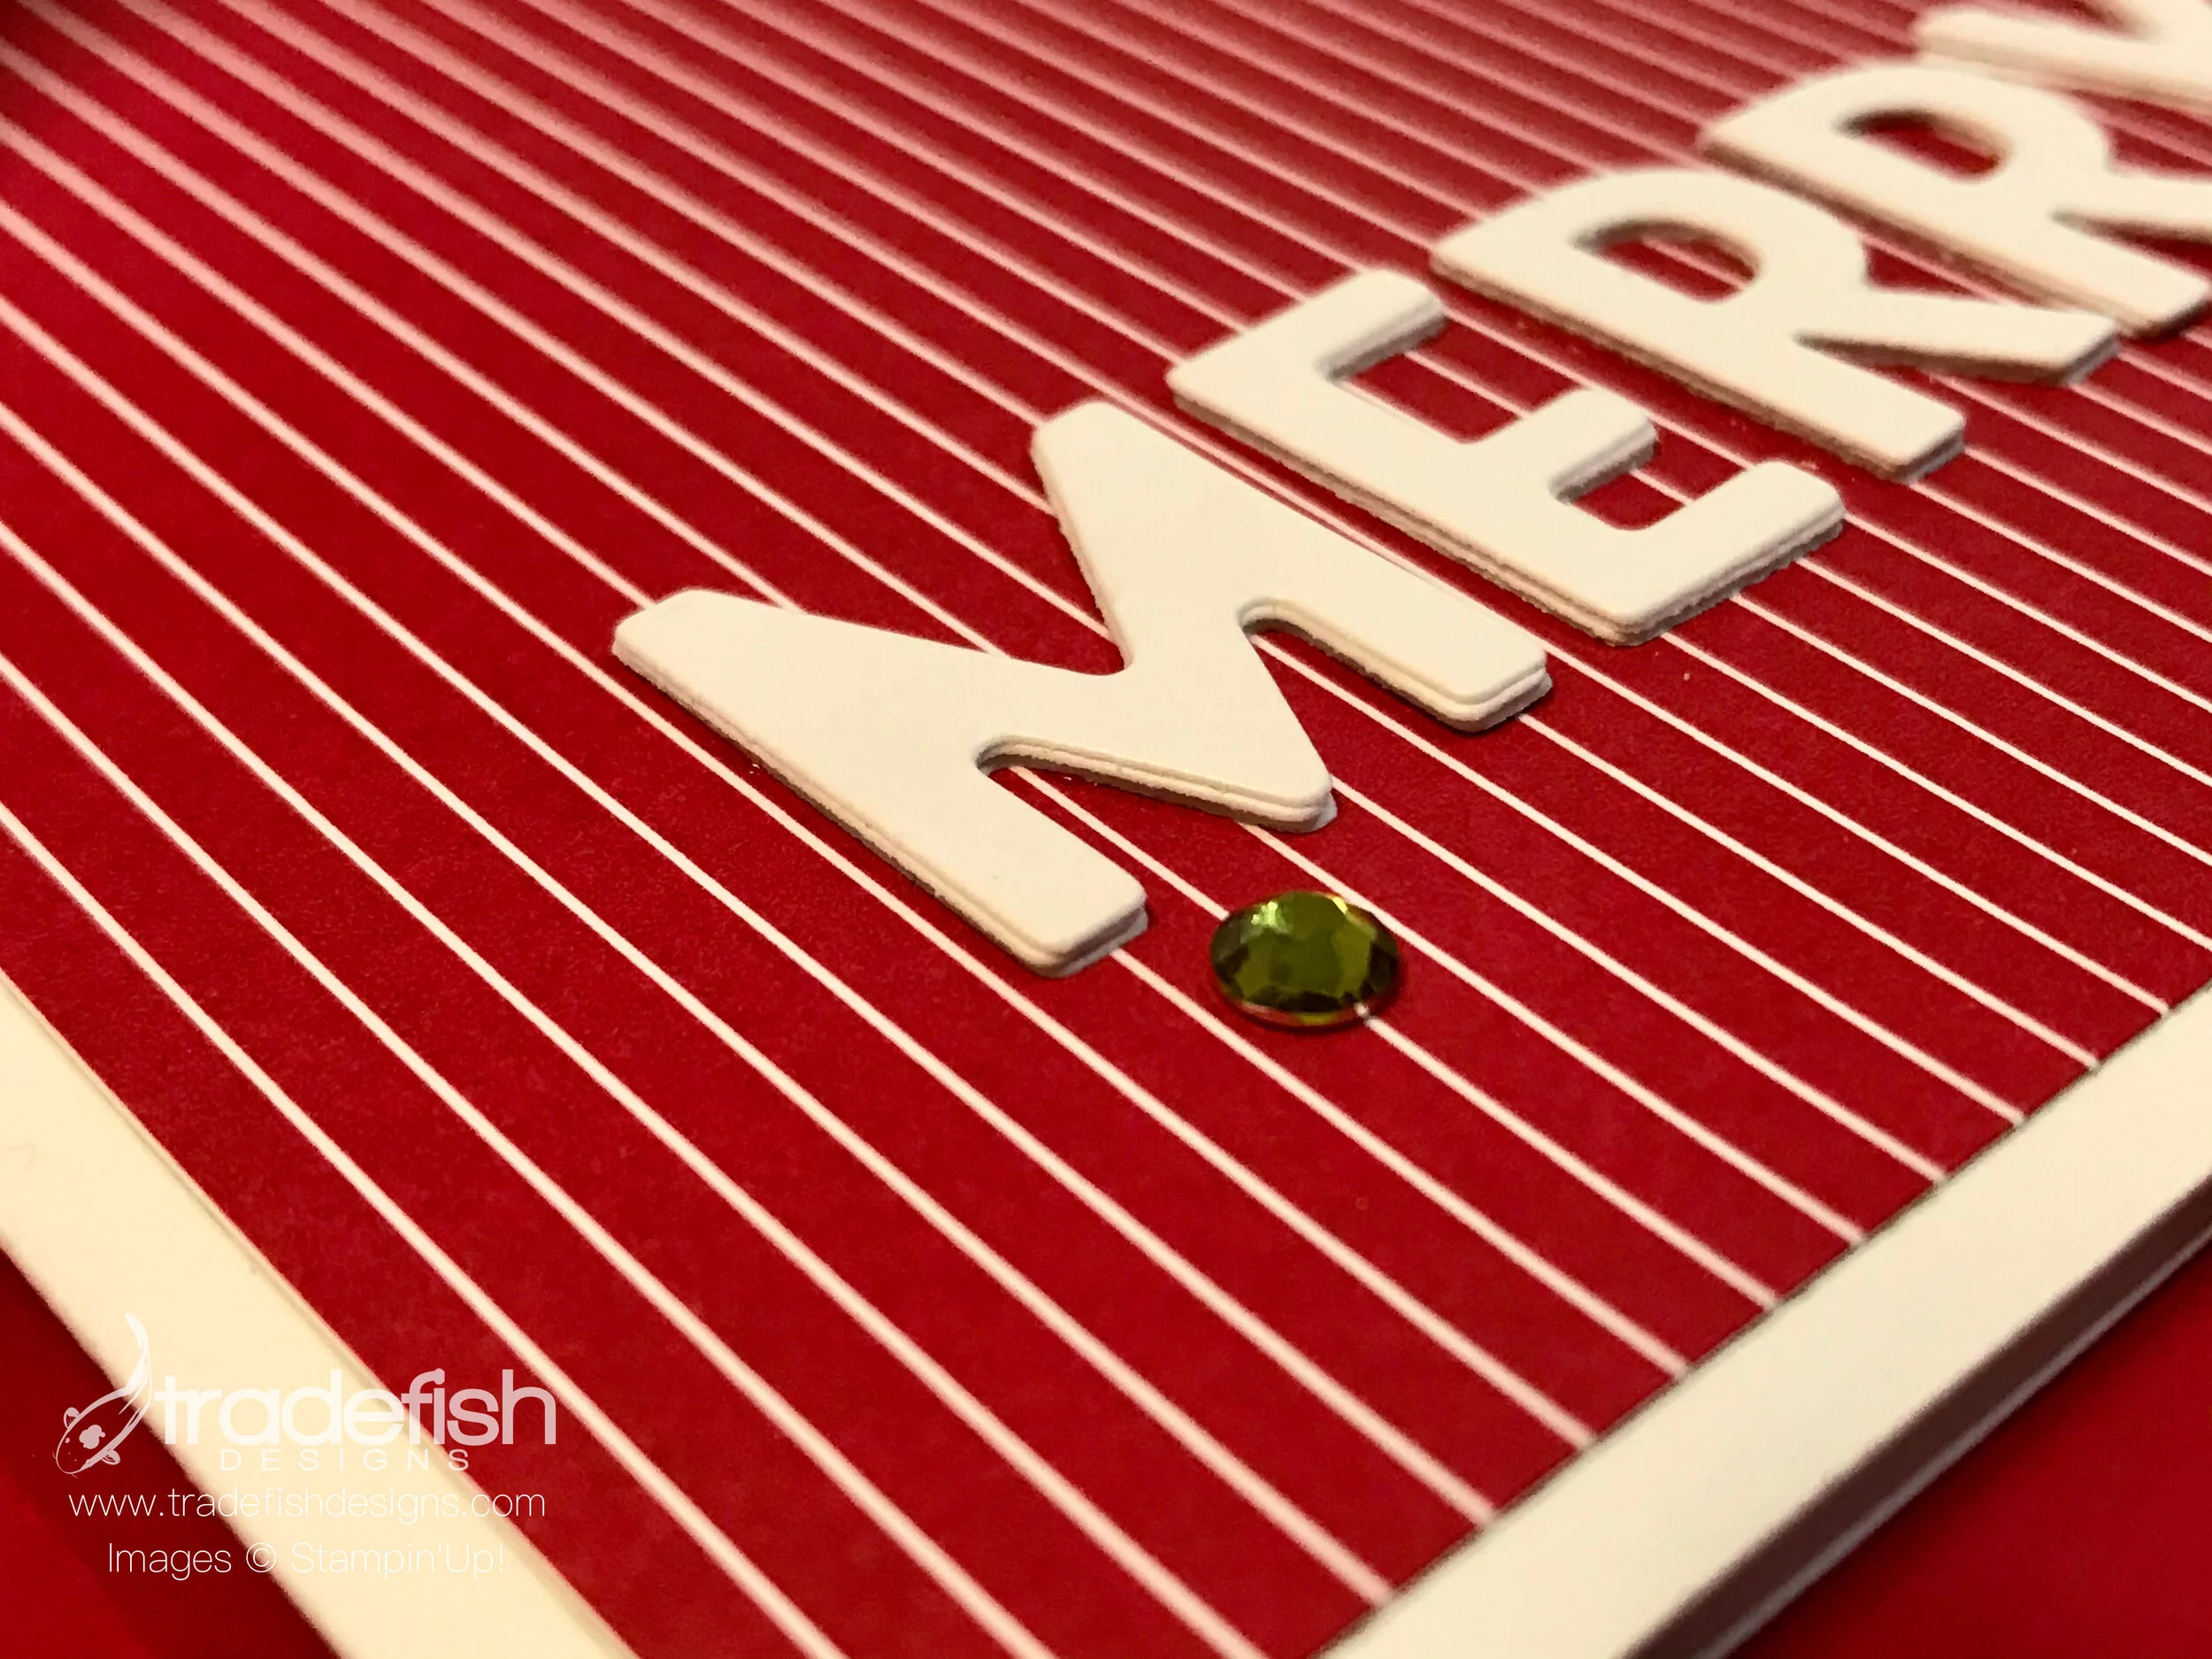
A Simple Merry
A simple Merry card using Stampin’ Up’s Playful Alphabet, Heartwarming Hugs Designer Series Paper and some Noble Peacock Rhinestones.
I love the simplicity of this card! I used the Playful Alphabet dies, some basic Designer Series Paper and some Noble Peacock Rhinestones and voila, the card is done. I will be doing many more of these cards. I find my favorite cards are always the ones that are clean and simple.

The angle photo shows the dimension I achieved by stacking and adhering the individual letters 4 times. This takes a little time but the effect is worth it. If you have dimensional/foam adhesive or even fun foam from the craft store you can get the same effect. Don’t be afraid to keep it simple.

I hope you enjoyed my card today. If you are interested in any of the items I used in this project please check out the Product List below. Pleases note that some items may be no longer available depending upon when you see this post – if that’s the case, feel free to substitute items you may already have in your craft stash. Keep it crafty friends!
 |  Noble Peacock Rhinestones [149494] $5.50 | |


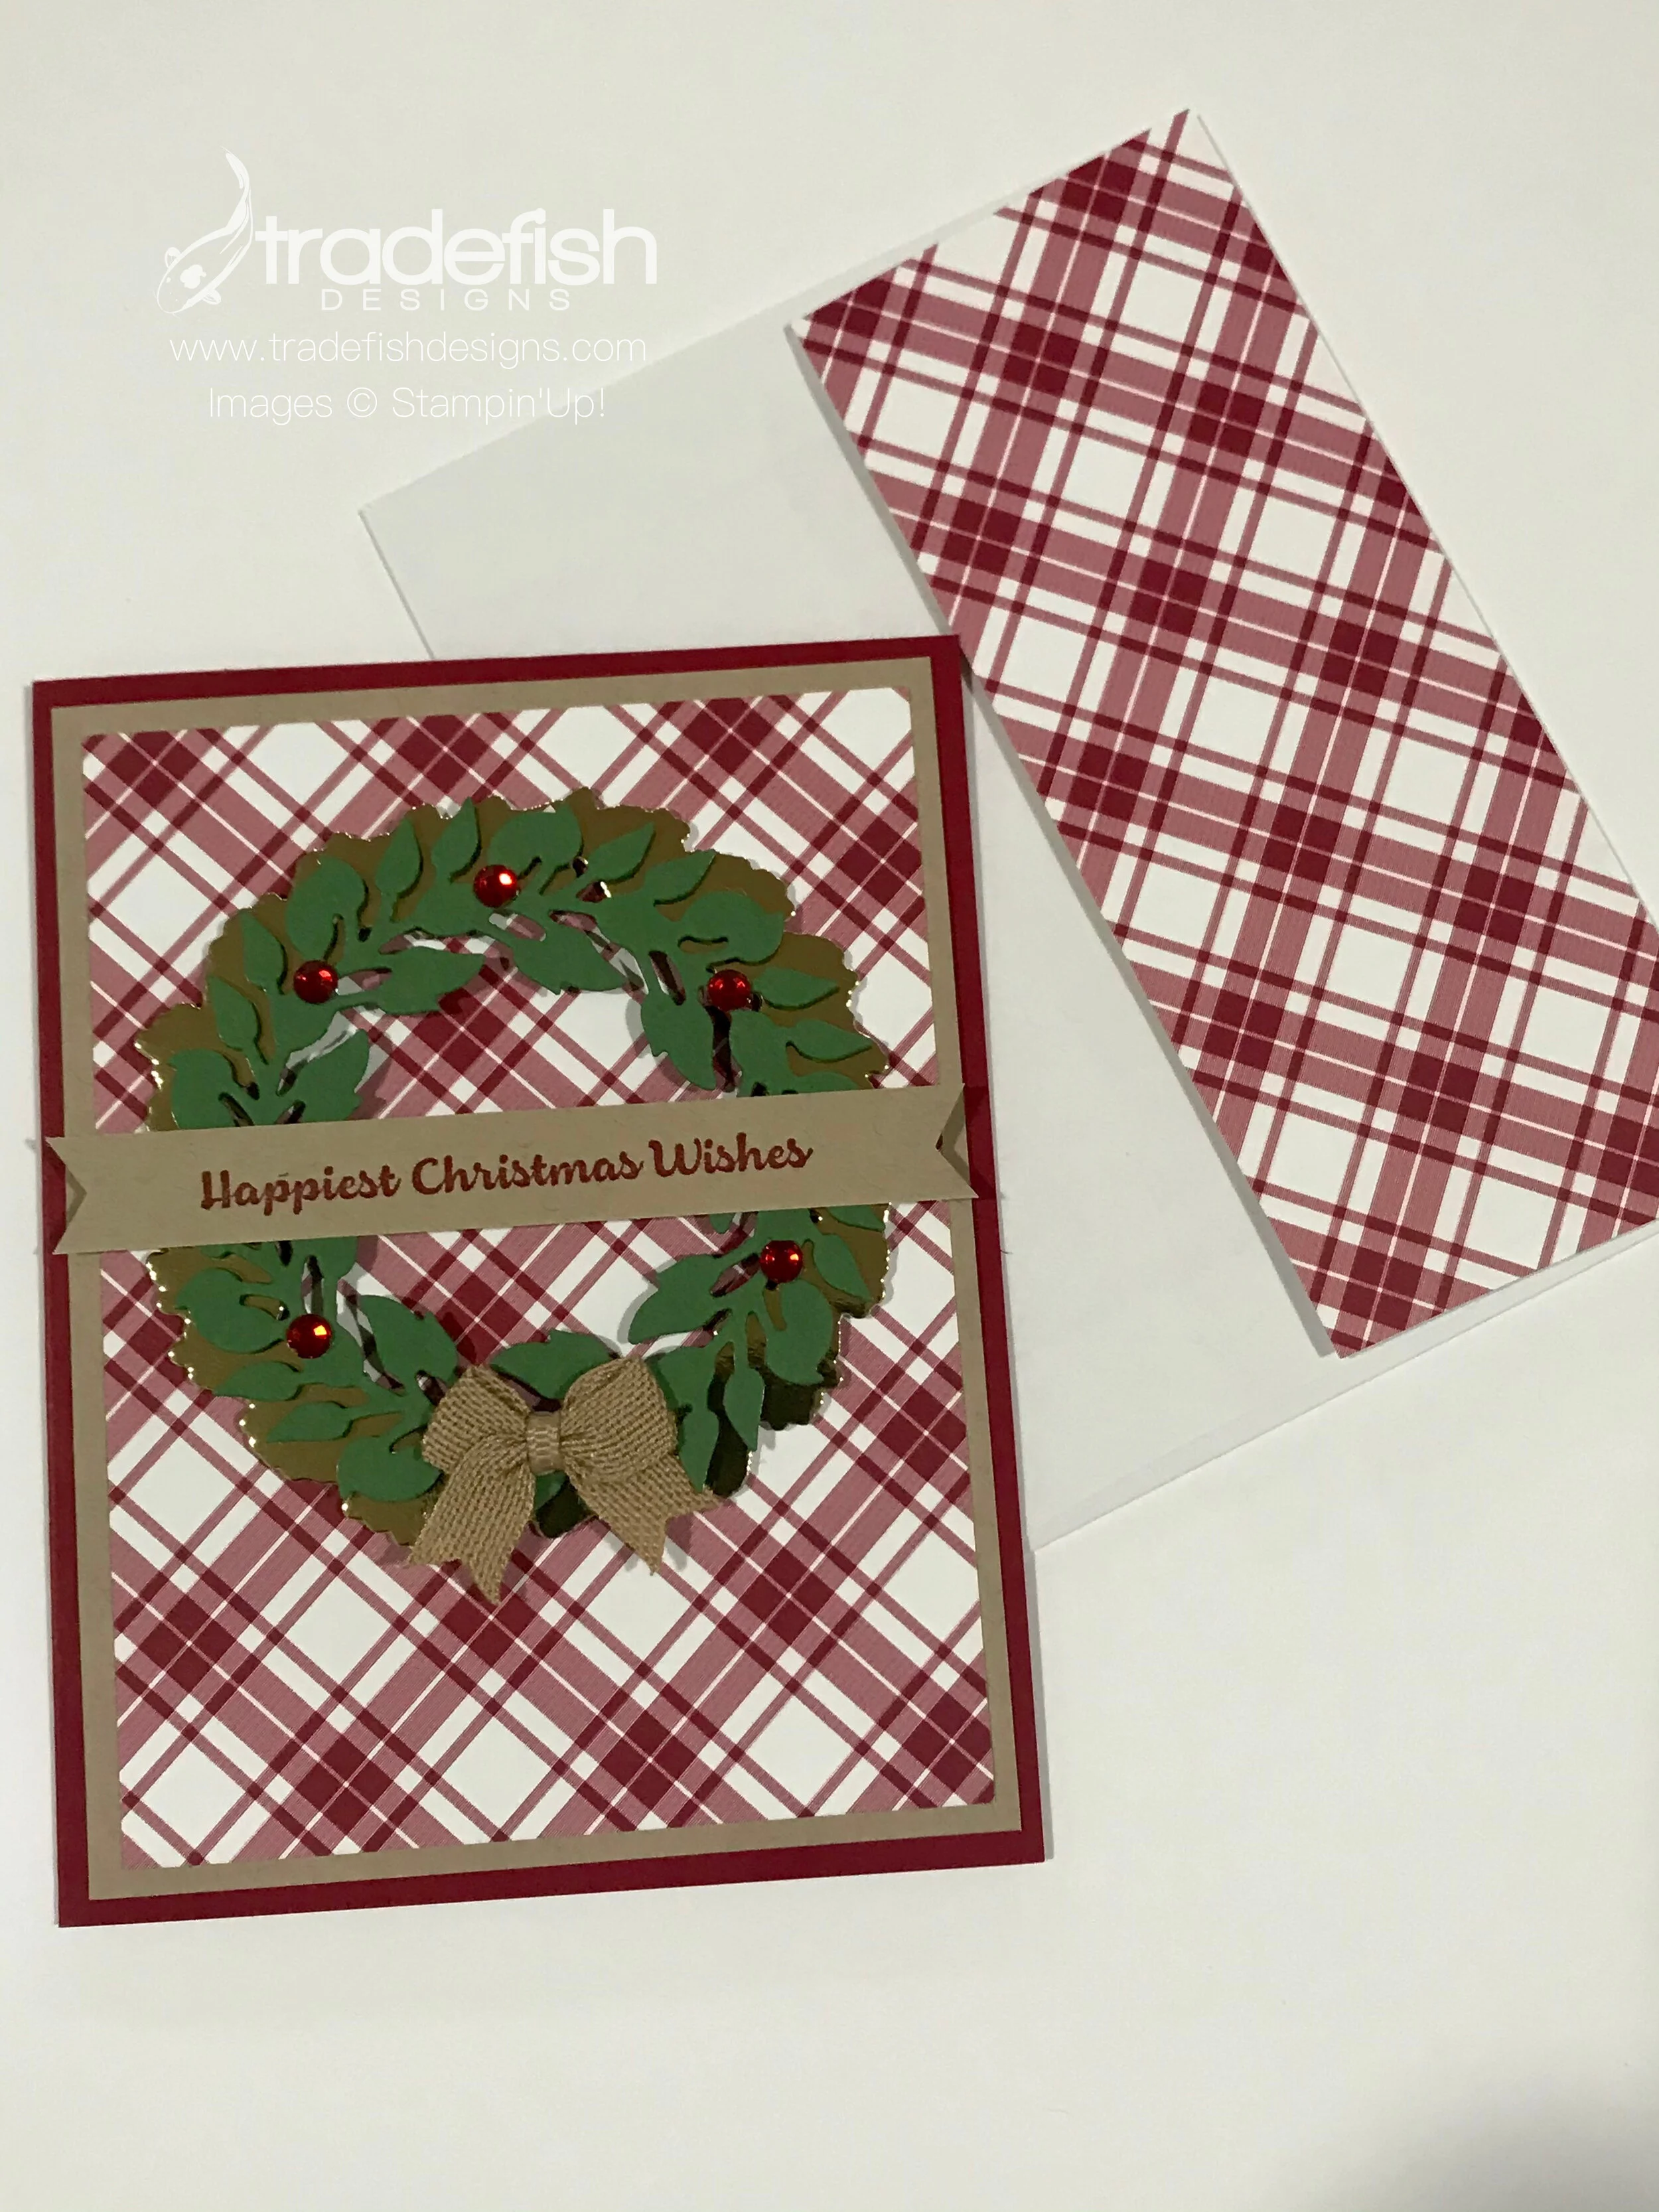
A Christmas Wreath for You!
A Christmas card and matching envelope using the All Around Wreath dies, Lots of Cheer Stamps, Plaid Tiding Designer Series Paper and the Mojo Monday Sketch #504.
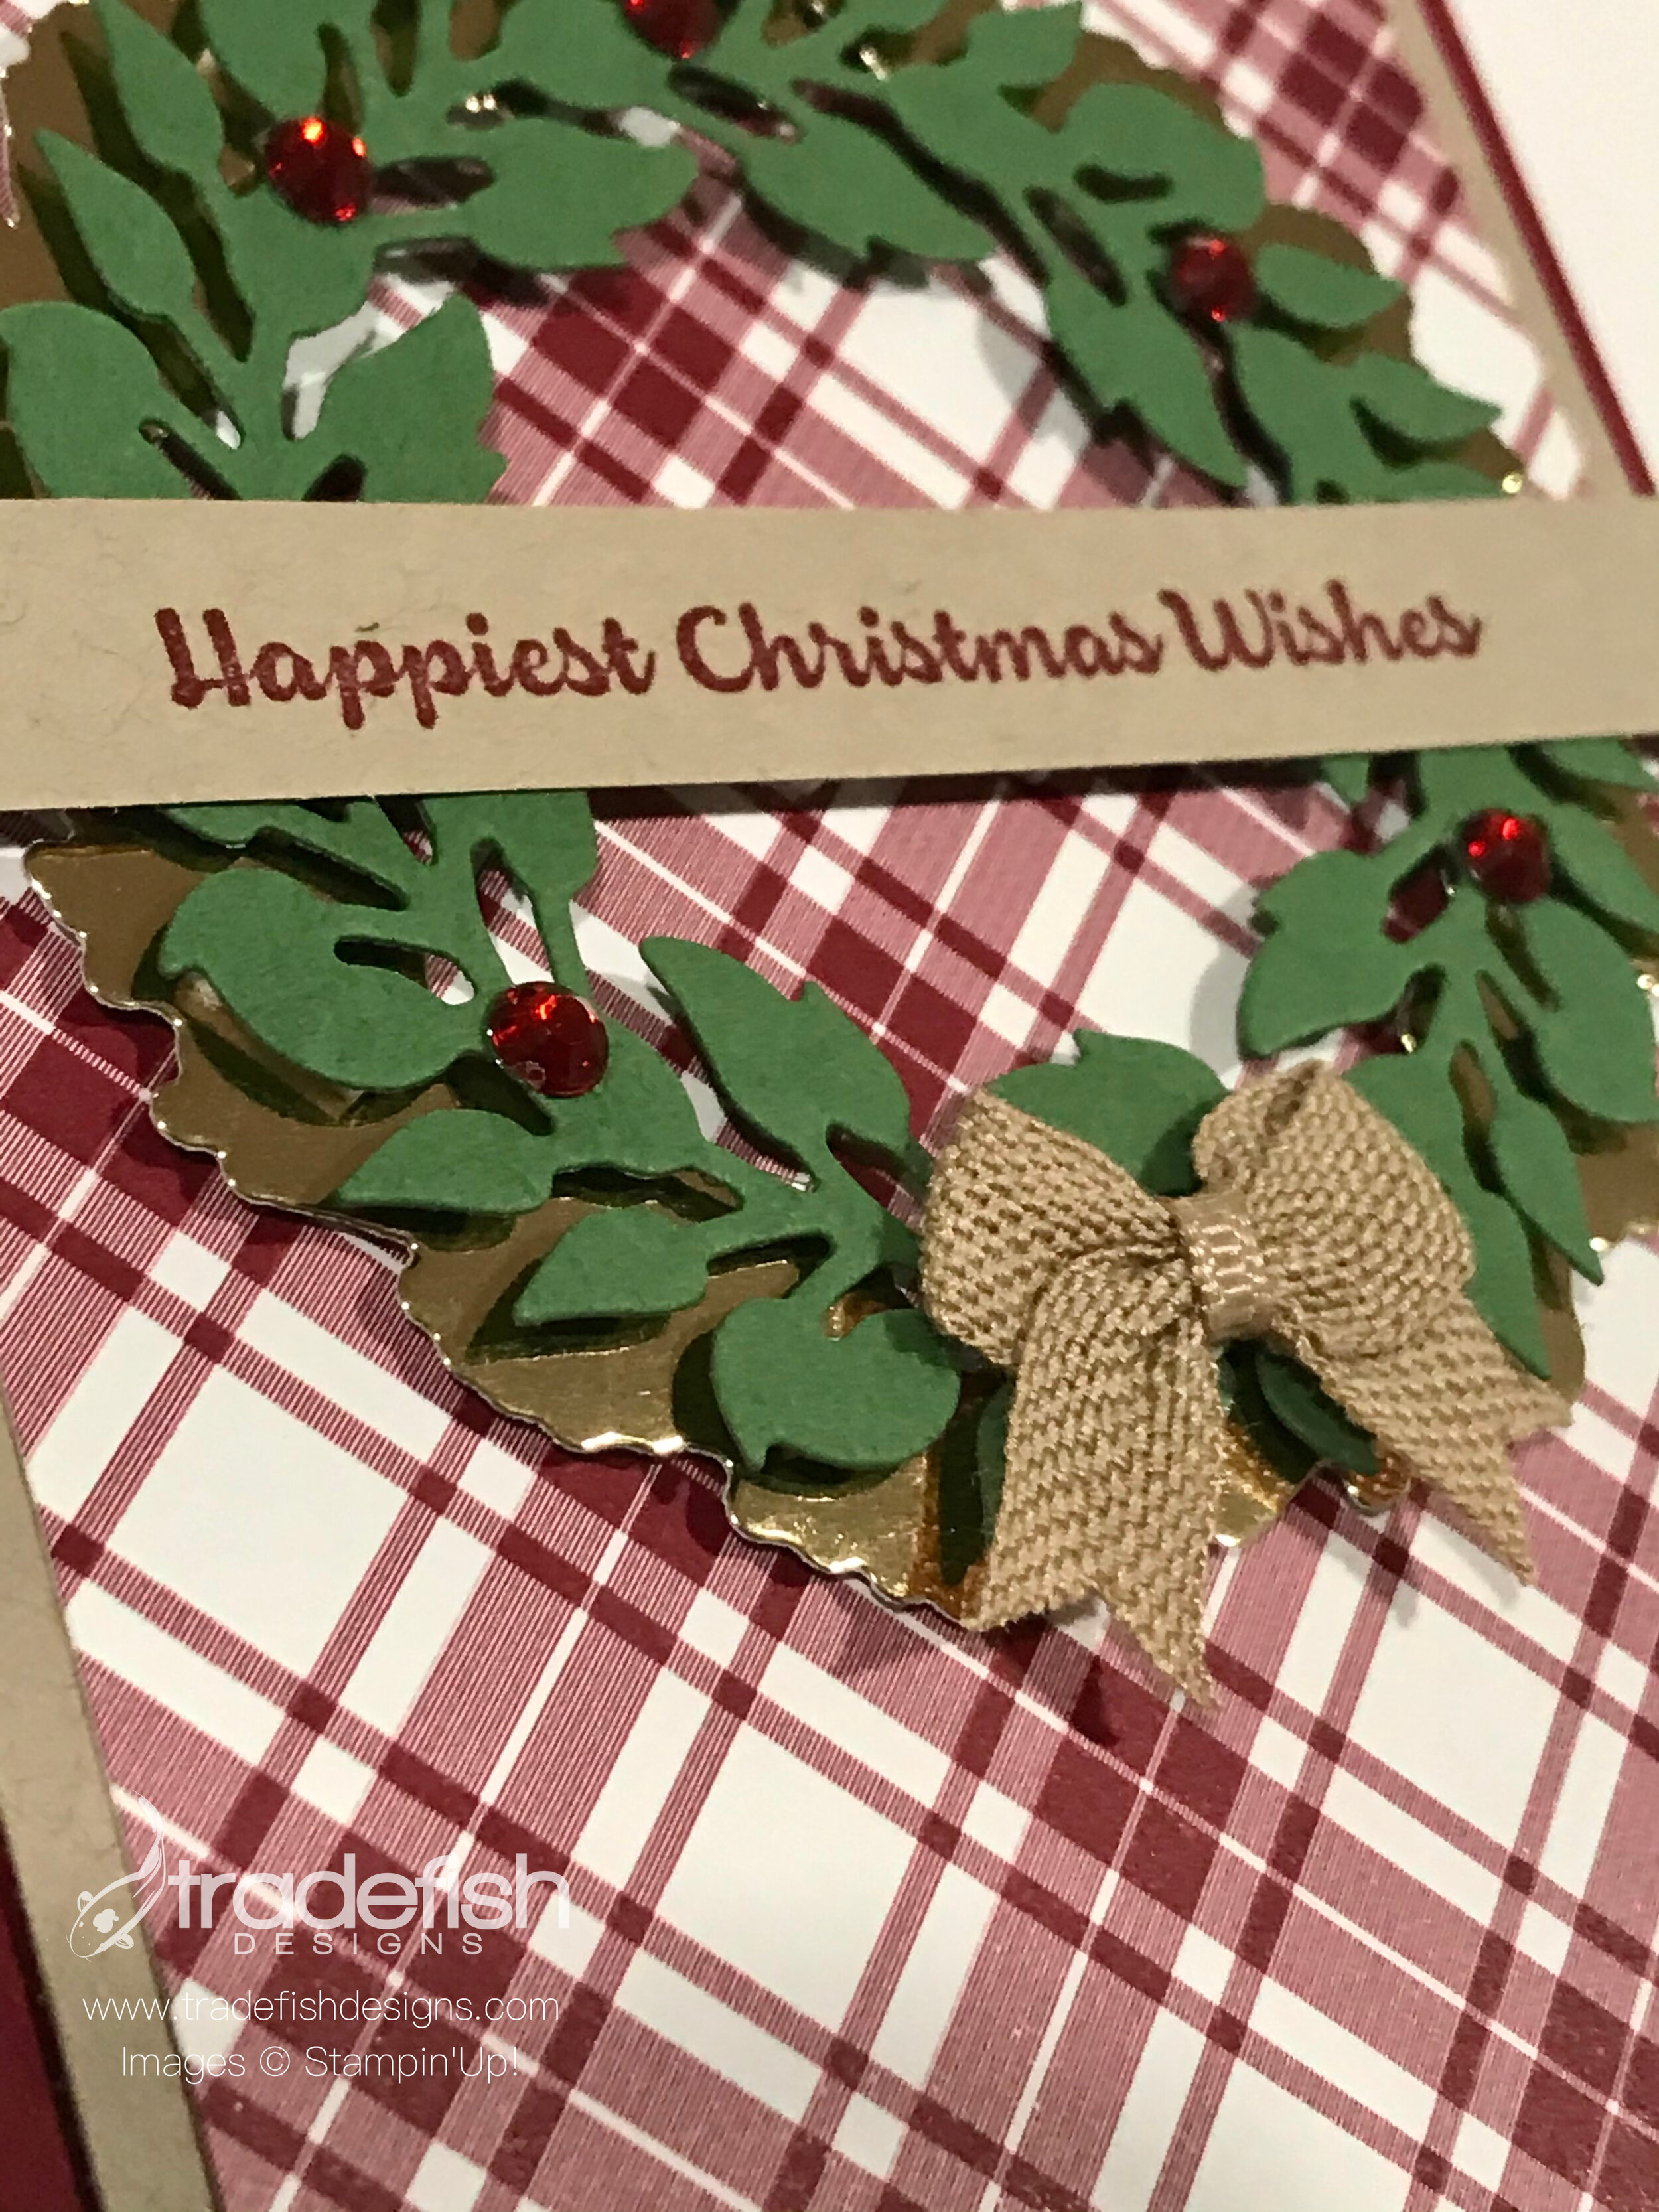
Here’s a fun card using more paper from the Plaid Tidings Designer Series Paper and the All Around Wreath dies. Don’t you love a good holiday plaid?

This card layout is based on a Mojo Monday Sketch (#504). The link for this sketch is below the sketch photo.

LINK to this card sketch.
My angle photo really makes the craft ribbon bow just pop! This is a fun bow I purchased in a set of 6 from Hobby Lobby. You can also make your own if you happen to be a good bow-tier…I’m not so when I saw this pre-done and with dimensional adhesive I was in heaven.
Remember peeps, no naked envelopes! Here I just threw some extra matching paper on the envelope flap. Easy-peasy.

I hope you enjoyed my card today. If you are interested in any of the items I used in this project please check out the Product List below. Pleases note that some items may be no longer available depending upon when you see this post – if that’s the case, feel free to substitute items you may already have in your craft stash. Keep it crafty friends!

 Lots Of Cheer Cling Stamp Set [149503] $20.00 | ||||
 |  |  | ||
| |  | |


A Frosty Christmas Card for you (and it's a gift card holder too!)
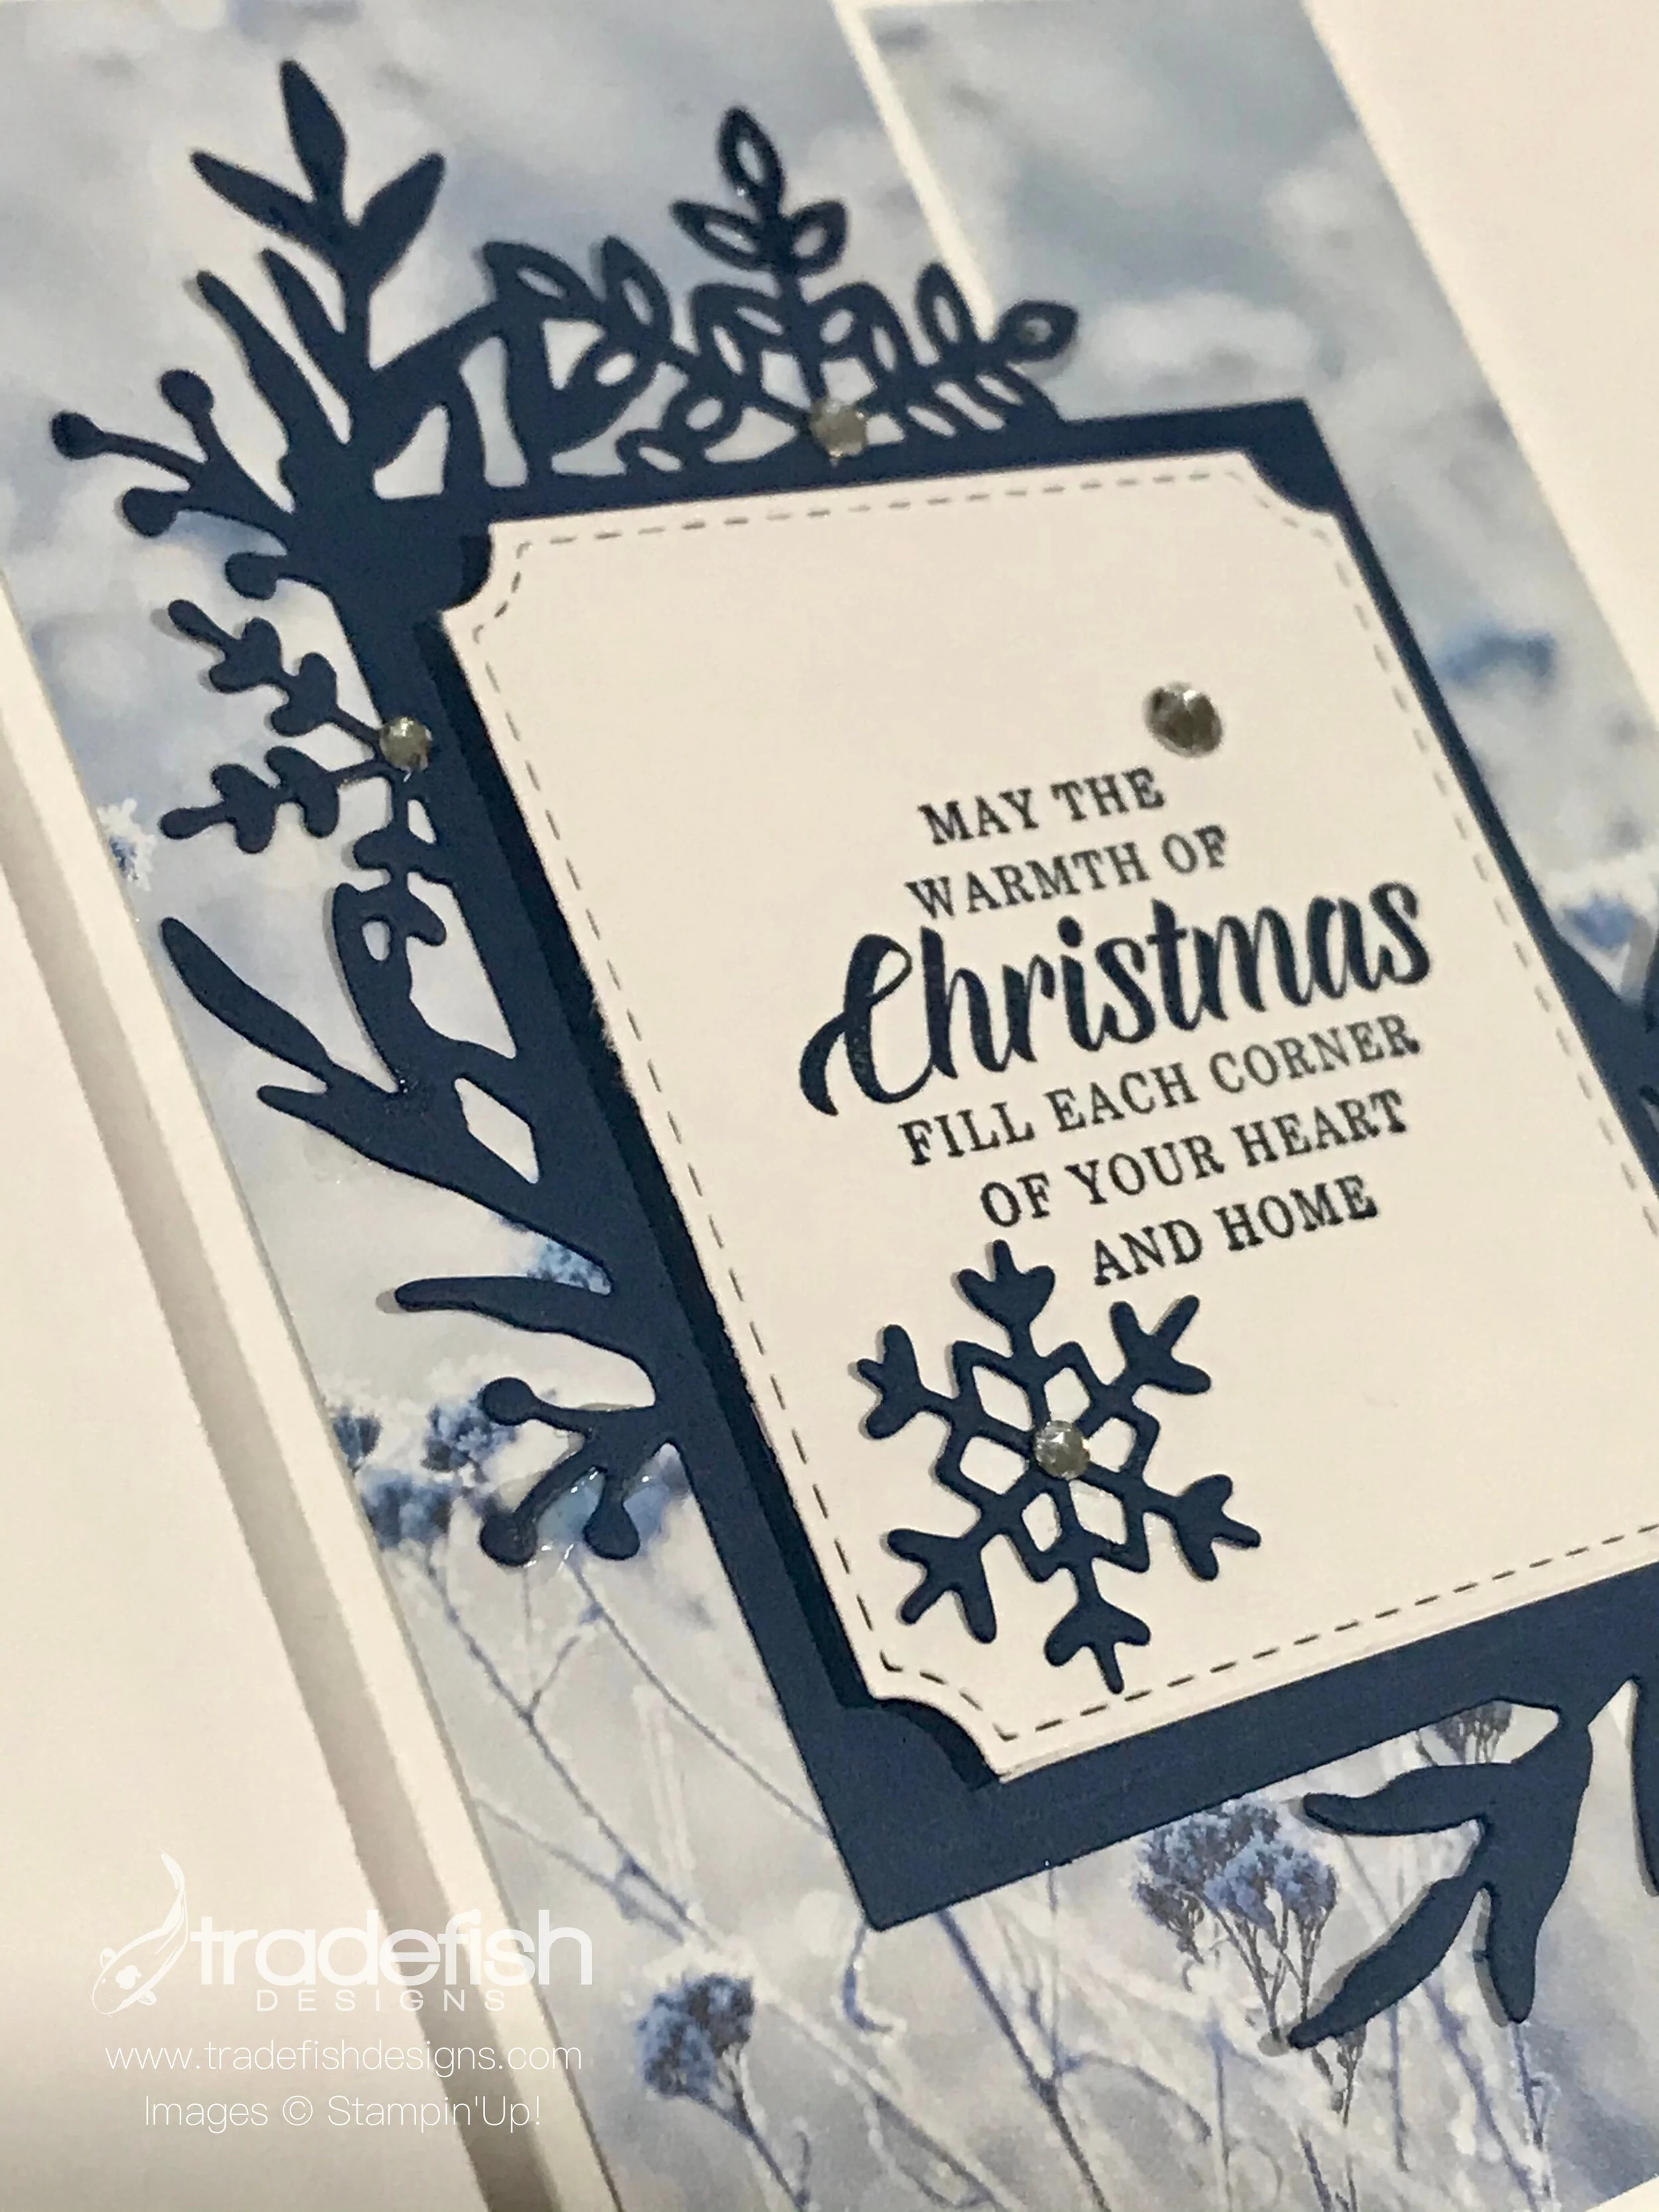
A frosty Christmas card that doubles as a gift card holder using Feels Like Frost paper, Frosted Frames and Timeless Tidings stamps.
It’s another holiday card on the blog. Remember, all November posts will feature holiday/Christmas cards to inspire you to break out your stash of holiday stamps, papers and embellishments and get crafty. Today’s card uses the Feels Like Frost Designer Series Paper again and the fun Frosted Frames dies. Hint: there will be many more cards featuring the Feels Like Frost paper…you’ve be warned!
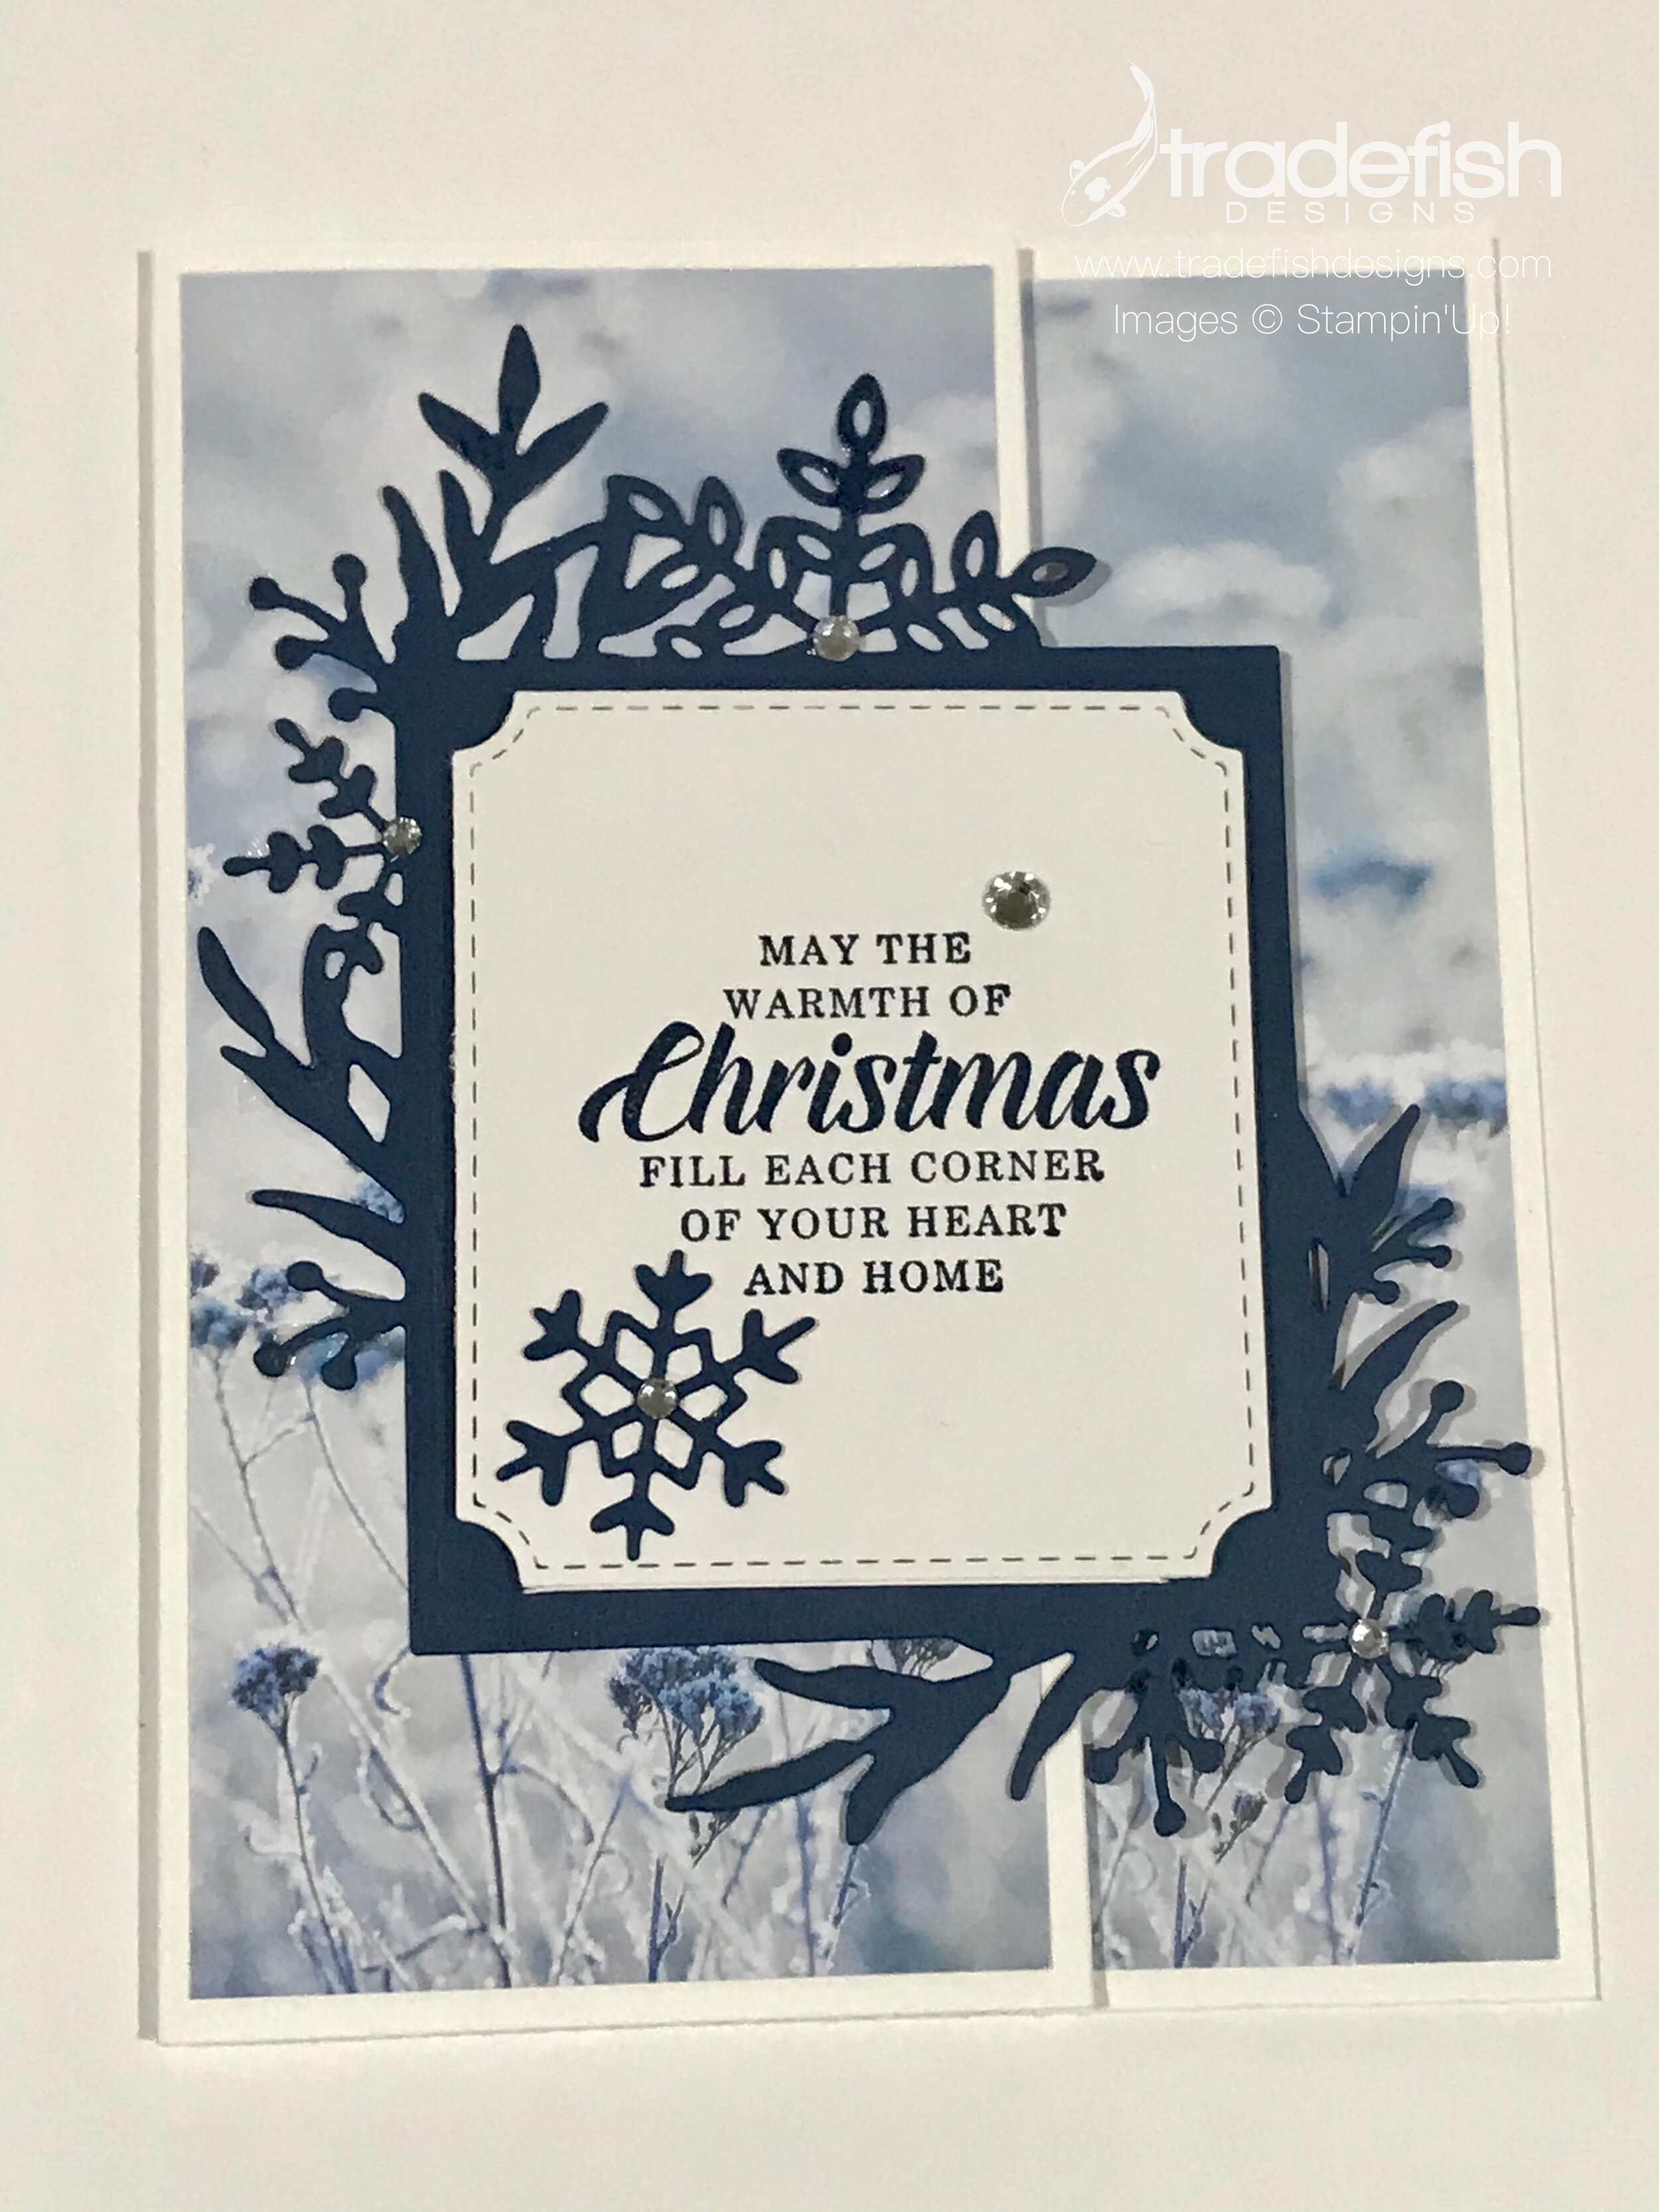
The sentiment is taken from a retired stamp set, but you can substitute anything you want. This doesn’t have to be a Christmas card either…it could be a winter thank you card…you decide. The angle shot on my cards is a way to show off the dimension of the card but it also makes you look at a card differently. You can really see the details that you often miss when putting it together. I love the stitching from the die on the Whisper White paper that contrasts with the frame in Night of Navy. And who doesn’t love a good basic rhinestone!

The inside of this card is designed with a pocket on the left hand side that can hold a gift card. I may send this to my son who will not be home for Christmas this year. He is an officer in the Coast Guard and will likely be onboard his ship somewhere in the Pacific Ocean.

I hope you enjoyed my card today. If you are interested in any of the items I used in this project please check out the Product List below. Pleases note that some items may be no longer available depending upon when you see this post – if that’s the case, feel free to substitute items you may already have in your craft stash. Keep it crafty friends!
 |  | | |  |

 Designer Series Paper")

Let's start making those holiday cards my crafty friends!
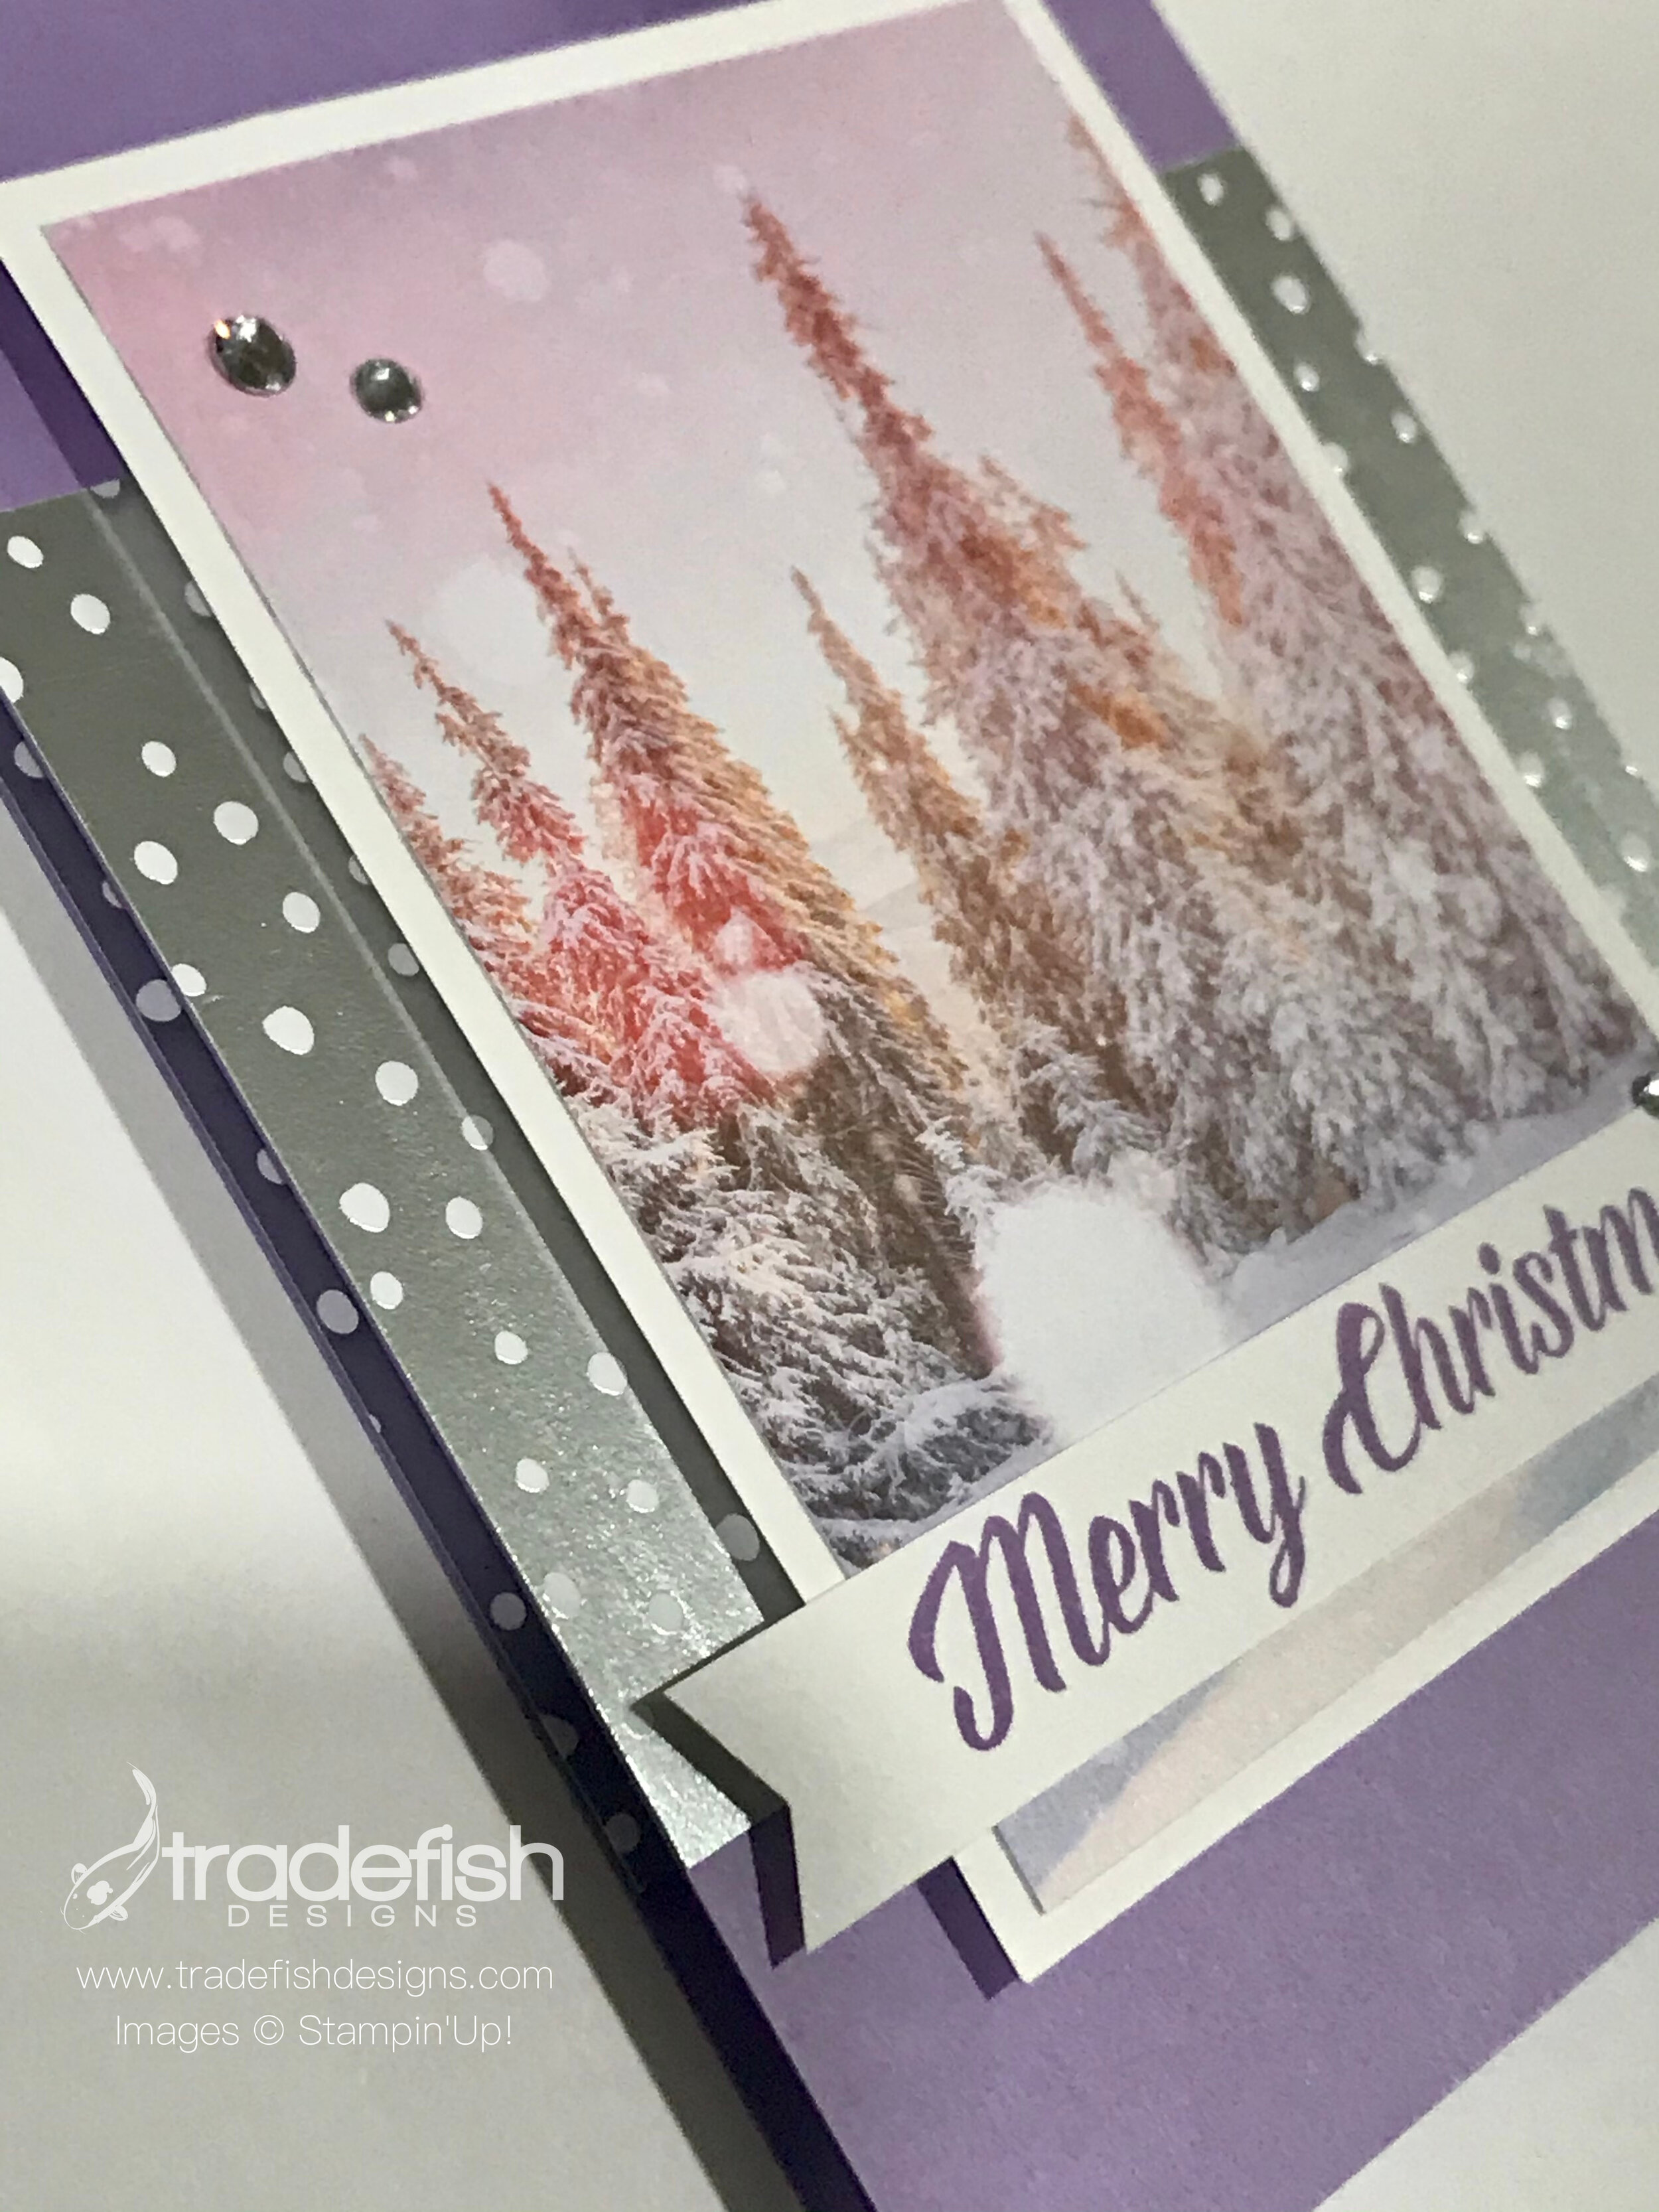
A Christmas card using the non-traditional color of Highland Heather and Feels Like Frost Designer Series Paper.
Welcome to November my crafty friends! I have to admit it does not feel like we are entering into the holiday season. It has been quite a year. In an effort to move me along toward Christmas, every post this month will feature a Christmas card. I hope to not only inspire you to create your own holiday cards but to finish up all my Christmas cards. I traditionally send them out after Thanksgiving to friends and family.
Here’s a Christmas card using the non-traditional colors of white, silver and Highland Heather. This Feels Like Frost Designer Series Speciality Paper will be highlighted throughout the month because (1) it’s just too beautiful not to share and (2) I have a bunch of it and don’t want to be a paper hoarder.

One of the best things about this speciality paper is that one side is a photo of an outdoor wintery scene while the other side features a silver and white design. I added some pretty rhinestones to mimic the snowfall and a simple sentiment in Highland Heather to finish off this super simple but beautiful card.

The inside of the card coordinates with the look of the front leaving plenty of room for a holiday message.

I hope you enjoyed my card today. If you are interested in any of the items I used in this project please check out the Product List below. Pleases note that some items may be no longer available depending upon when you see this post – if that’s the case, feel free to substitute items you may already have in your craft stash. Keep it crafty friends!
| | | |


