
Happy Birthday Aliza!
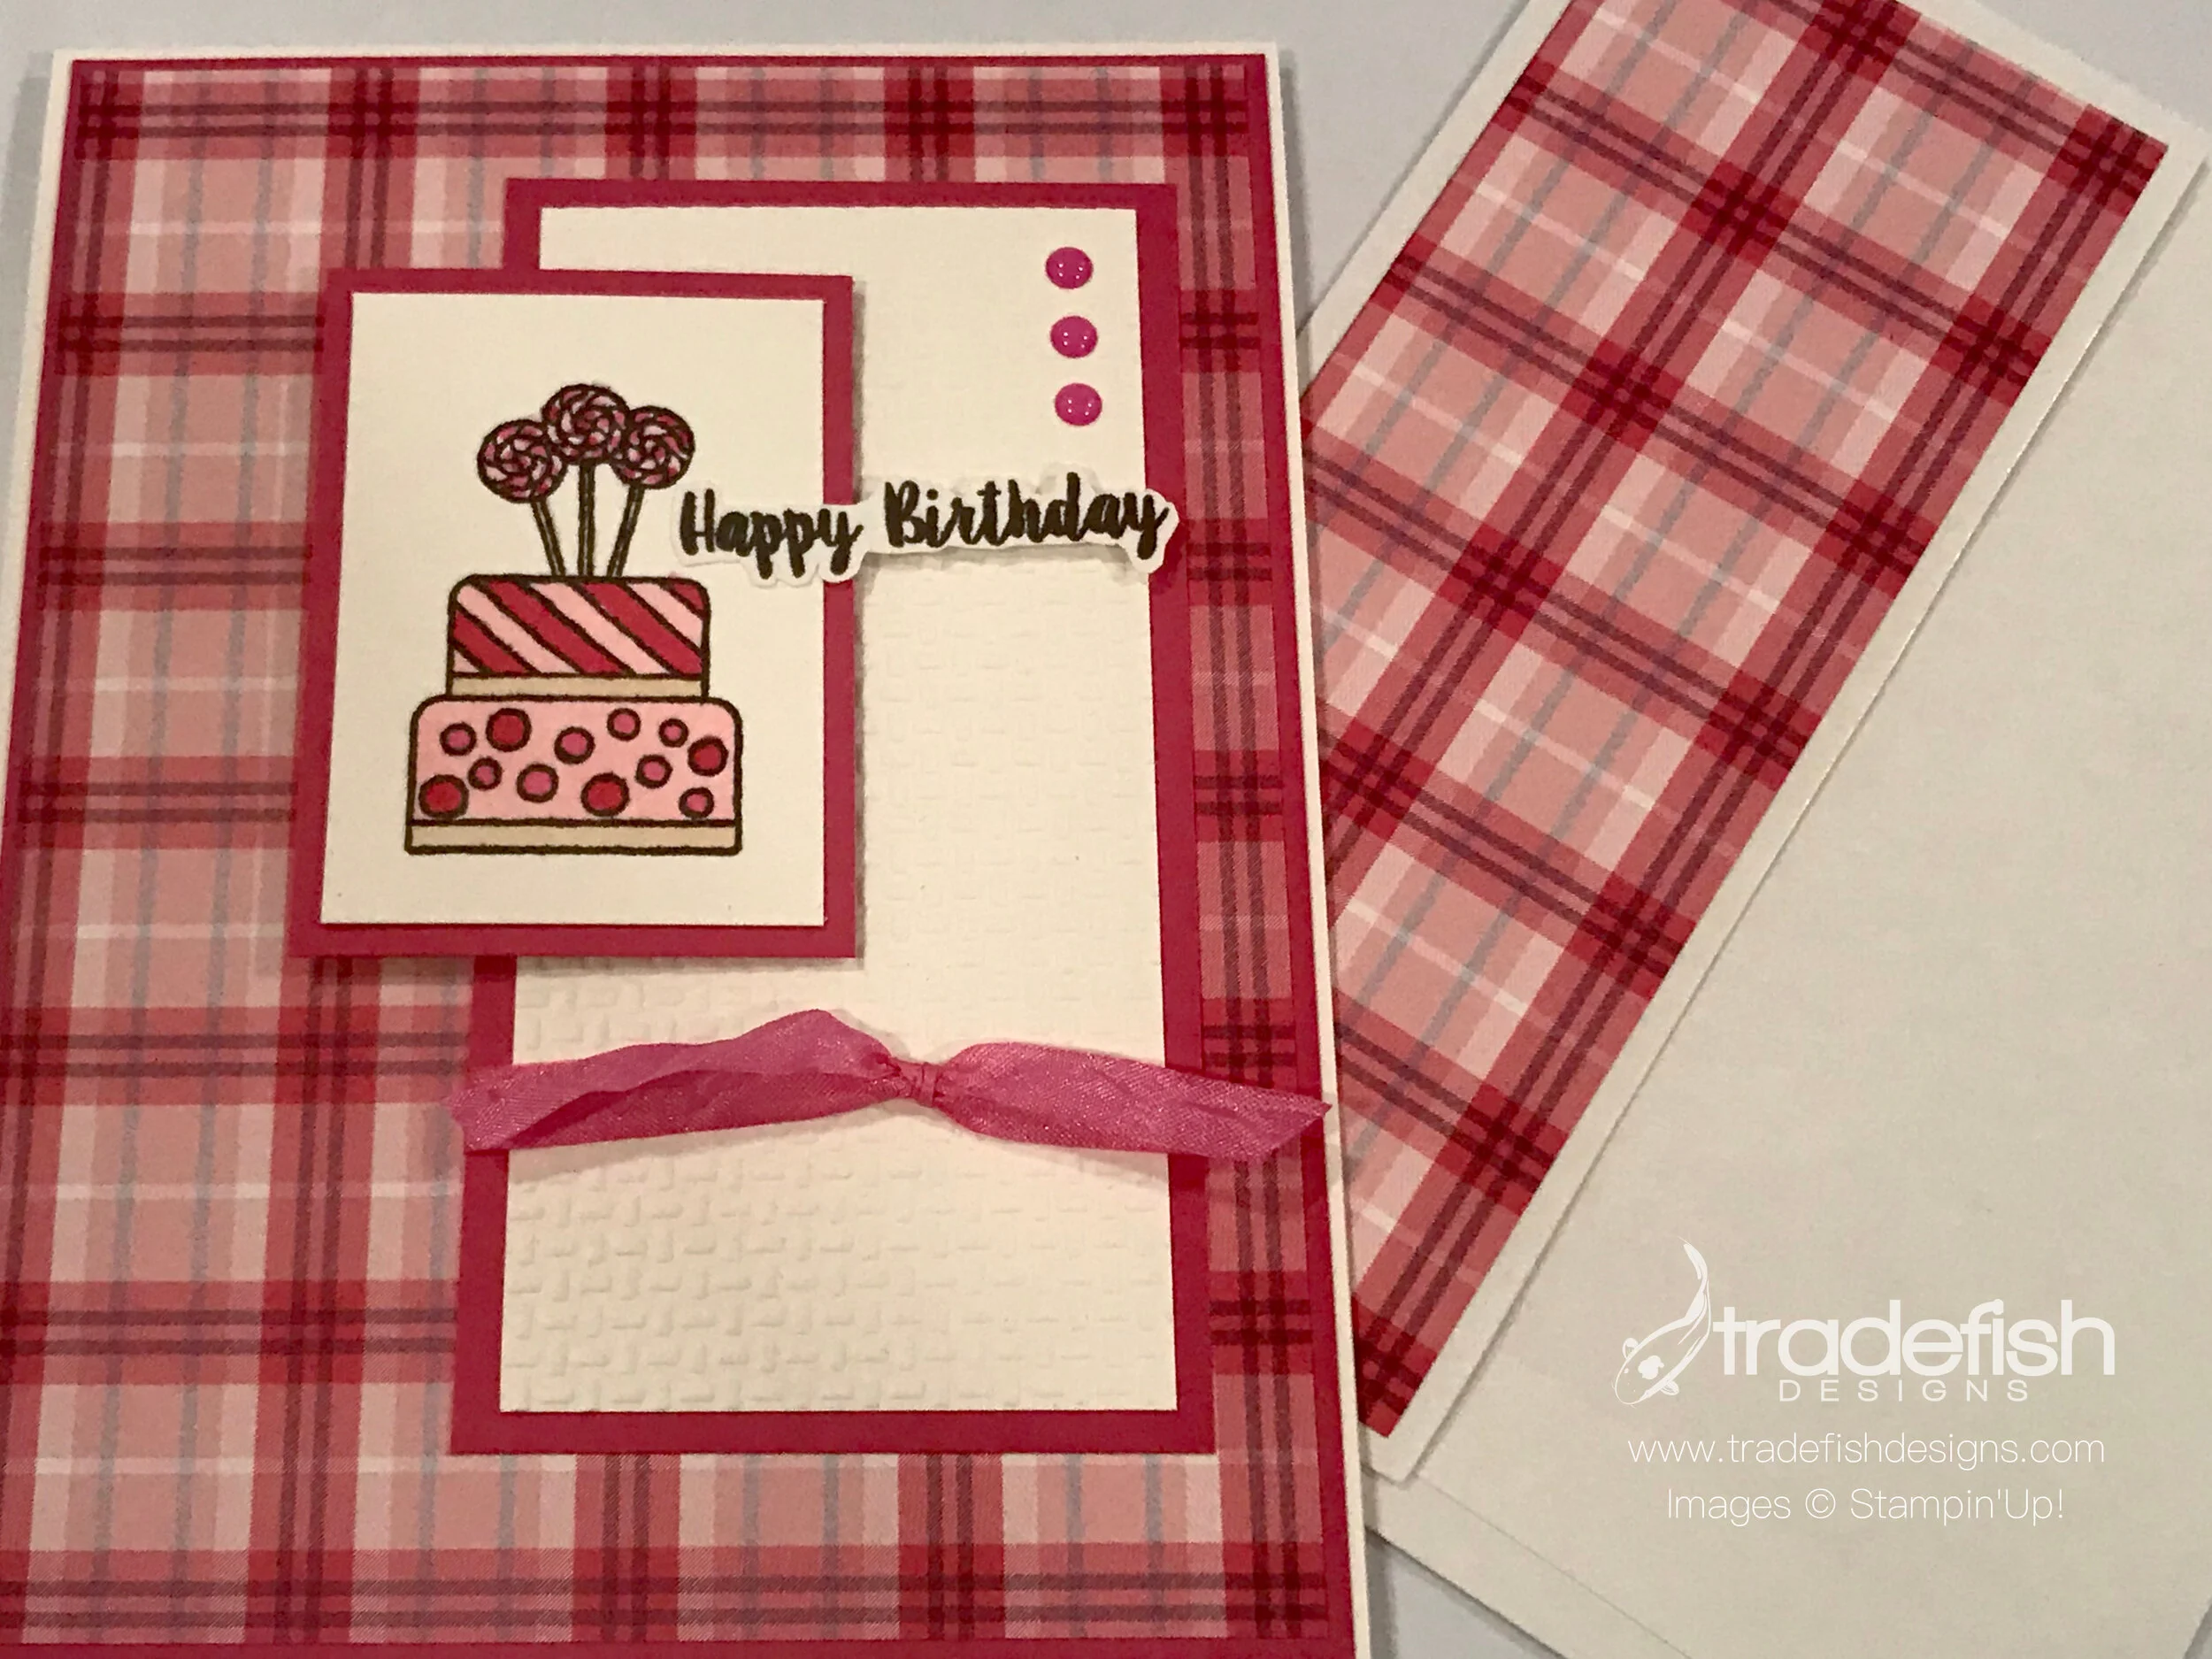
A pretty pink plaid birthday card using Stampin' Up products Plaid Tidings, Piece of Cake, Stampin' Blends, Wrapped in Texture, In Color Enamel Dots and Crinkled Seam Binding Ribbon. This card also uses a sketch from Operation Write Home.
This weekend my neighbor Aliza turned 5 years old! It has been a very exciting week leading up to the big day. It was announced every day to me in the backyard over the fence so I wouldn’t forget. She was going to the beach for the weekend to celebrate. I know she, her parents, and her big brother Trace had a wonderful time. In honor of her birthday I created this simple, but fun, card in her favorite color…PINK!

I used a sketch from Operation Write Home as a foundation but did a little free-lancing. I used some pink plaid, and why wouldn’t you for a 5 year old girl’s birthday card, and some cool enamel dots in, you guessed it, pink!

The angle in this photo highlights the dimension I achieved using one of the Wrapped in Texture embossing folders as well as shows off the coloring I did using Stampin’ Blends. Don’t forget the fussy-cutting on did on the Happy Birthday sentiment. Only the best for Aliza!

I also used my Melon Mambo Stampin’ Blend (light) to color the Whisper White Crinkled Seam Ribbon pink to coordinate with the card. And I always insist on a coordinating envelope. Here I used some of the excess designer paper and added it to the flap of the envelope. Don’t tell Aliza, but I’m adding five-one dollar bills in the card…one for each year. I can’t wait to give it to her!

I hope you enjoyed my card today. If you are interested in any of the items I used in this project please check out the Product List below. Pleases note that some items may be no longer available depending upon when you see this post – if that’s the case, feel free to substitute items you may already have in your craft stash. Keep it crafty friends!
 Piece Of Cake Photopolymer Stamp Set [148610] $17.00 |  | |||
 | ||||
 |  |
 Designer Series Paper")


 Crinkled Seam Binding Ribbon")

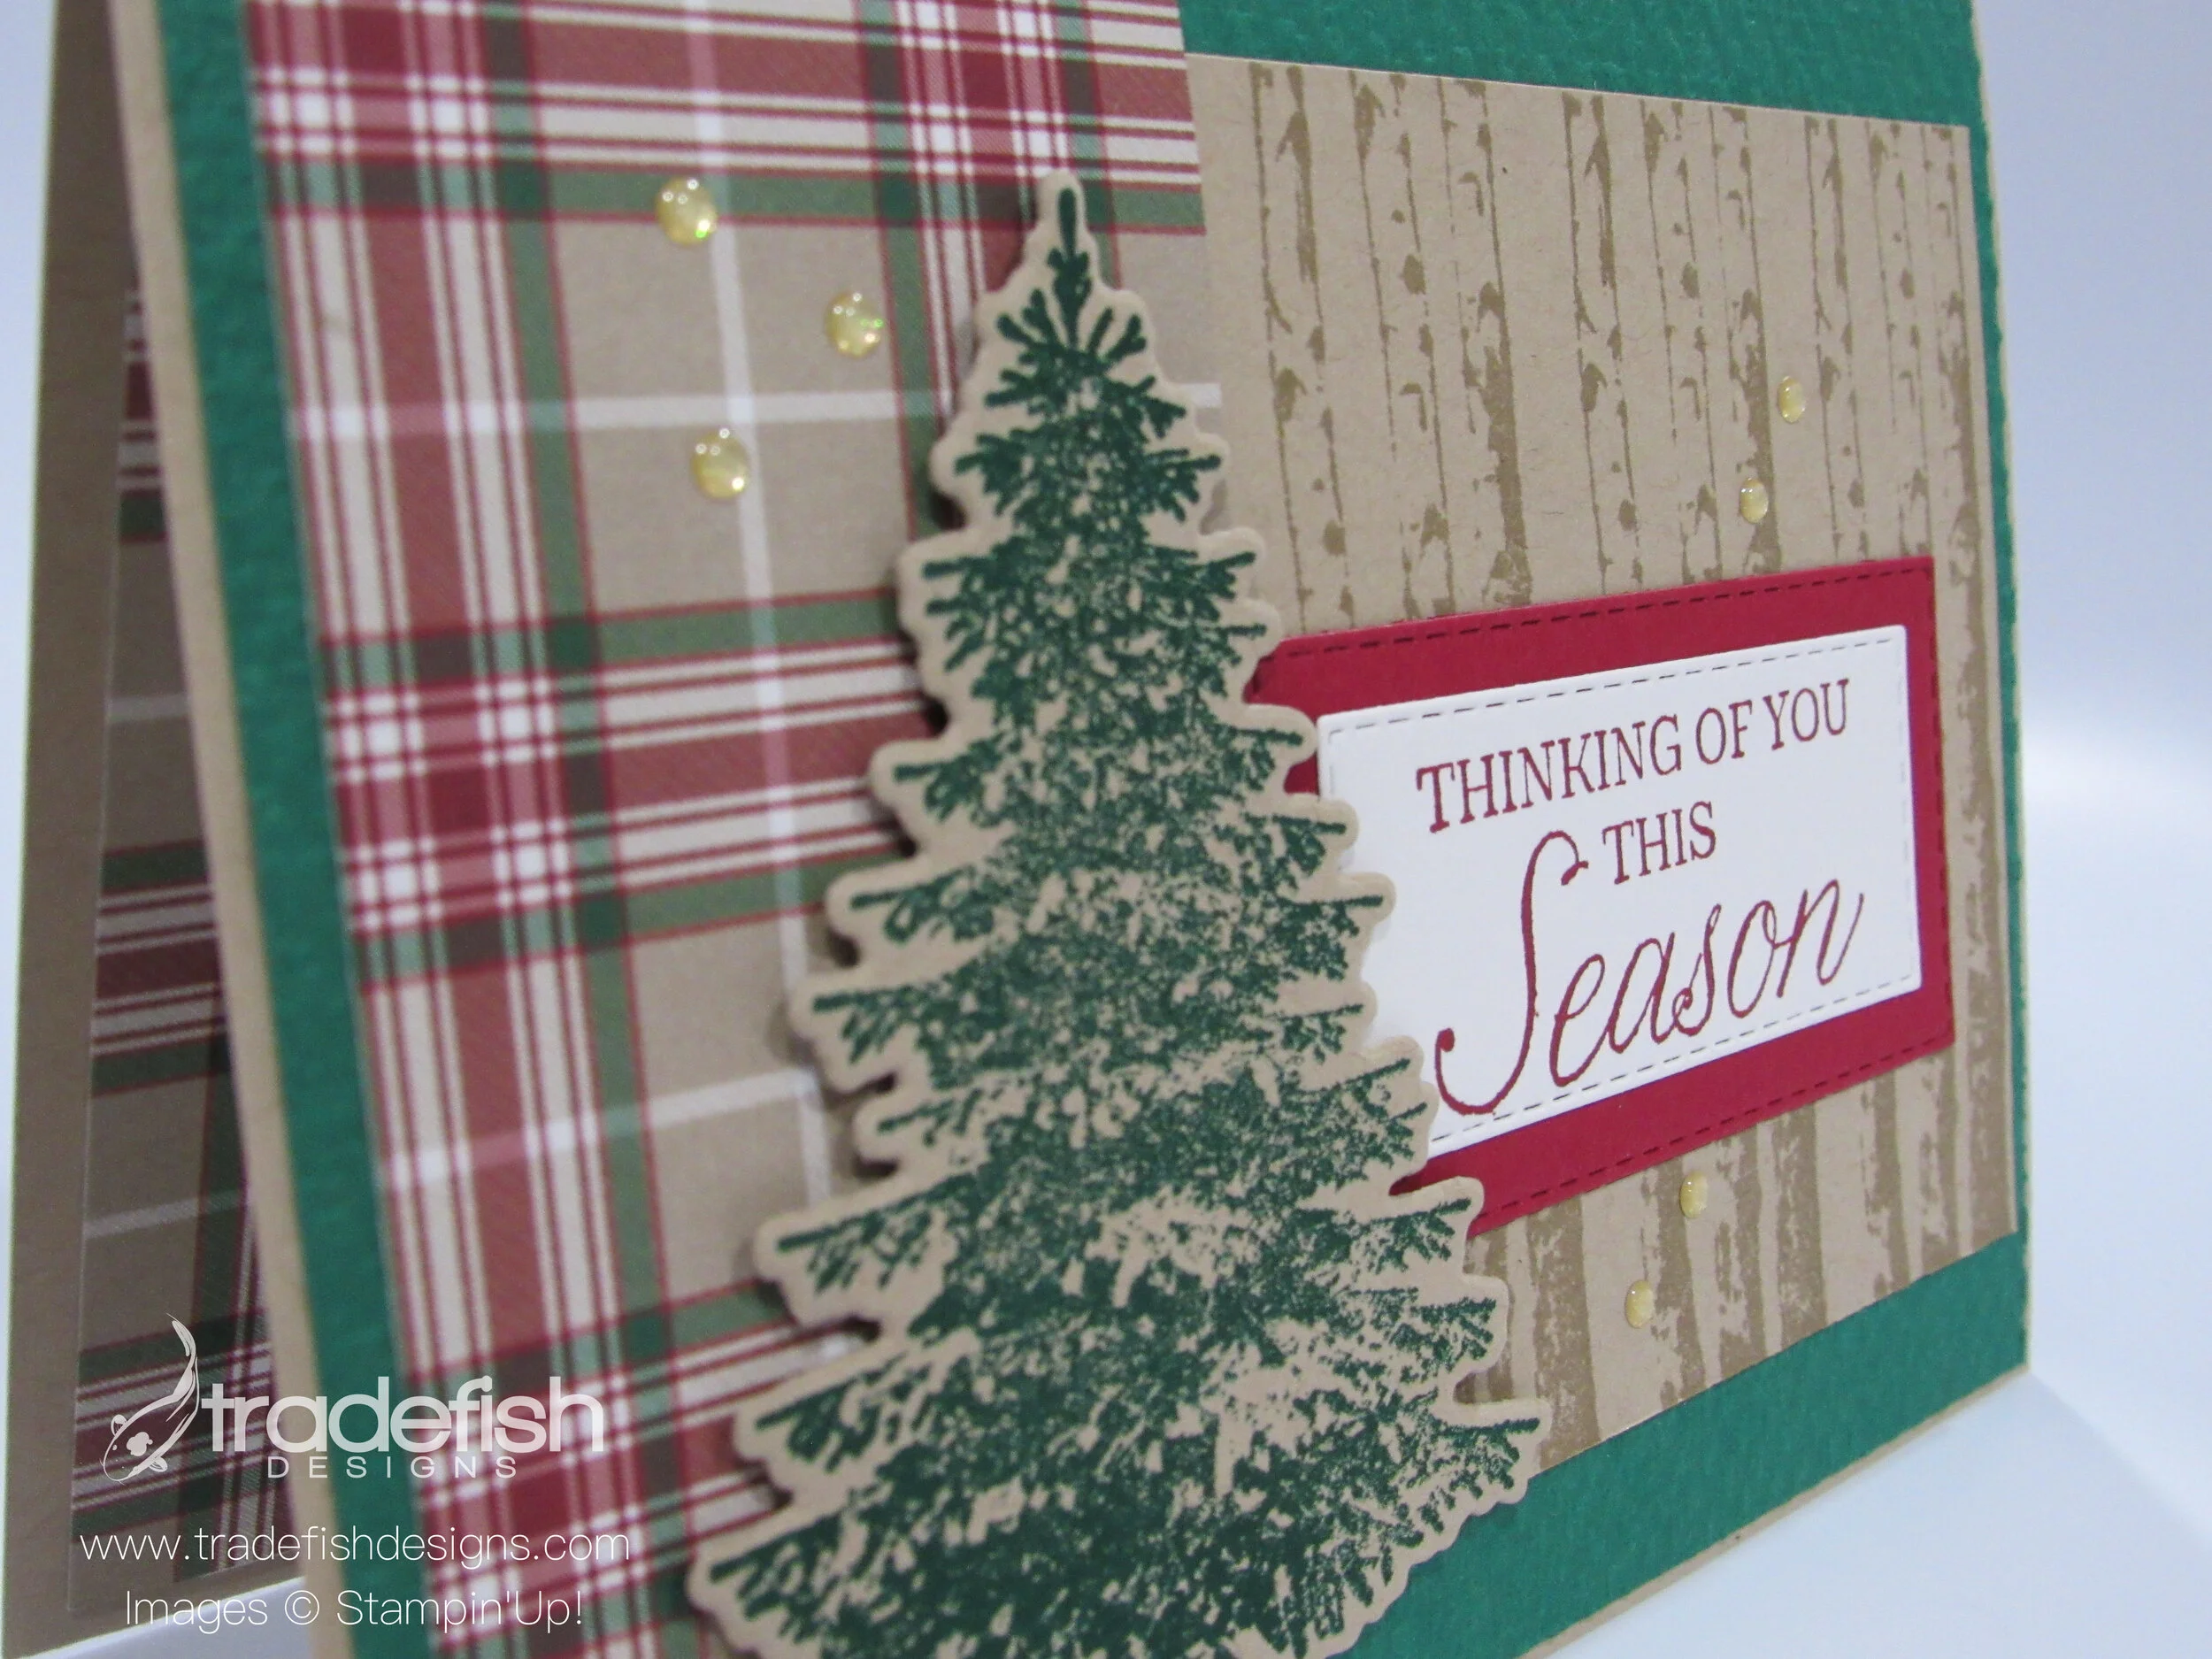
Thinking of You This Season - Holiday Card
Today’s card is a Christmas card using the Winter Woods stamps and the coordinating In The Woods dies from Stampin’ Up.

The angle shows the dimension you get from the tree and the background embossing. Mixing all the layers gives the card depth. Plus I like to add a little bling with the gold glitter enamel gems,

Don’t forget to decorate the inside of the card. I used the coordinating designer series paper and stamped the pine tree off the side to allow for space for a holiday message.

I hope you enjoyed my card today. If you are interested in any of the items I used in this project please check out the Product List below. Keep it crafty friends!
 |  | ||
 | | ||
| |


Keep it crafty peeps!
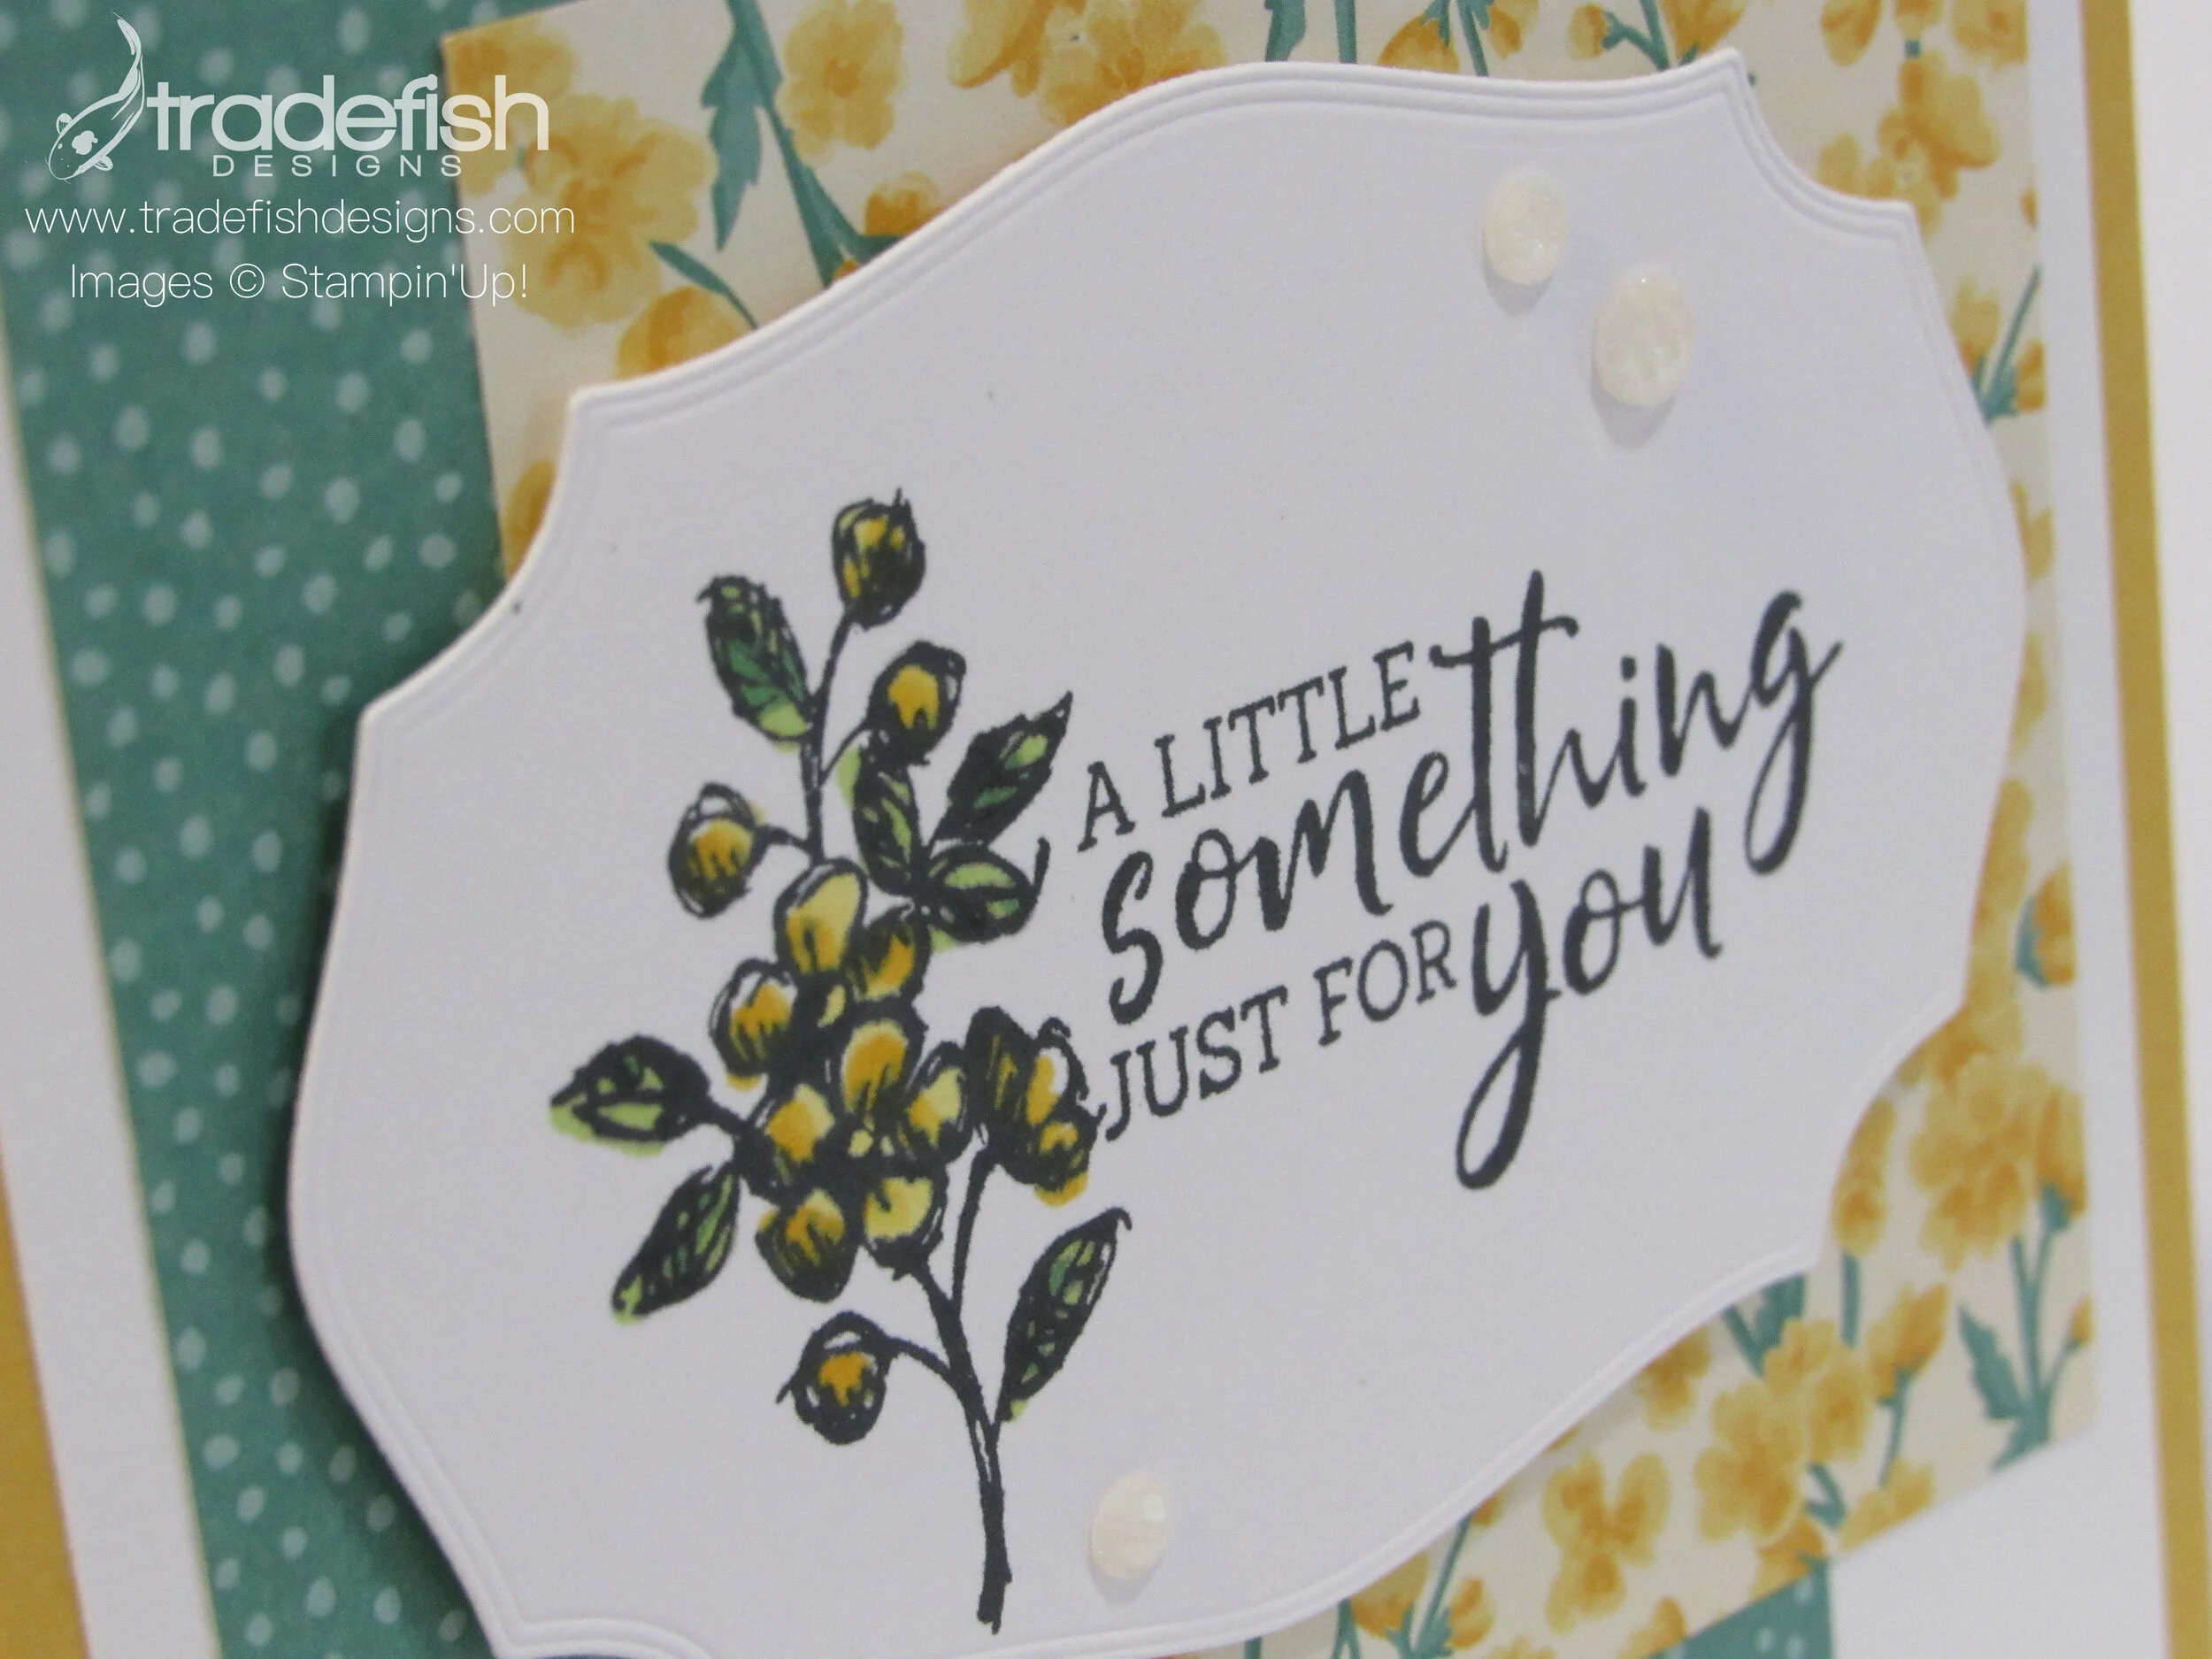
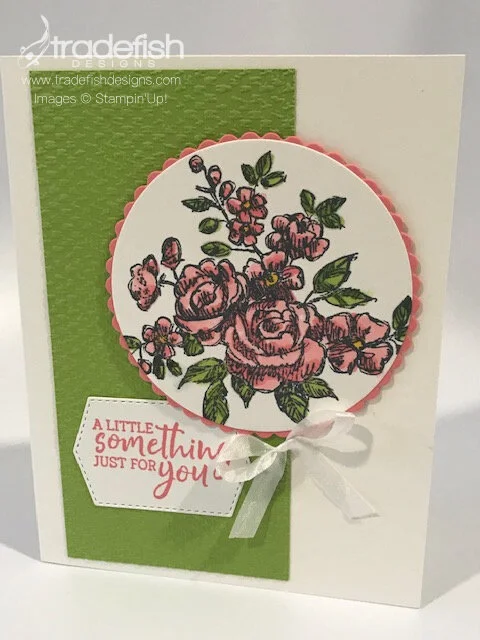
A Little Something Just For You.
Here’s another card using my favorite stamp set in the current Stampin’ Up catalog - Fancy Phrases. I’m not a girly girl and flowers aren’t normally my go to design but it’s something about the sketchy design and the sentiments that just speak to my crafty heart.

I always like to take an angled photo to give you a different perspective to the card. It also shows of the dimension is an eye-pleasing way. This photo shows off the lovely die cut from Tasteful Labels dies, the Elegant Faceted Gems and the fact that I don't always color inside the lines (which just proves it’s homemade). Isn’t this label die just gorgeous?!

Notice I added a little flower to the envelope? No reason you can’t add a smile to mail carrier’s face right?!

I hope you enjoyed my card today. If you are interested in any of the items I used in this project please check out the Product List below. Keep it crafty friends!
 | | |||
 | | |
 Designer Series Paper")


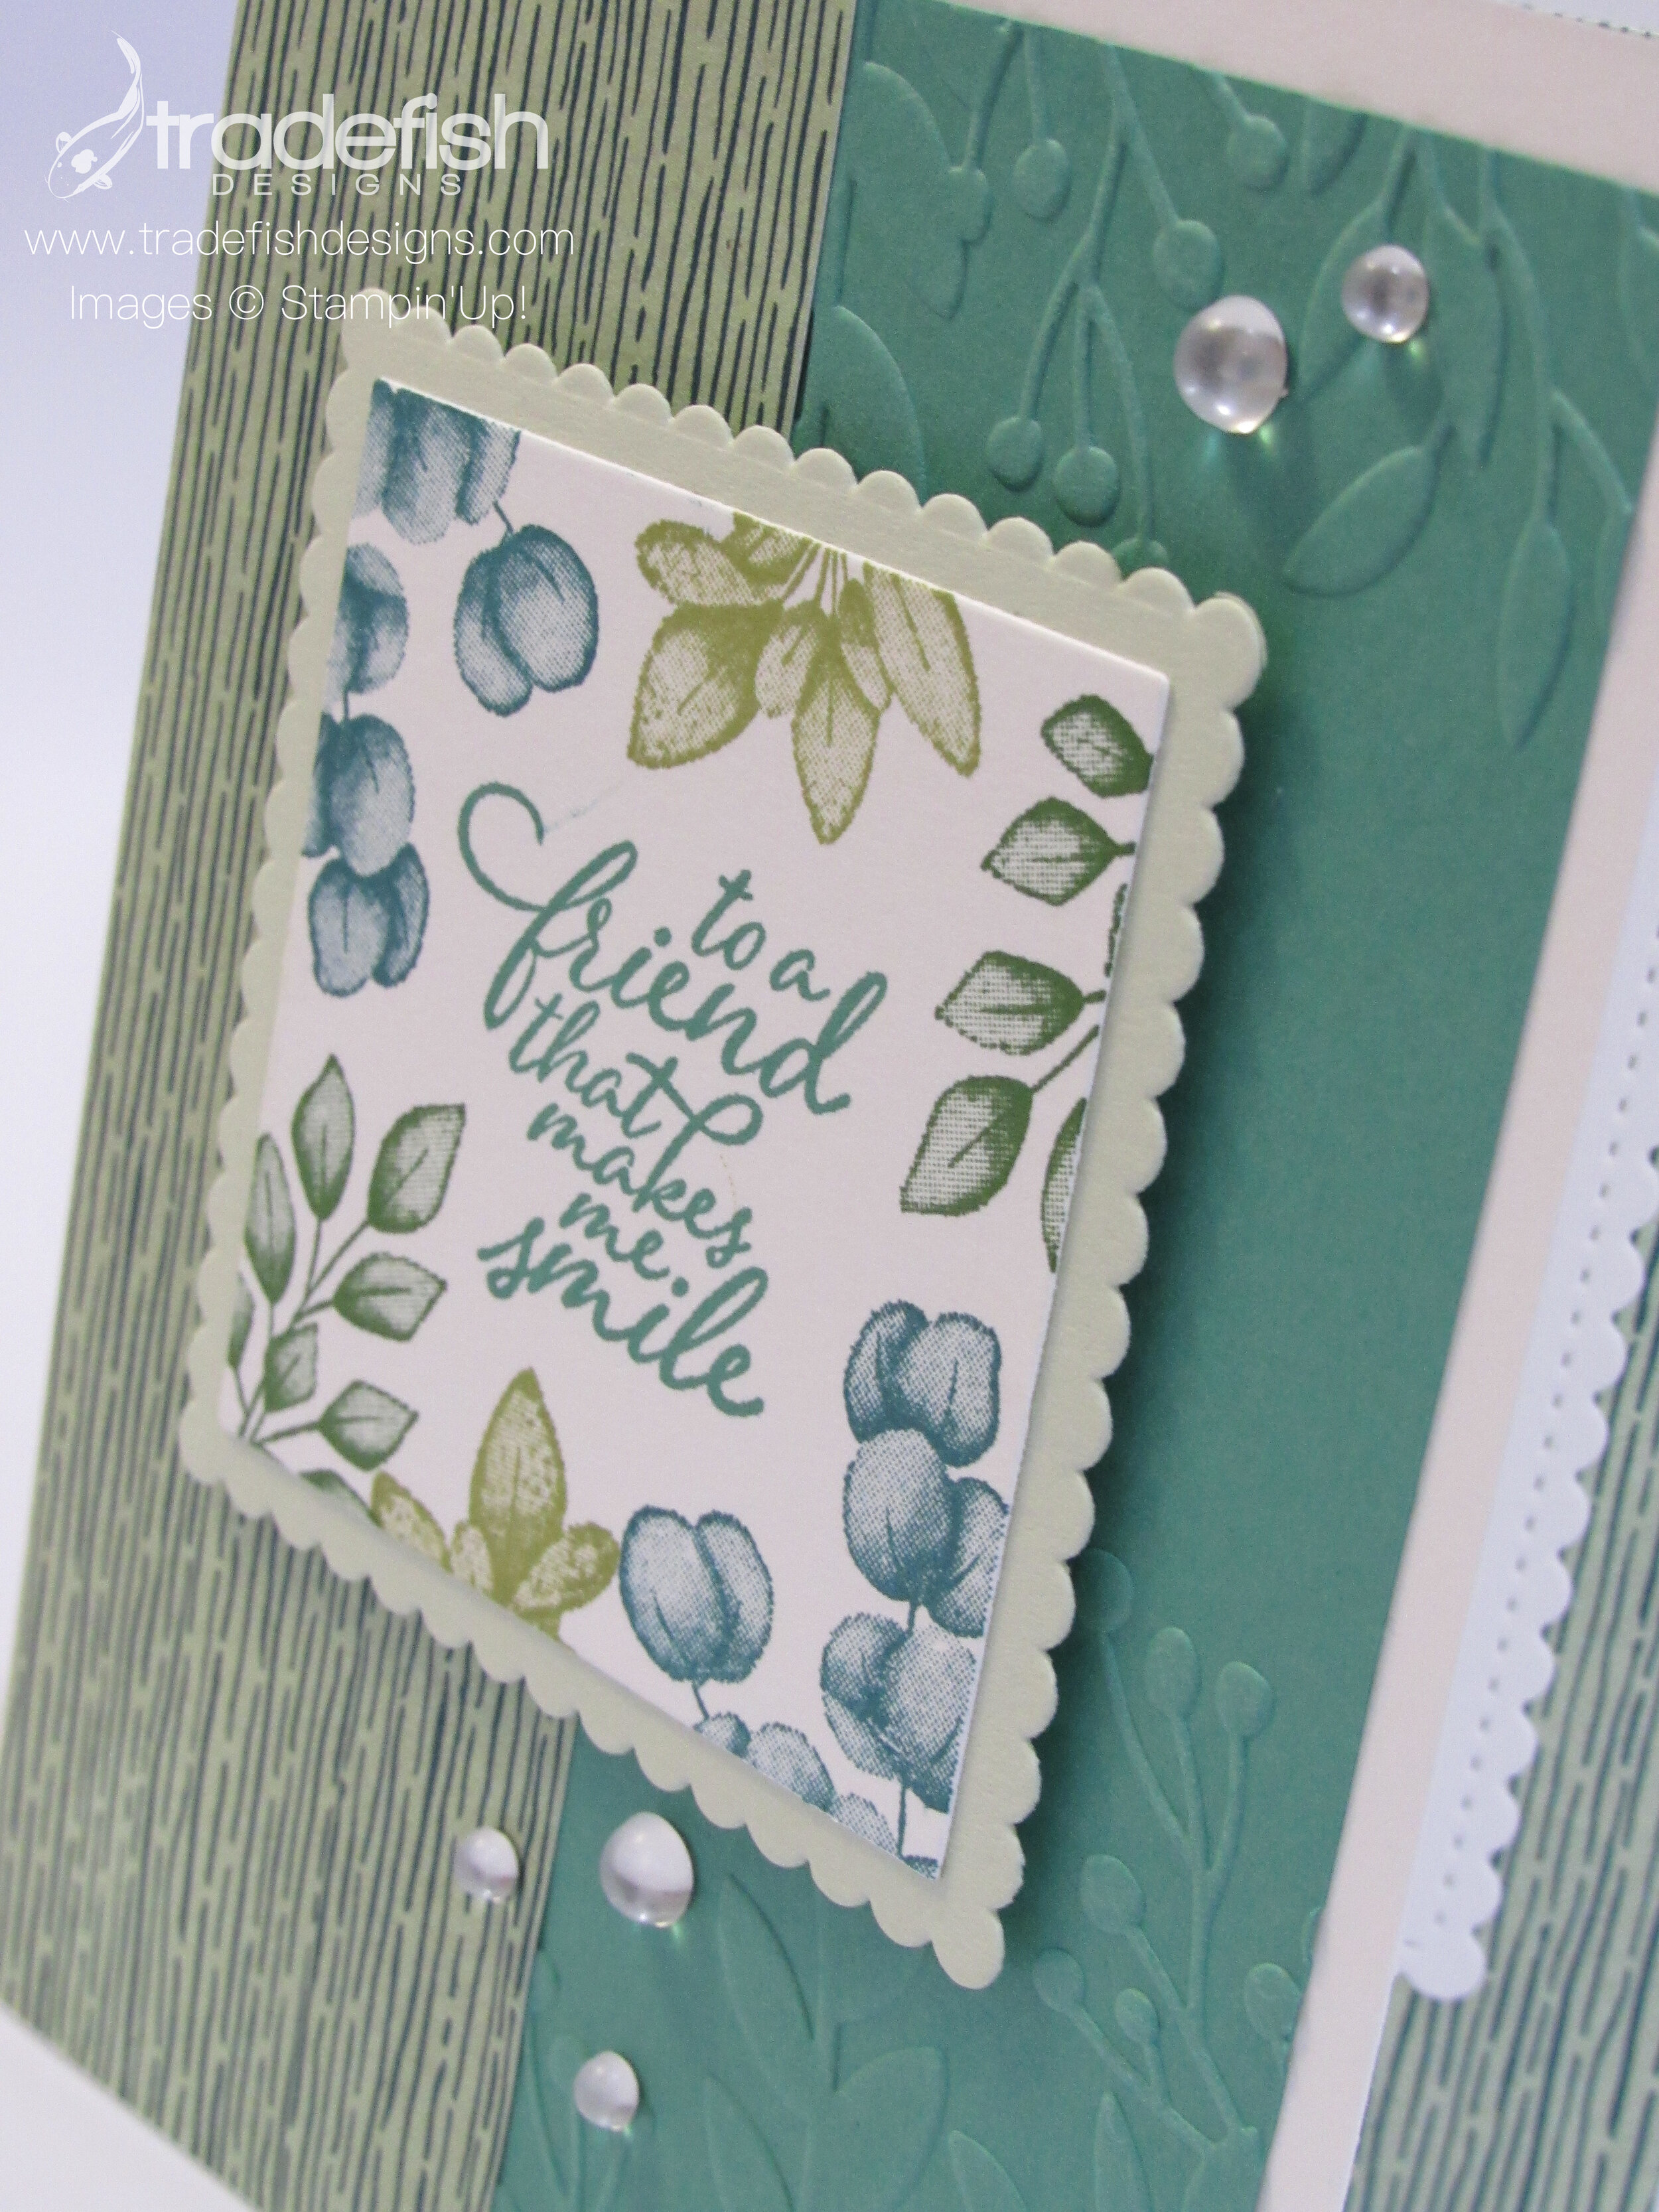
To a friend that makes me smile
The card for today was from a kit someone sent to me but I did what I call “freelancing”. This just means that I took the original design and amped it up to fit my style. This project uses one of my favorite stamps sets from Stampin’ Up…Forever Fern. The color combinations in the coordinated designer series paper is just gorgeous.

The soothing colors, textures and die cutting just make me smile. You can see the coordinating embossing folder, epoxy drops and multi colors of leaves all on display. Making this card was just so satisfying.

Remember my crafty friends, no naked envelopes!

I hope you enjoyed my card today. If you are interested in any of the items I used in this project please check out the Product List below. Keep it crafty friends!
 | ||||
 | ||||
 |  |  |
")


Keepin’ it real crafty!
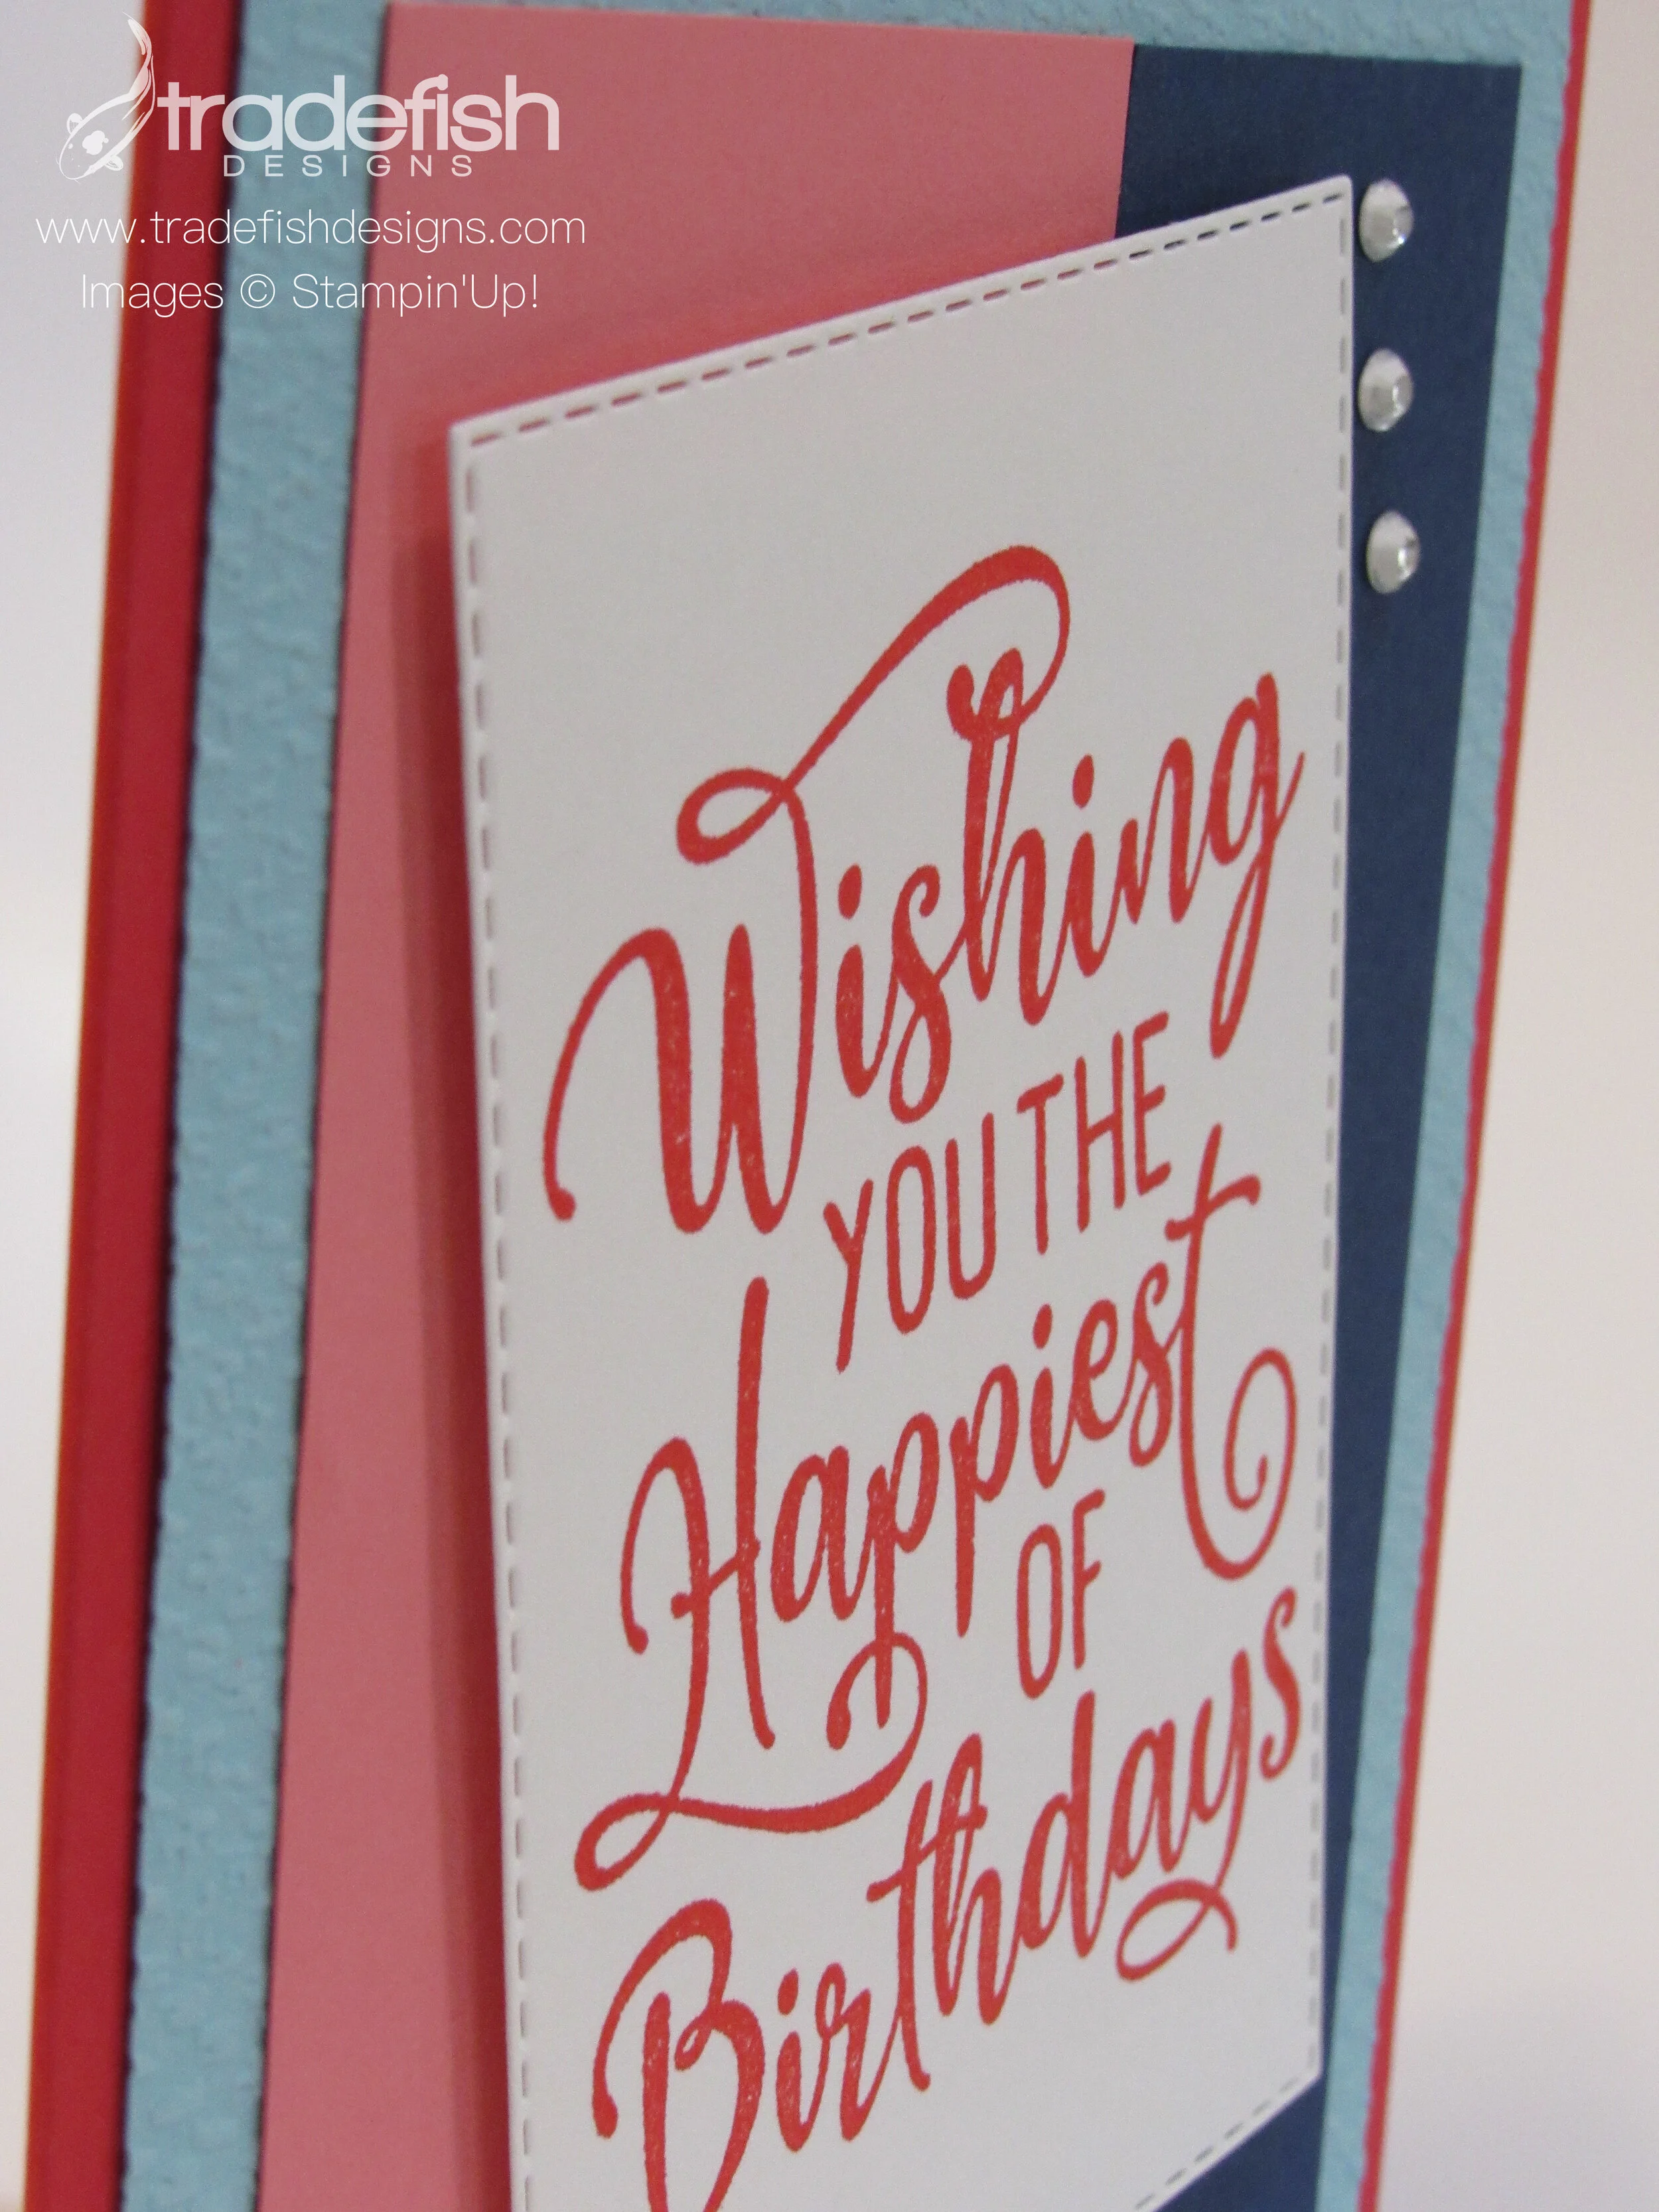
Colorsplash #3: Wishing you the happiest of birthdays.
I took part in a Colorsplash Challenge which required the use of 4 colors: Poppy Parade, Flirty Flamingo, Balmy Blue and Night of Navy. Those colors and a new stamp set led me to this fun birthday card. Loving how the design shows off the texture of the embossing done to the Balmy Blue cardstock. #colorsplash3

At this angle you can see the cool stitching on the rectangle die and the rhinestones.

I couldn’t forget the inside of my card. A simple and bright message in Poppy Parade.

I hope you enjoyed my card today. If you are interested in any of the items I used in this project please check out the Product List below. Keep it crafty friends!
 | |||
 |
")


Keepin’ it crafty!
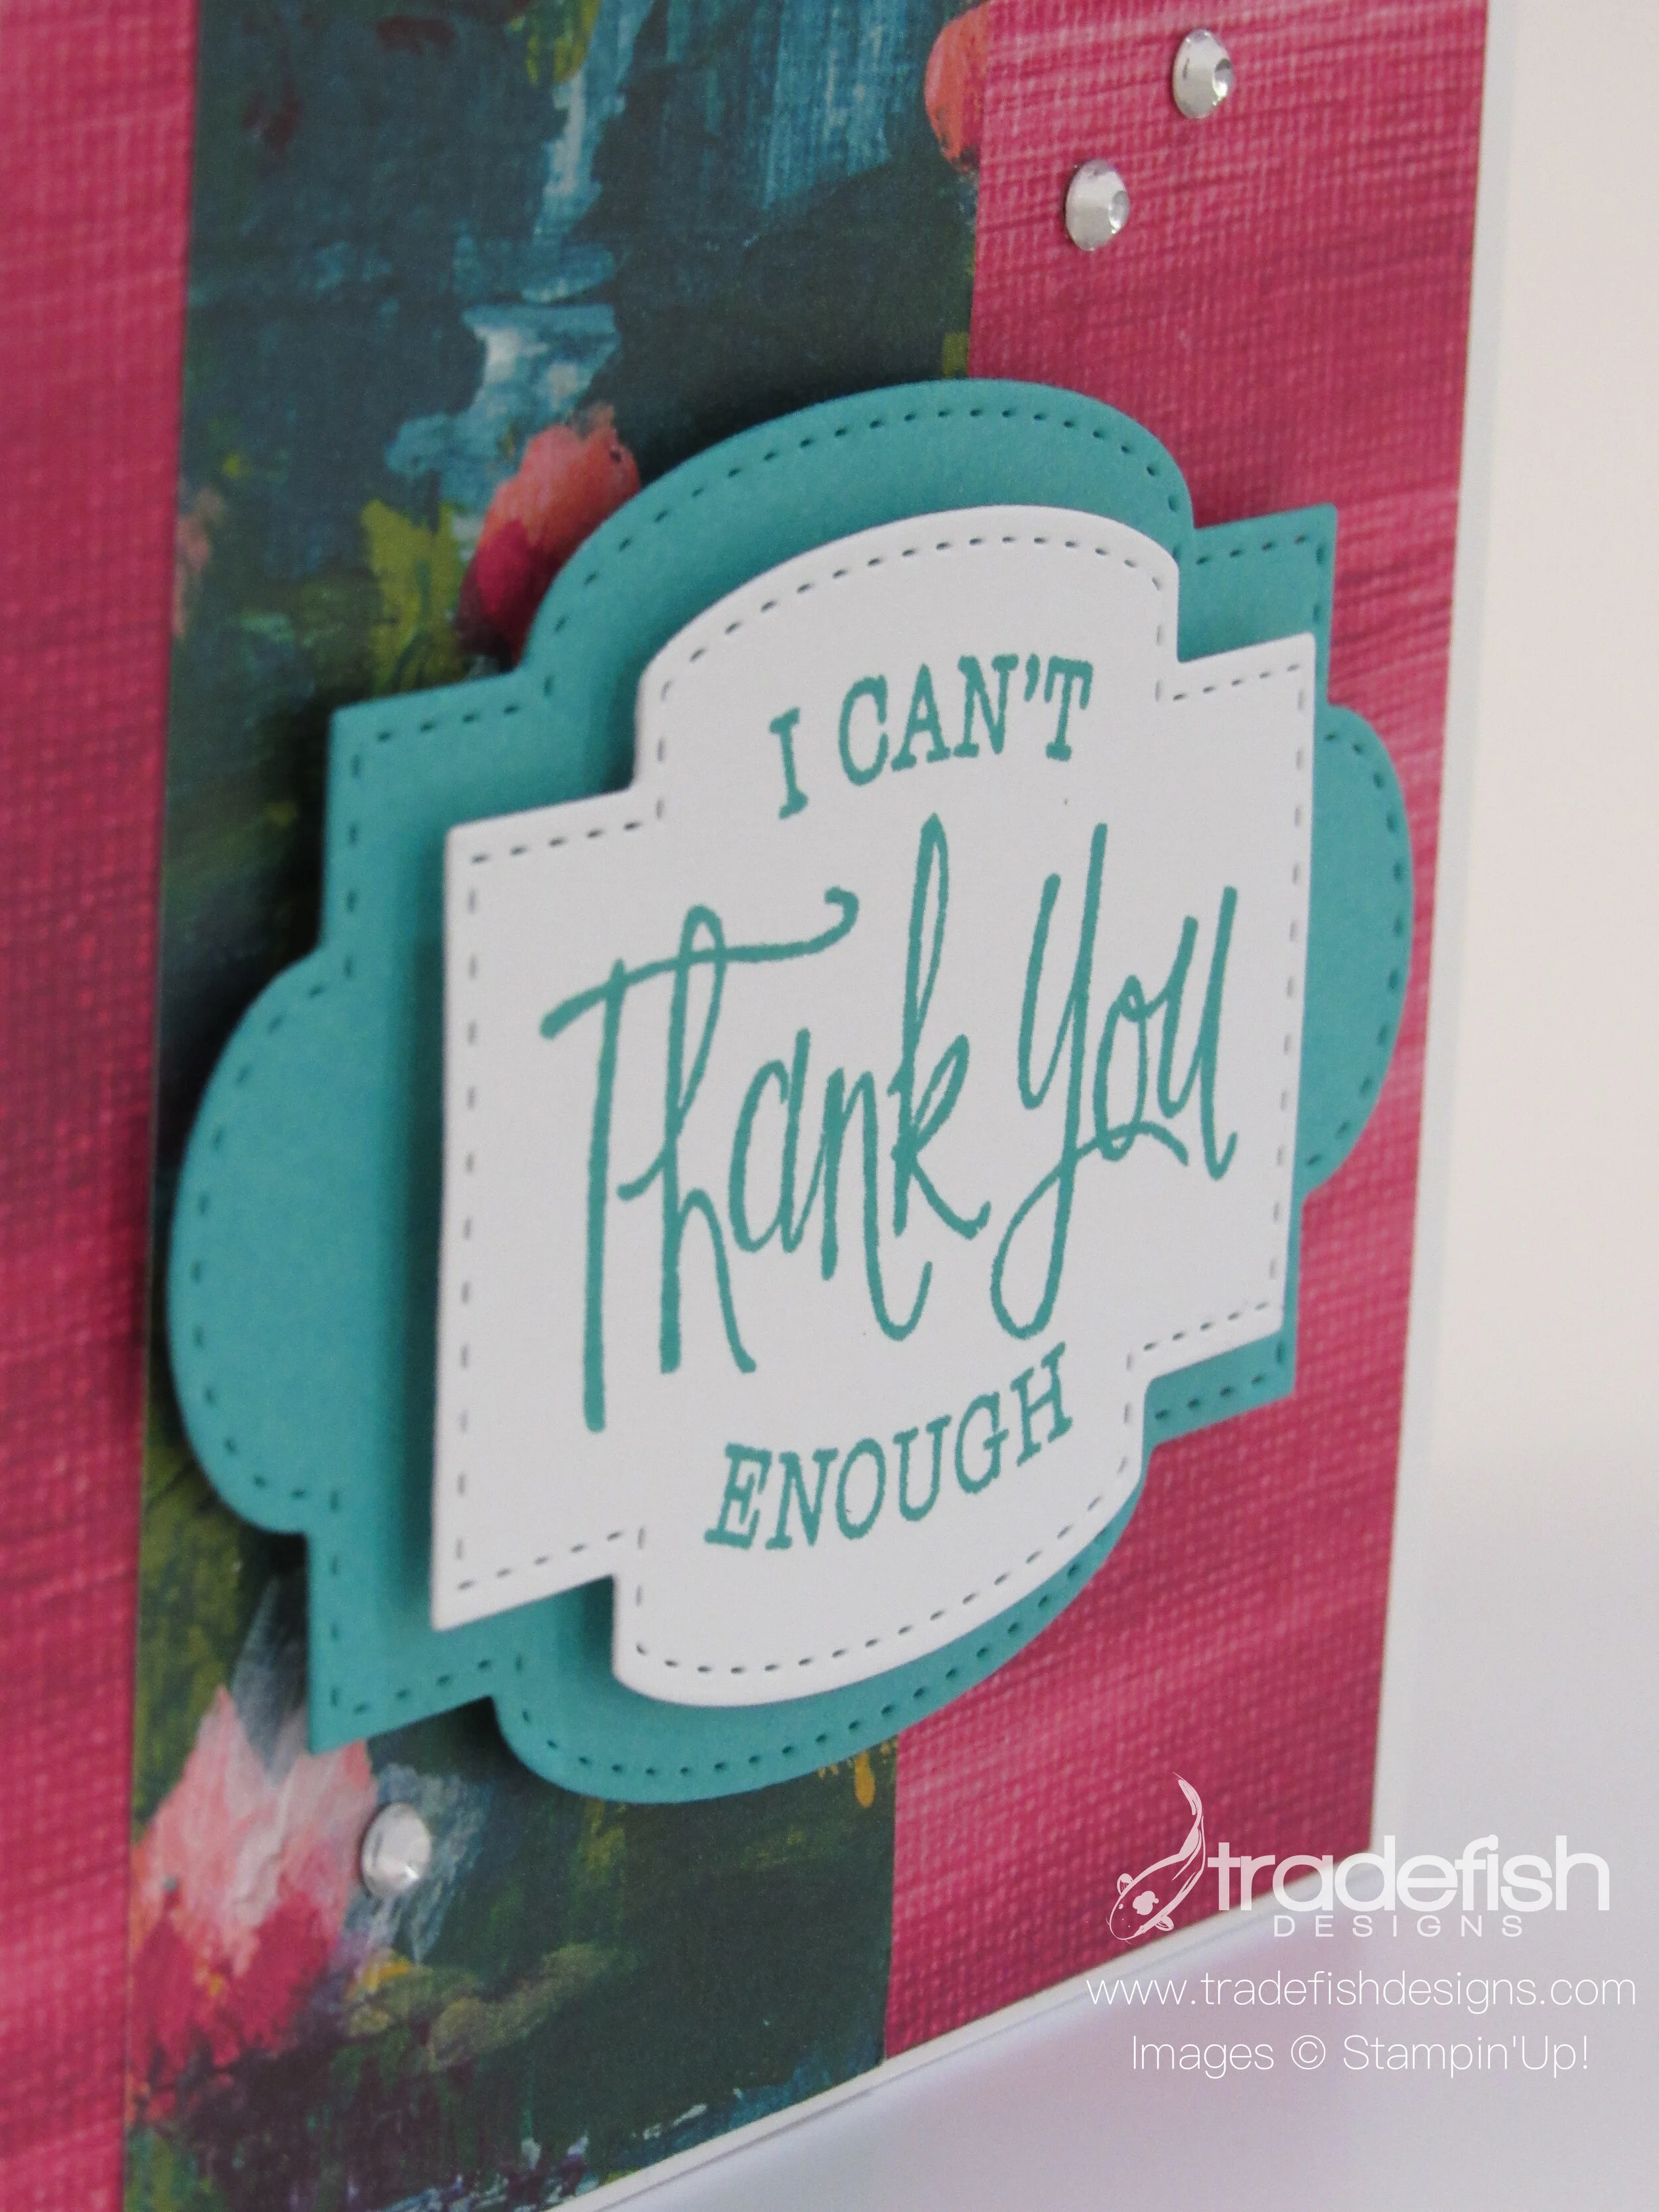
I can't thank you enough!
Not enough people send thank you cards anymore. People don’t really send letters at all but I do think a thank you card is important. Here’s a colorful one I created and I hope you enjoy it!

The angle view gives you a great look at the dimension on this card as well as the sparkly rhinestones. The stitching on the dies looks great up close too.

I brought the designer paper to the inside of the card and it will really highlight whatever message I send on the inside. Don’t forget the envelope too. I little color splash is a nice treat to the recipient and the mail carrier!

Same card using different colors. Love the bright paper that has so much texture in it.

I hope you enjoyed today’s card and if you want any of the supplies and you can find them below in the Product List.
| | |||
| |
")


Remember to send those thank you notes!
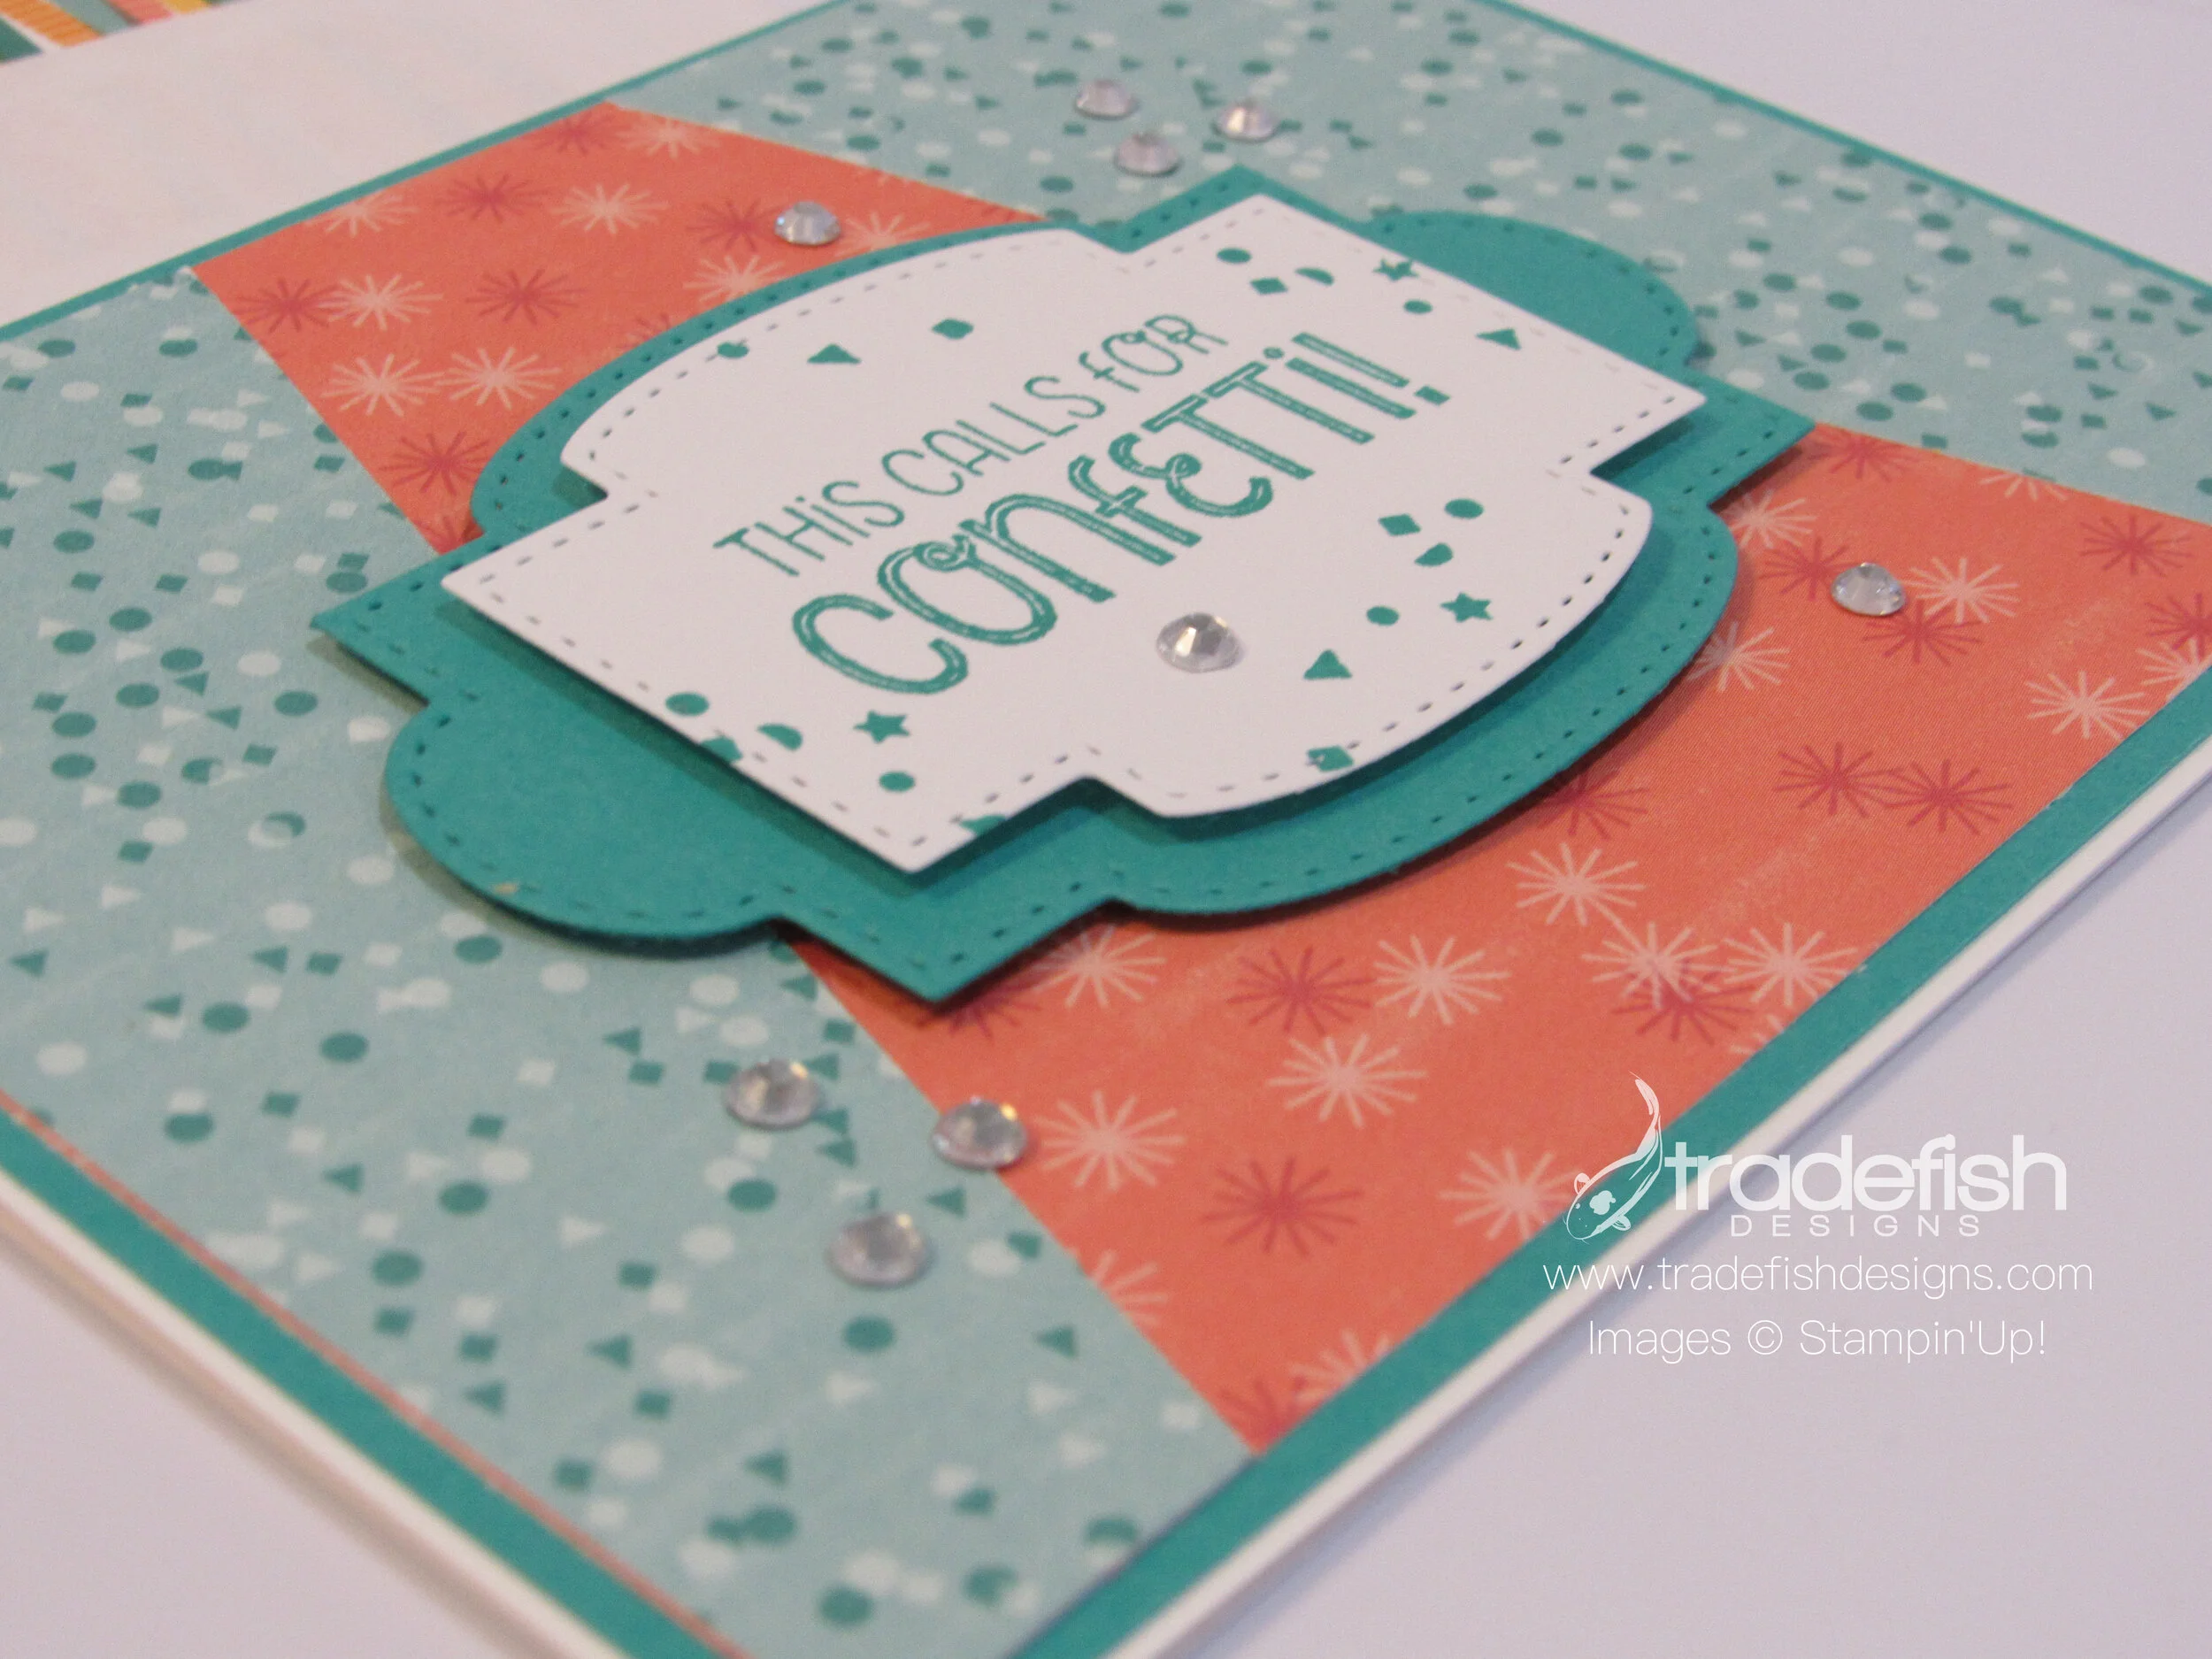
This calls for confetti!
Today I have a fun birthday card using silly and bright colors. This is a great card for kids or adults.

Here’s an angle view showing off the dimension of the layers and the pretty rhinestones.

I always try to decorate the inside of my card to coordinate with the cover. This is also a great way to use up your designer paper. Let’s not hoard it but use it…to make room for the new paper when it comes out.
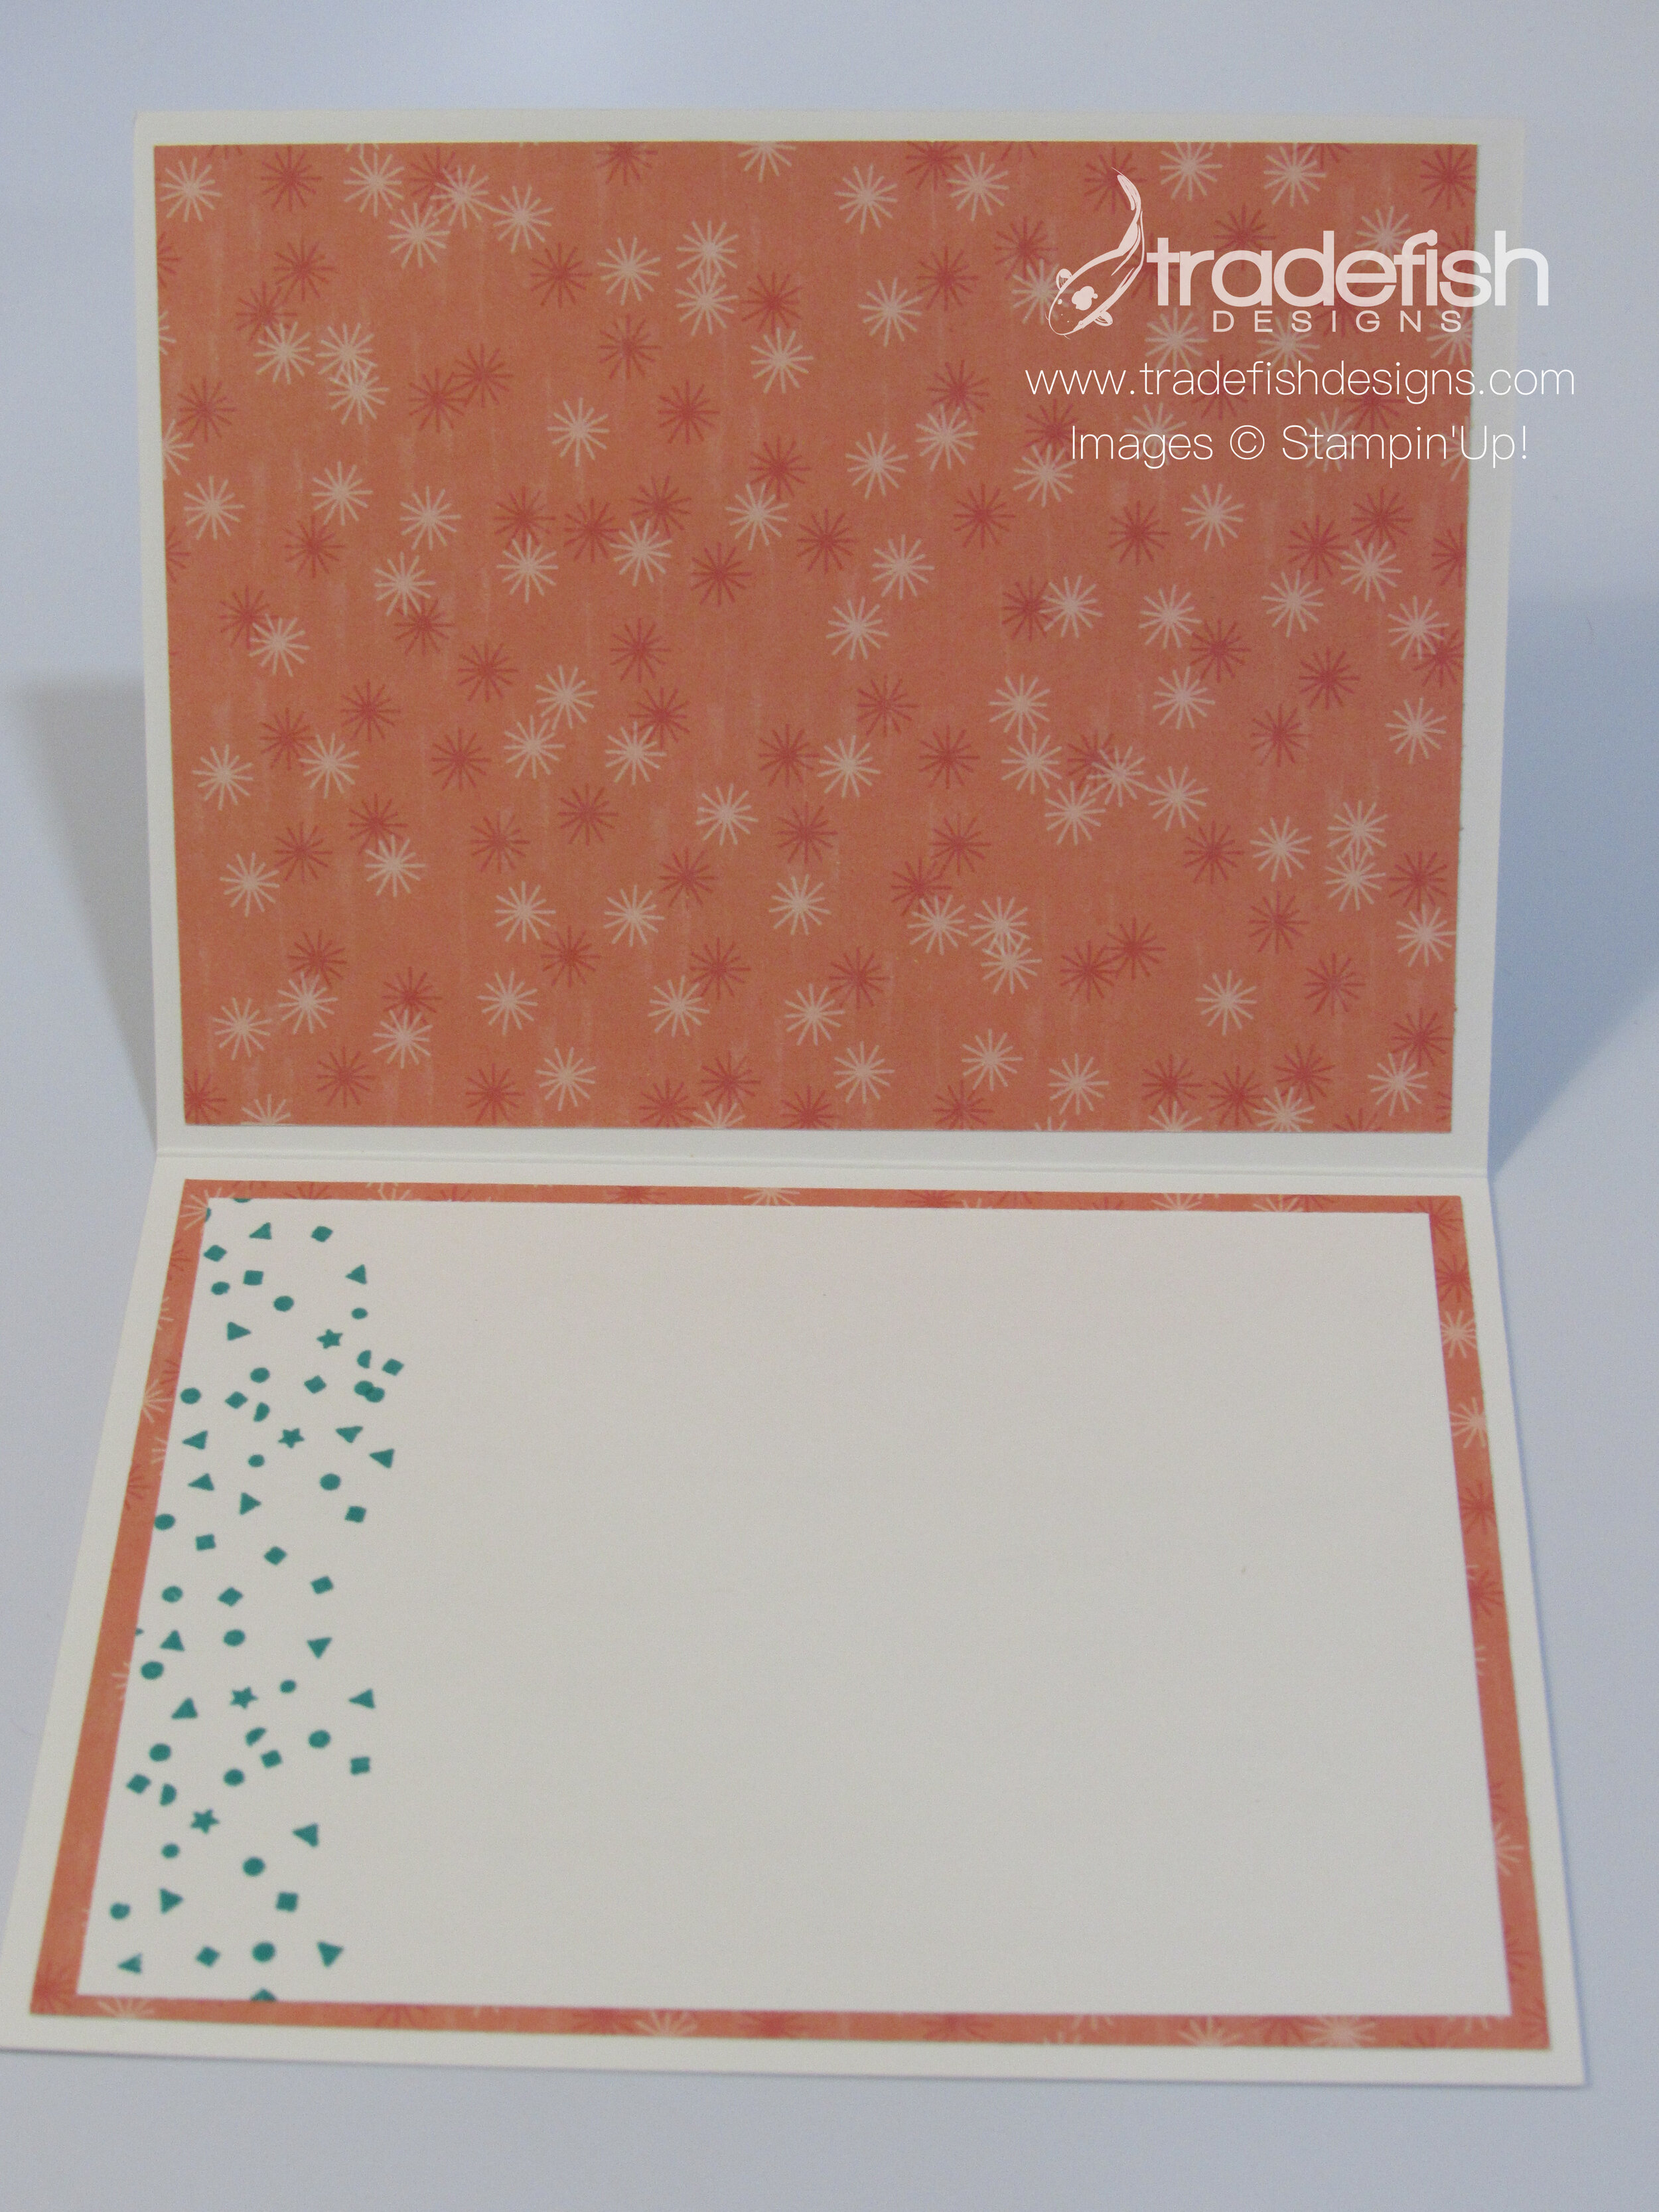
I also find another way to use up the extra paper is to decorate the envelope. Remember, no naked envelopes!

I hoped you enjoyed today’s card. If you are interested in getting the supplies go ahead and look at the product list below.
") | |||
| | | |


Keep it crafty peeps!
Rest & Relax...yes please.
Today’s card takes us to the tropics. I had fun coloring the hibiscus flower and leaves and enjoyed all the textures from the paper and embossing folder as well as all the paper layers.

If you are a paper hoarder, like most crafters, you know you can put some designer paper on the inside. I’ve been trying to use up my paper before it retires. Its always nice to tie the inside of the card back to the front of the card.

You can always spread the designer paper love to the envelope. It will make quite an impression when the recipient opens it.

No naked envelopes!
I hope this card makes you think of relaxing on a beach and breaking out your summer stamps and paper even though it’s now fall. These products are from Stampin Up and I have them listed below if you would like to purchase any of them. But if you have other supplies you can use that instead. Just use them and create something beautiful today.
 |  Tropical Oasis Designer Series Paper [151252] $11.50 |  | |
| | |||
 Coastal Weave 3D Embossing Folder [151503] $9.00 | |||
")


Don’t be a paper hoarder. Use it!
Because adulting is hard...
Today’s card is for all of those who like to enjoy the occasional cocktail at the end of the day… This is a simple but fun card. I embossed the front of the card and used the Nothings Better Than stamp set and dies to create this cute little card front.
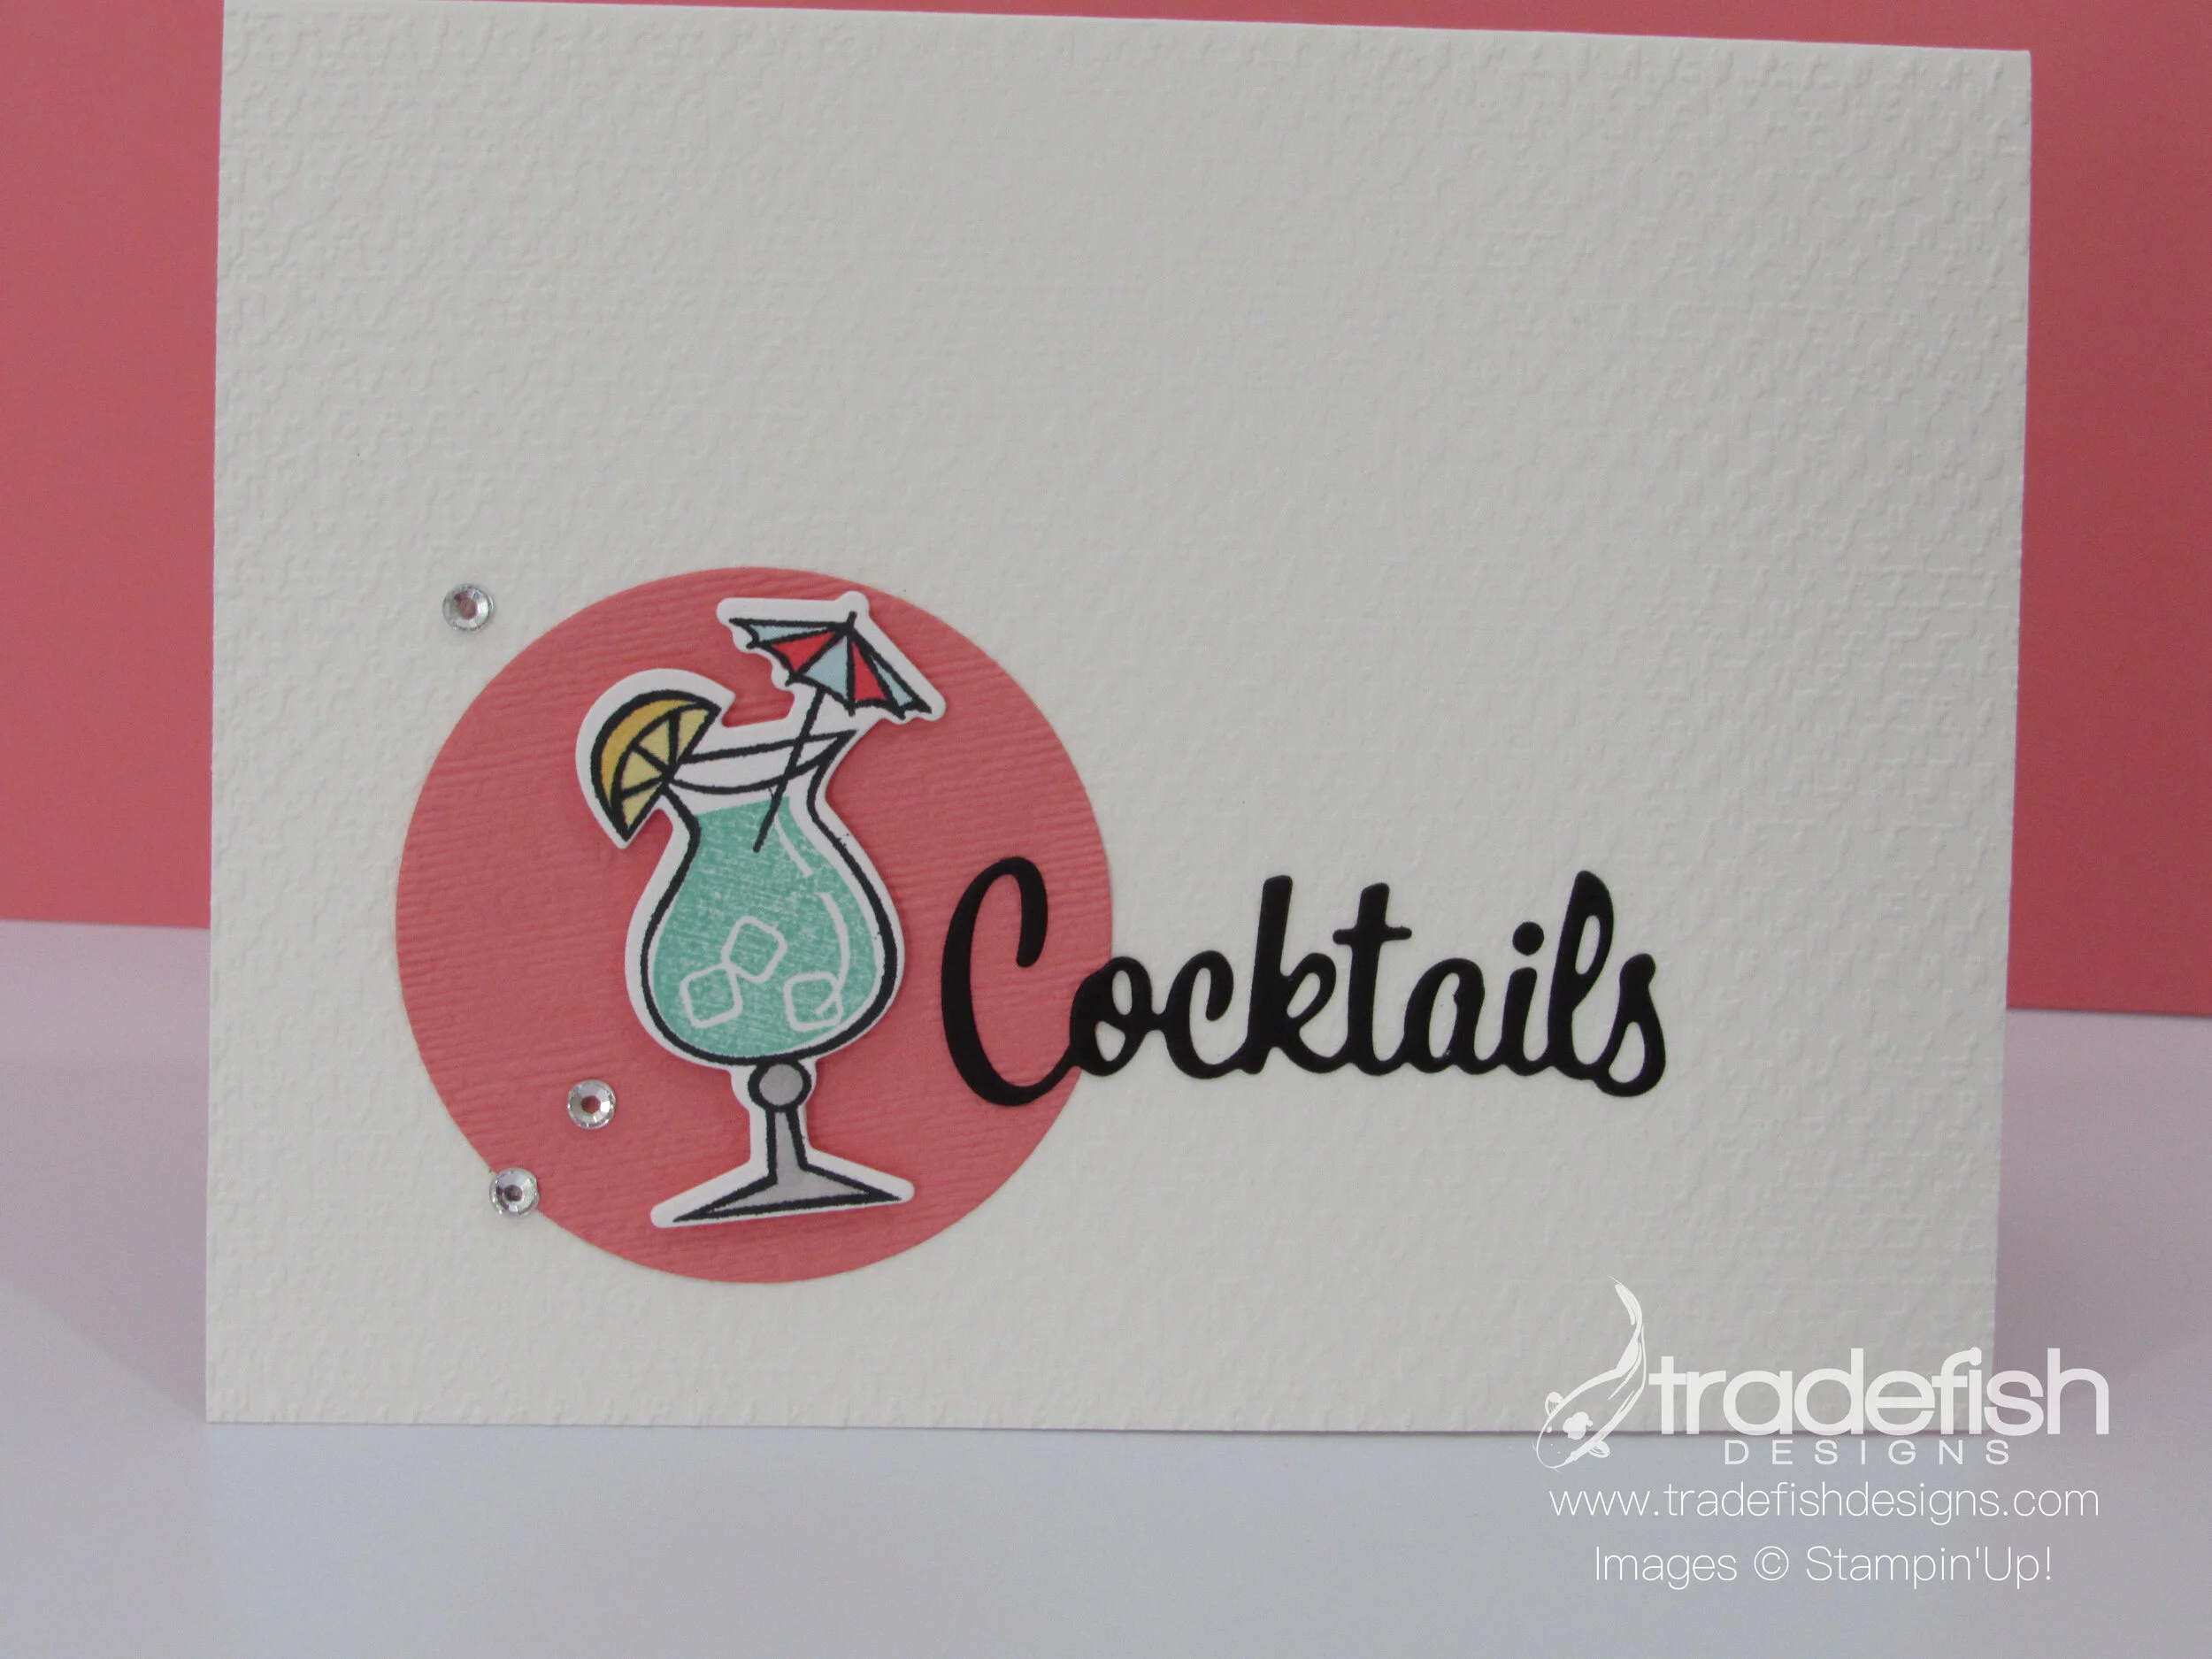
Here’s a close up of the front of the card that shows off the decorative rhinestones and the separate embossing I did on the circle die. There’s also a nice close up of the coloring of the cocktail stem.

It’s always important for me to do something on the inside of the card. I think this just makes for a happy recipient.
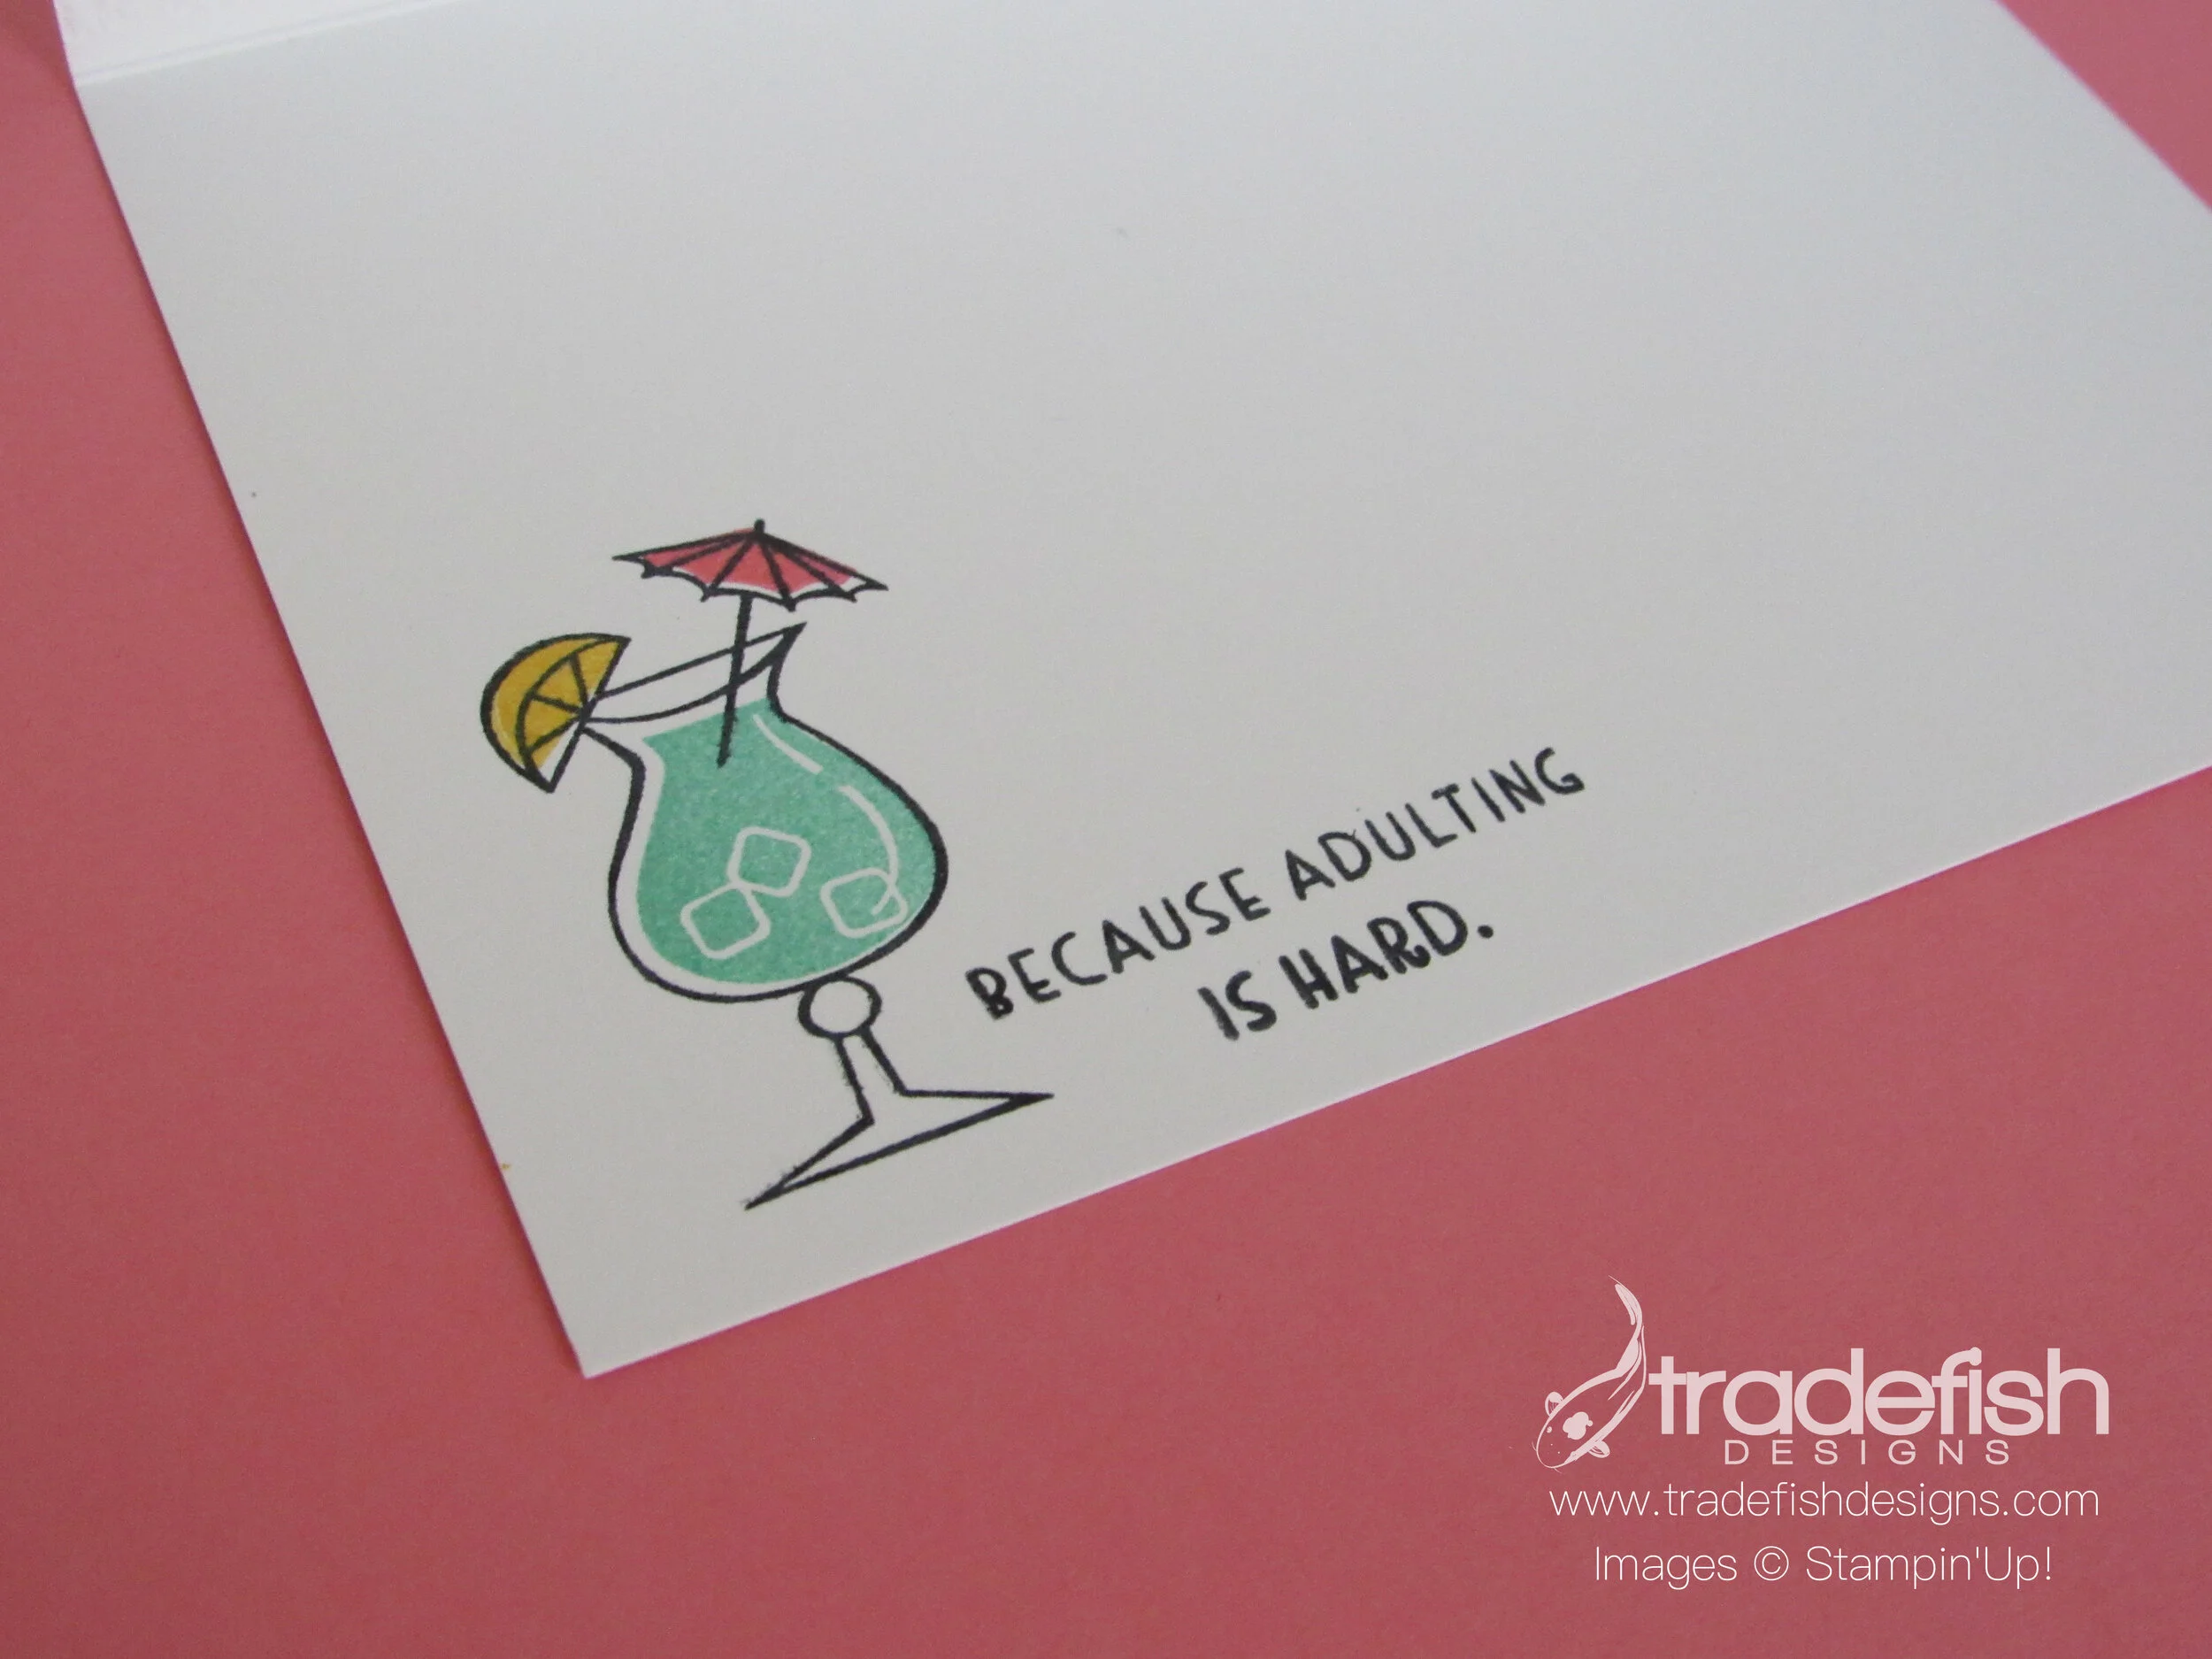
Don’t forget…no naked envelopes!

I hope you enjoyed today’s project. The products I used are listed below. Have a wonderful day my crafty friends!
 | |||
 |  | ||
| |


Keepin’ it crafty!
Memories & More Cards
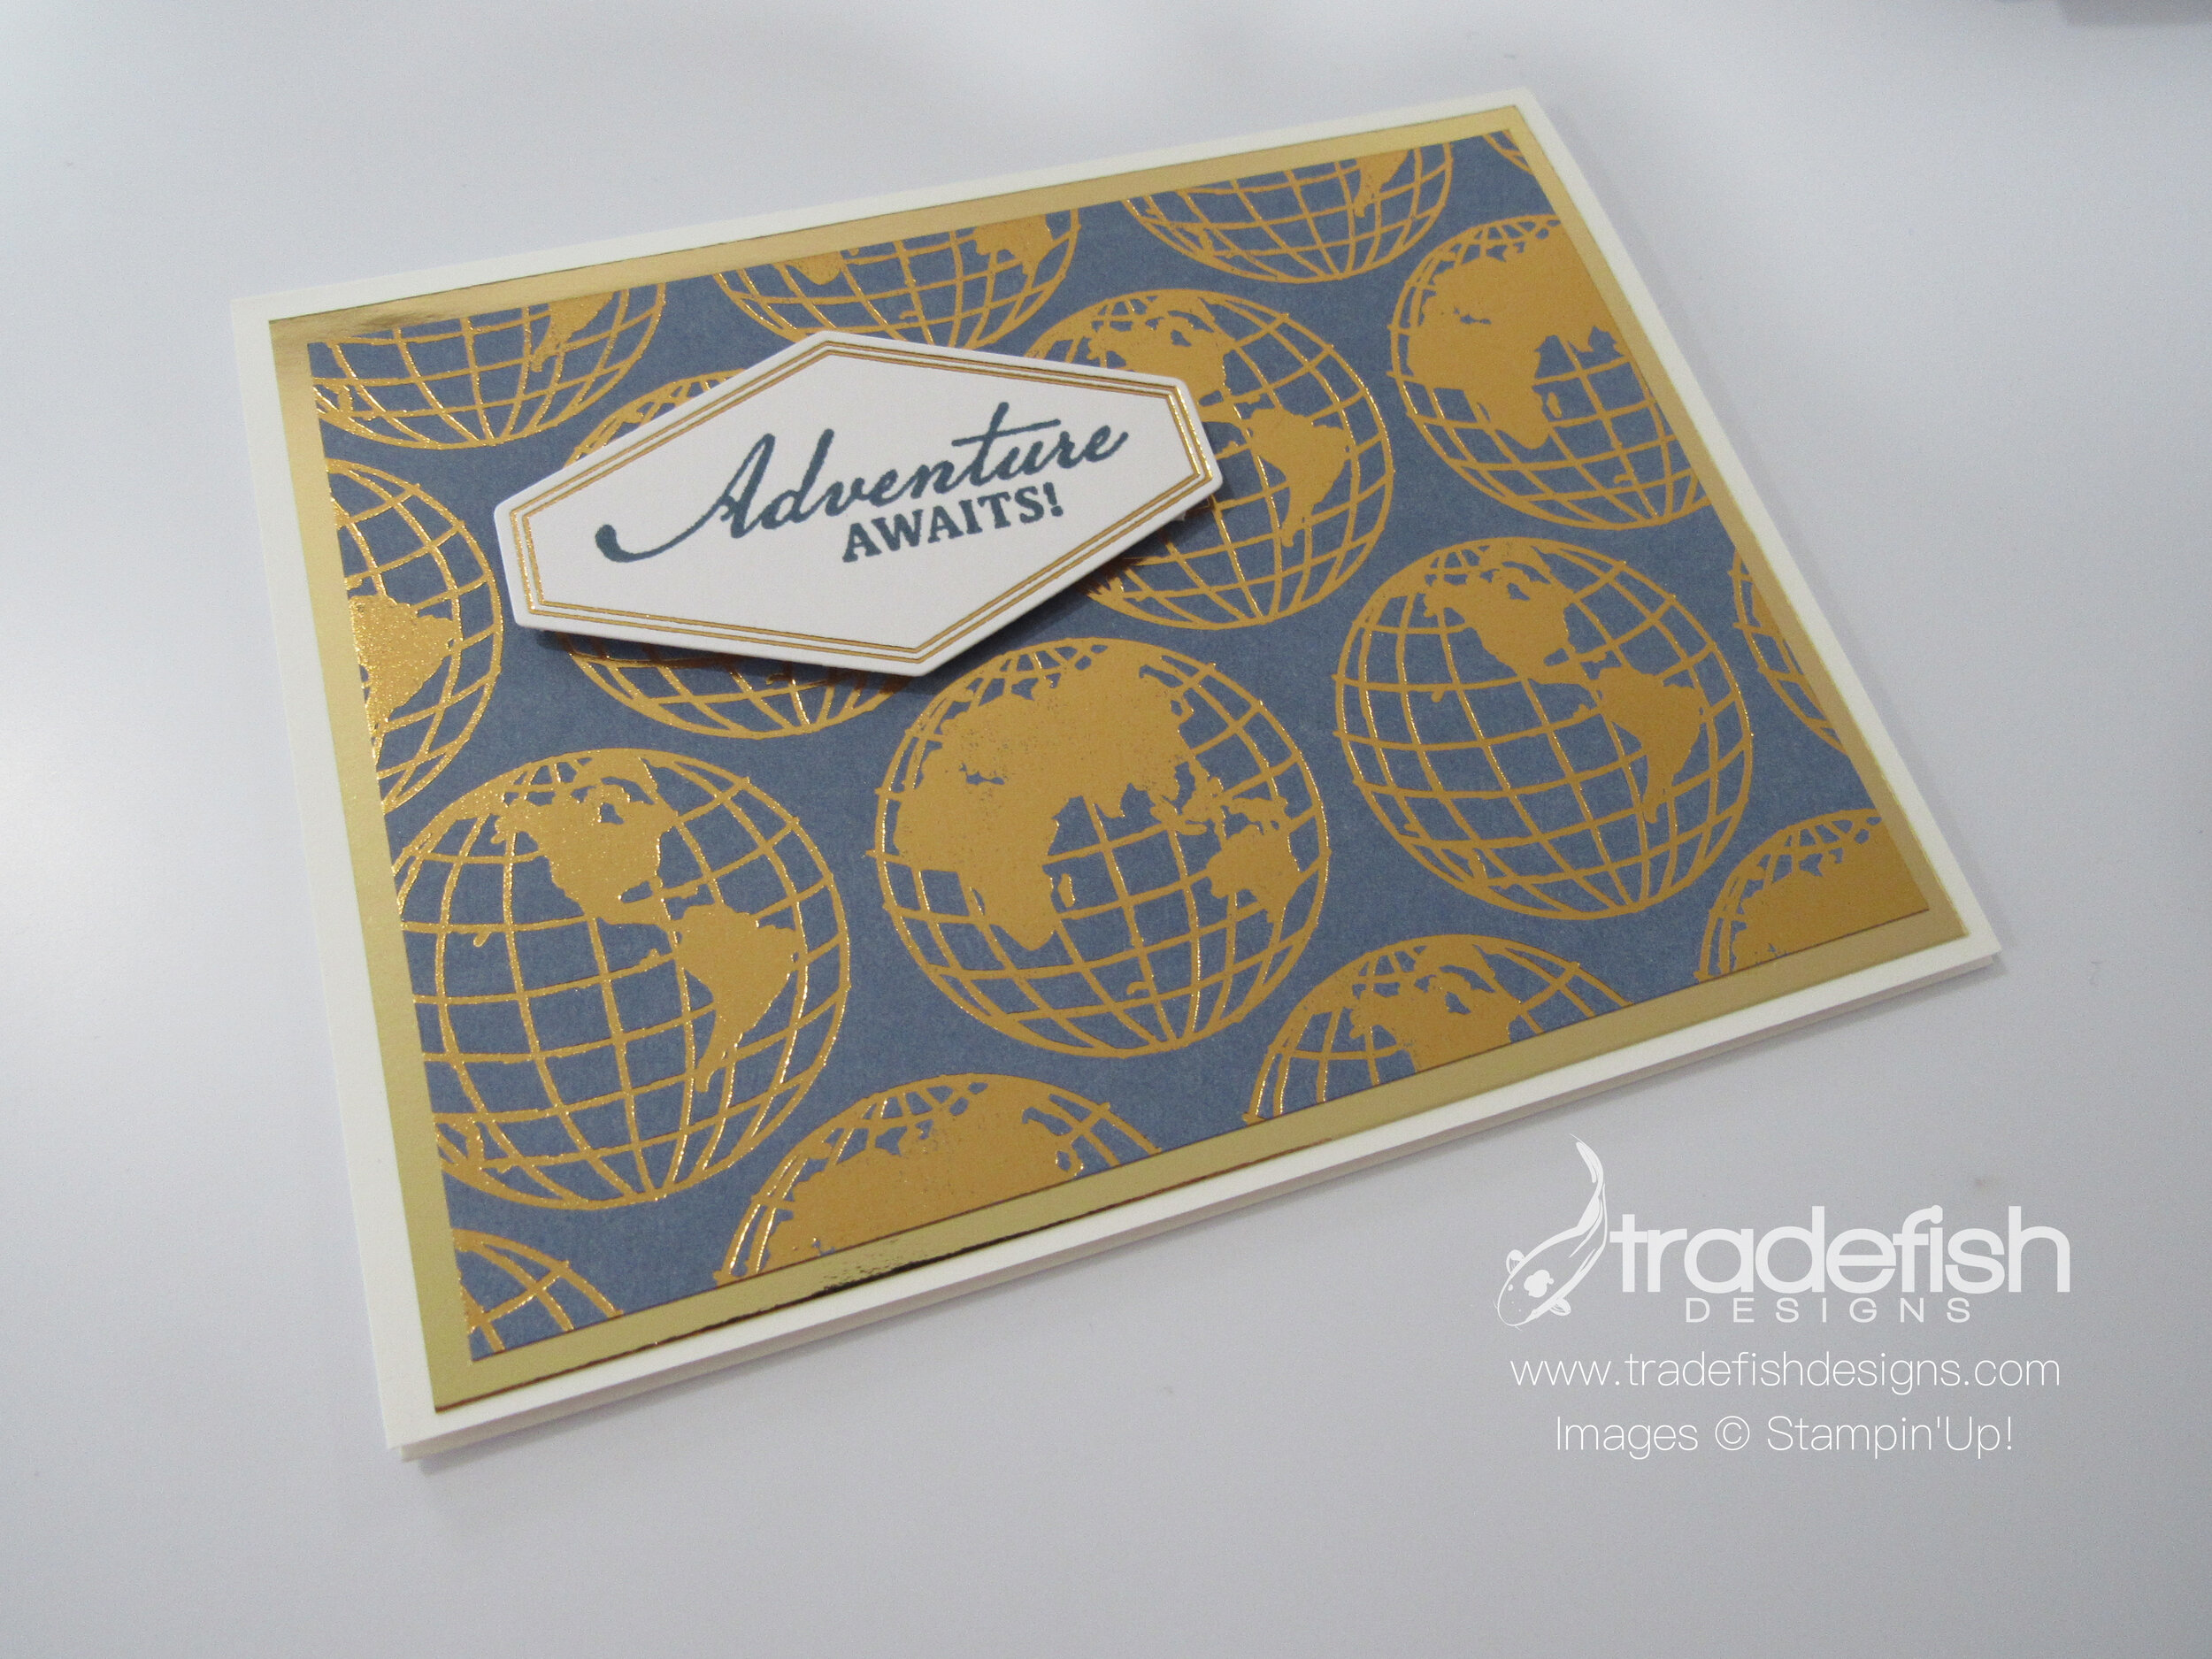
Todays’ post shows you that you can take a Memories and More pack from Stampin’ Up and make 20 cards (with leftover bits). I took my World of Good Memories & More Cards and coordinating cardstock and a few embossing folders and made 20 cards. If you are looking for cards for men this is a great option. This particular card set features travel-related themes…not a flower in sight!

Here’s a card that uses some of the stickers inside the Memories & More Card set. I stamped the Adventures Awaits from the Beautiful World Stamp Set in Misty Moonlight and popped it up.

The inside of the card has a scrap from the front and a sticker from the Memories & More Cards.

Cards in the Memories and More Card set come in two sizes. I used the larger one for the base and the smaller one popped up for the sentiment.

I used another one of the smaller cards for the inside of the card to carry through the travel theme.

For this card I incorporated some embossing for the background. I thought the Scripty embossing folder was perfect.

Here’s a close up of the embossing. It’s really a subtle touch on the Crumb Cake cardstock.

Here’s a card using the Tasteful Textile embossing folder and matted layers to add more dimension.

Again, here’s another one of the smaller cards inside with a small sticker to provide a sentiment inside the card.

I hope you enjoyed seeing what I was able to create with the World of Good Memories & More Cards. Here are all the products used in this project!
 | |||
 | | |

")


Keeping it crafty!
Creativate Mystery Card Challenge
My project from a Mystery Card Challenge.
Hello Crafty Peeps,
Today, as a part of International Card Making Day, I’m taking part in an online retreat where 2,000 of us stampers are watching 5 amazing Stampin’ Up demonstrators create a project every hour on the hour from 10am to 9pm. I’m loving it. One of the things that is happening is what is called a Mystery Card Challenge. They provide the dimensions for you to cut your paper and then you put it together. I’ve never done this before and I can’t share the dimensions as is a part of a paid event but I figure I could share what I created…


Remember, no naked envelopes!

I really enjoyed the challenge of a mystery card and hope to do it again soon. All the goodies I used are pictured below!
 |  |
")


Happy Crafting Peeps!
A Little Something Just For You
Hello Everyone,
It’s been quite a while since I posted. Many changes have taken place for me. We sold our house and purchased a new one and the company I worked for was sold and I have a new position with the company that acquired us. A lot of buying and selling going on around me. In any event, I took some time to get squared away on all fronts and now I’m back to making cards and ready to share them with you.
Today’s card features the stamp set Fancy Phrases. This was the first stamp set I purchased from the current catalog. Something about the sketchy style caught my eye right away. There’s a lot going on with this card…stamping, embossing, die cutting and coloring. I even tied a bow (which is rare on my cards).

I couldn’t forget to add some interest on the inside of the card too.

And remember, no naked envelopes!

Here are the products I used in making the card above.
| | |||
| | |||
| | |


TradeFish Designs Card Sketch #1
The first monthly card sketch for TradeFish Designs is here. My goal is to have new sketch the first Friday of every month. I have a picture of the sketch and the dimension of all the cuts needed. After the photos I have a list of the supplies I used to make my sample cards.

Here are the dimensions for the Card Sketch above:
A2 card base (4.25” x 11” folded in half)
4-1/8” x 5-3/8” of designer series paper
1-7/8” x 5-3/8” of designer series paper or cardstock
2” x 5-3/8” cardstock
a die-cut shape or punch


Here are the supplies used to make this card:
Stamps: Peaceful Moments
Ink: Terracotta Tile
Paper: Woven Threads, Terracotta Tile, Balmy Blue, Purple Posy
Tools: Tailored Tag Punch
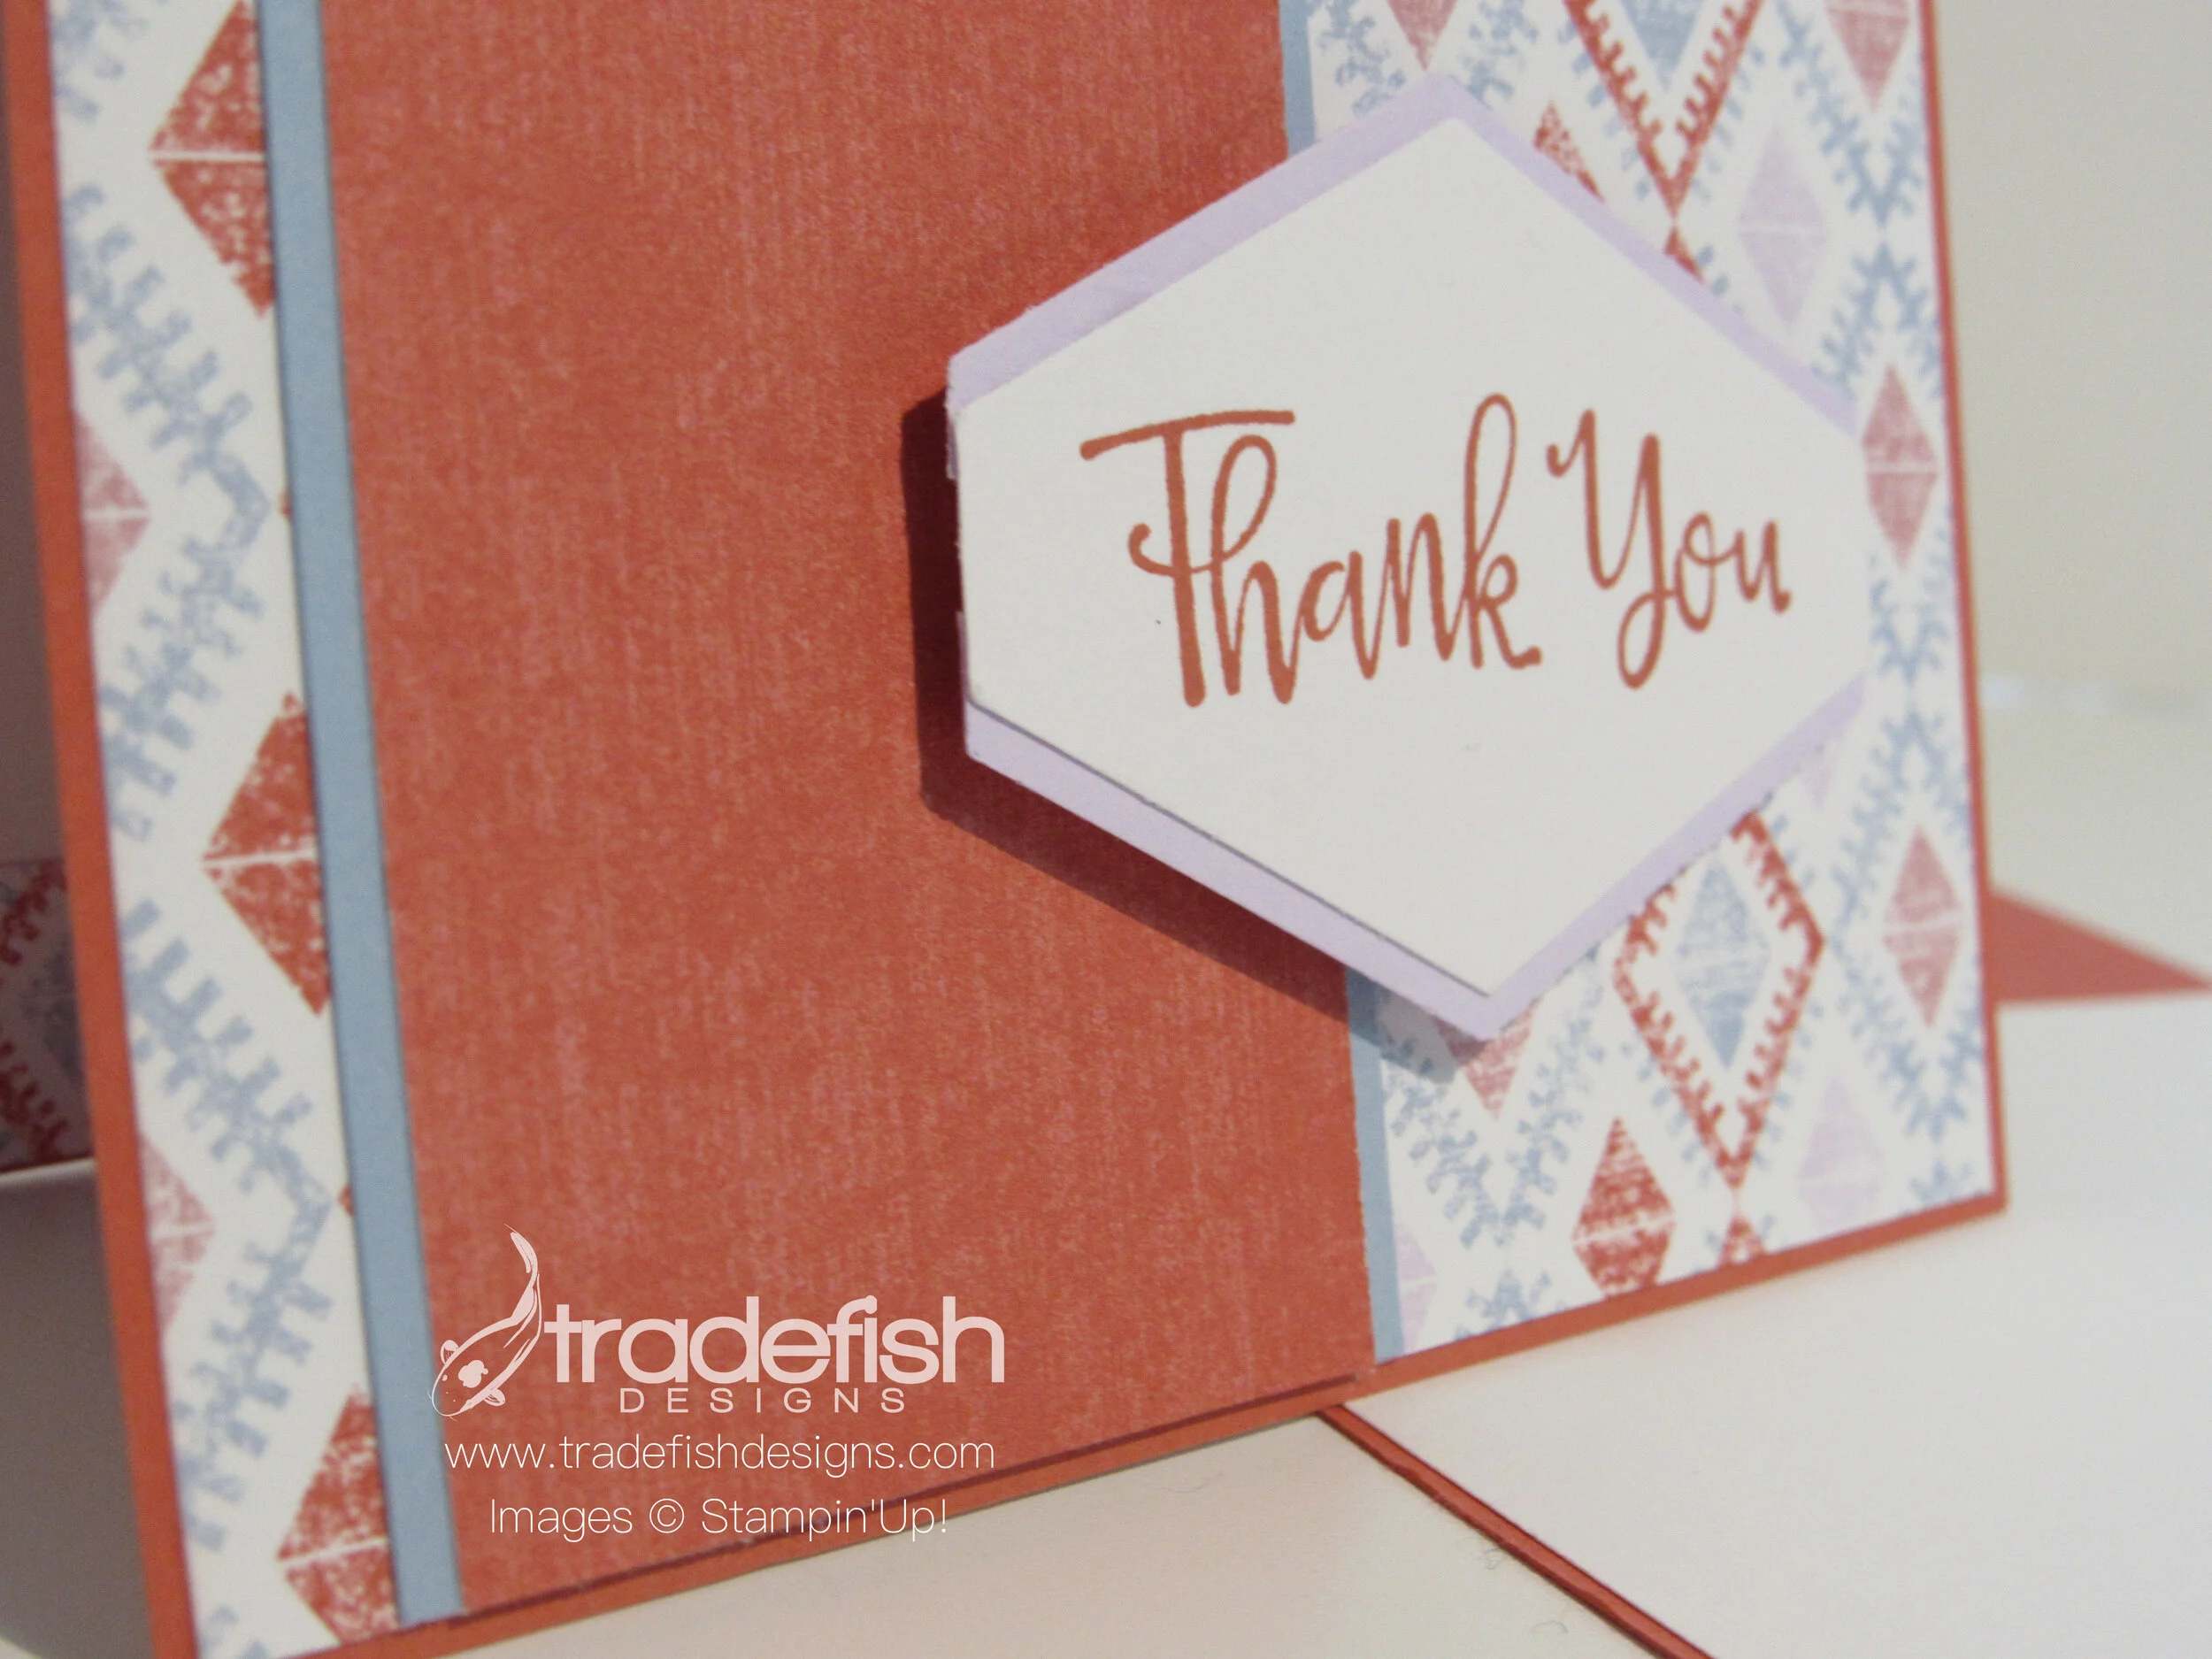
Woven Threads Thank You!
Here’s a fun and simple Thank You card. This is an easy to use card for a man or a woman. I started off with the Stampin’ Up Designer Series Paper called Woven Threads. I love the patterns because they’re not overly feminine. I also love the colors used…I love the Terracotta Tile from Stampin’ Up as the A2 card base (which is half of an 8-1/2 x 11 sheet of cardstock folded down the middle). It’s a rusty colors that works well here.
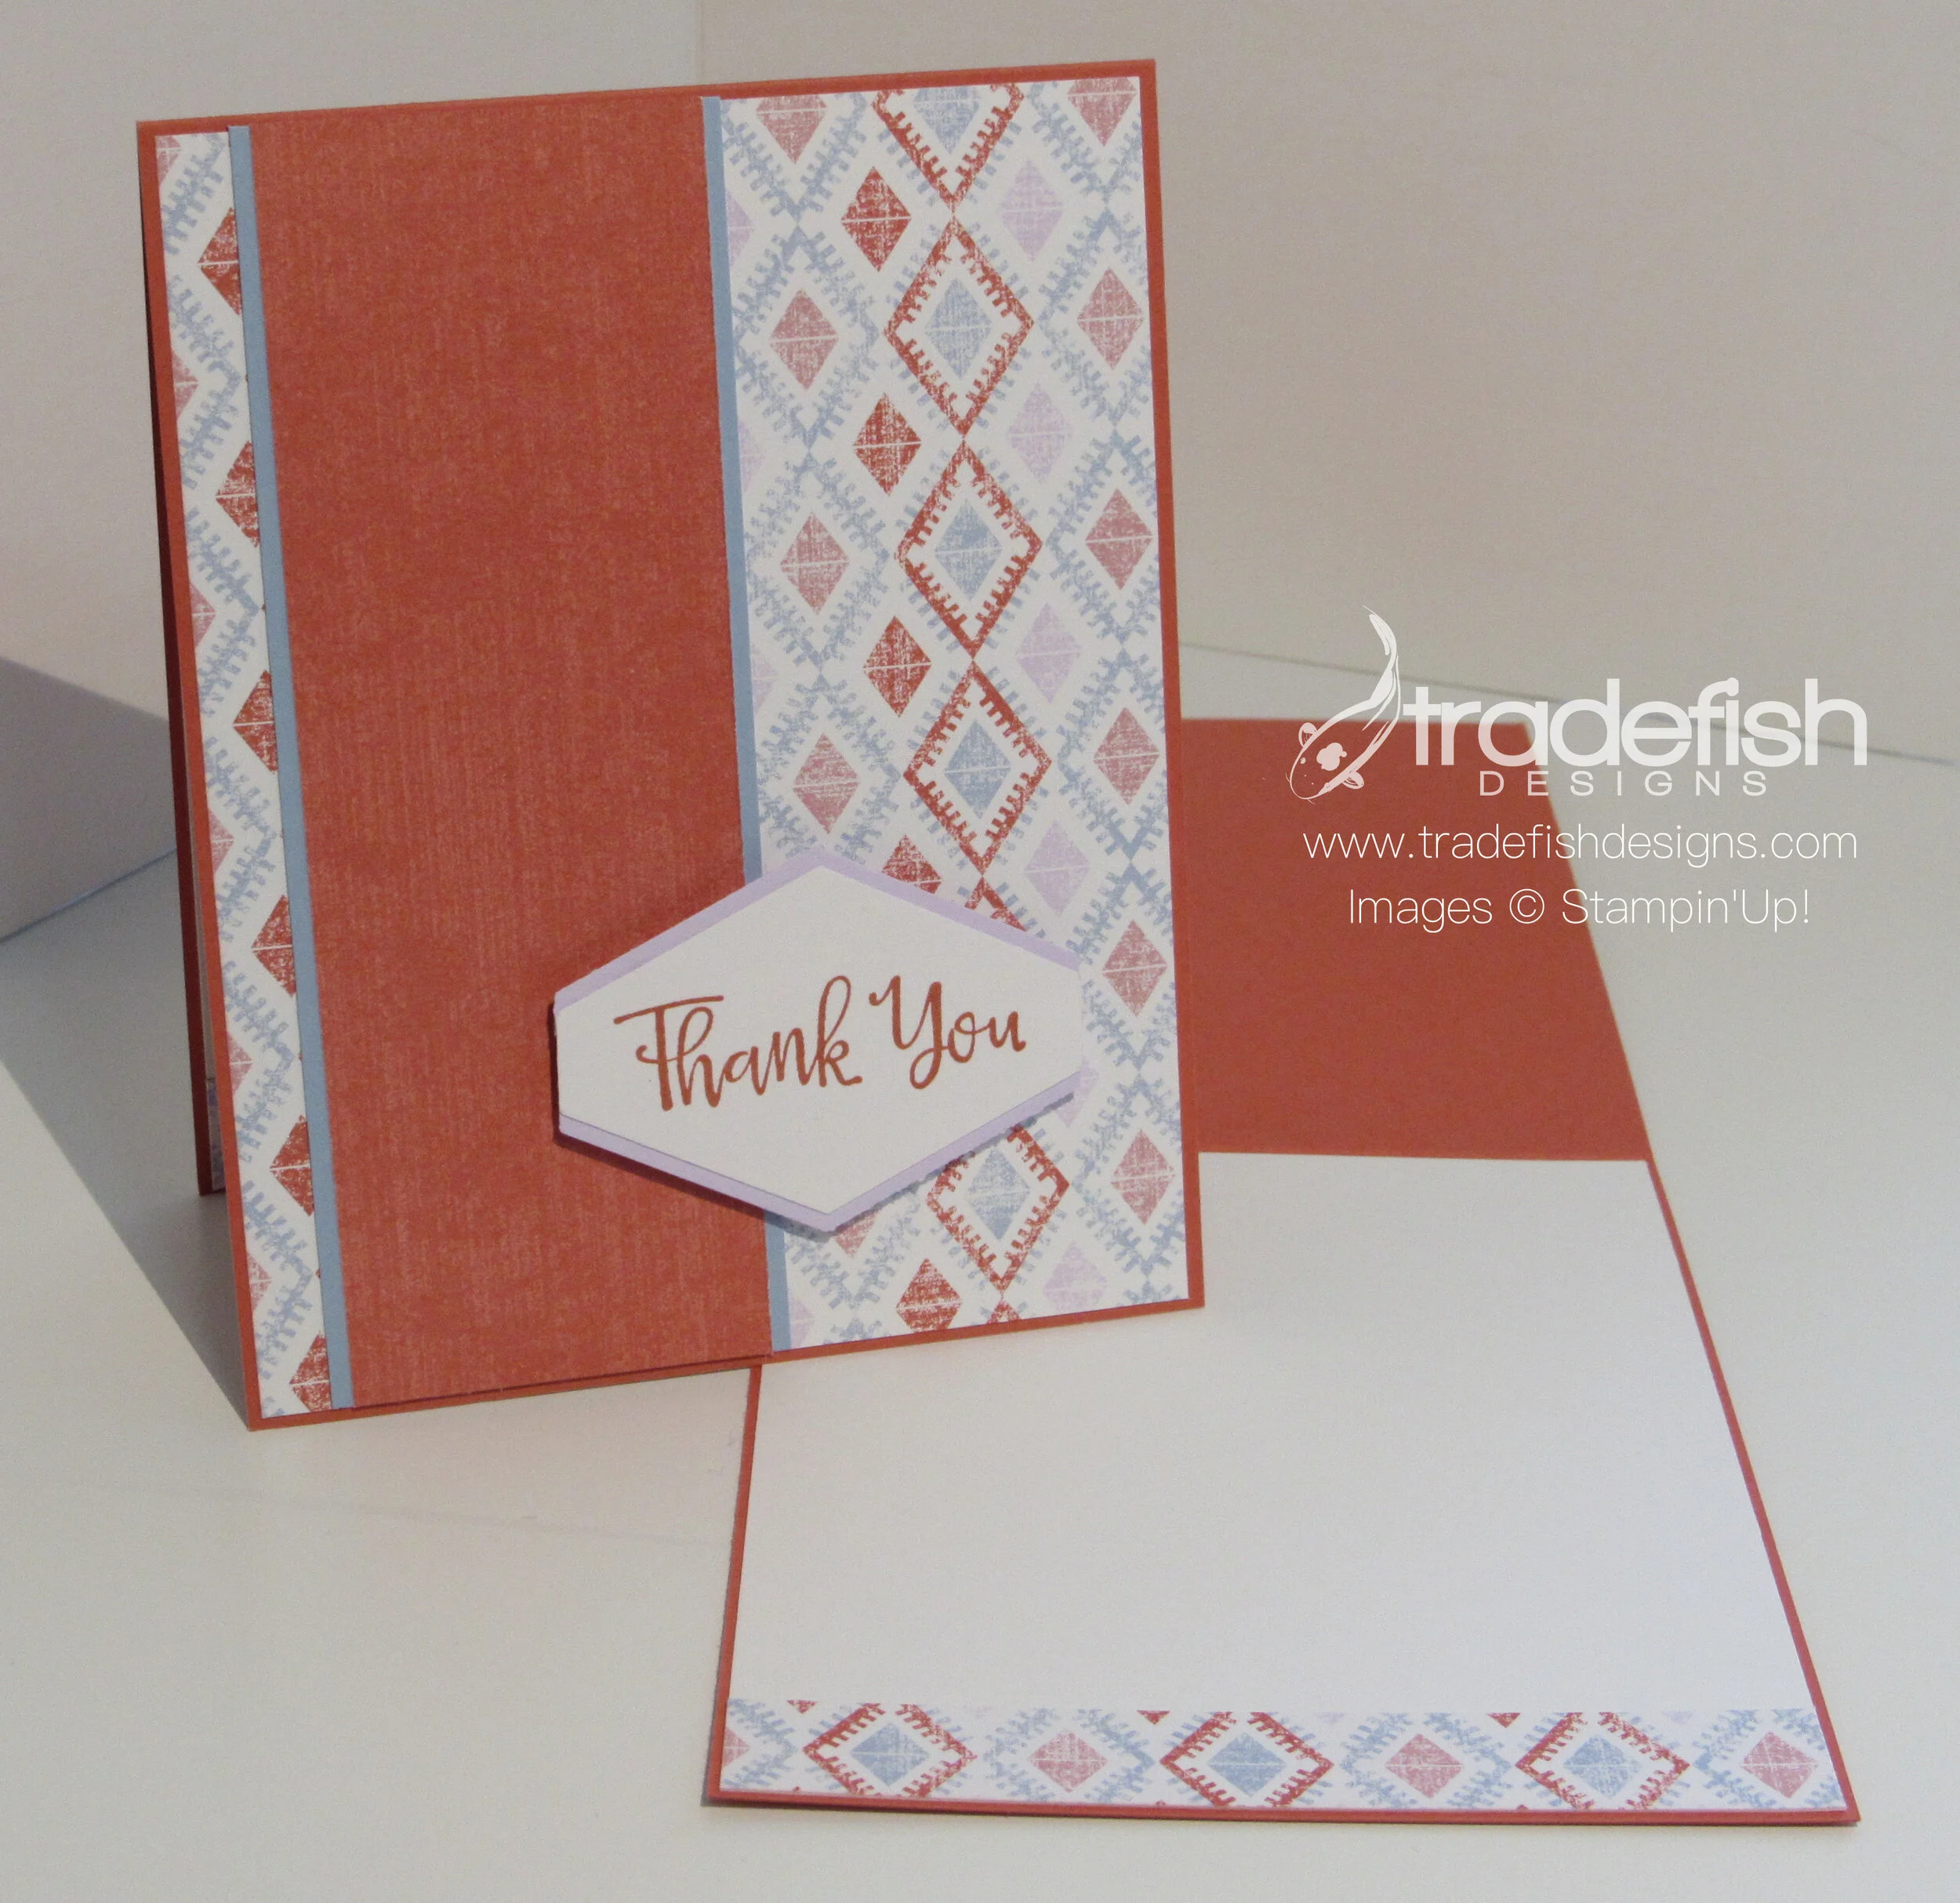
This close up shows off the Seaside Spray mat and the Purple Posy trim around the sentiment. I used the Tailored Tag punch for the sentiment with Whisper White cardstock and then cut another tag out of the Purple Posy cardstock and cut it in half and layered it under the sentiment at the top and the bottom. I added the sentiment with Terracotta Tile ink using the Peaceful Moments stamp set. This is by far the most used stamp set I have from the recent SU Mini Catalog. I just love the font and the sentiments are perfect for so many occasions.
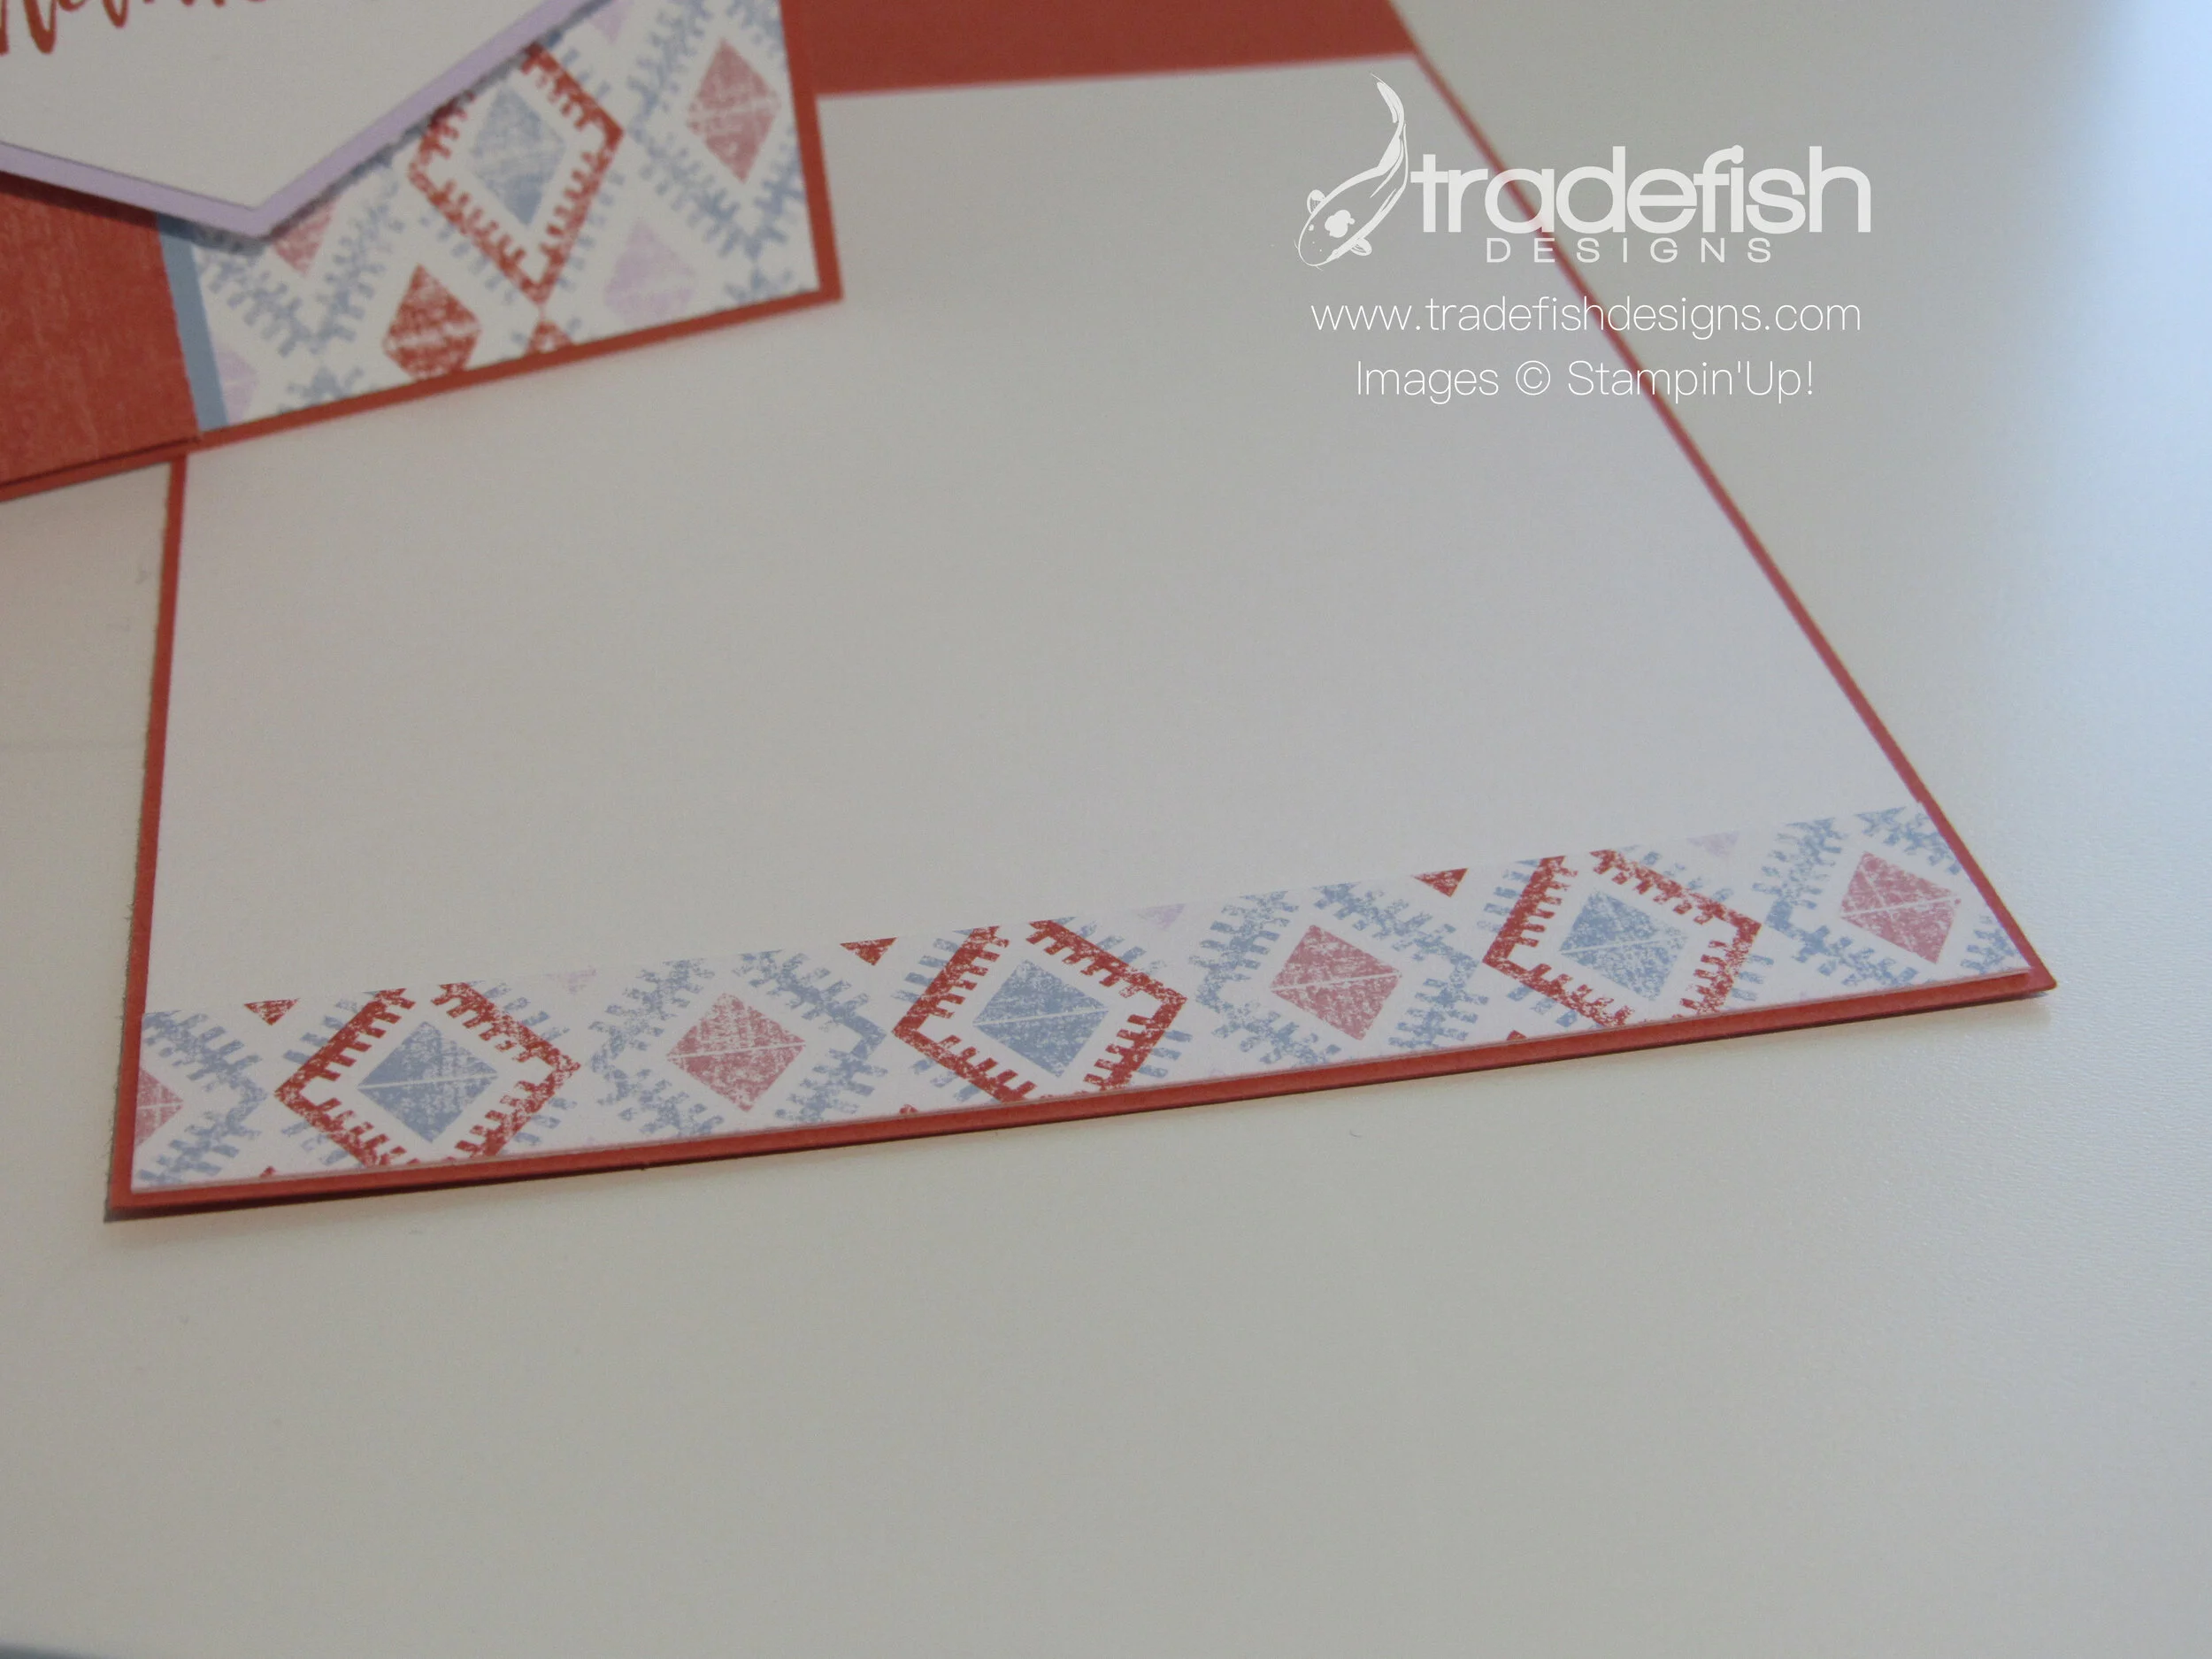
Below is the inside of the card. I always try to keep any scraps from trimming of the Designer Series Paper because you can always add a bit to the inside of the card to tie everything together. That's all I have for you today. I hope I have inspired you to make something fun today.
Products used to make this card:
Stamps: Peaceful Moments
Ink: Terracotta Tile
Paper: Woven Threads DSP, Terracotta Tile, Whisper White, Seaside Spray and Purple Posy
Tools: Tailored Tag Punch

Stay home & stay safe!
Christmas Tuesday!
Here’s another Christmas card Tuesday. Hope you enjoy it!

Love a good snowman card!
This card uses some fun paper and coloring with my Stampin’ Blend markers. This stamp set and paper is no longer available from Stampin’ Up but I’m sure you have something in your stash to substitute. Hopefully this card will inspire you to get a head start on your Christmas cards.

Don’t forget the decorate the inside of your card too!

Stay home and safe!
So Very Happy To Know You!
Just a quick post today. So much is happening in the World but I want to try and keep up the posts every Tuesday and Friday. Lots happening. As if the crazy pandemic of COVID-19 wasn’t enough, the hubs (aka Rob) and I are moving in a few short weeks. We are downsizing and that means my craft room will have to be packed away and relocated so I am trying to plan ahead on posts so that you don’t see any disruption.
Today’s card was created from a Fall Retreat I attended virtually hosted by Dena Rekow of The Creativity Cave. She is a Stampin’ Up rockstar and I wanted to share this beautiful creation she designed and I re-created. All the items in this card are still available, as of this posting date, to order from Stampin’ Up. I will have the list and links below.

A combination of beautiful stamps, colors & textures.
Items used in the making of this card.
Stamps: Beautiful Friendship
Ink: Blackberry Bliss, Rich Razzleberry, Crushed Curry, Pear Pizzazz, Early Espresso
Paper: Rich Razzleberry, Whisper White, Crumb Cake
Dies: Stitched Rectangles
Embellishments: Tin Tile 3D Embossing Folder
Adhesive: Dimensionals, Multi-purpose Liquid Glue

Keep it healthy crafters!
Happy St. Patricks's Day!
Hello my crafty friends. Just a quick card I pulled out of my stash that I made a few years back with my Cricut. It’s a simple St. Patrick’s Day card using four different style of shamrocks on a 6x6 piece of white cardstock.

Four fun shamrocks made with my Cricut.
I popped the shamrocks up on dimensionals to really let them stand out on the stark white paper. Clean, simple and fun. I hope you all enjoy a safe and happy day!

Keep it safe & Crafty!
Peaceful Poppies Sympathy Card
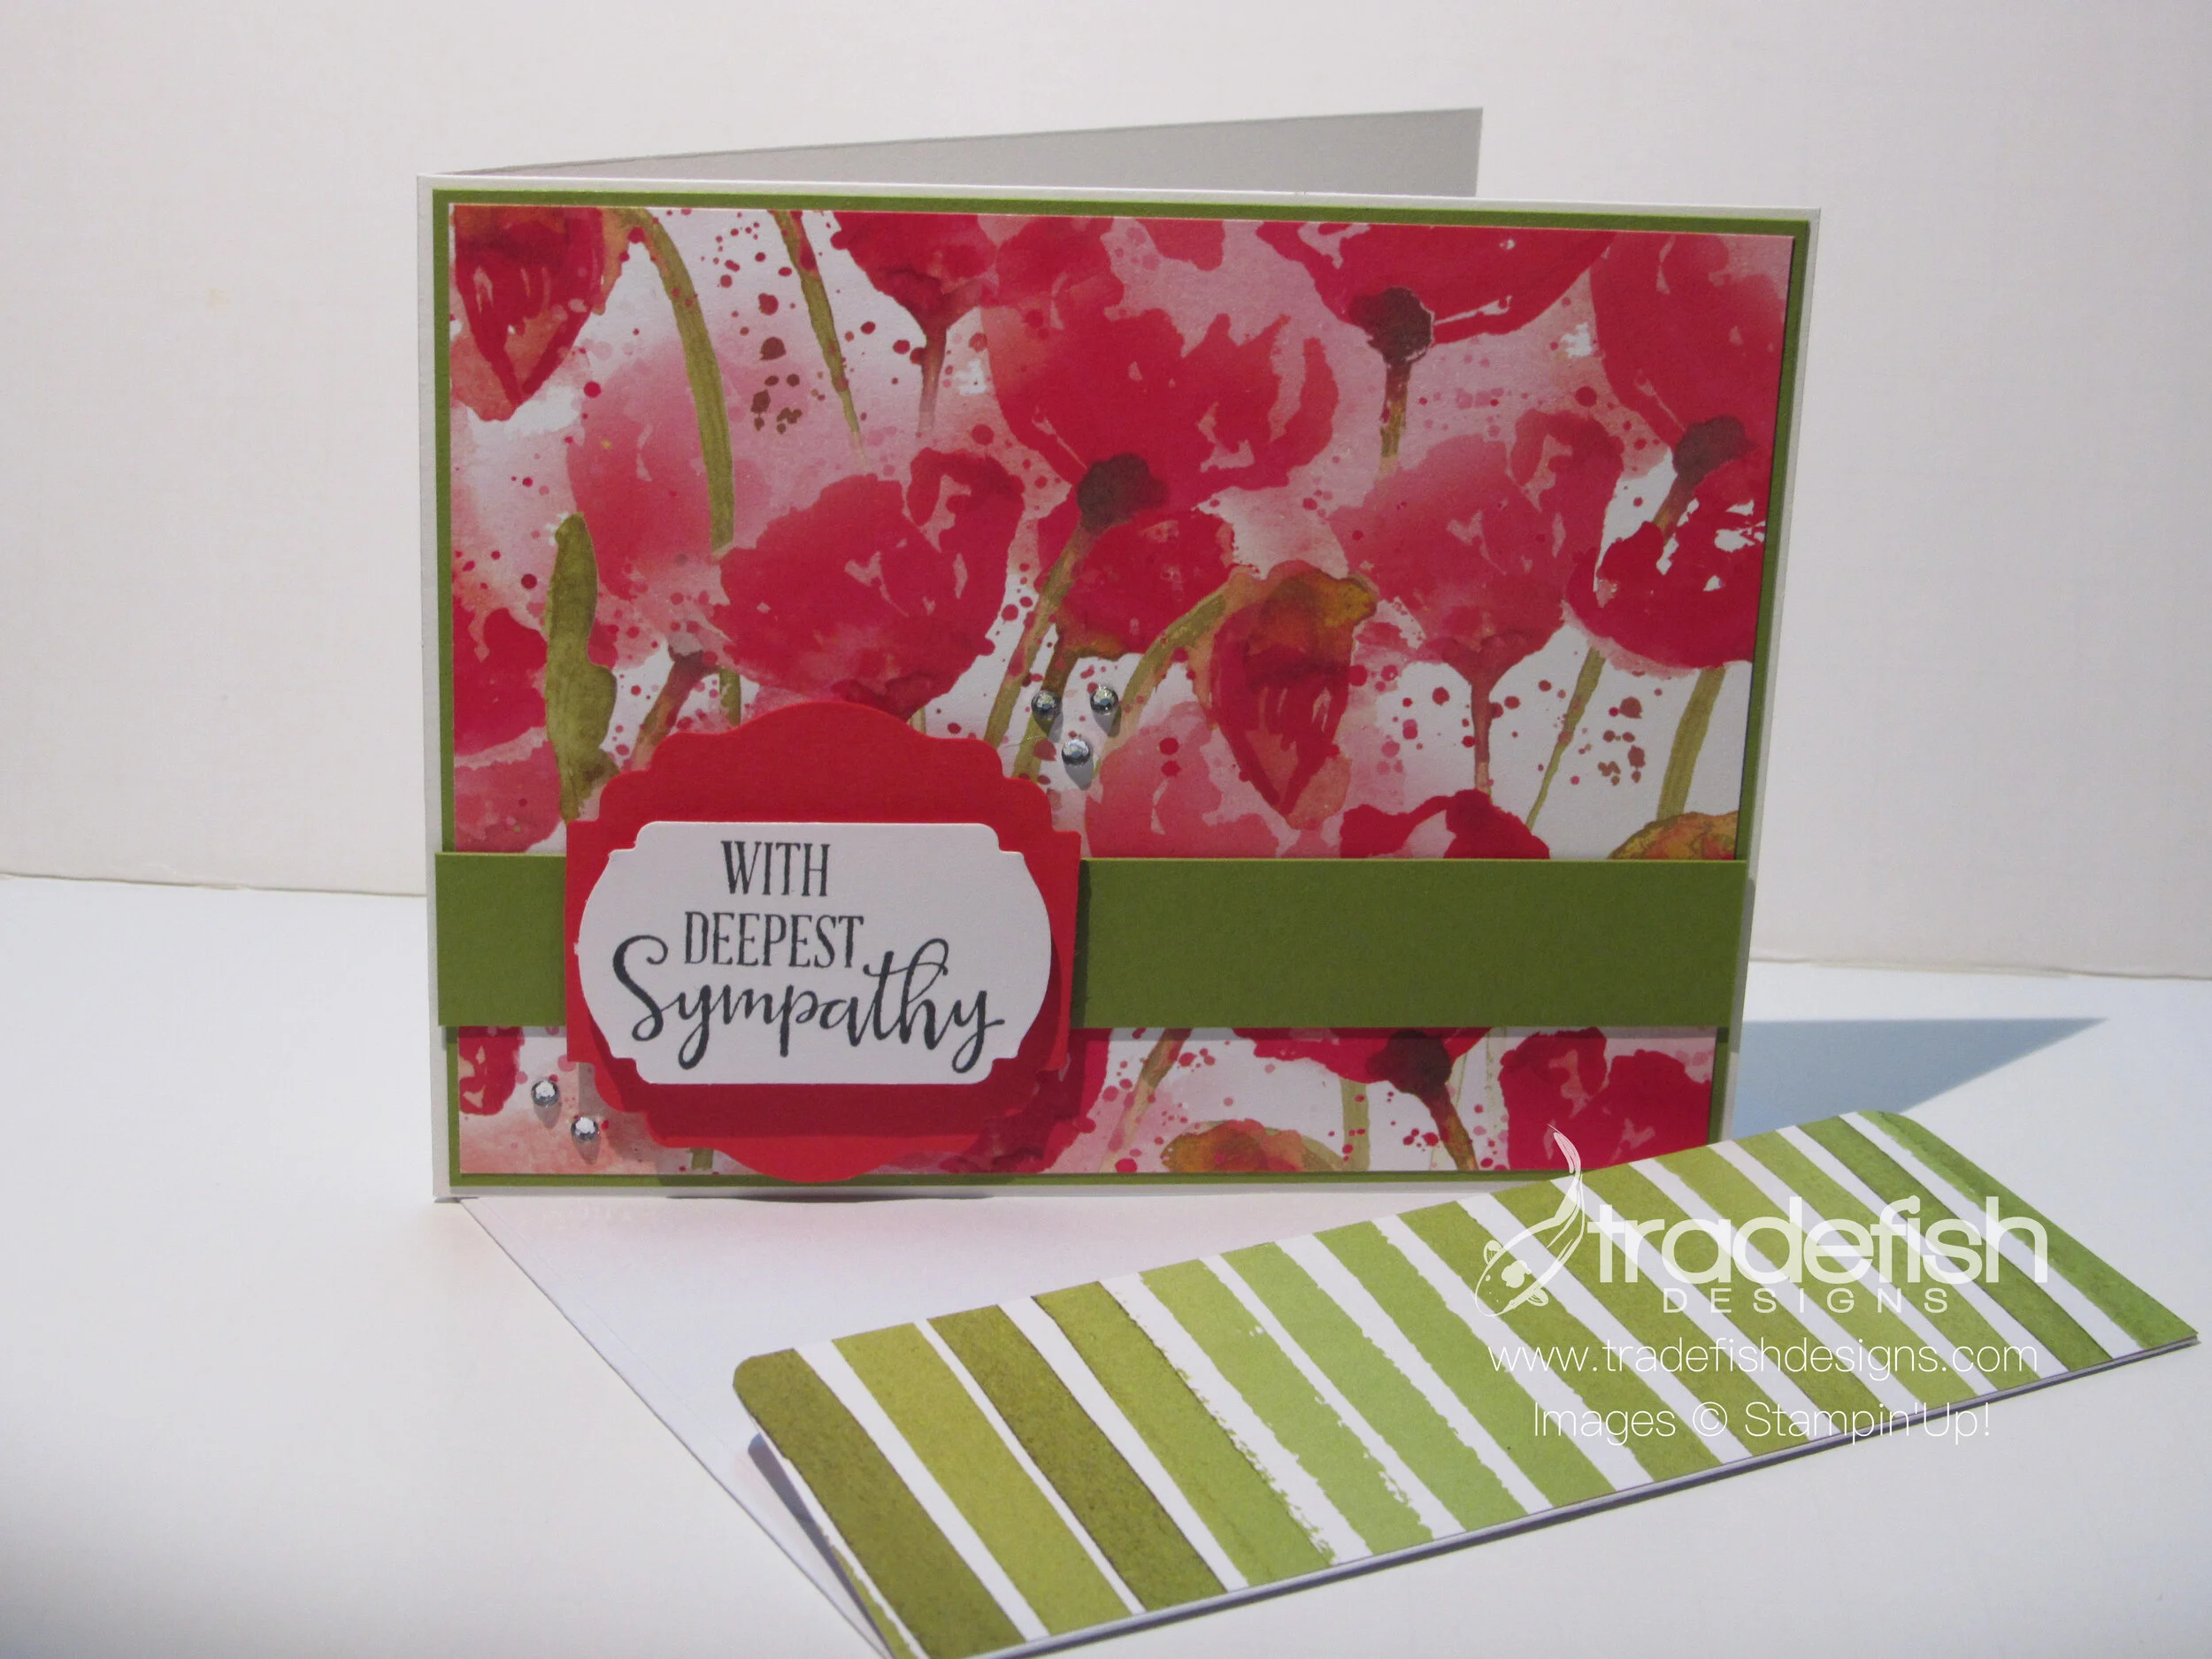
This has been a difficult time of year for many people that I cherish. I have friends that have lost parents, spouses and pets. When that time comes I do my best to send a small piece of my heart to them. This is a card that I sent to a dear friend who lost her beloved pet. It is such a dark moment but I felt the need to bring a little light to her using my favorite designer series paper from Stampin’ Up…Peaceful Poppies.

Use some scrap designer series paper to adorn the flap of your envelope. You letter will be opened first for sure!
If you haven’t noticed, I prefer a clean and simple style of cardmaking. I try to take advantage of beautiful paper to help convey the tone I am trying to set and utilize a sentiment that would apply. Here I have layered the Peaceful Poppies DSP over an Old Olive cardstock mat and layered that on a Whisper White card base.

A touch of bling with Rhinestones adds a little bit of sparkle to a somber card.
Next I added a clean strip of Old Olive cardstock to anchor the sentiment I used from one of my favorite new stamp sets, Peaceful Moments. I used some Memento Black Ink on the first punched out shape (Label Me Fancy) and then popped that up on top of a second punch (Label Me Lovely). The dimension adds a nice look to the card.
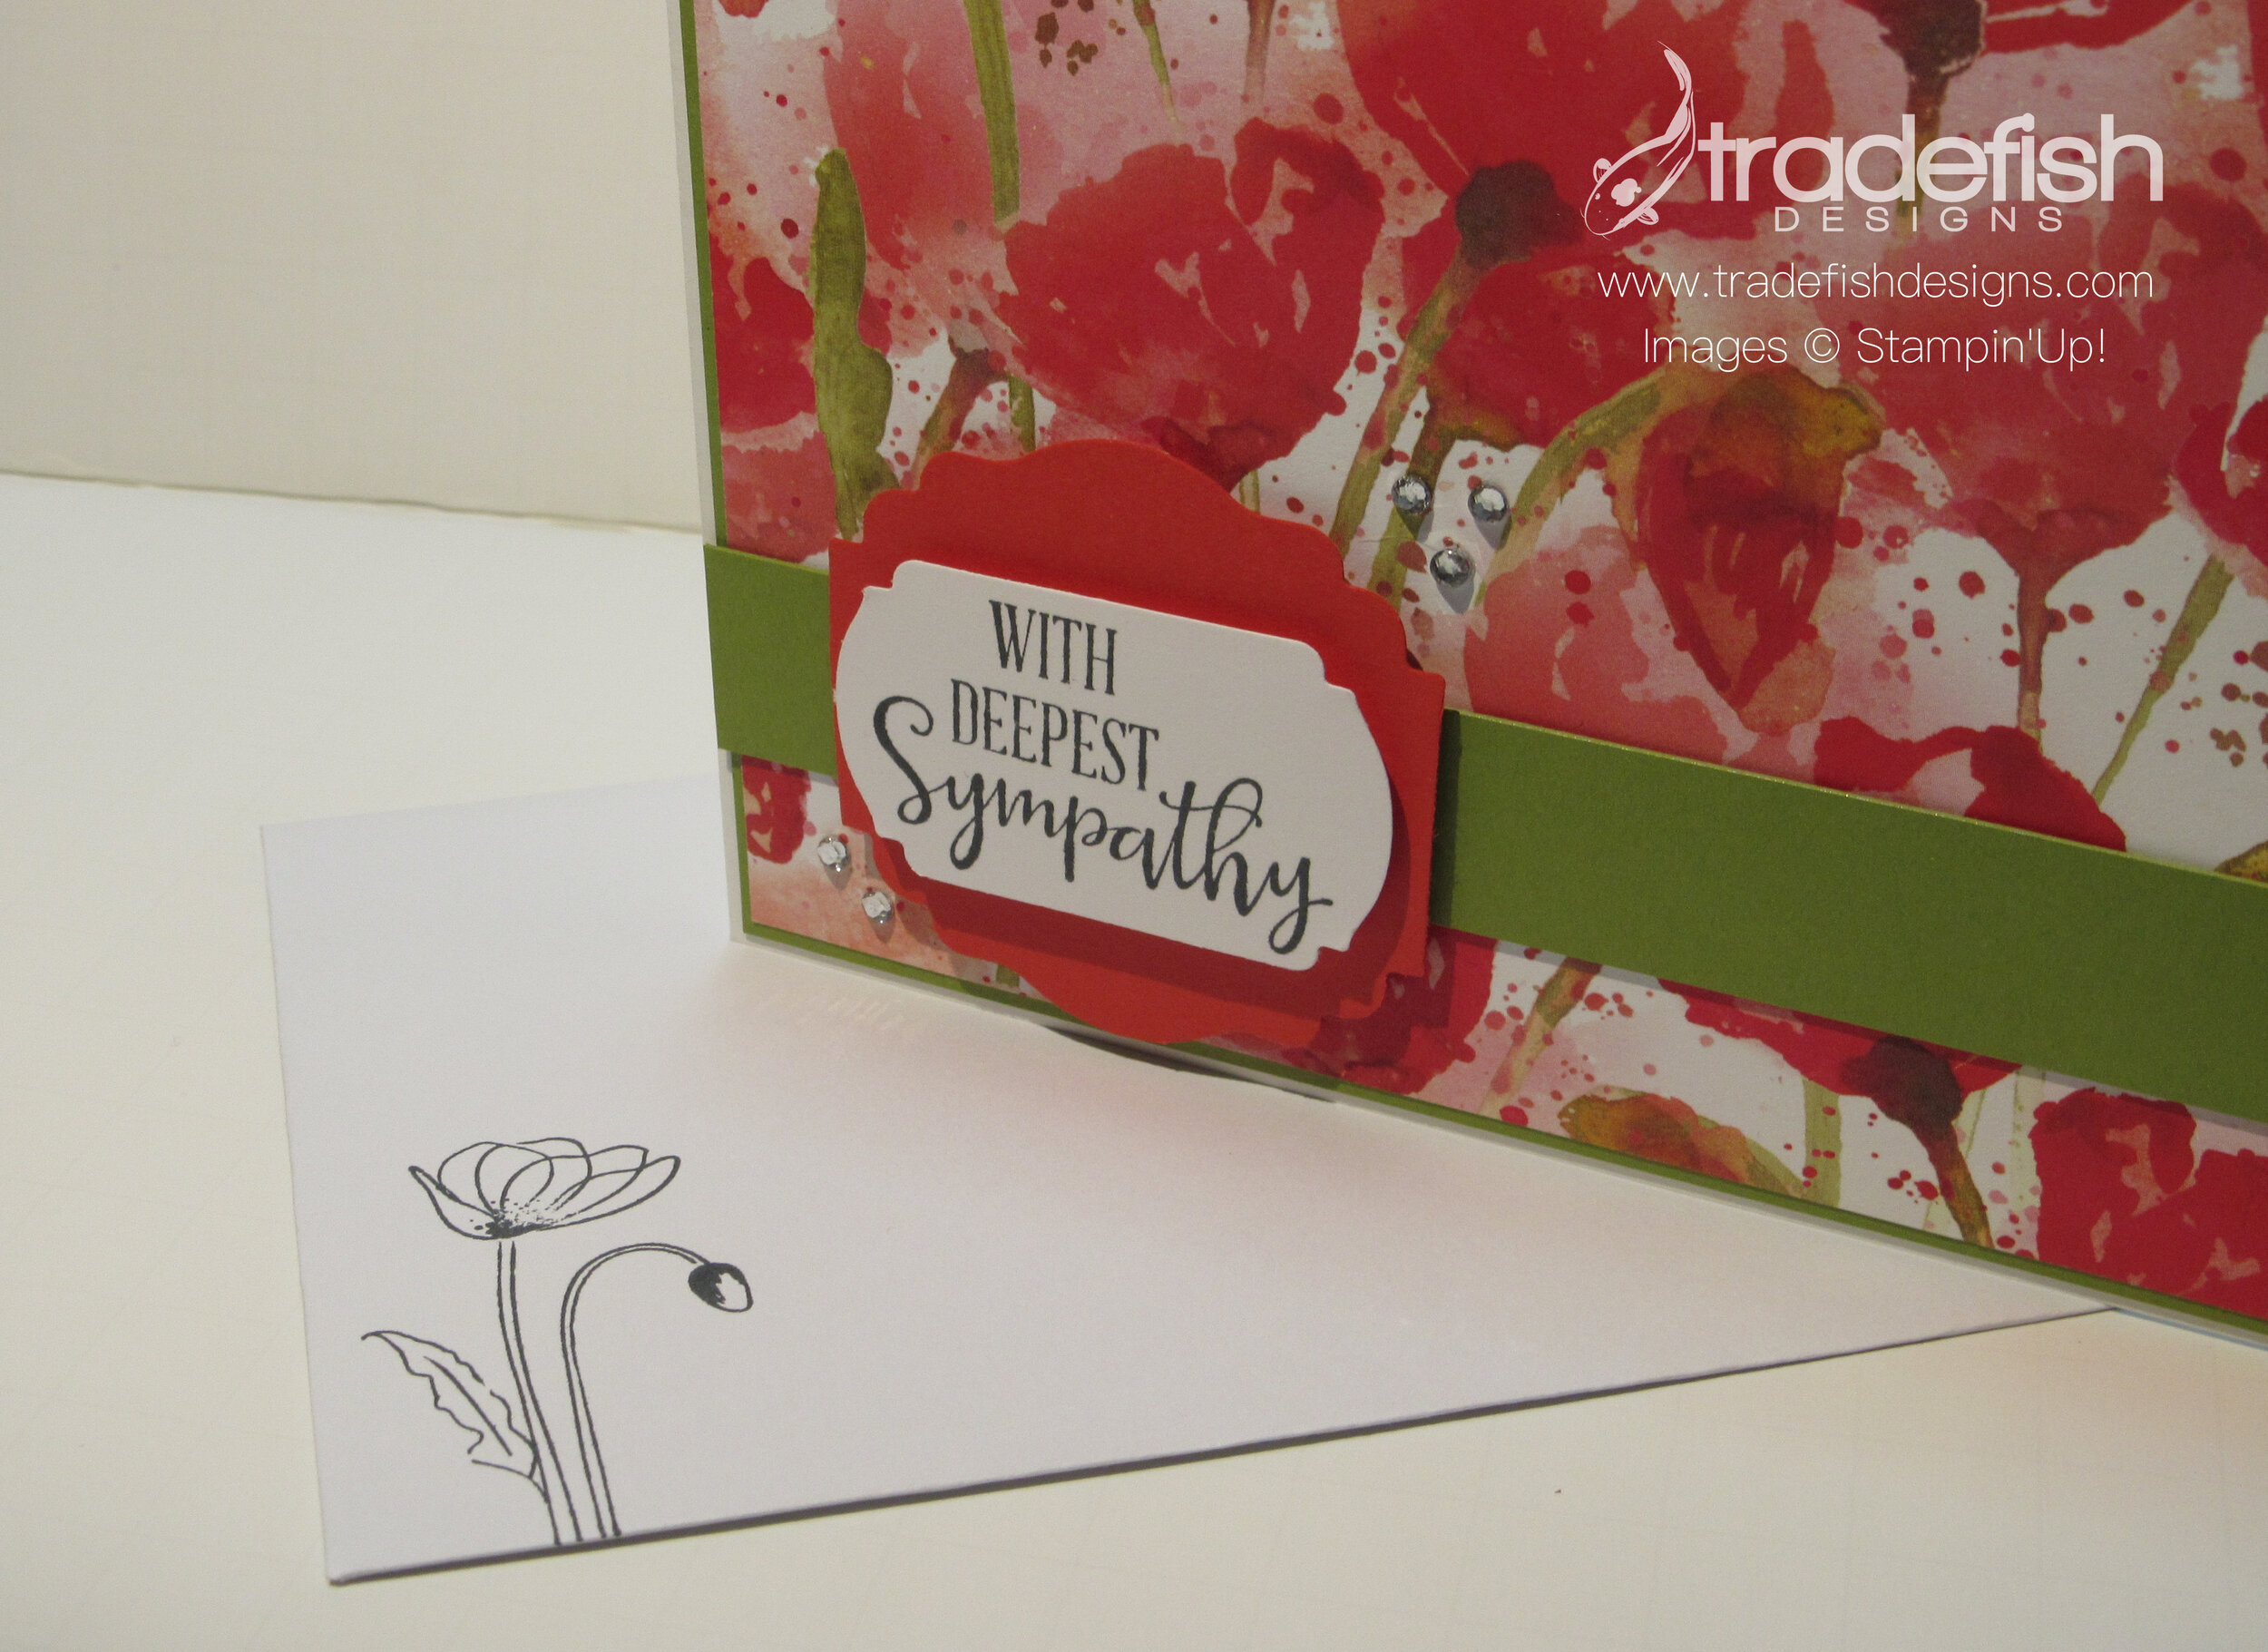
Don’t forget to look at the front of your envelope as a change to kick it up a notch. Here I used a stamp from the Painted Poppies cling stamp set to give a hint as to what the recipient will find inside of the card.
In a time when we are all sending emails, texts and (gasp) e-cards, it’s important to remember the impact of a simple card with a handwritten note inside. I know this meant so much to my friend because she knows I spent the time to create something just for her. Come back next week my crafty friends for a special St. Patrick’s Day card that you can recreate for any holiday or occassion.
Here are the supplies used to make this card:
Stamps: Painted Poppies, Peaceful Moments
Ink: Memento Tuxedo Black
Paper: Poppy Parade, Old Olive, Whisper White, Peaceful Poppies Designer Series Paper
Punches: Label Me Lovely, Label Me Fancy
Embellishments: Rhinestones
Extras: Whisper White Envelopes
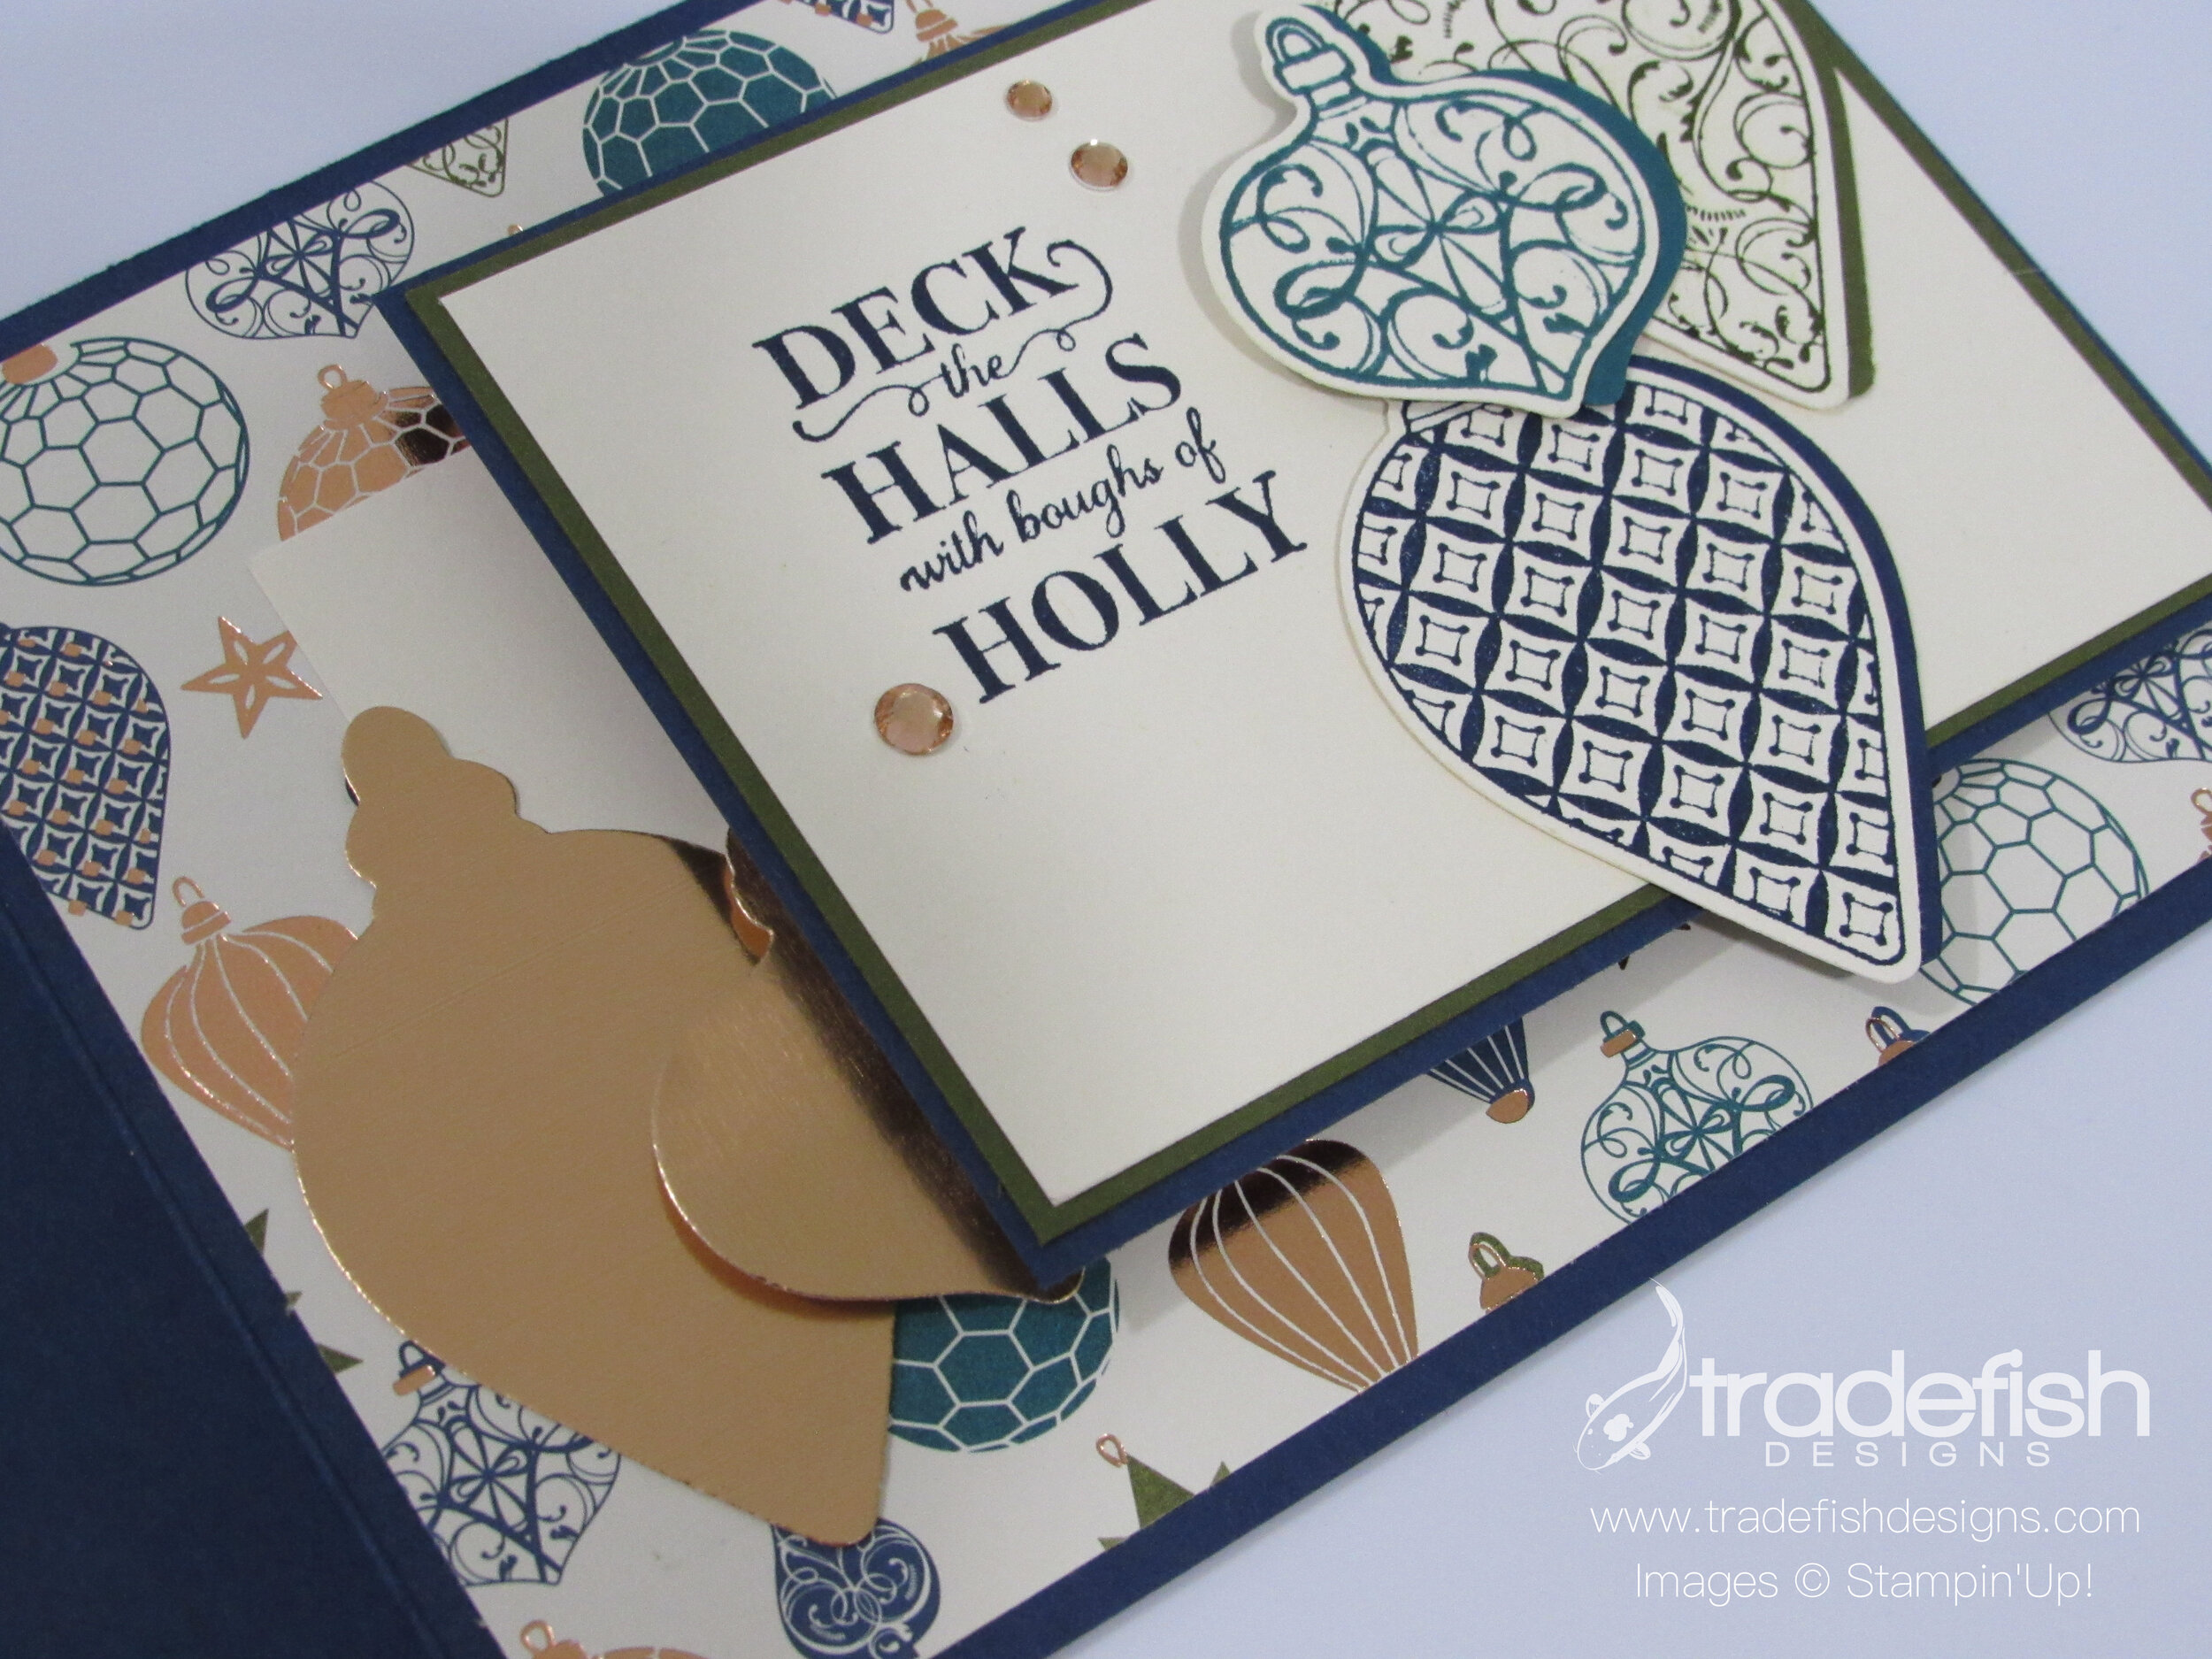
Christmas Tuesday!
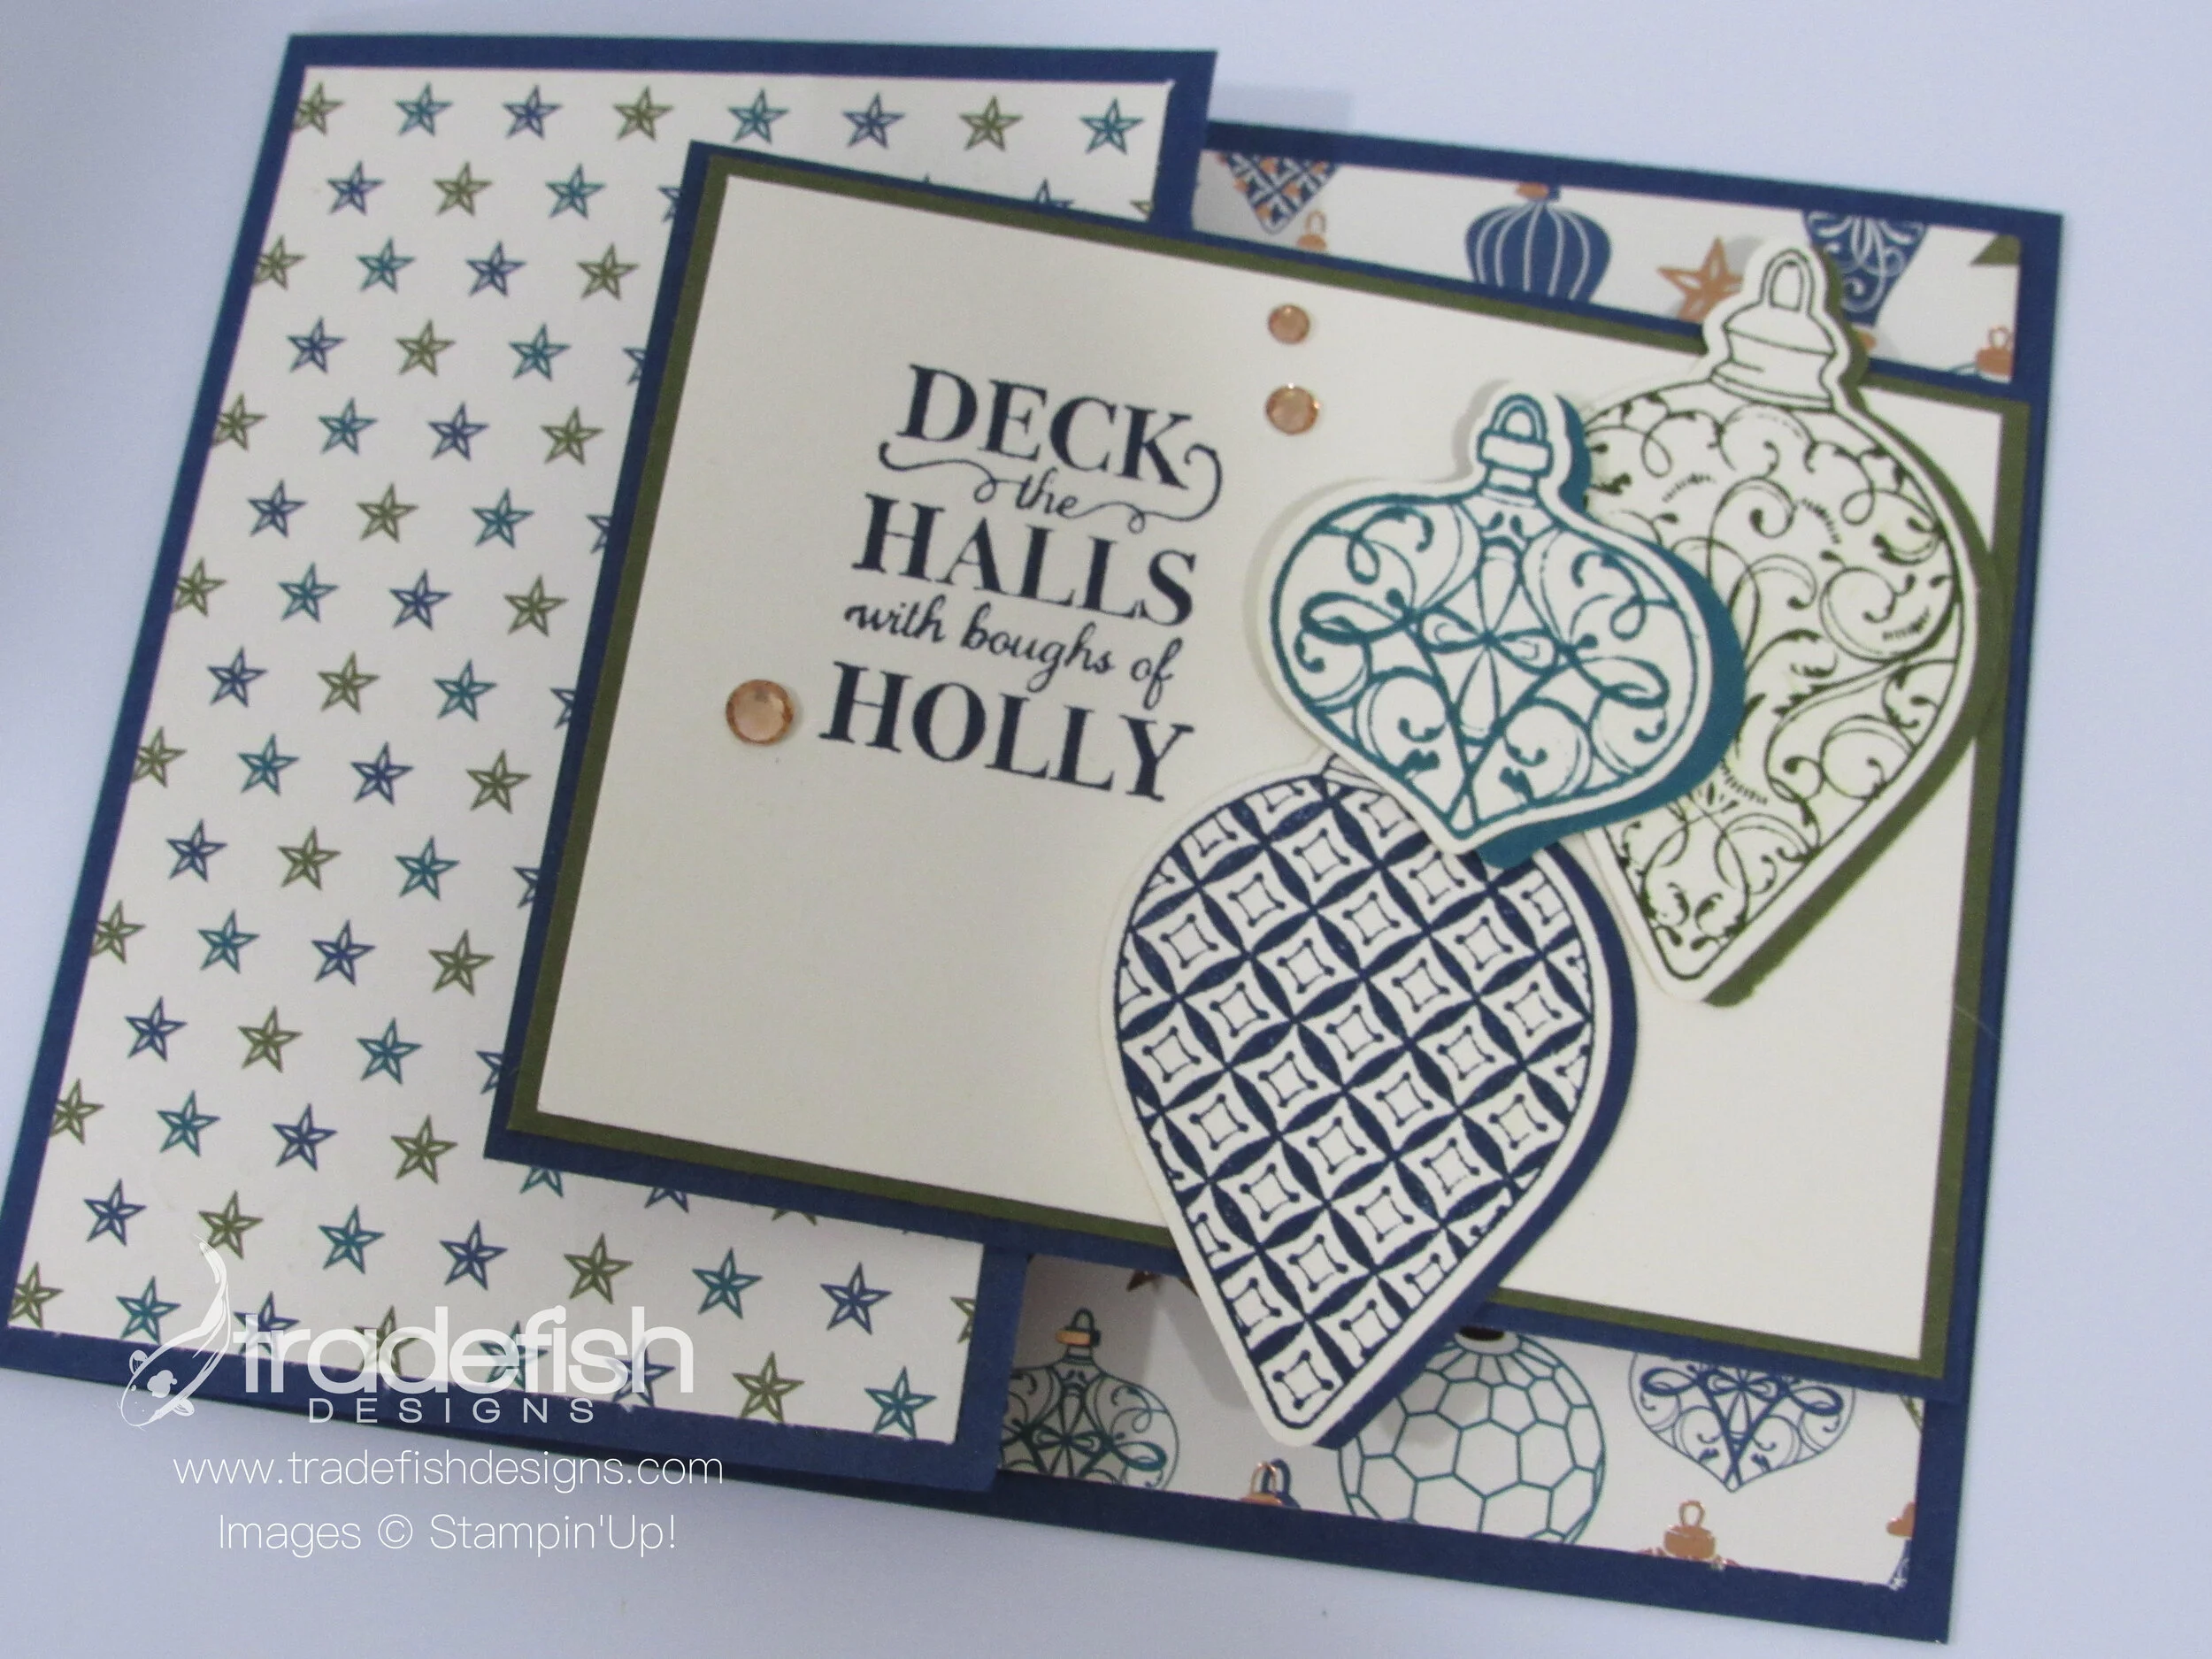
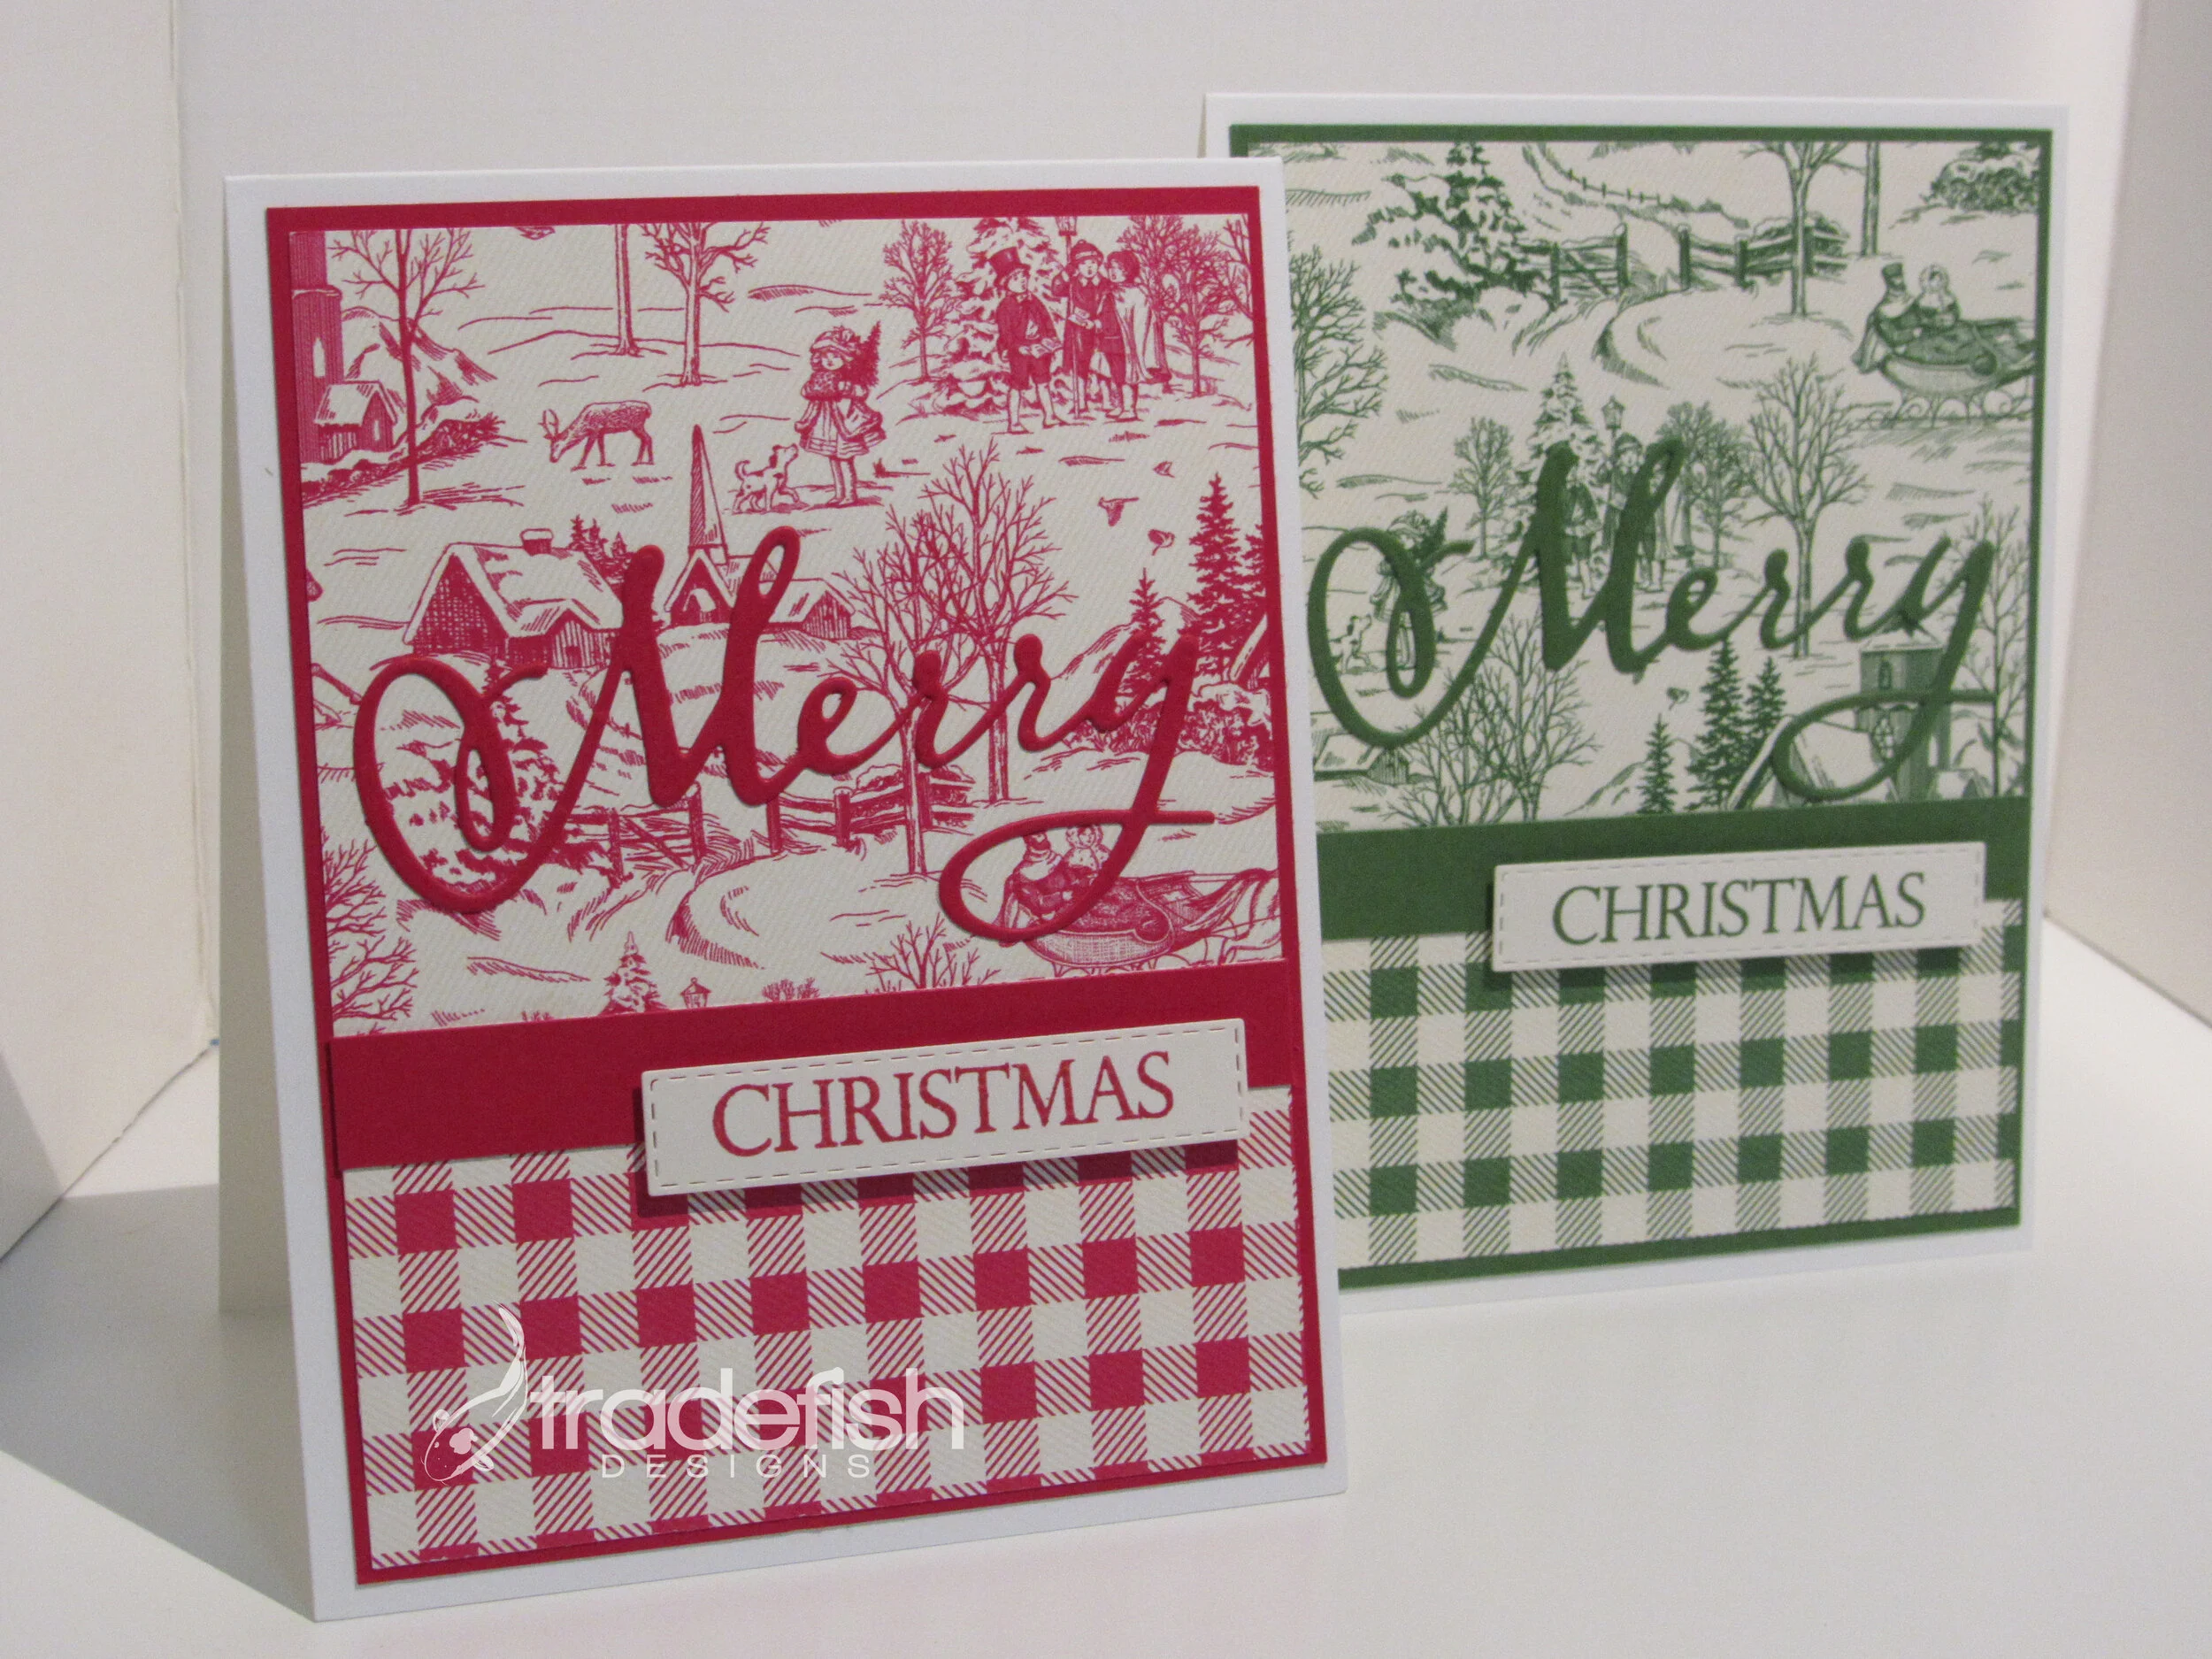
Another simple but stunning Christmas card to add to my collection for my big mailing in December. I saw this card on Pinterest and knew I have to try it out. The designer series paper (Toile Tidings) is retired paper from Stampin Up’ but you can substitute any paper (and it doesn’t have to be Christmas themed either). The cardstock, stamps, ink and dies are still available. See the links below to check them out.

I’m a sucker for a crisp and bright plaid and the contrast with the toile is just perfect.

Here’s a close up to see the dimension as well as the stitching in the dies used.
Here’s a list of what I used to make this sweet and simple Christmas cards:
Ink: Real Red, Garden Green
Paper: Toile Tidings (retired), Real Red, Garden Green, Whisper White
Stamps: Merry Christmas to All

Christmas crafty!
Sail Away to Maine Scrapbooking
Today’s post shows off a 2 page scrapbooking layout from a trip to Maine I took for work last fall. A co-worker and I visited Kennebunkport, Maine and visited the nearby lighthouse and got a peek (albeit at a distance) of the Bush compound known as Walker’s Point.

I used my Stampin’ Up Come Sail Away Suite Bundle that includes a beautiful nautical paper, coordinating stamps and dies as well as stickers and small cards.

I used my Night of Navy ink pad to stamp the lighthouse and the compass on whisper white cardstock and then I die cut them and used them to embellish my photos. I used one of the coordinating cards from the suite to journal about my trip.

Here is a cute cluster of coordinating stickers to carry the nautical them onto the second page.

Finally a rope and compass sticker combination finishes off the other photo.
This is truly a beautiful suite. You can but all of the pieces individually but save money if you splurge and get the whole suite bundle. I hope you enjoyed my scrapbook page. I’m trying to break out and use my stamping and cardmaking supplies with the my scrapbooking. I like the 8-1/2 x 11 format too.
Come back again next week for another Christmas Tuesday and another set of cards using the Peaceful Poppies products. If you are interested in the items I used in today’s project, check out the list below. Remember, you can buy the Suite Bundle or individual pieces of the Bundle.
Bundle: Come Sail Away Suite Bundle (purchase this bundle and save 10% on the stamps and dies)
Ink: Night of Navy
Stamps: Sailing Home
Paper: Come Sail Away Designer Series Paper, Whisper White
Dies: Smooth Sailing
Embellishments: Come Sail Away Memories & More Card Pack (the stickers in the layout above use stickers from this pack)

Crafty memories!