
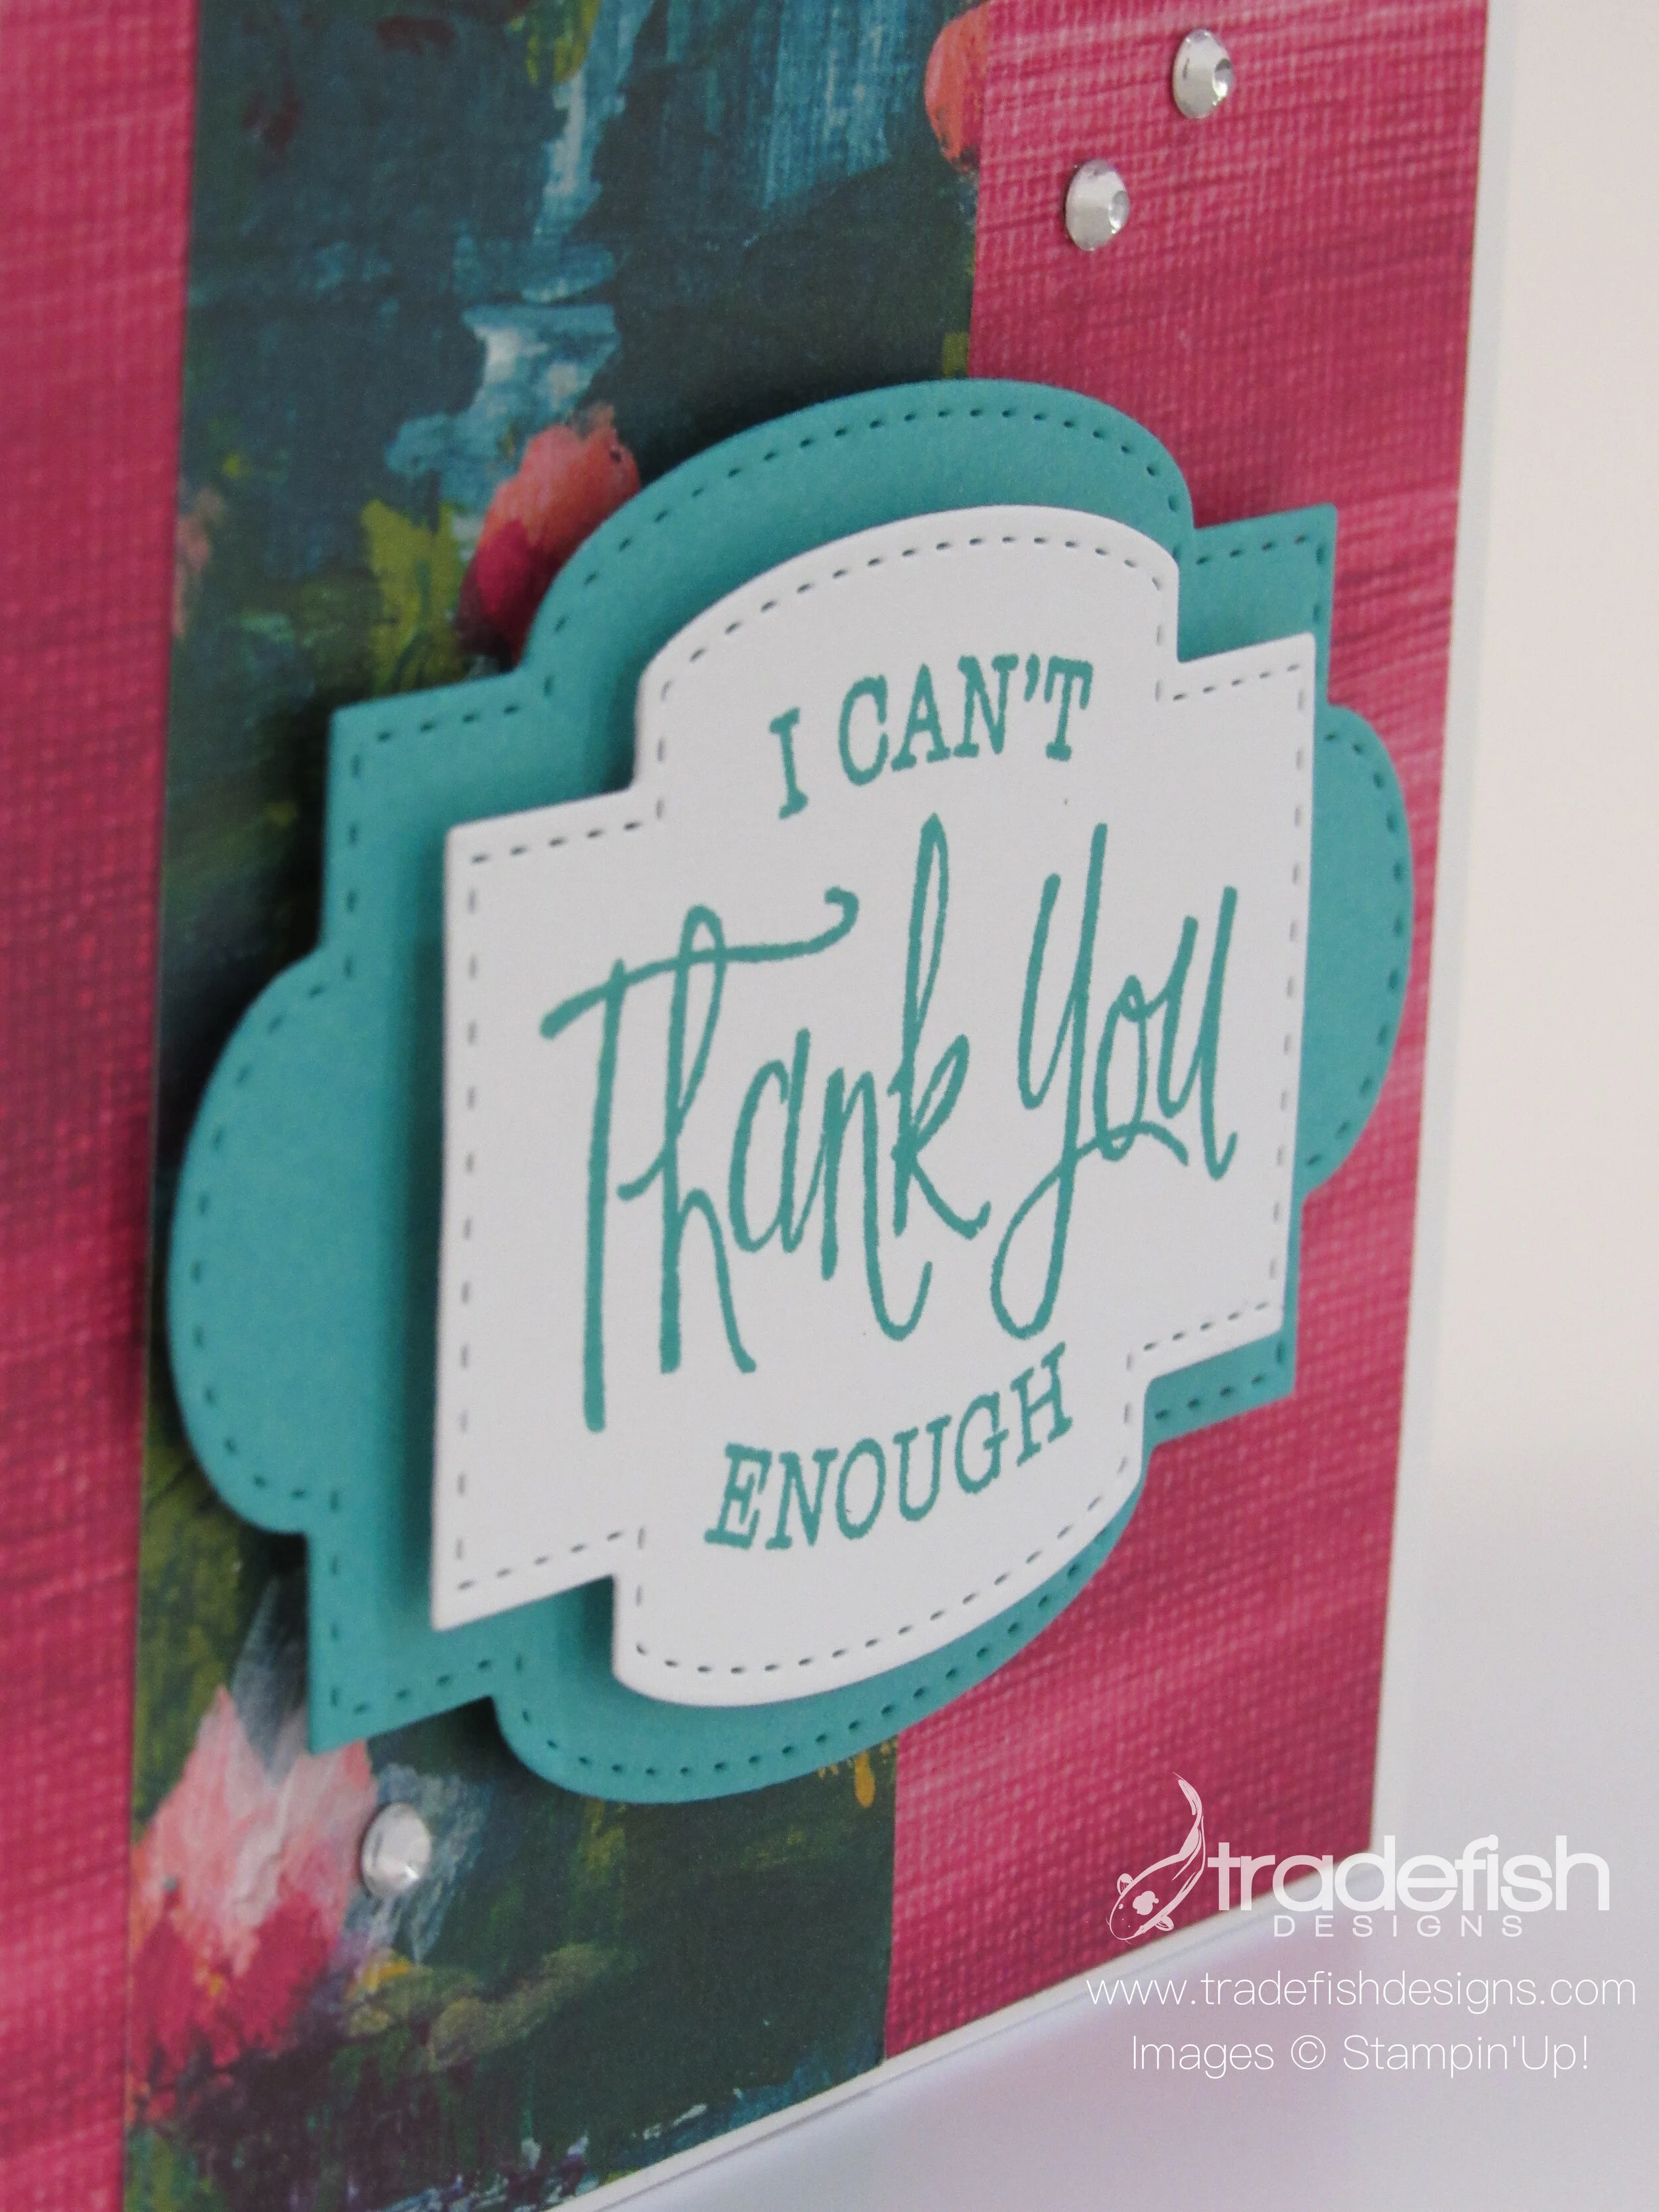
I can't thank you enough!
Not enough people send thank you cards anymore. People don’t really send letters at all but I do think a thank you card is important. Here’s a colorful one I created and I hope you enjoy it!

The angle view gives you a great look at the dimension on this card as well as the sparkly rhinestones. The stitching on the dies looks great up close too.

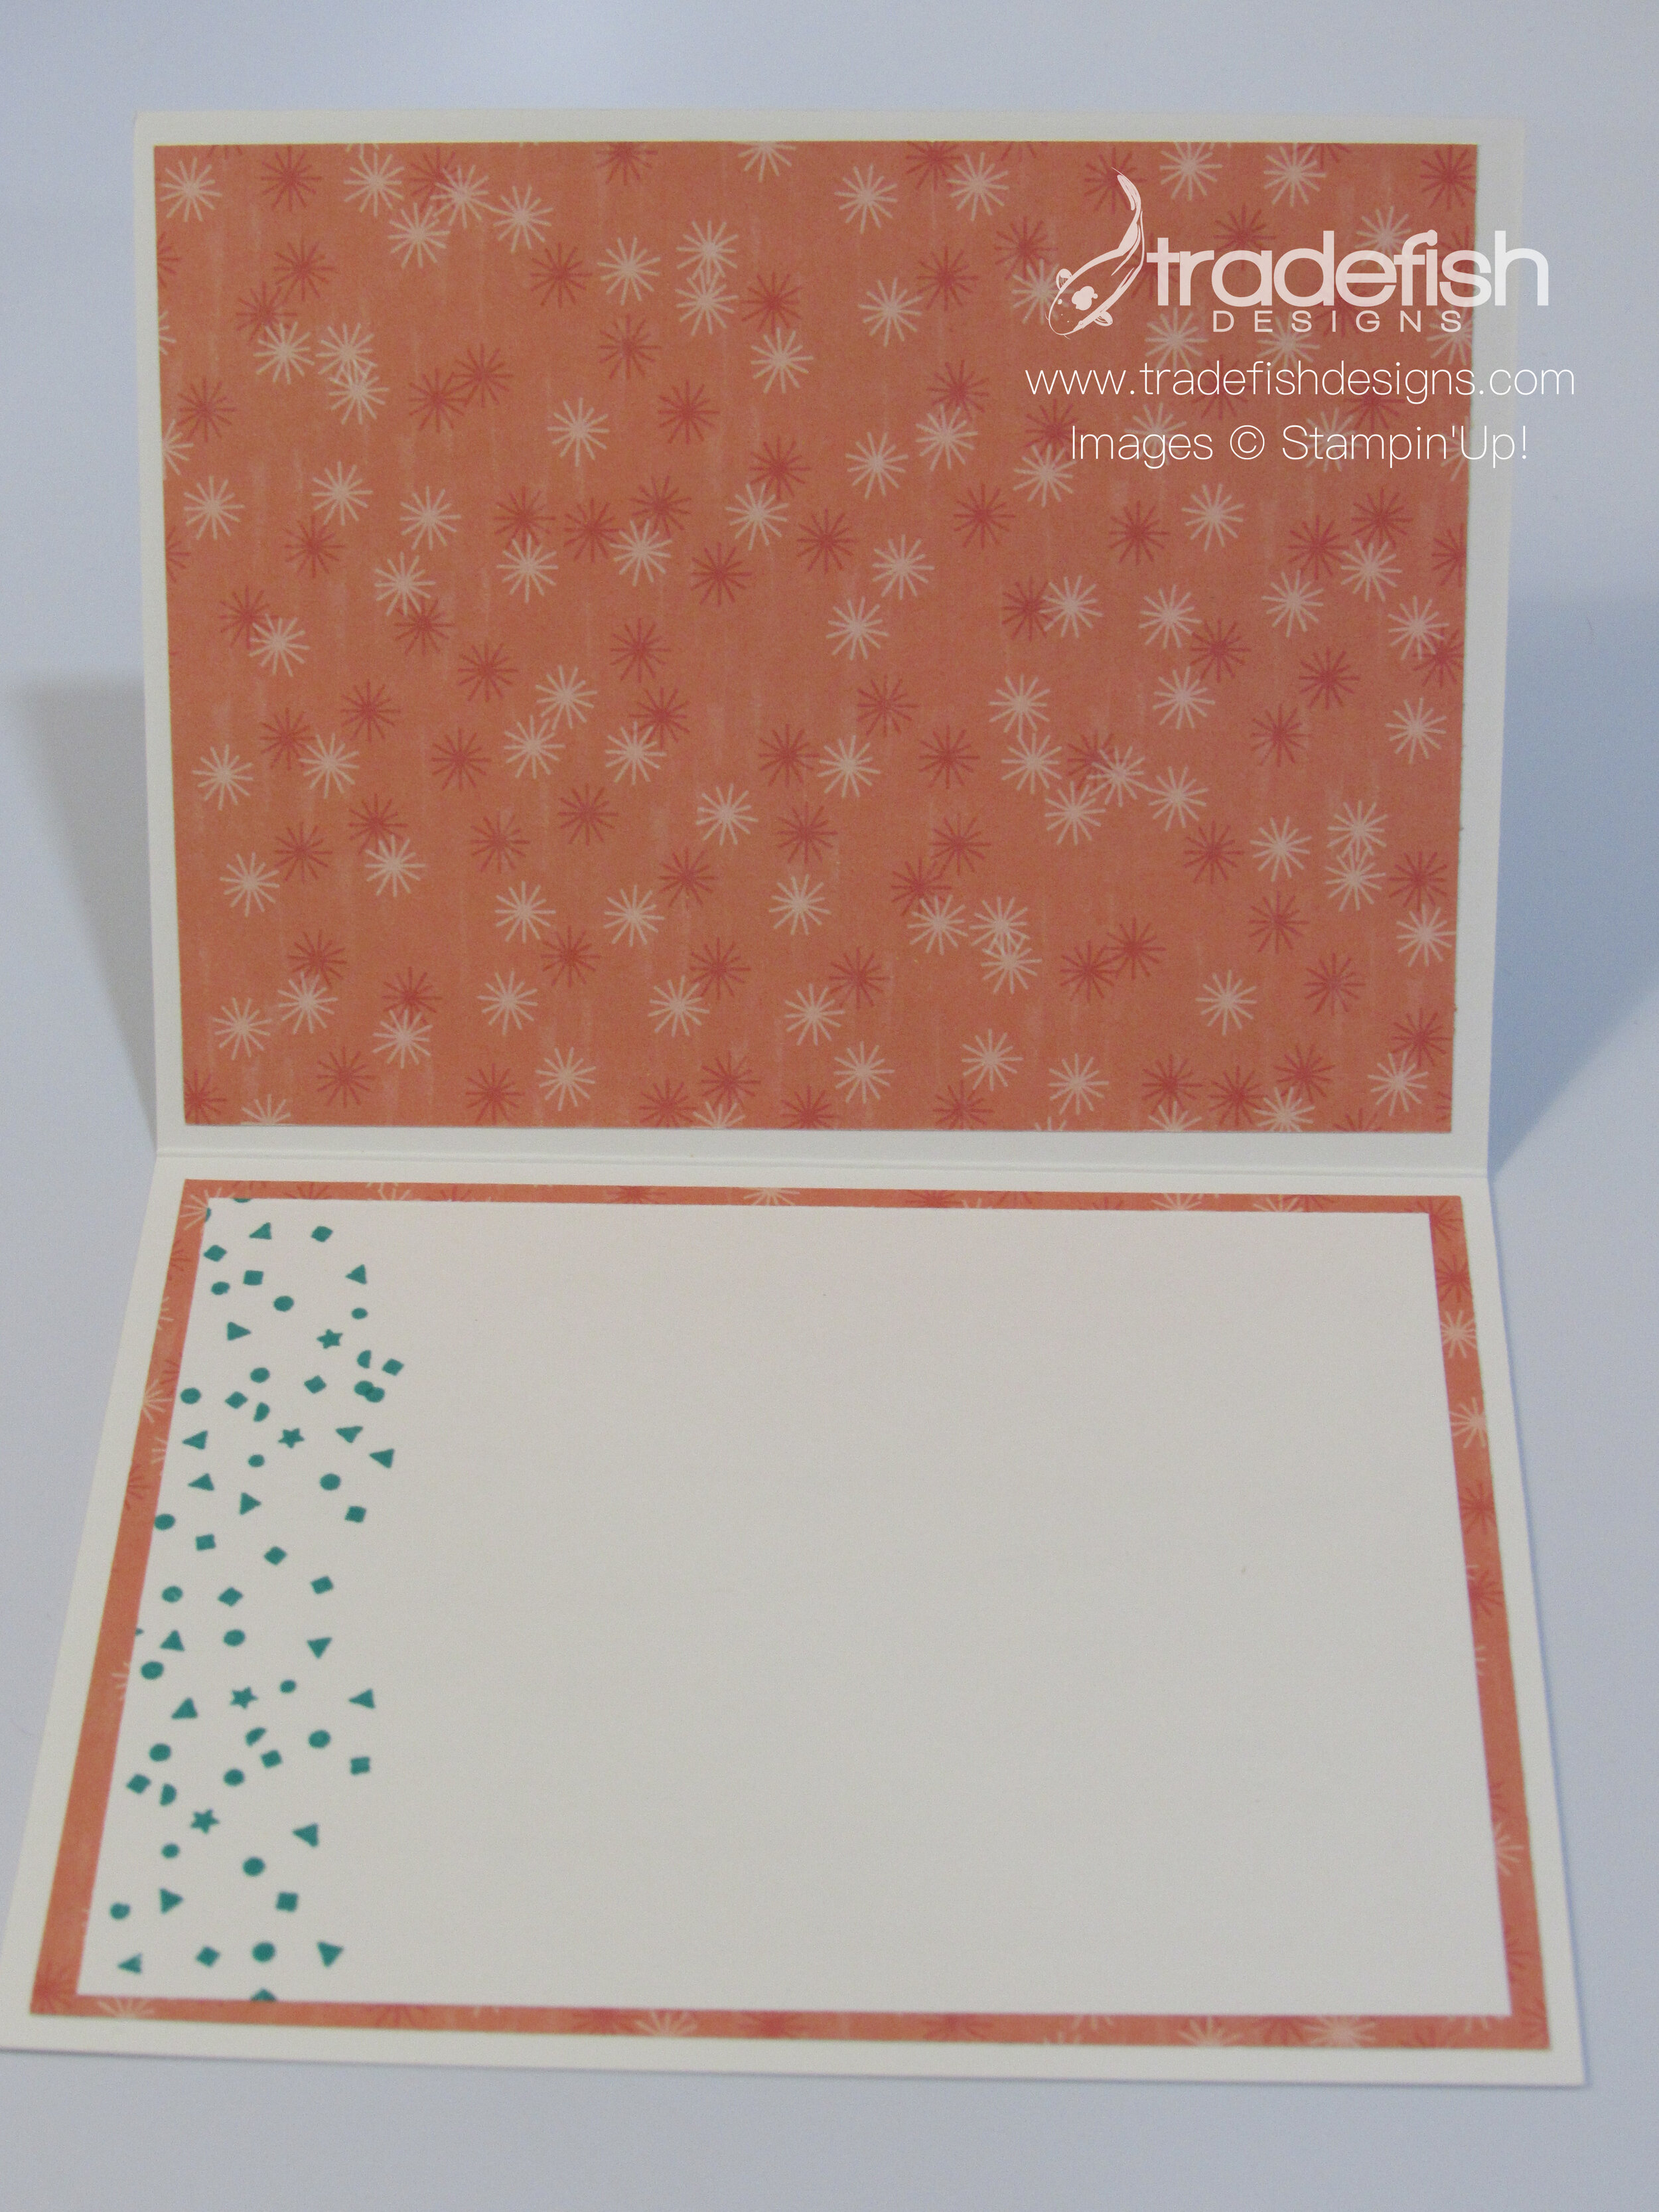
I brought the designer paper to the inside of the card and it will really highlight whatever message I send on the inside. Don’t forget the envelope too. I little color splash is a nice treat to the recipient and the mail carrier!

Same card using different colors. Love the bright paper that has so much texture in it.

I hope you enjoyed today’s card and if you want any of the supplies and you can find them below in the Product List.
 | |||
 |
")


Remember to send those thank you notes!
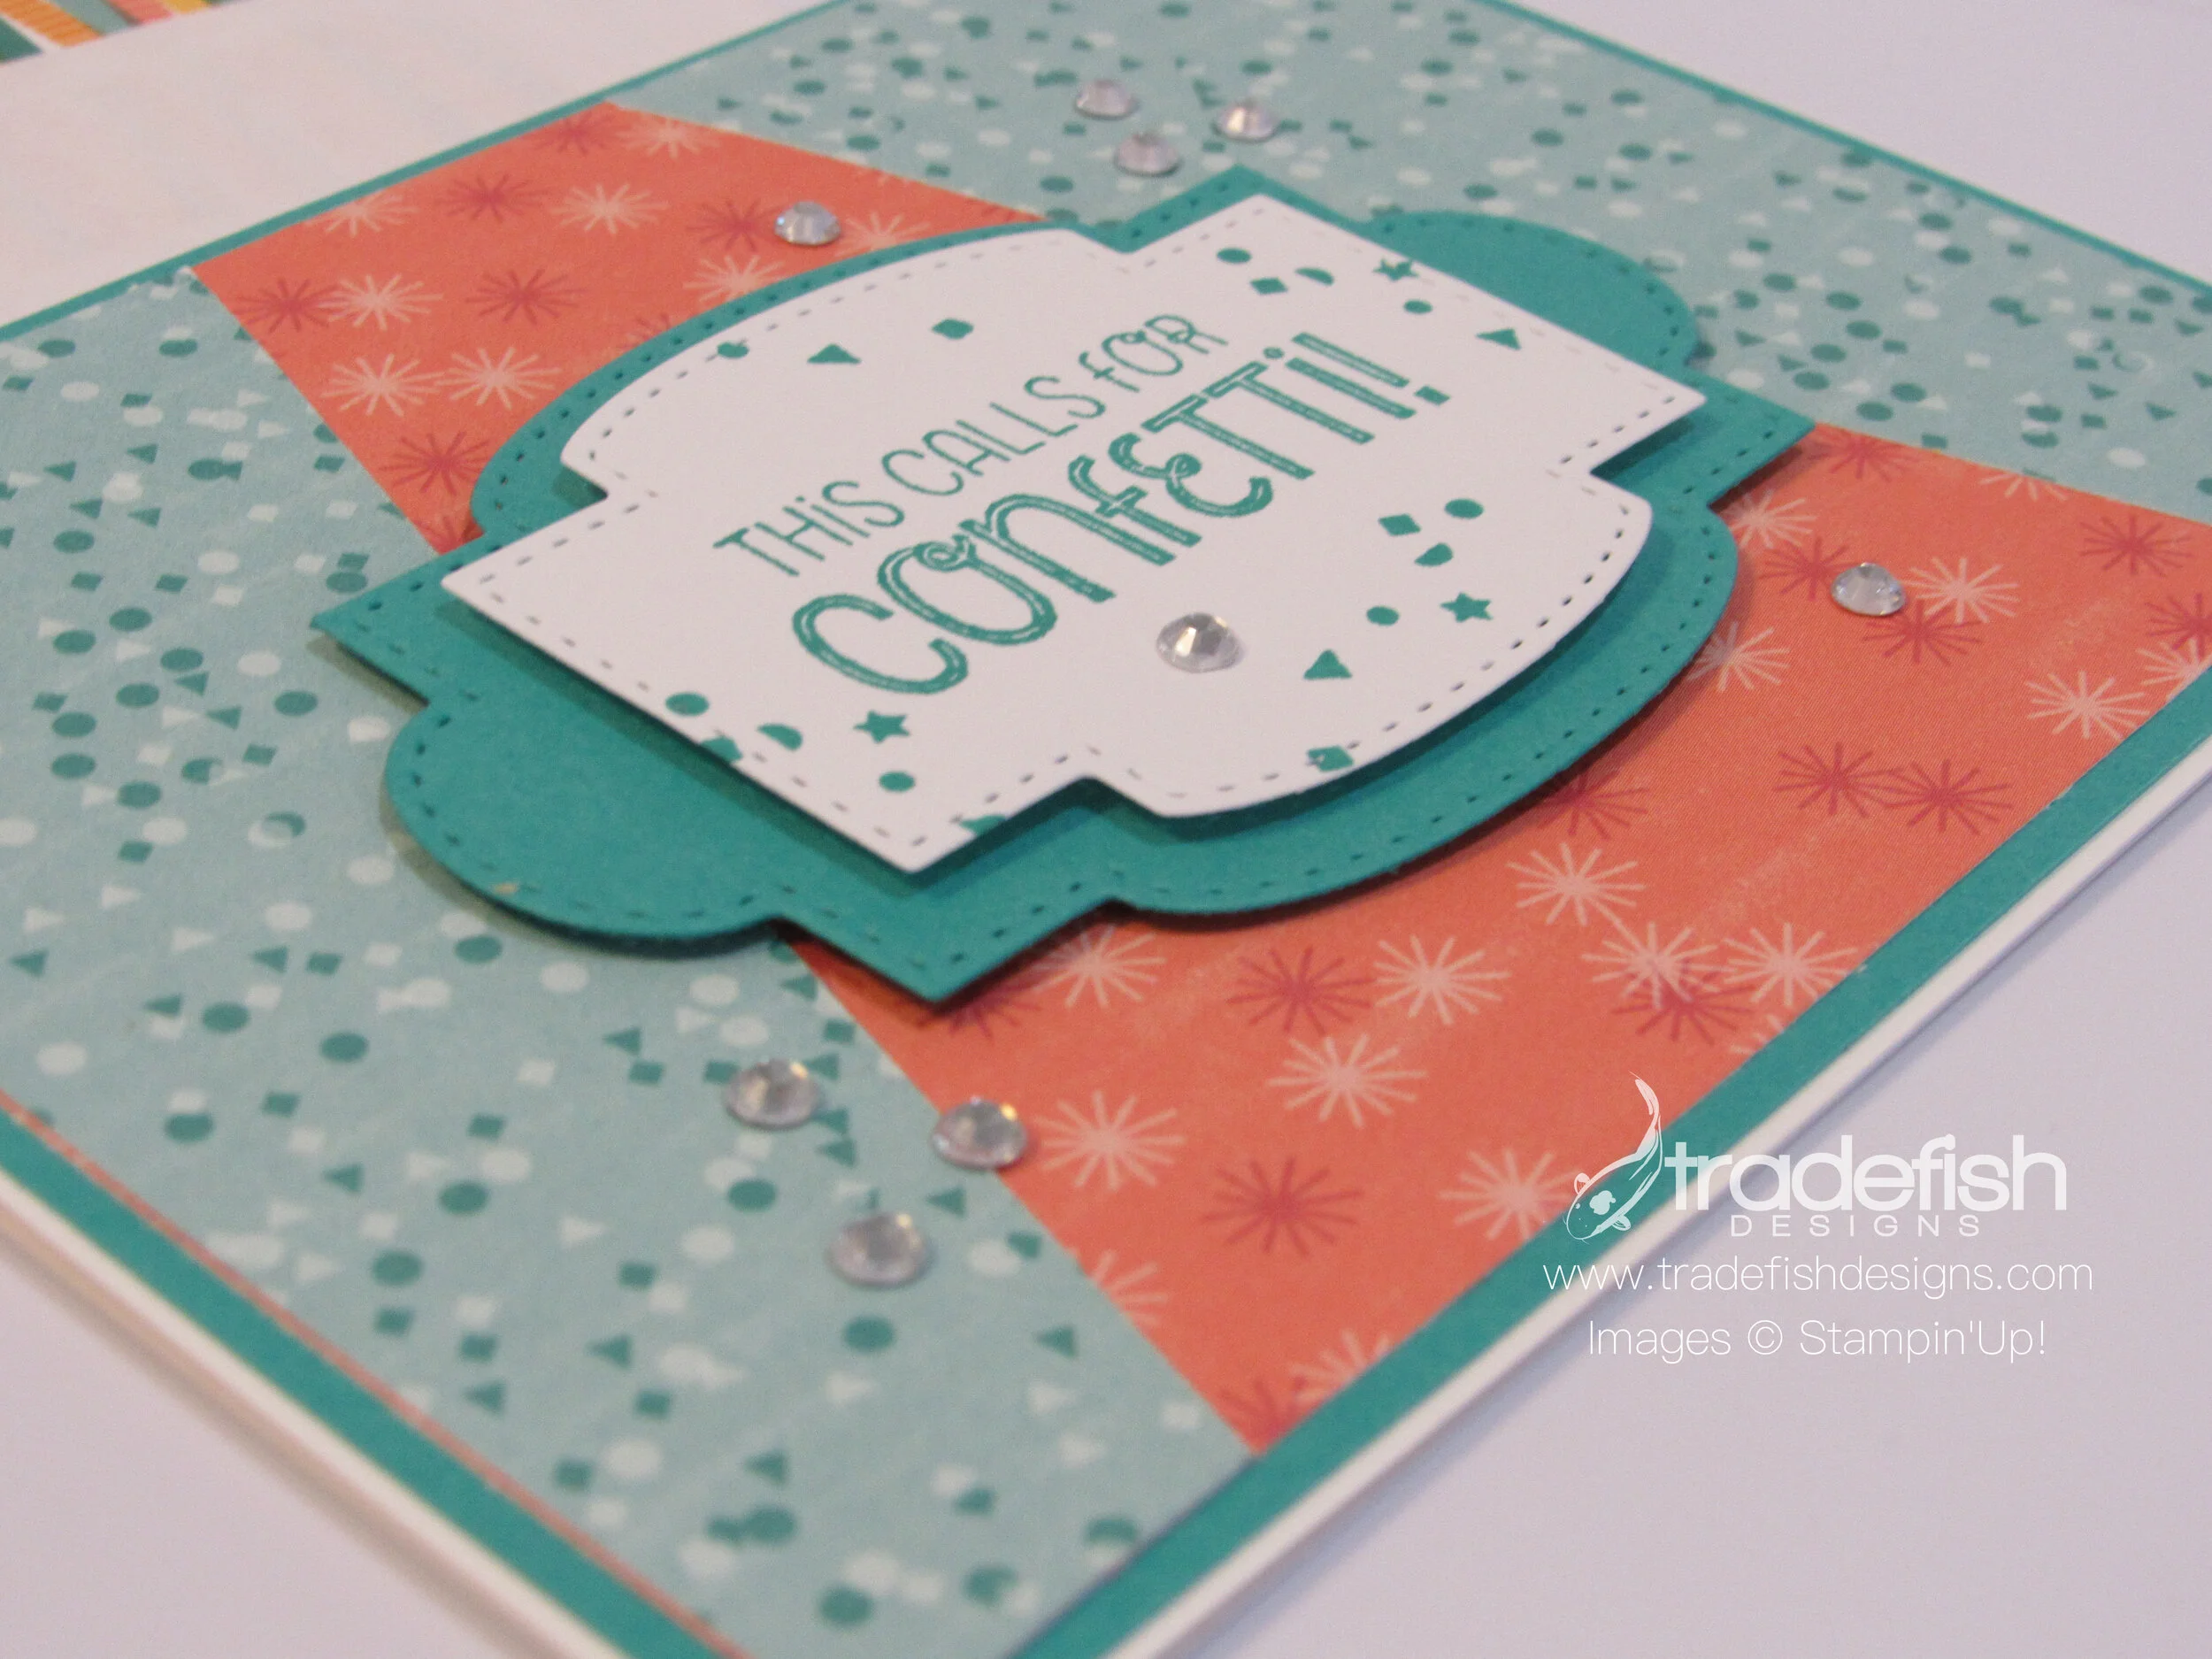
This calls for confetti!
Today I have a fun birthday card using silly and bright colors. This is a great card for kids or adults.

Here’s an angle view showing off the dimension of the layers and the pretty rhinestones.

I always try to decorate the inside of my card to coordinate with the cover. This is also a great way to use up your designer paper. Let’s not hoard it but use it…to make room for the new paper when it comes out.
I also find another way to use up the extra paper is to decorate the envelope. Remember, no naked envelopes!

I hoped you enjoyed today’s card. If you are interested in getting the supplies go ahead and look at the product list below.
") | |||
| |  |  |


Keep it crafty peeps!
Memories & More Cards
Todays’ post shows you that you can take a Memories and More pack from Stampin’ Up and make 20 cards (with leftover bits). I took my World of Good Memories & More Cards and coordinating cardstock and a few embossing folders and made 20 cards. If you are looking for cards for men this is a great option. This particular card set features travel-related themes…not a flower in sight!

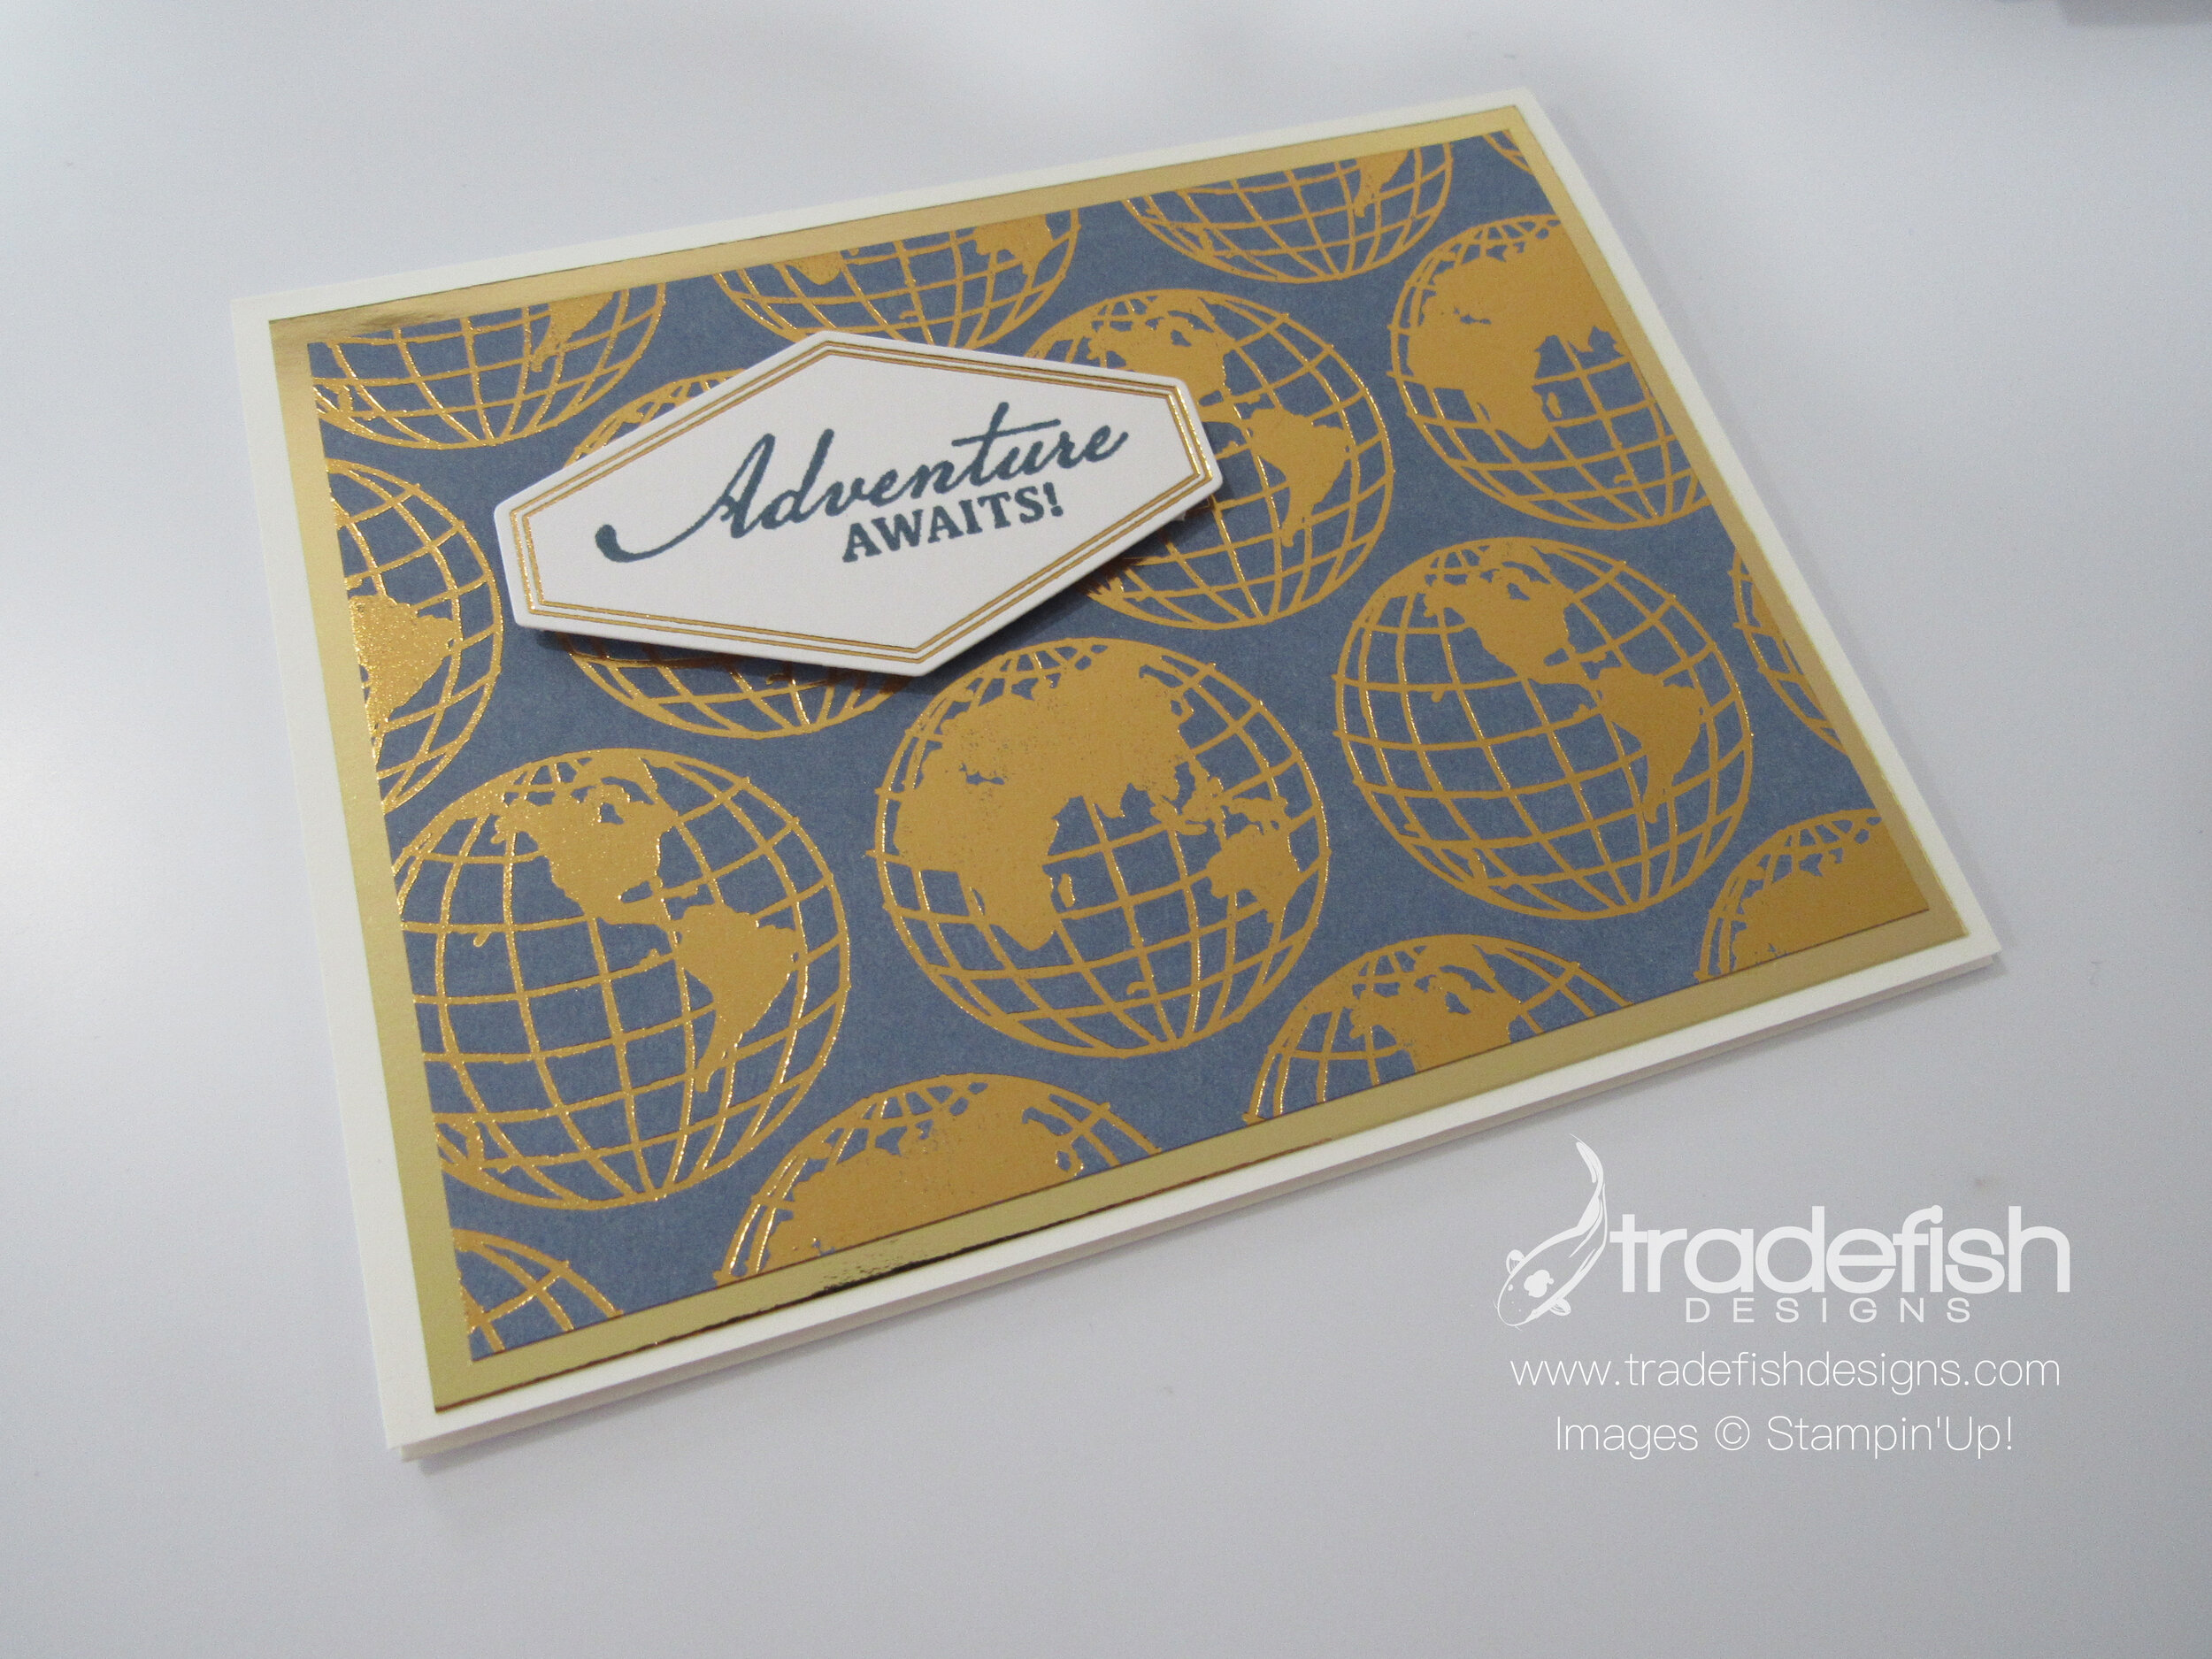
Here’s a card that uses some of the stickers inside the Memories & More Card set. I stamped the Adventures Awaits from the Beautiful World Stamp Set in Misty Moonlight and popped it up.

The inside of the card has a scrap from the front and a sticker from the Memories & More Cards.

Cards in the Memories and More Card set come in two sizes. I used the larger one for the base and the smaller one popped up for the sentiment.

I used another one of the smaller cards for the inside of the card to carry through the travel theme.

For this card I incorporated some embossing for the background. I thought the Scripty embossing folder was perfect.

Here’s a close up of the embossing. It’s really a subtle touch on the Crumb Cake cardstock.

Here’s a card using the Tasteful Textile embossing folder and matted layers to add more dimension.

Again, here’s another one of the smaller cards inside with a small sticker to provide a sentiment inside the card.

I hope you enjoyed seeing what I was able to create with the World of Good Memories & More Cards. Here are all the products used in this project!
 | |||
 | | |

")


Keeping it crafty!
Creativate Mystery Card Challenge
My project from a Mystery Card Challenge.
Hello Crafty Peeps,
Today, as a part of International Card Making Day, I’m taking part in an online retreat where 2,000 of us stampers are watching 5 amazing Stampin’ Up demonstrators create a project every hour on the hour from 10am to 9pm. I’m loving it. One of the things that is happening is what is called a Mystery Card Challenge. They provide the dimensions for you to cut your paper and then you put it together. I’ve never done this before and I can’t share the dimensions as is a part of a paid event but I figure I could share what I created…


Remember, no naked envelopes!

I really enjoyed the challenge of a mystery card and hope to do it again soon. All the goodies I used are pictured below!
 |  |
")


Happy Crafting Peeps!
A Little Something Just For You
Hello Everyone,
It’s been quite a while since I posted. Many changes have taken place for me. We sold our house and purchased a new one and the company I worked for was sold and I have a new position with the company that acquired us. A lot of buying and selling going on around me. In any event, I took some time to get squared away on all fronts and now I’m back to making cards and ready to share them with you.
Today’s card features the stamp set Fancy Phrases. This was the first stamp set I purchased from the current catalog. Something about the sketchy style caught my eye right away. There’s a lot going on with this card…stamping, embossing, die cutting and coloring. I even tied a bow (which is rare on my cards).

I couldn’t forget to add some interest on the inside of the card too.

And remember, no naked envelopes!

Here are the products I used in making the card above.
 | |||
 | |||
 | |


 Crinkled Seam Binding Ribbon")
Christmas Tuesday!
I’m back with another fun and simple Christmas card for you. The designer paper may not be available but you can easily swap any other paper and coordinating cardstock to achieve a similar look.

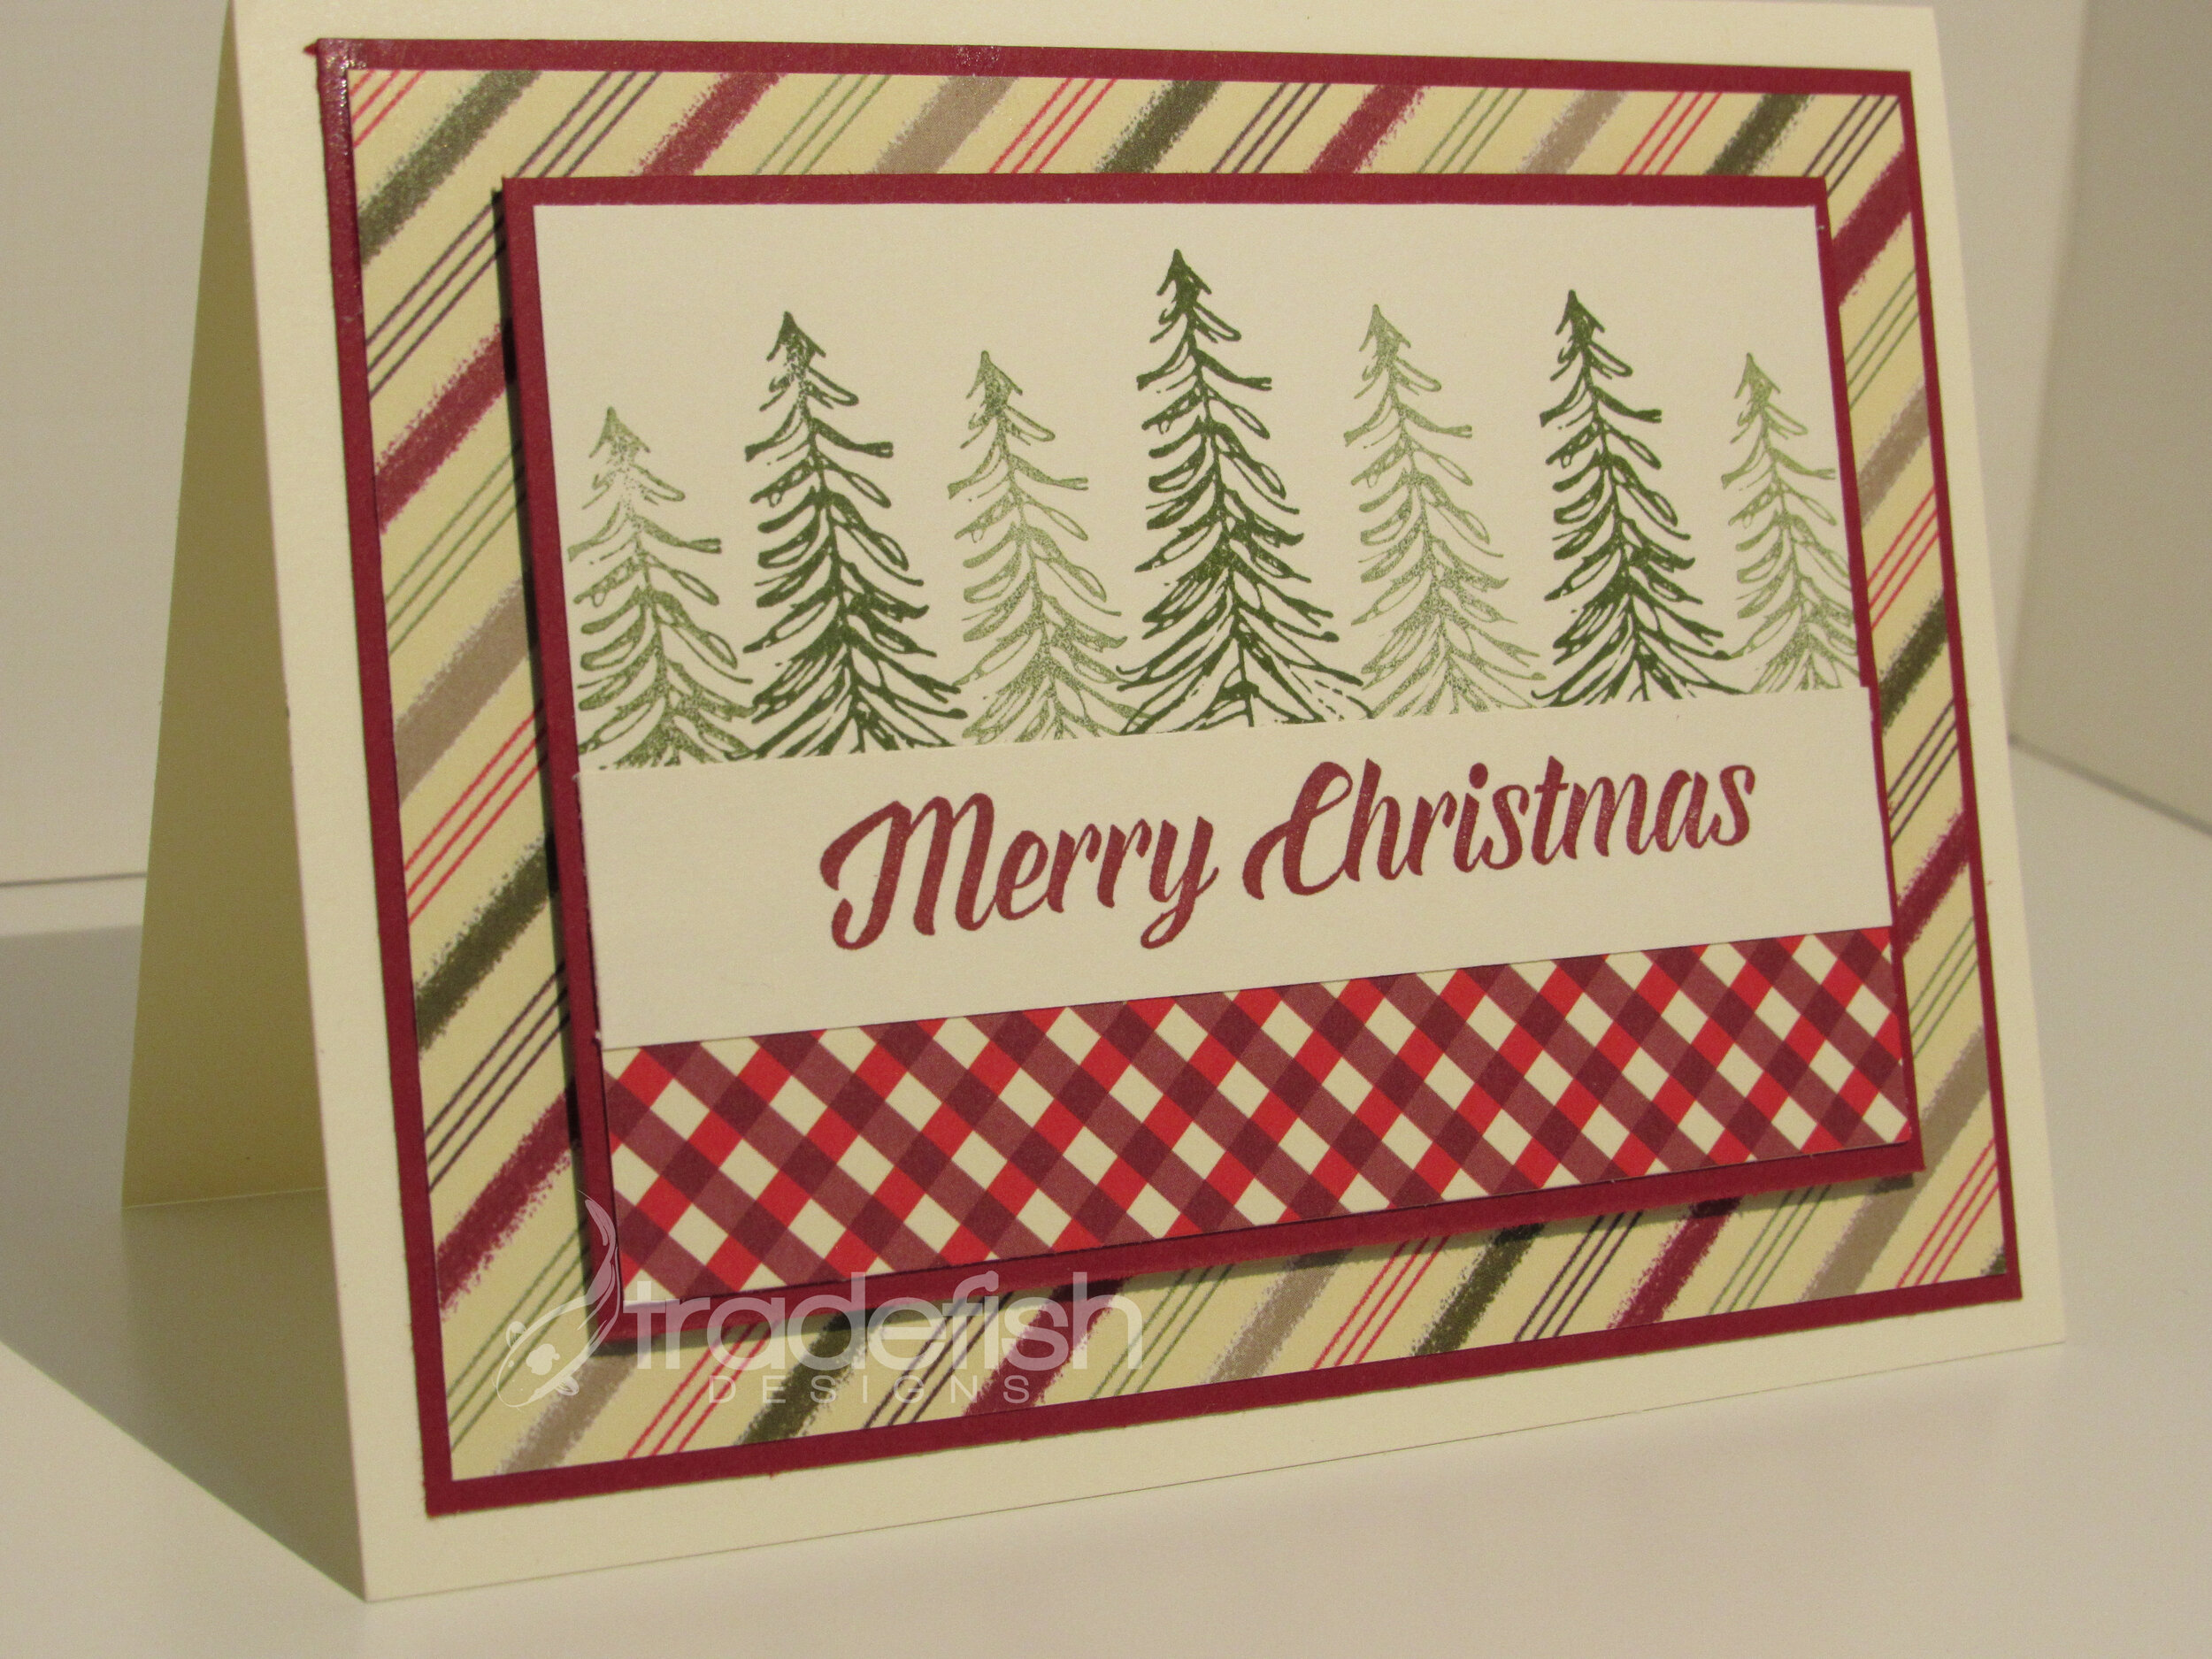
Most of my cards are pretty simple. Here I’m mixing different coordinating designer series paper (unfortunately retired) with layers to add dimension and some simple stamping to add interest.

Second generation stamping of the trees with Shaded Spruce ink.
This close up shows the crisp definition of the stamping of the sentiment using Cherry Cobbler ink and the first and second generation stamping of the trees using Shaded Spruce ink. Simply layer rectangles cuts with solid coordinating card stock mats and you have a lovely card with some very basic stamping that anyone would appreciate getting for Christmas.
Stuff I used here that's still available from Stampin’ Up:
Ink: Cherry Cobbler, Shaded Spruce
Paper: Cherry Cobbler, Whisper White

Christmas Crafts!

Christmas Tuesday
Another Christmas card for you on this lovely Tuesday in February. All the goodies in this one are retired except the yummy ink and paper. But I just love the super simple layout of the card. Very easy to copy for your own card, whether it’s for a Christmas card any card!

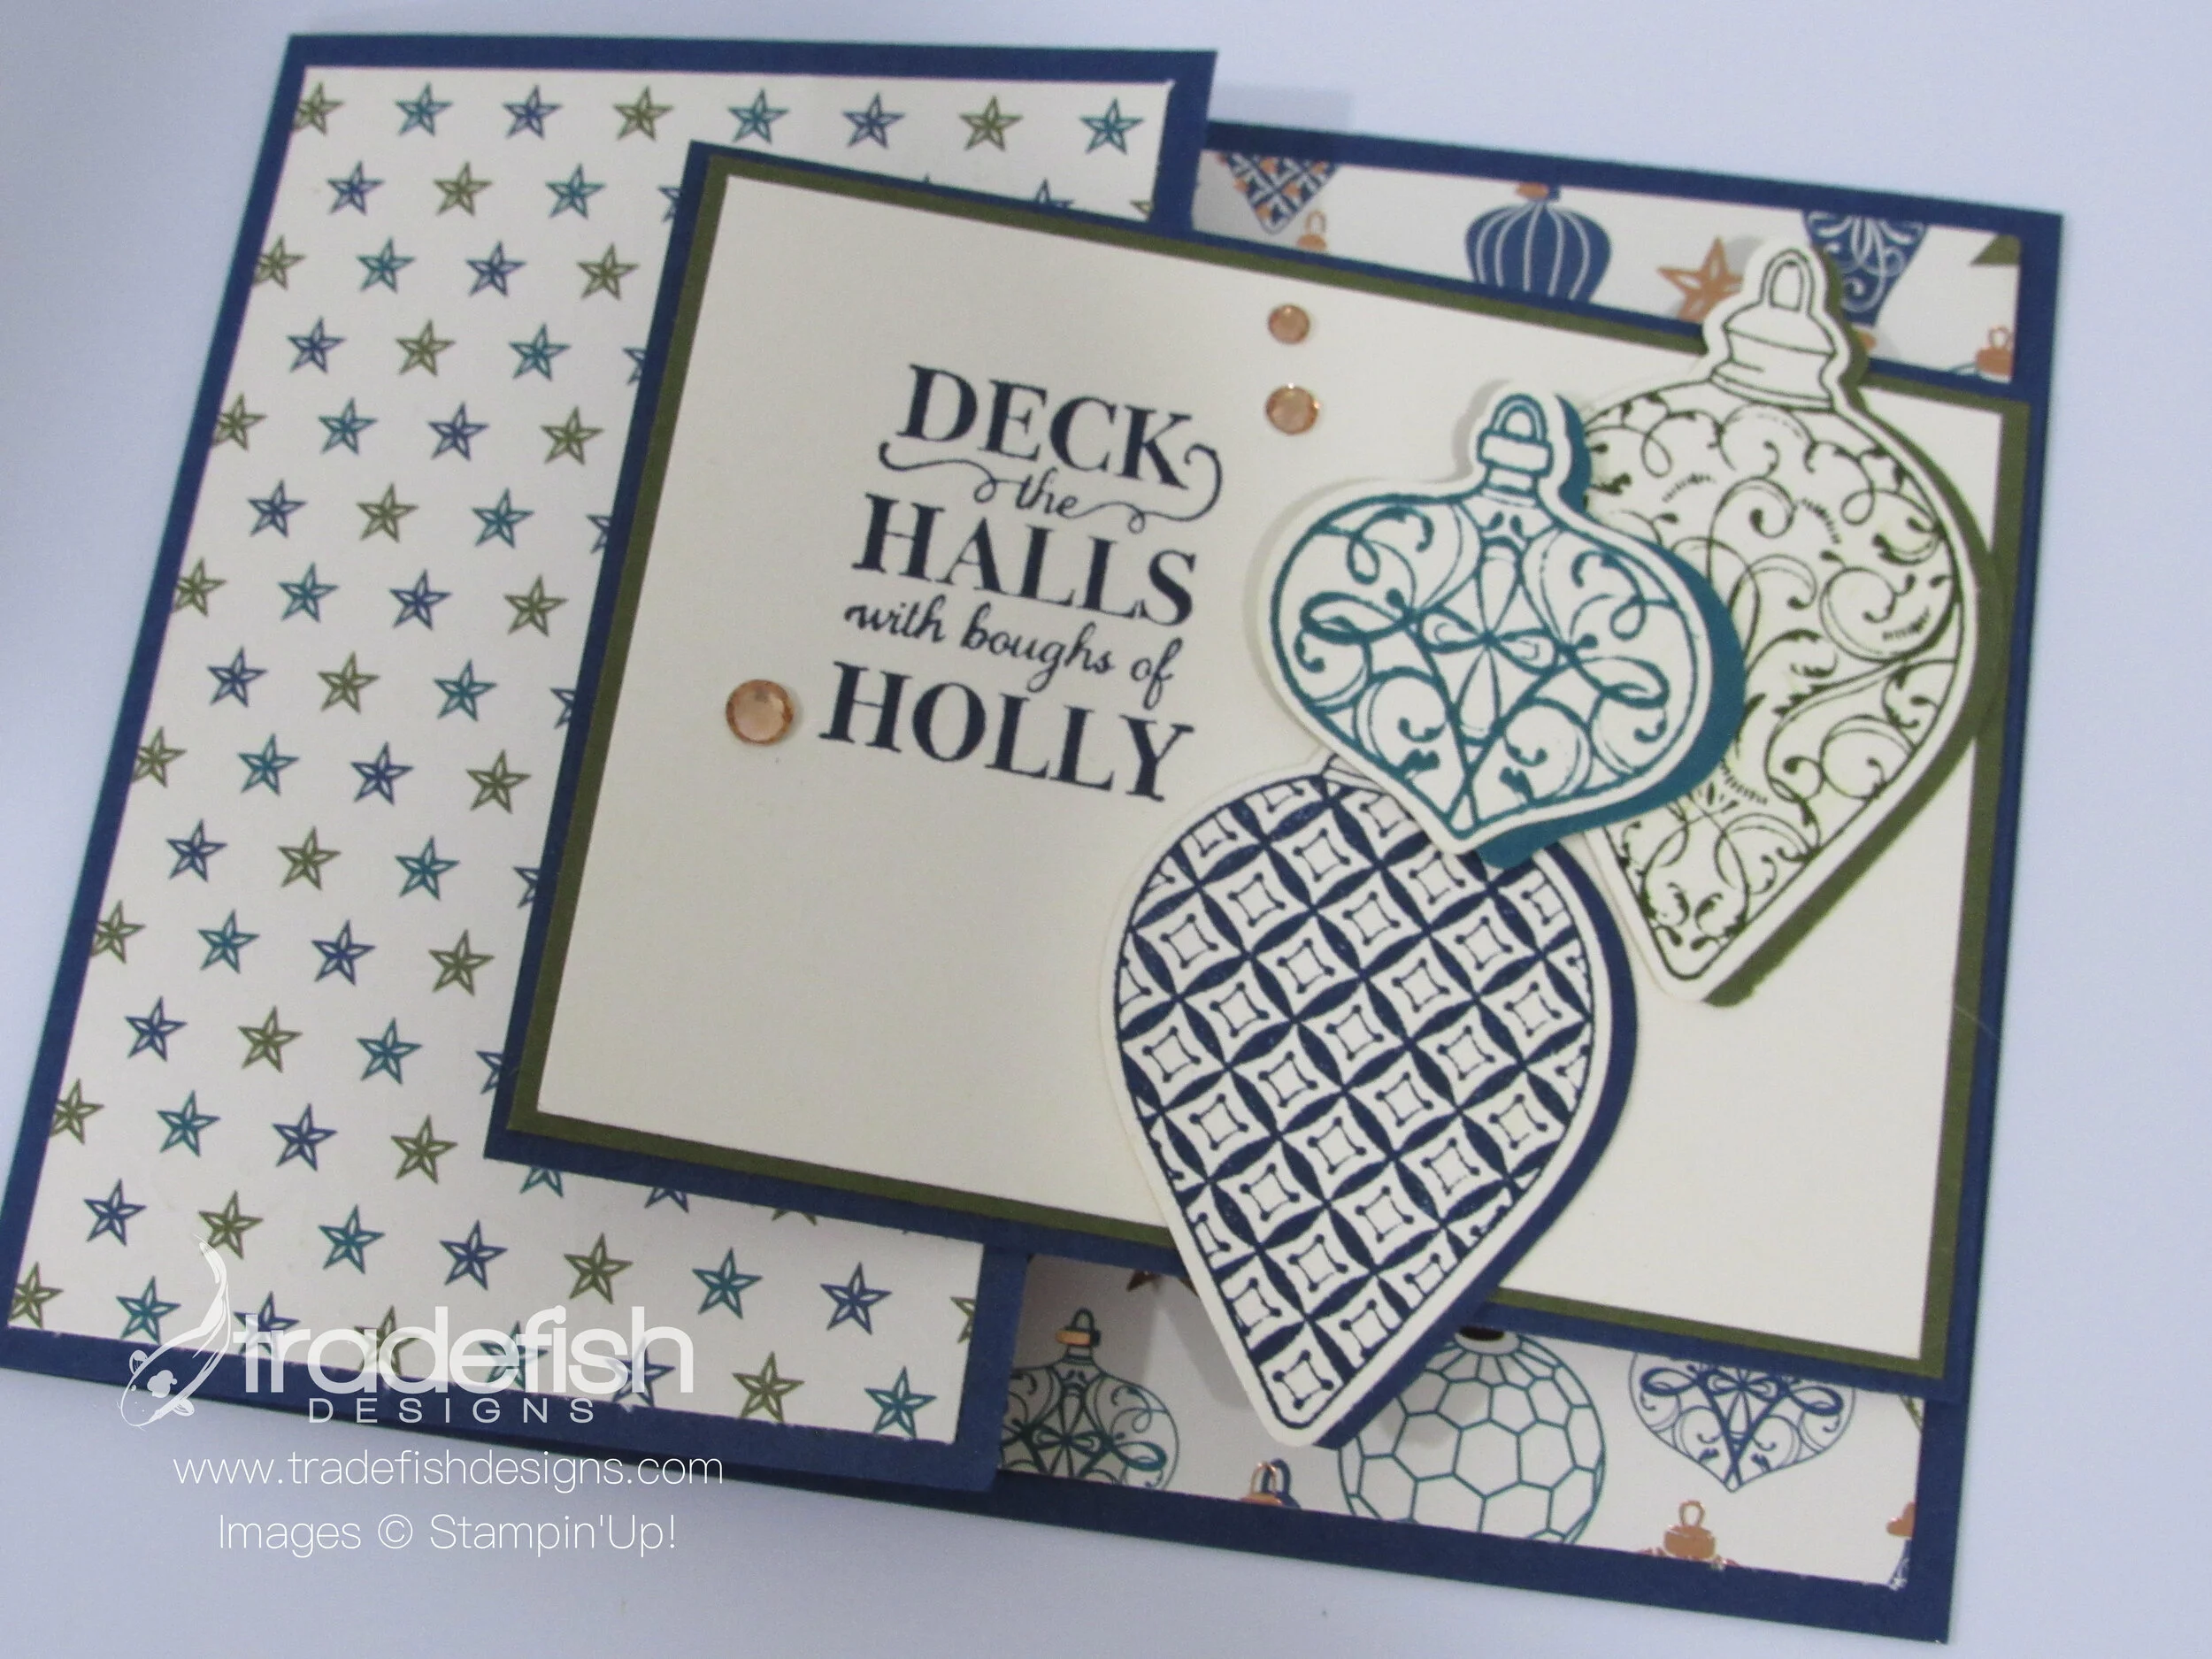
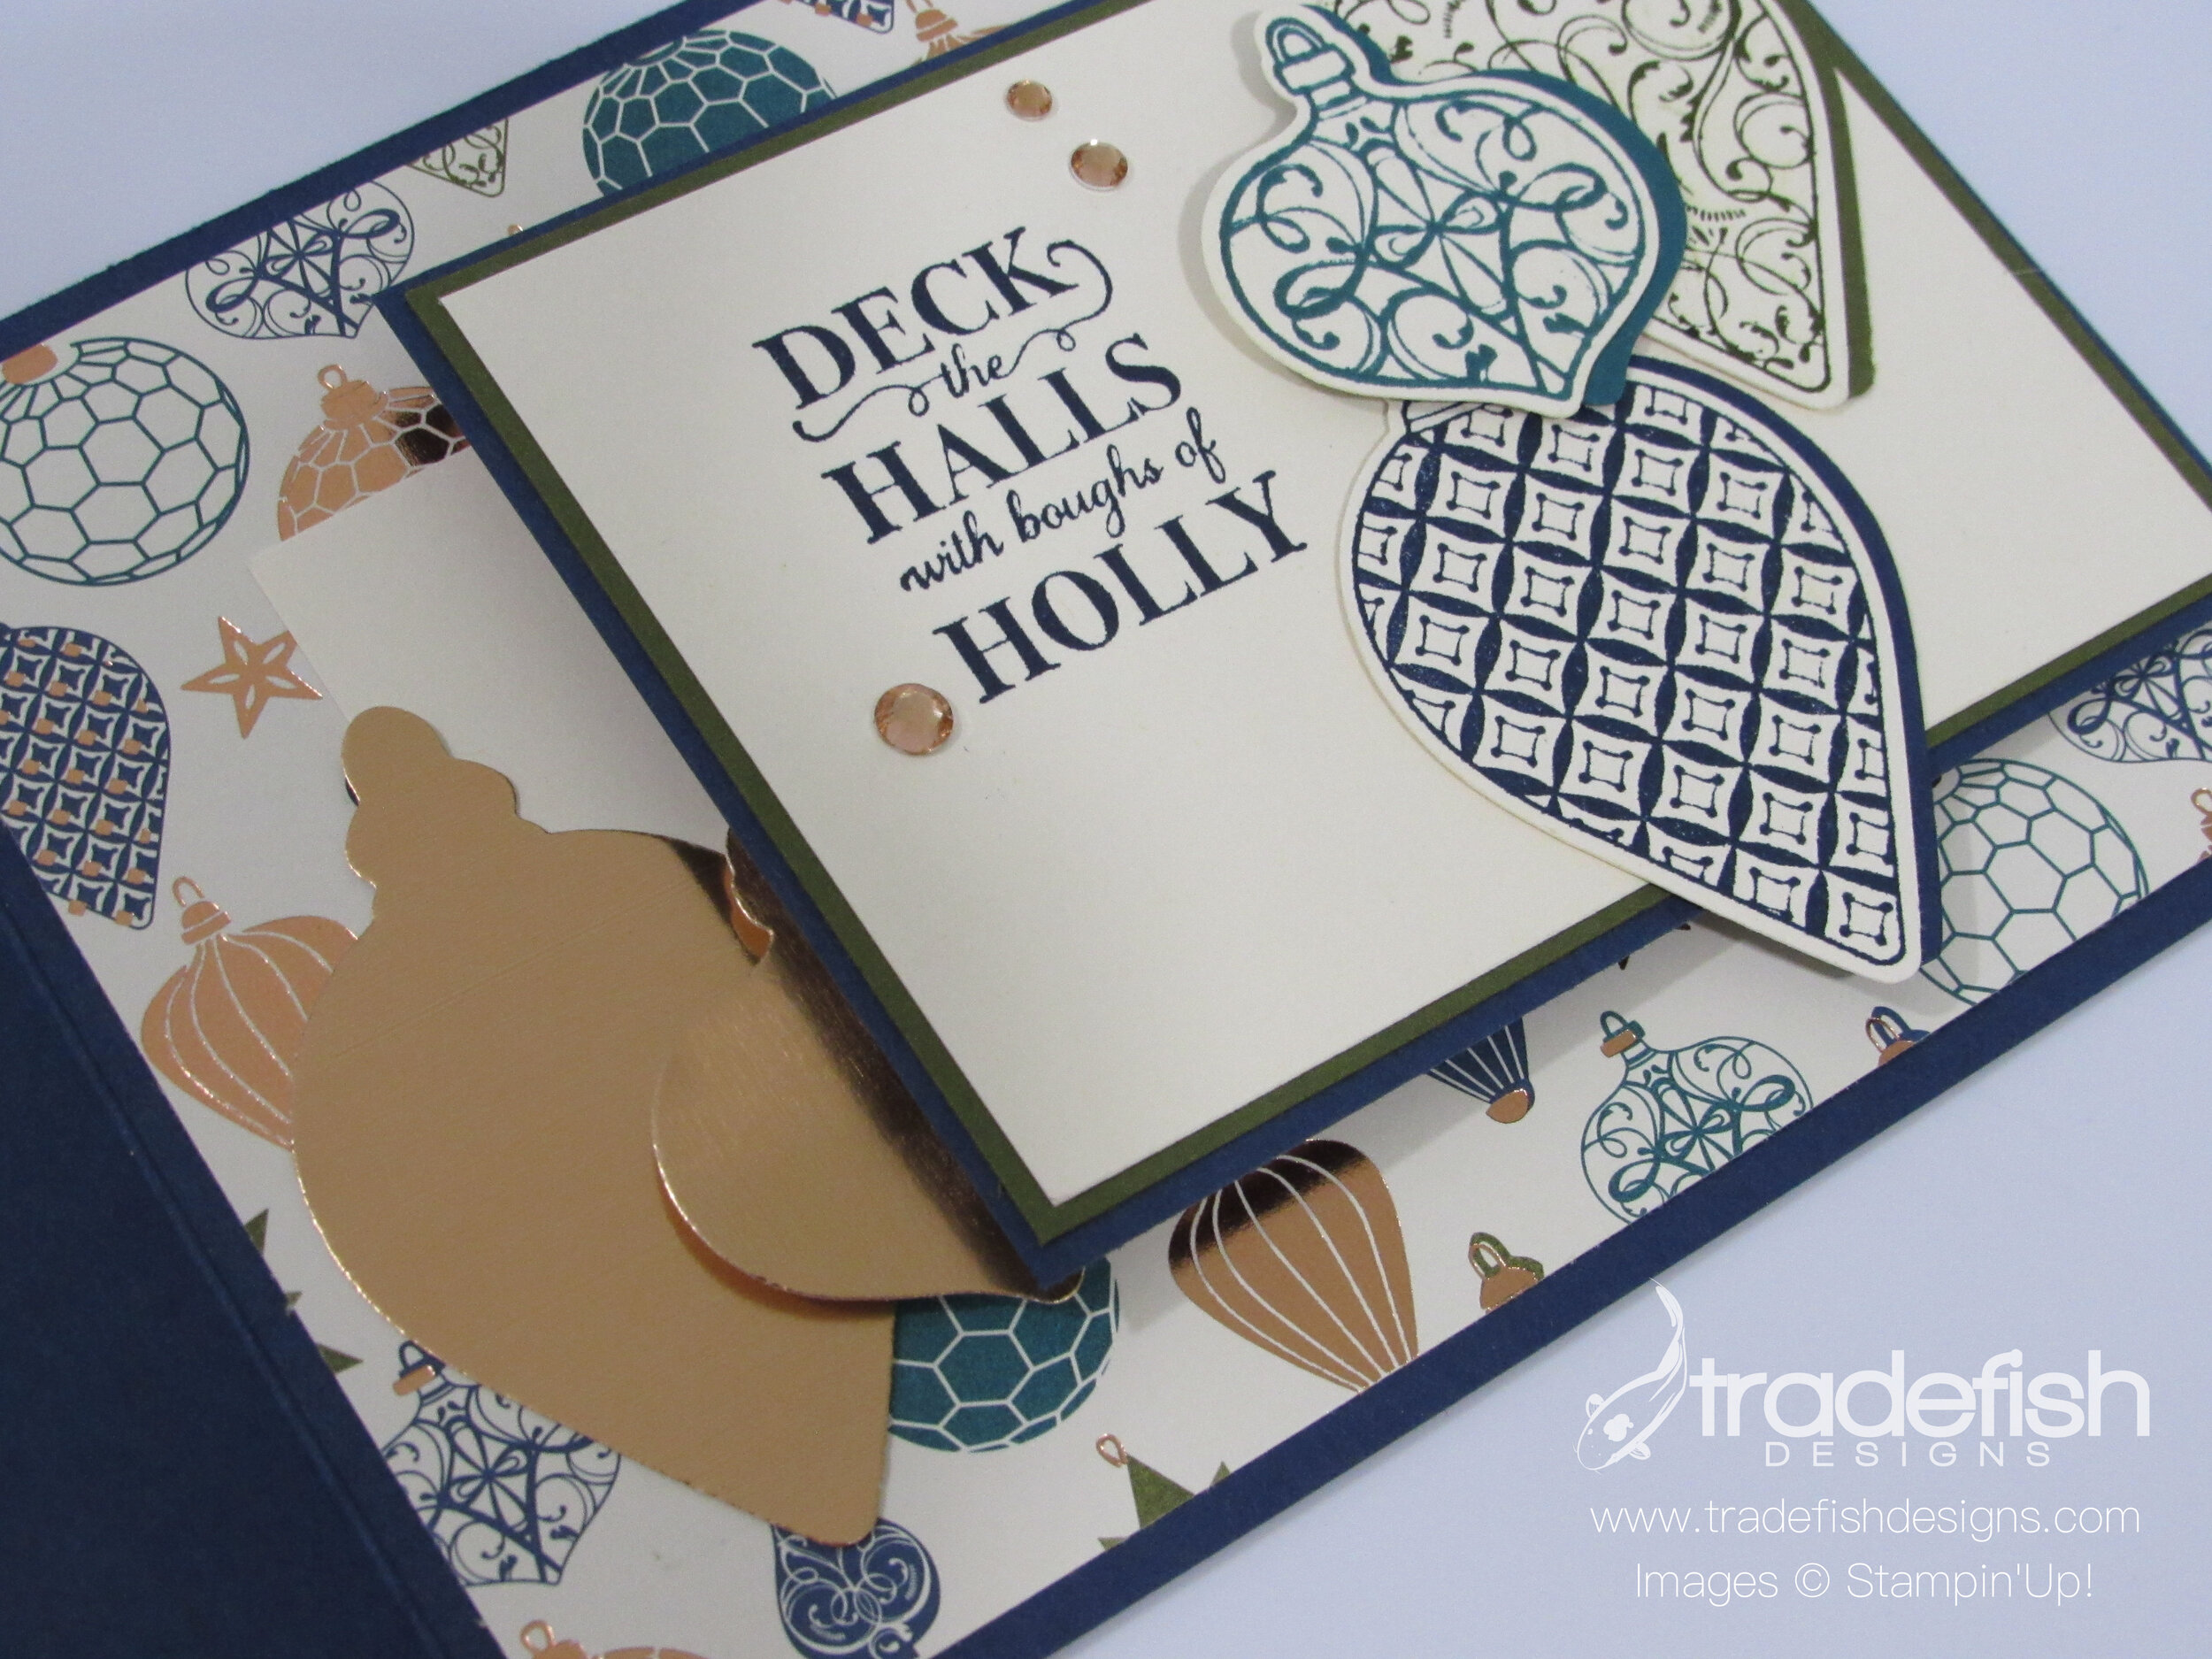
Don’t you love fun ornament Christmas paper?

To get the lighter shade for my stamped ornaments I stamped off once and then stamped the image on my cardstock. That way the sentiment stood out when I stamped it at full strength with Pretty Peacock ink.
Here’s a close up on an angle to show you the dimension on the card and a closer look at the ink and paper I used.
Ink & Paper!

A craft Christmas card!
Mary and Me Layout
A simple layout of me and my wonderful friend Mary. I’ve recently switched back to 8.5 x 11 scrapbooking. I’m keeping it simple by reducing the amount of photos and just focusing on the moment.

Background created with black ink stamping of the poppies. Peaceful Poppies designer series paper takes center stage.
This photo of me and Mary was taken at a charity event at the Angus Barn restaurant. It was a fundraiser for House of Hope a few years back. Mary was part of the organizing and running of the event and it was incredibly successful.

A little bling is always a good idea. Also love the trim piece die from the Painted Labels dies.

These dies from the Poppy Moments die set add a whimsical touch but I wish I had my black mini dimensionals for the centers of these poppies…next on my order list!
The stuff I used…

Scrapping crafty!
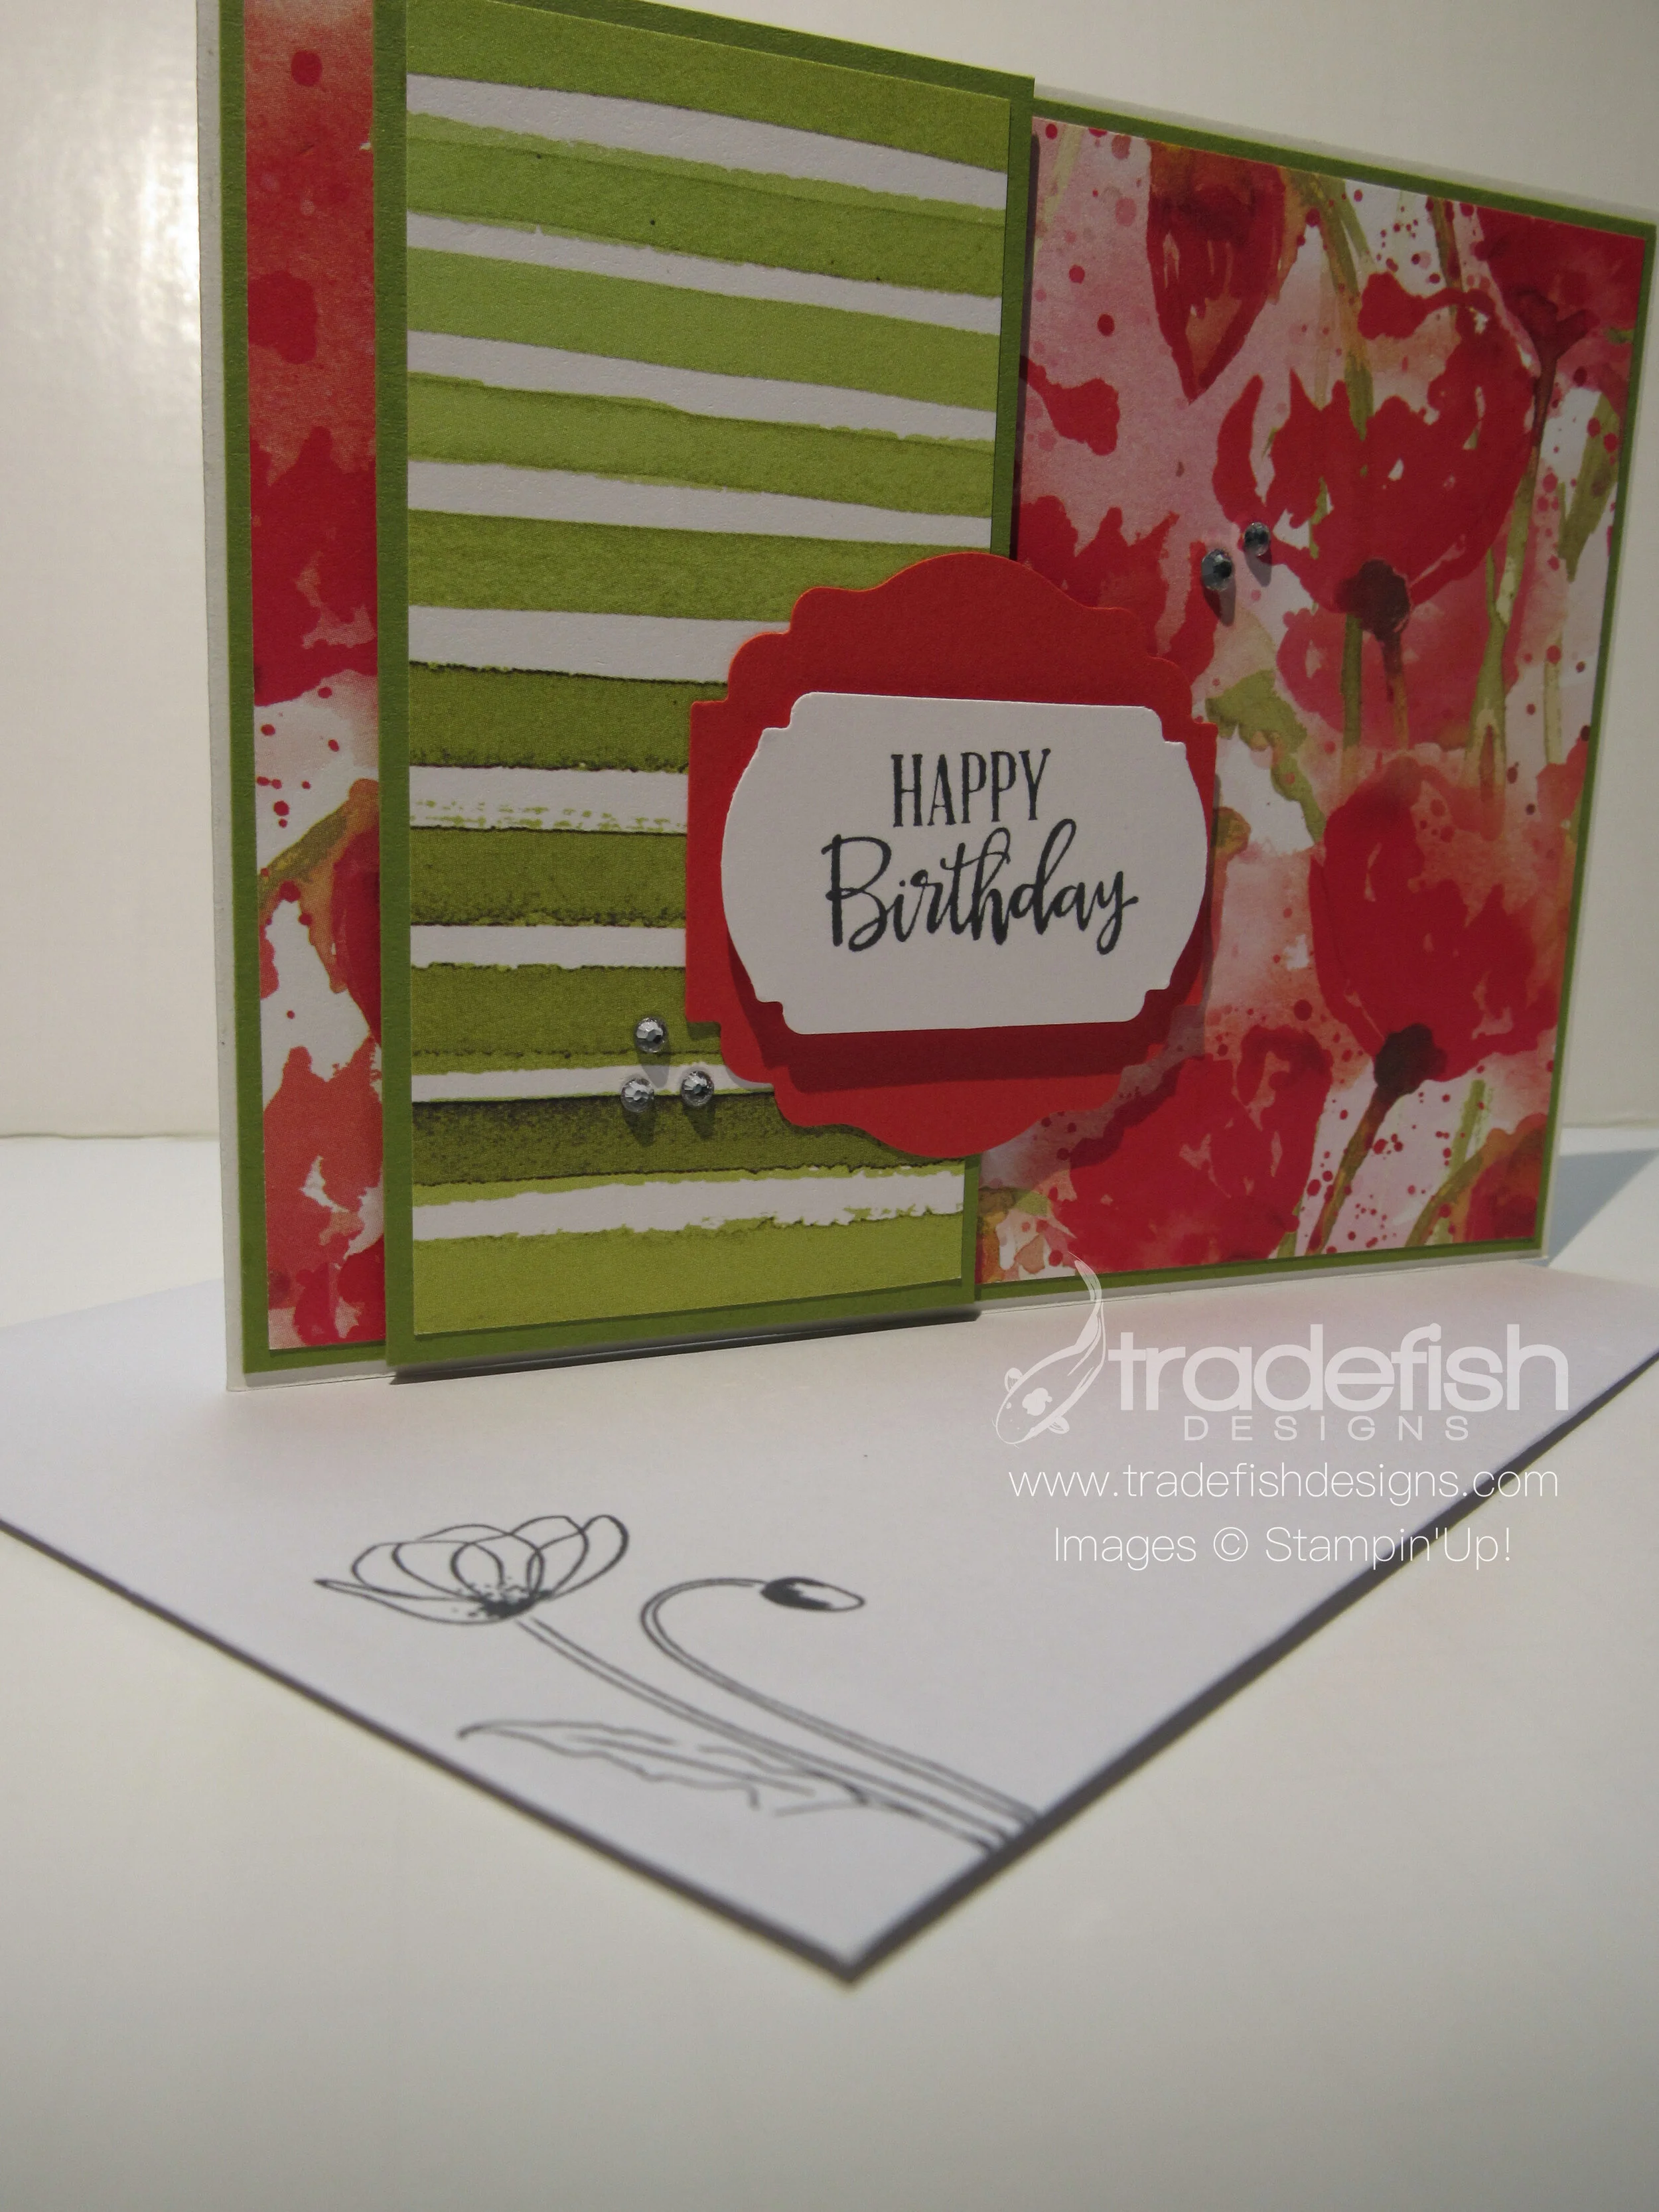
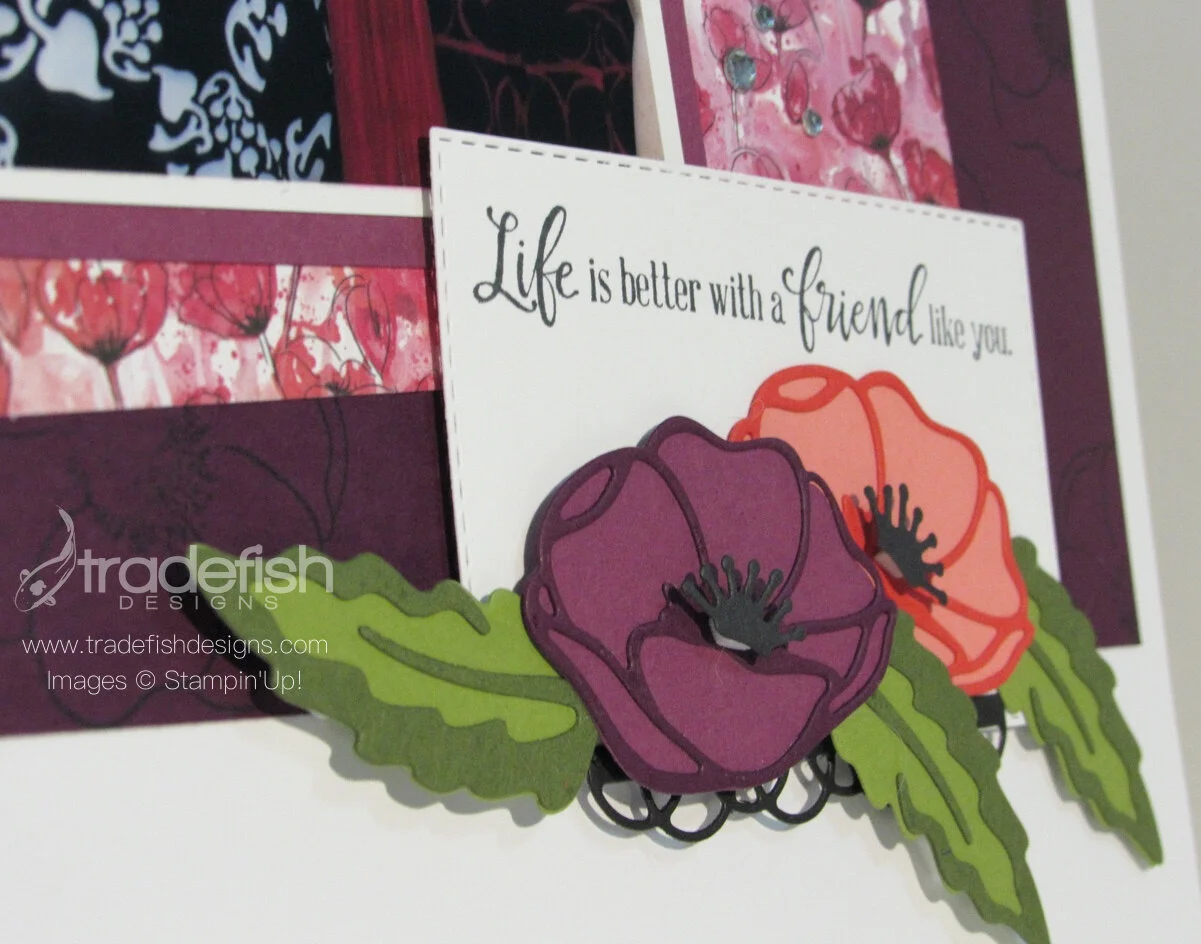
Peaceful Poppies Birthday Card
I love the new poppies products in the new Stampin’ Up Mini Catalog. I’m using a bunch of the products here. Take a look and let me know what you think!

I like to dress up the envelope flap with coordinating paper.

I added a coordinating stamp to the front of the envelope.

Here’s a close up showing off the rhinestones, birthday sentiment and punches.

Don’t forget the inside of the card too!

Keeping it crafty!
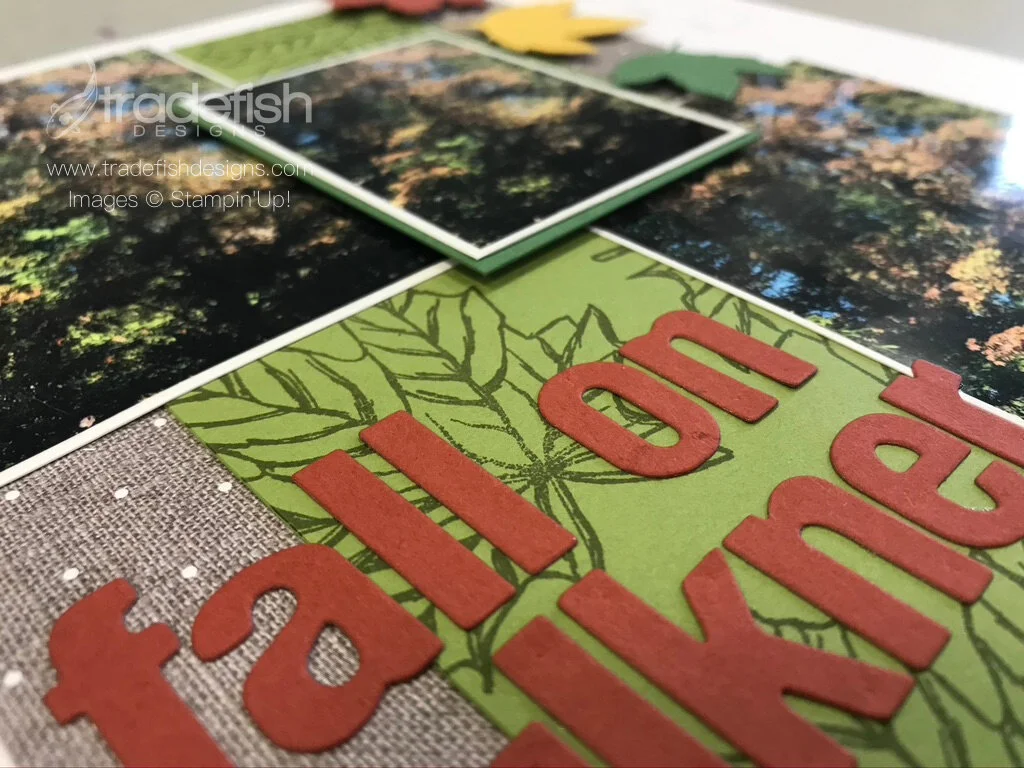
Let's Gather Together for Fall on Faulkner 2019
Welcome! Today I have a new scrapbook page to show. I’m switching it up and going back to scrapbooking on 8.5x11 instead of 12x12. It’s easier to store and allows me to keep it simple and not feel obligated to have a dozen photos on a layout. I’ve always been a clean and simple scrapbooker. I also wanted to show people that you can use your Stampin Up supplies for more than just cardmaking. I enjoy incorporating my stamps, inks, designer series paper and dies in my layouts. I hope to share more of these kinds of pages on the blog. I hope you enjoy them too!
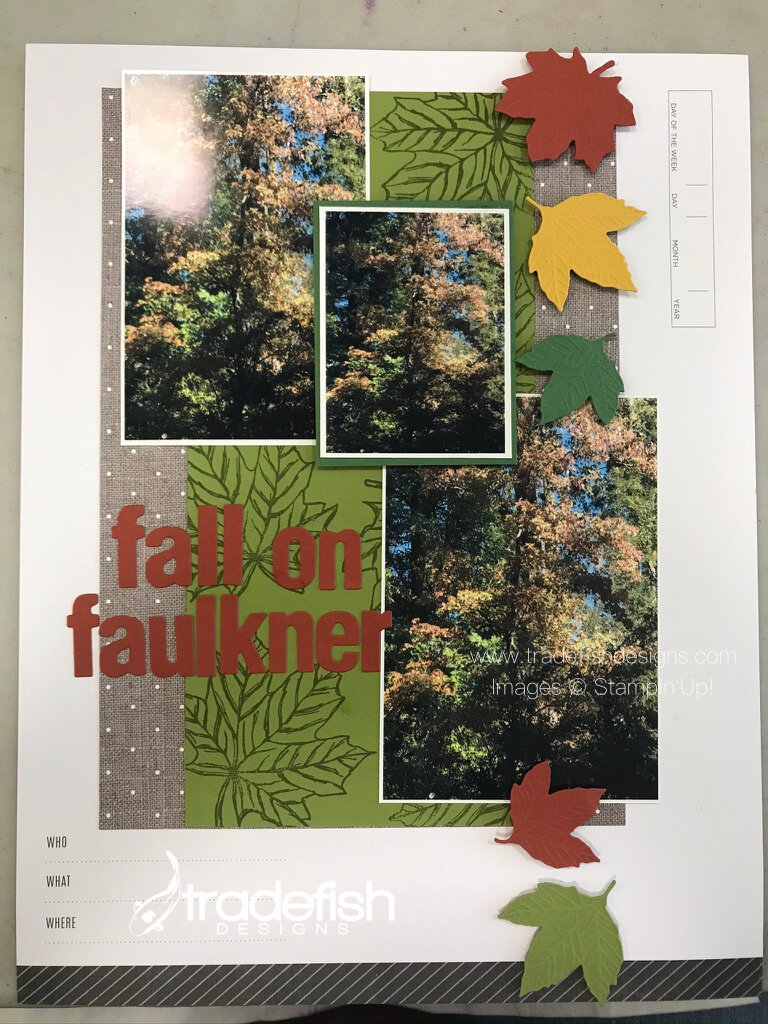
Every year I do a layout I call Fall on Faulkner. I live on that street so I like to capture the look of fall each year in my yard. There have been so many changes throughout the year that I enjoy looking back and seeing the differences. This layout does not have journaling yet but I wanted to share it anyway. You will see I have featured the stamps, designer series paper and dies from the Come To Gather Suite. Although those products are not available for sale any more it should give you an idea of what’s possible when you use your own stamps, inks and dies for more than cards.


This last shot shows off the dimension in the veins in the leaf die as well as the texture in the designer series paper. I really love how this turned out and was excited to share. I hope you think of fun ways to use your stamps in scrapbooking!

Keep it scrappy!

Christmas Tuesday!
Another Christmas Tuesday has arrived and another card is here for your enjoyment. Sending Tiding of Comfort and Joy to someone in a few months.

Here’s a close up on an angle to show you the dimension of the embossing folder, the ribbon and and lift from the dimensionals. Again, the products aren’t necessarily available from Stampin Up anymore, but the card layout is easy to replicate.

I hope this card inspires you to make one just like it whether it’s an early Christmas card for you or a fun valentines card…you choose.

Keep it crafty friends!
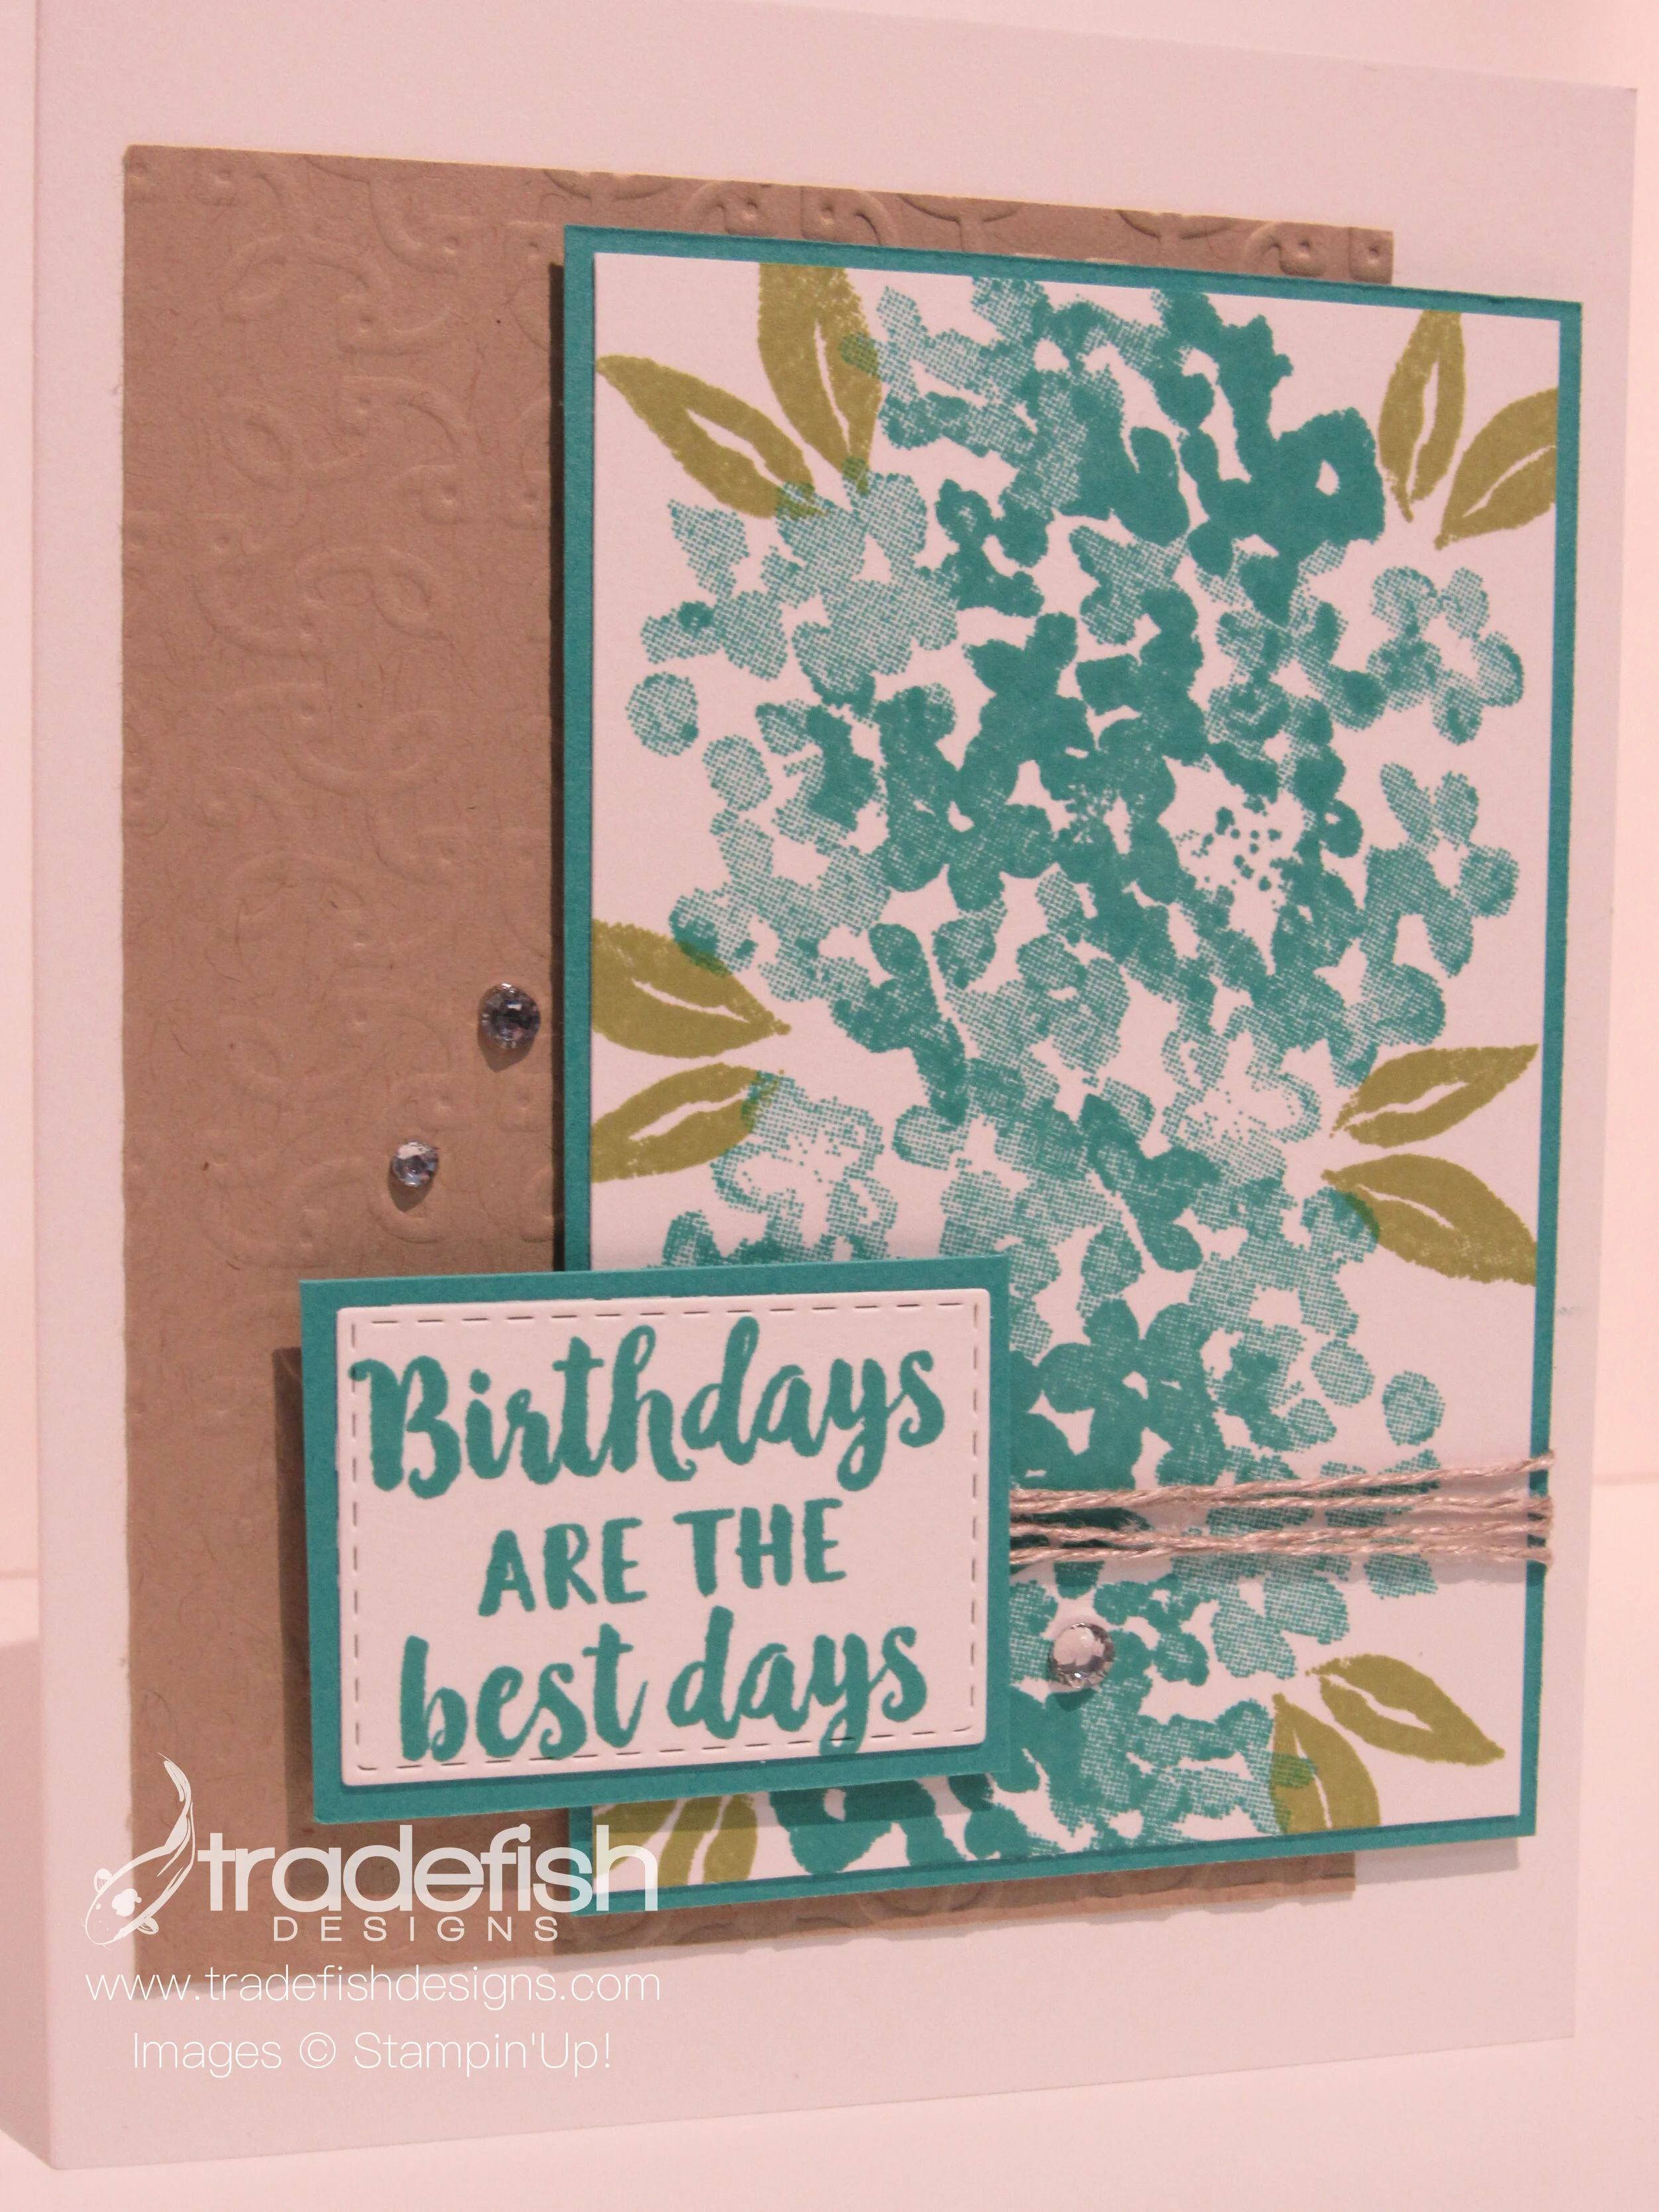
Birthdays are the best days!
Hello Crafty Friends!
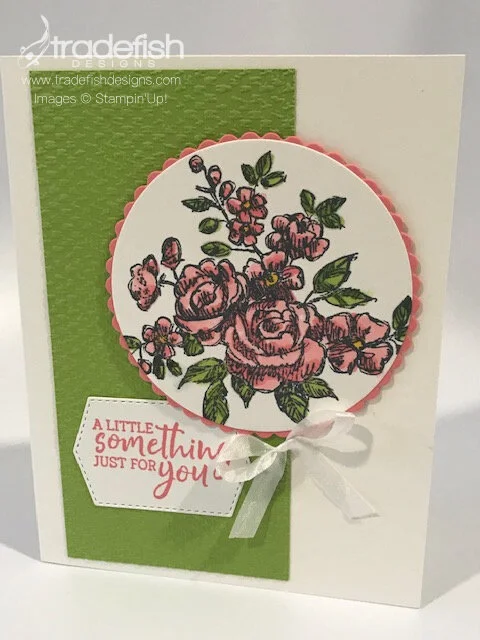
Here’s a fun birthday card using my favorite stamp set from Stampin’ Up…Beautiful Friendship. I’m not a girly-girl but I absolutely love this stamp set. I made this card as a part of the a card class. I love that you can make your own floral combination. You will see more of this stamp set in future projects!

Here’s a close up of the sentiments. It shows off the cool stitching in the die cutting of the paper with the sentiment as well as the texture of the embossing folder and bling - don’t forget the bling!

Supplies I have used for this card:
Stamps: Beautiful Friendship
Dies: Stitched Rectangle
Embellishments: Rhinestone Basic Jewels
Paper: Whisper White, Crumb Cake, Bermuda Bay, Old Olive
Ink: Bermuda Bay, Old Olive

Have a wonderful day!
Christmas Tuesday at TradeFish Designs
Christmas Tuesday at TradeFish Designs,
Ok, so I know we just finished with Christmas but I need lots of Christmas cards each year. I am on the Board of Directors for an Animal Sanctuary in North Carolina. It has been my pleasure and privilege to send a Christmas card to anyone who makes a donation to the Sanctuary. This was fine when there was only 75 donations but this past year that number grew to over 500. Yikes…I was certainly caught off guard. So now, instead of starting cards in November, it has become a year-round project so I will highlight a new Christmas card each Tuesday throughout the year.

Although I am an Independent Stampin’ Up Demonstrator I have to admit that half of the products are no longer available for purchase. But the truth is that you can use this card as a template with your own paper…and it doesn't need to be a Christmas card!
Have a wonderful week my crafty friends!

Keep It Christmas Crafty!
May the warmth of Christmas fill each corner of your heart and home...
Hello Crafters,
I have a Christmas card that I made at a crop event at the beach in November. I make MANY Christmas cards each year. I make them for a charitable organization to thank large donors for their support throughout the year. I also design and make our family Christmas cards. Finally, I make an assortment of cards for my husband to distribute to his team at work. This year I also made an assortment of cards just for fun. This card is one of them…enjoy!

This card uses a bunch of my Stampin’ Up supplies. The stamp set is retired but if you want to recreate thes card design you can substitute any holiday sentiment you already have in your stamp stash. The designer paper is Night Before Christmas from the current Holiday Catalog. The Holiday Catalog is only good through January 2nd so it you see something you like please don’t wait to place an order!

Here’s a close up at an angle so you can see the textures and dimension of the card. I hope you enjoy this simple card and come back tomorrow for another holiday card.
What Stampin’ Up products I used to make this card…
IF you want to purchase any of the items ABOVE please feel free to visit MY WEBSITE and use the following host code: 3XGZA7HB
If you place an order you can use the Host Code above in the Special Offers section of the shopping bag. Please only use this code if your order is under $150. If your order is above $150 you can select hostess benefits on your order.

Happy Crafting!
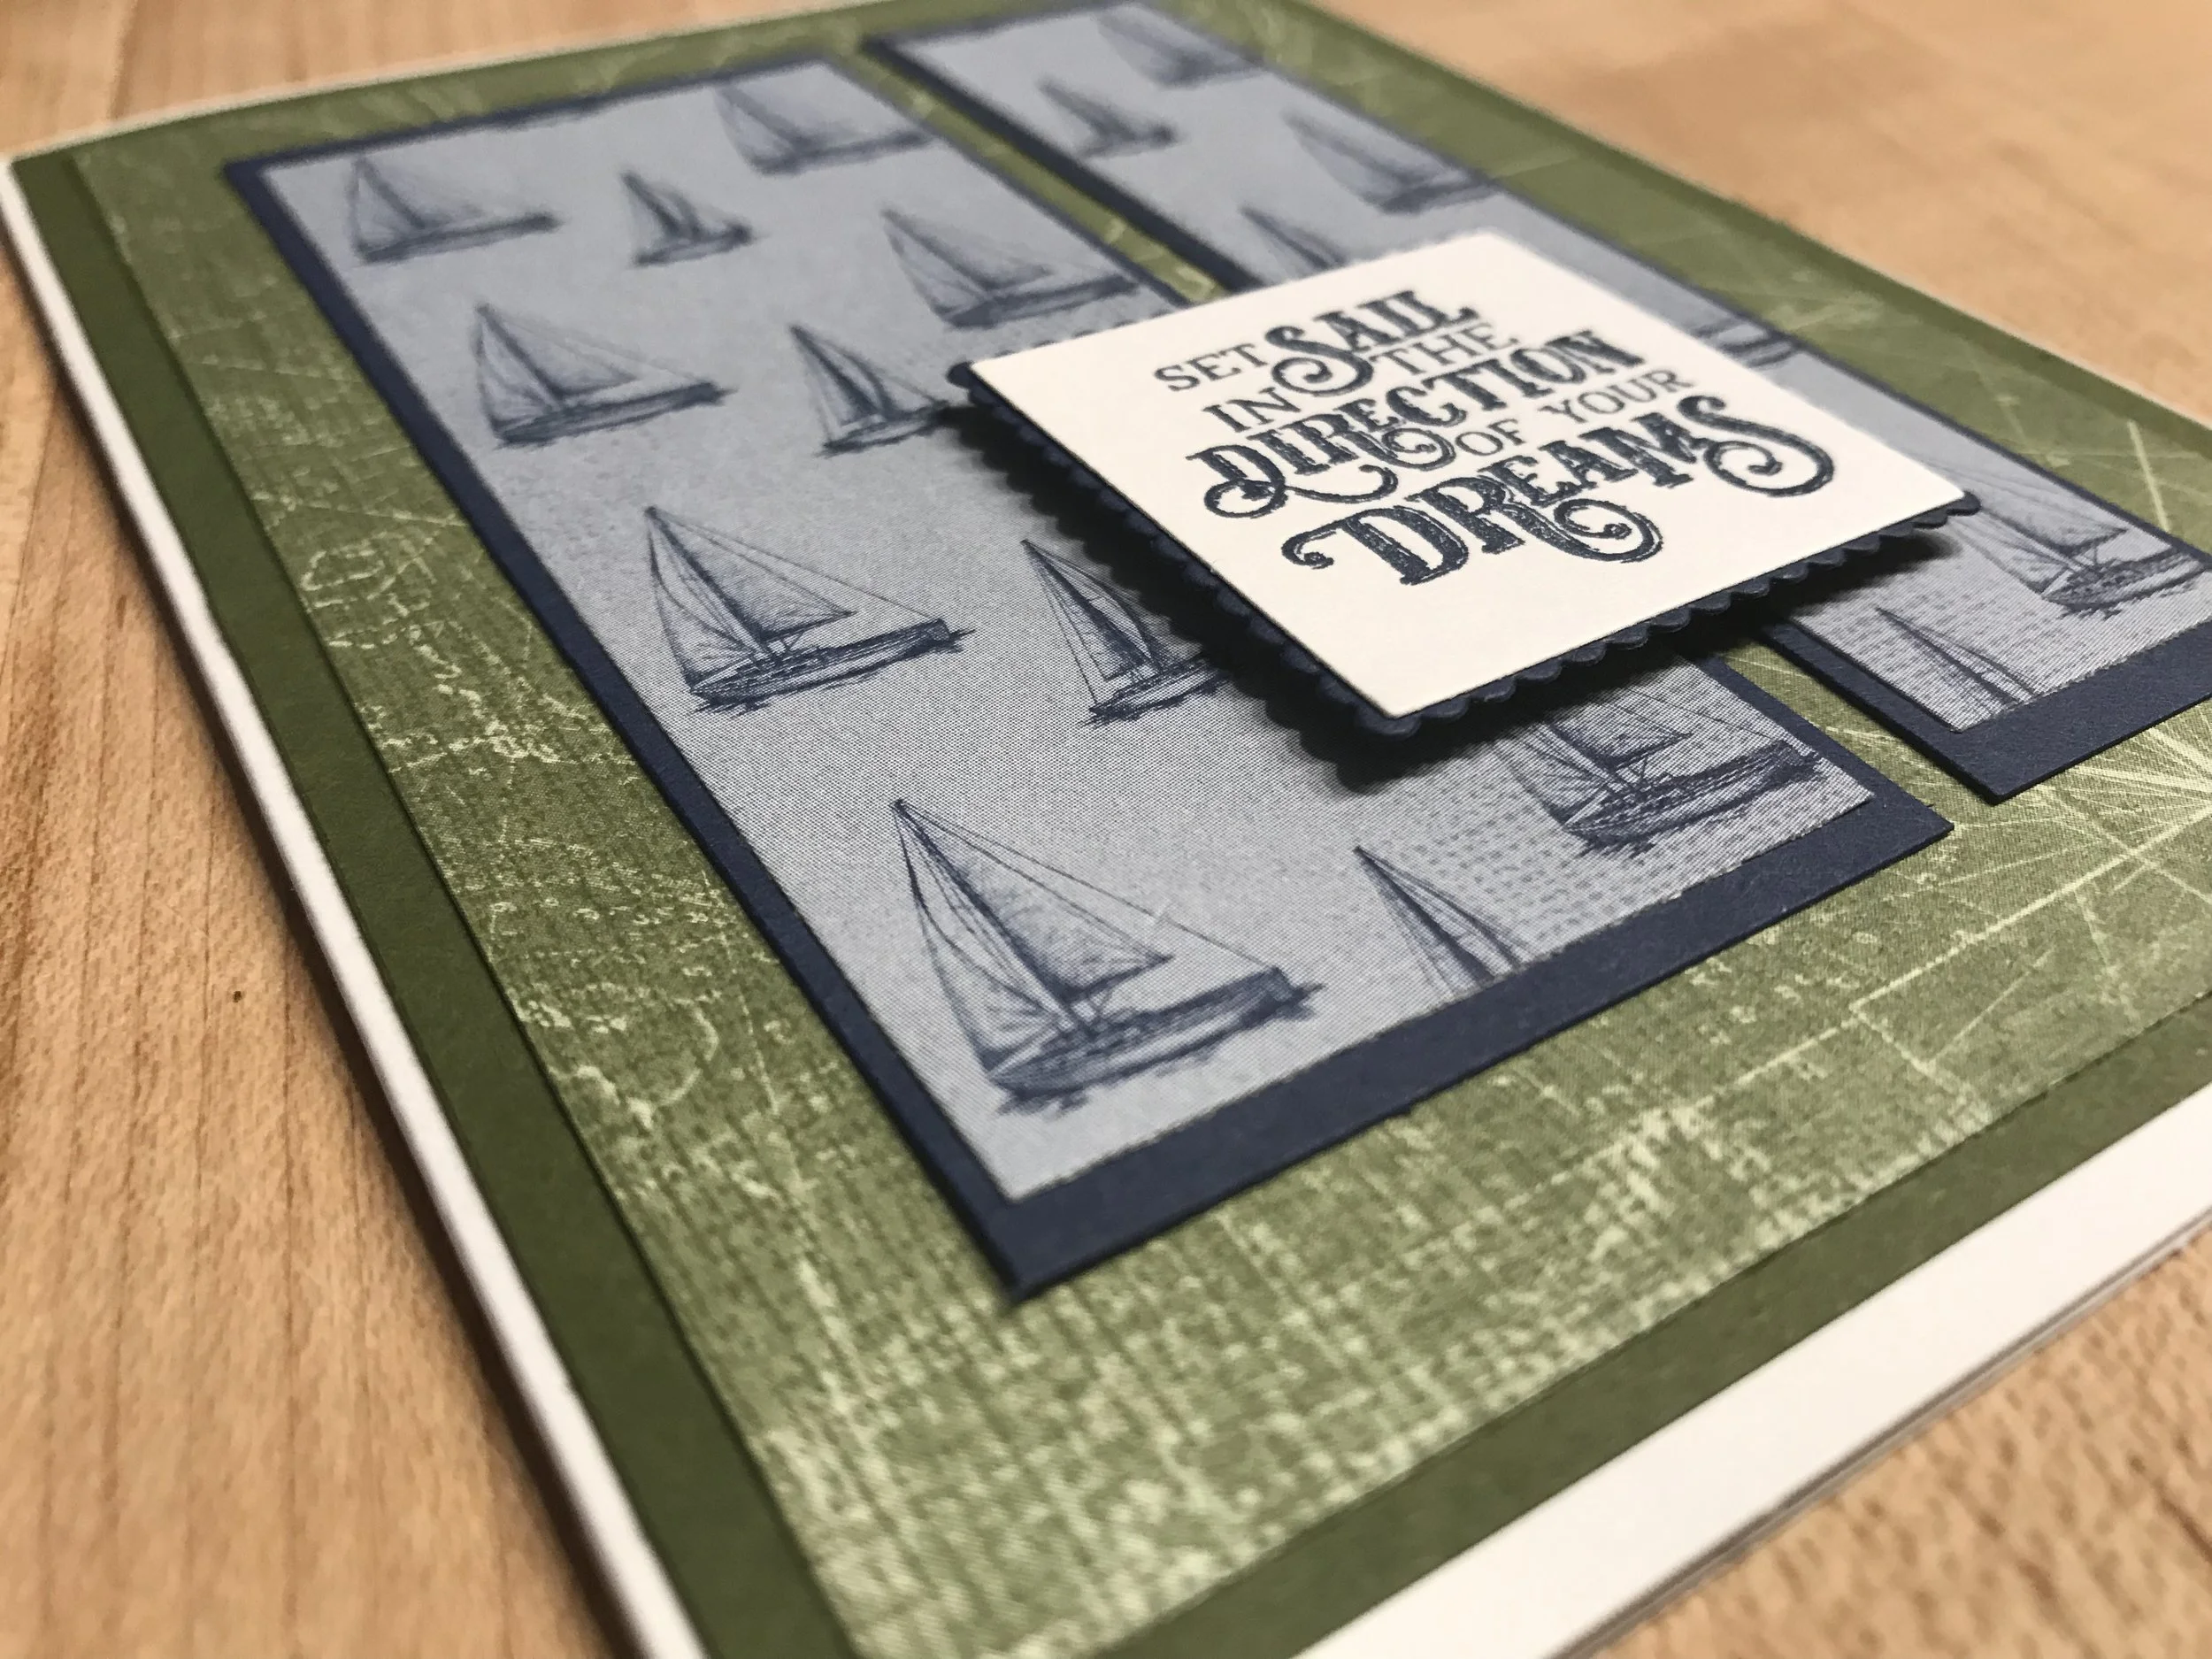
Come Sail Away...
First project for quite a while. I’ve been out of crafty commission for months. New job and side hustle filled all the vacant space. Now I have made a few adjustments, cleaned my craft room and busted out a could of cards. Here’s the first one…

Joined Stampin’ Up as a Demonstrator. It’s not the only product you’ll see on my blog because I really love it all but I will highlight the SU products when I use them.

I will always try to take an angle shot so you can see the dimension in the project.

I decorated the front and back of the envelope and the inside of the card as well but I forgot to take an inside pic.

I try to make a coordinating envelope where I can and use some coordinating paper to really tie it all together. It really makes a statement when the recipient opens the card and sees the matching look.
I don’t really have the dimensions here for you on this one. I did use the following supplies that you can buy on my Stampin’Up website - TradeFishDesigns.stampinup.net:
I hope you enjoyed this card. Come back soon for another fun project.
