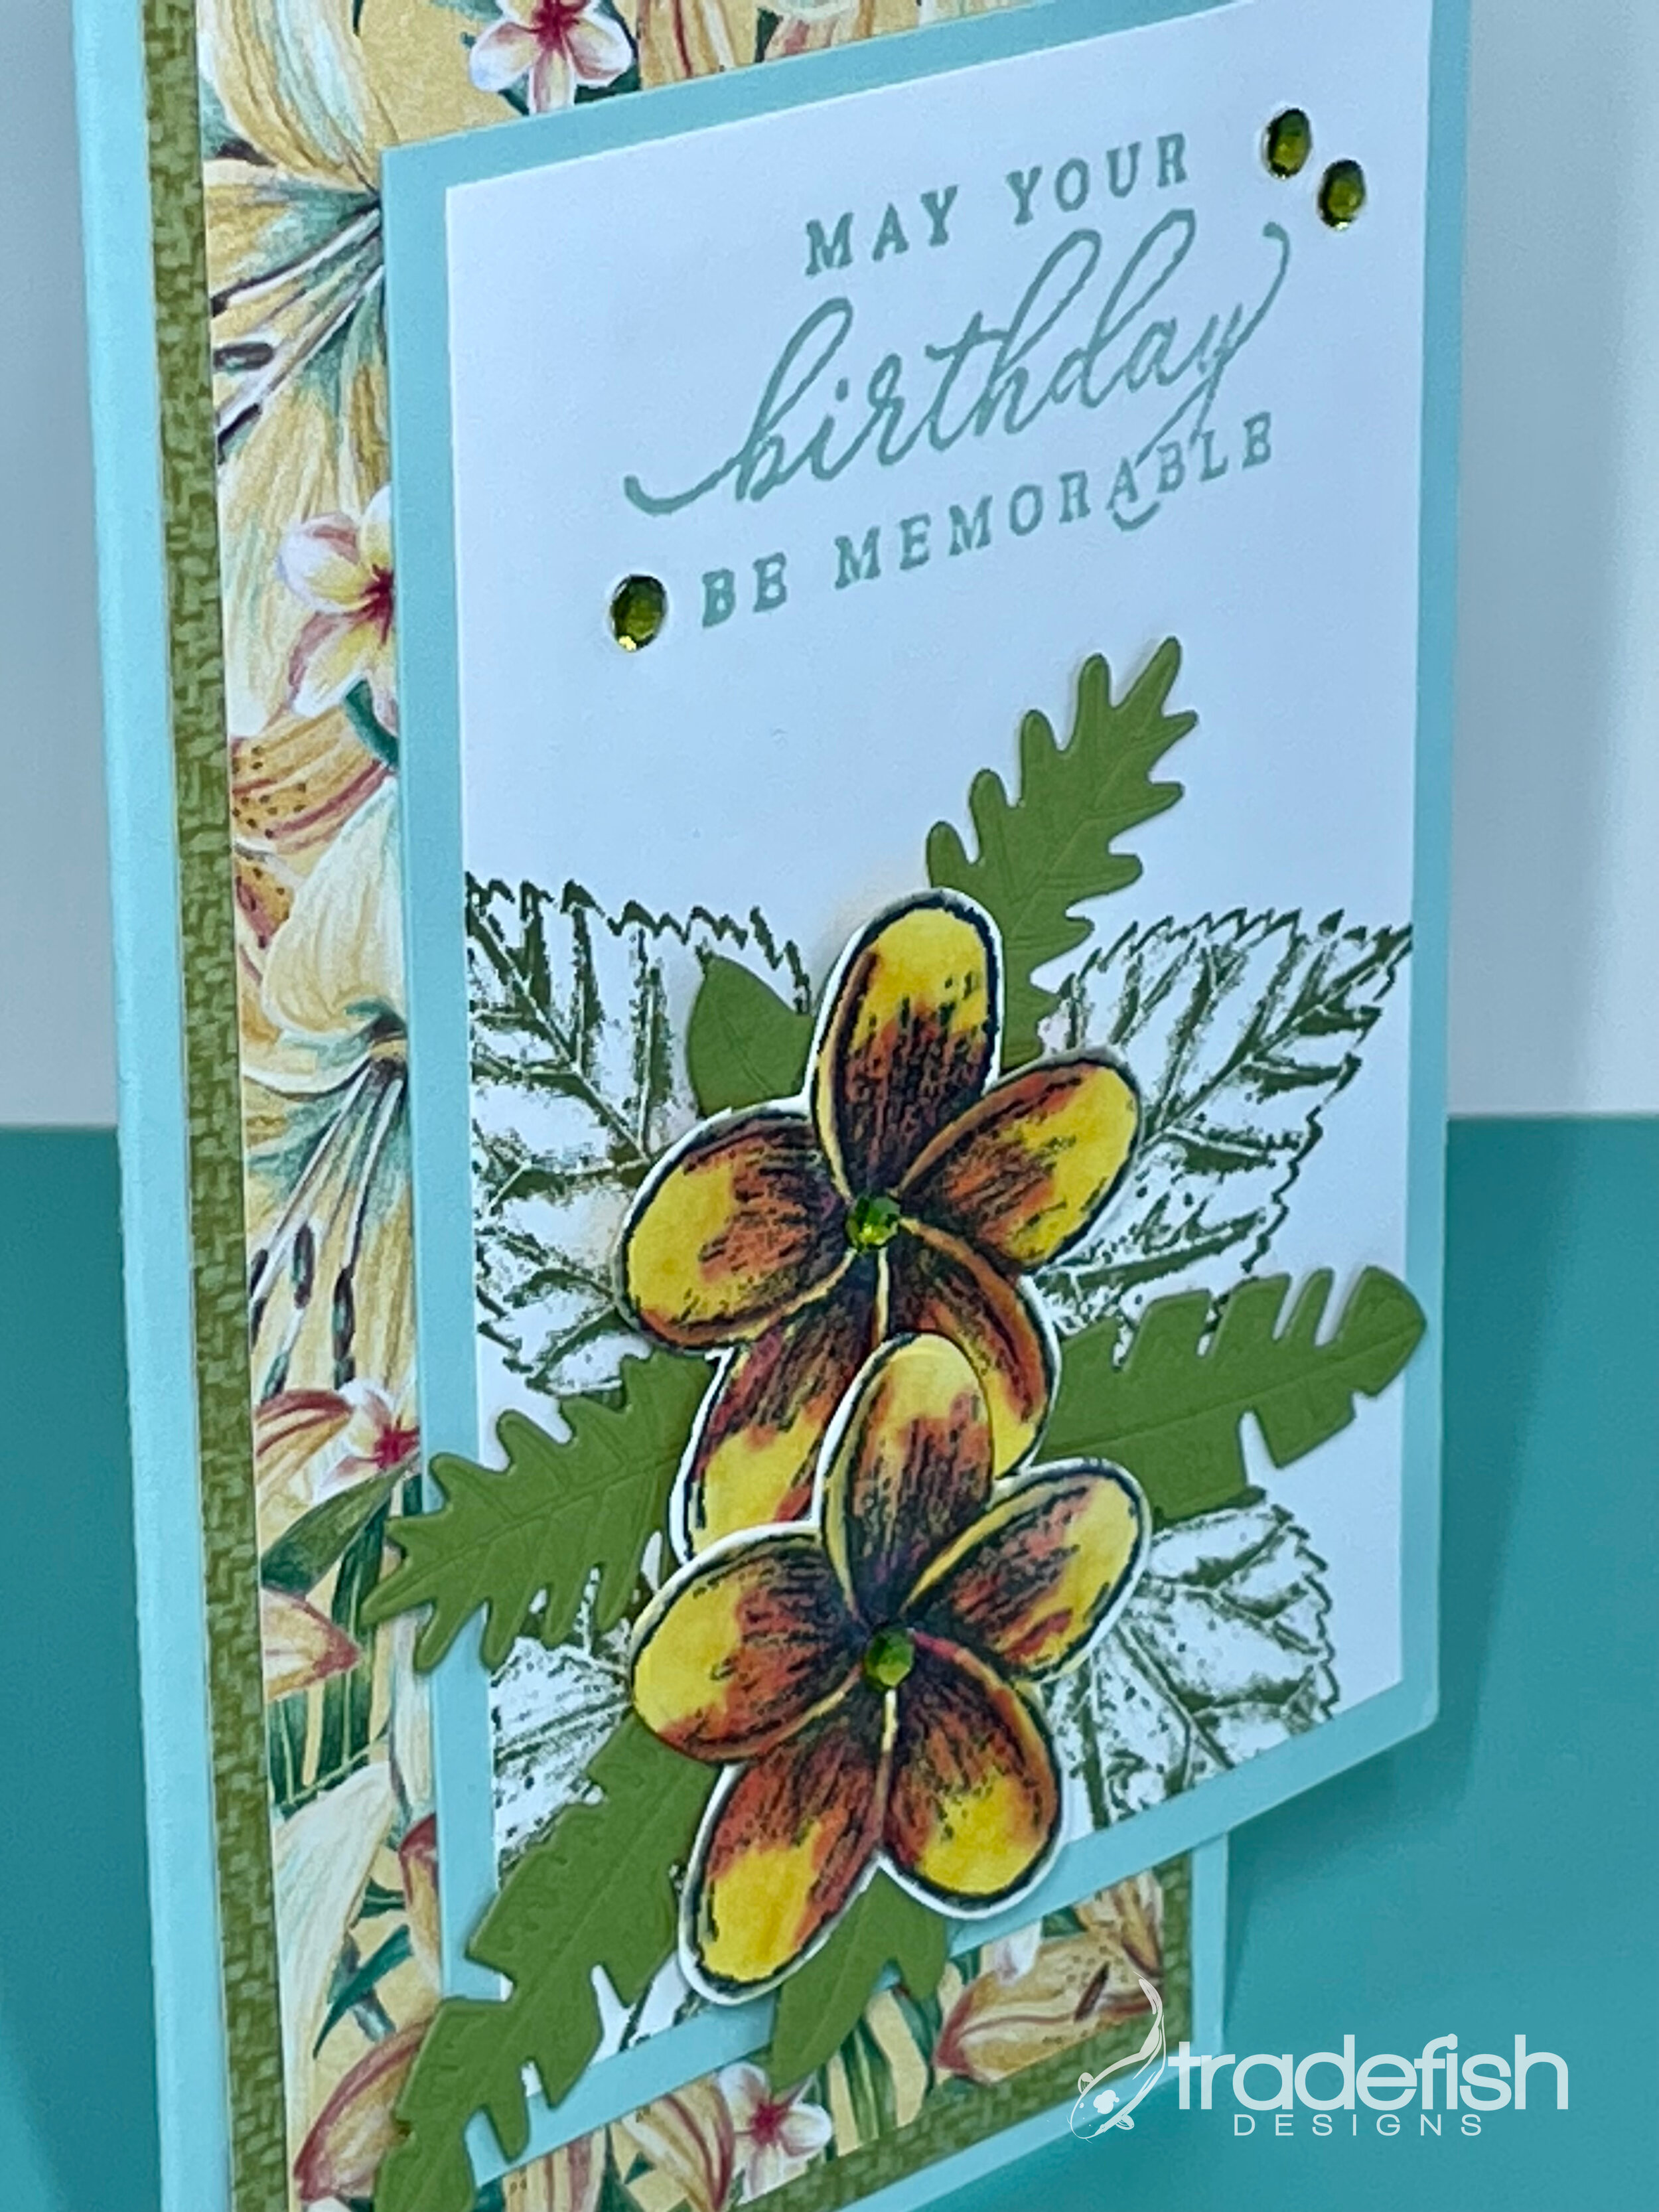
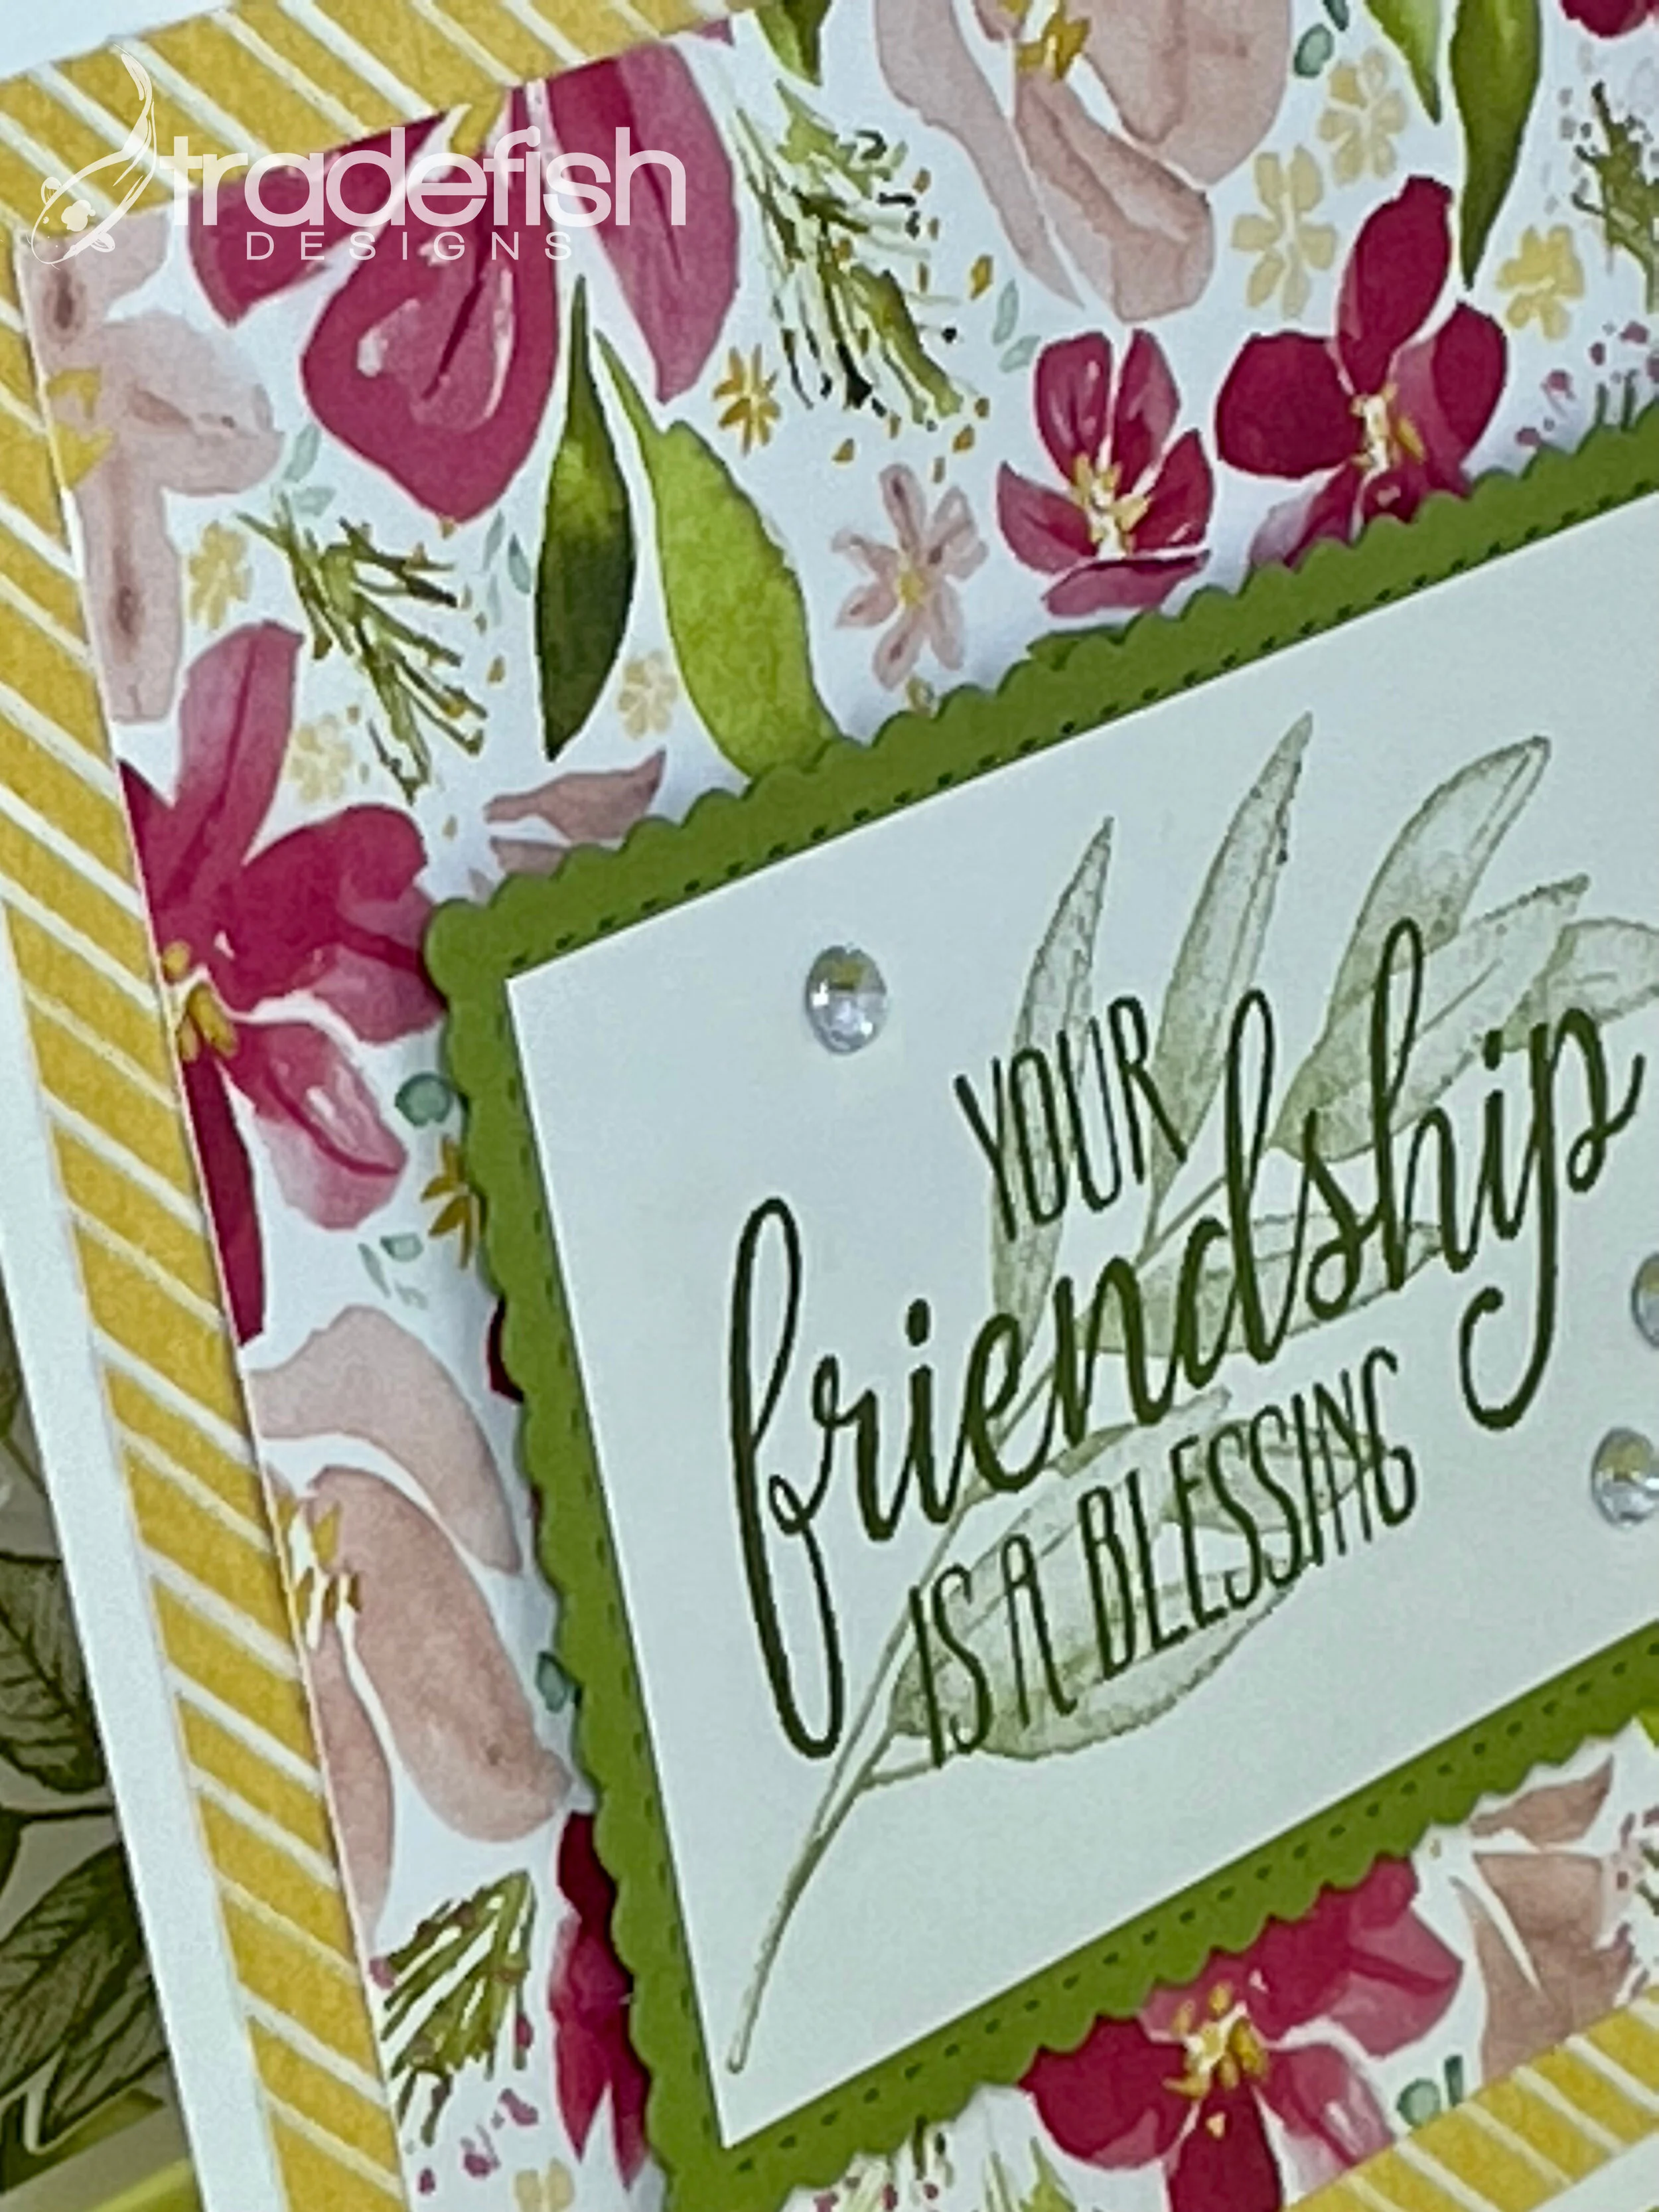
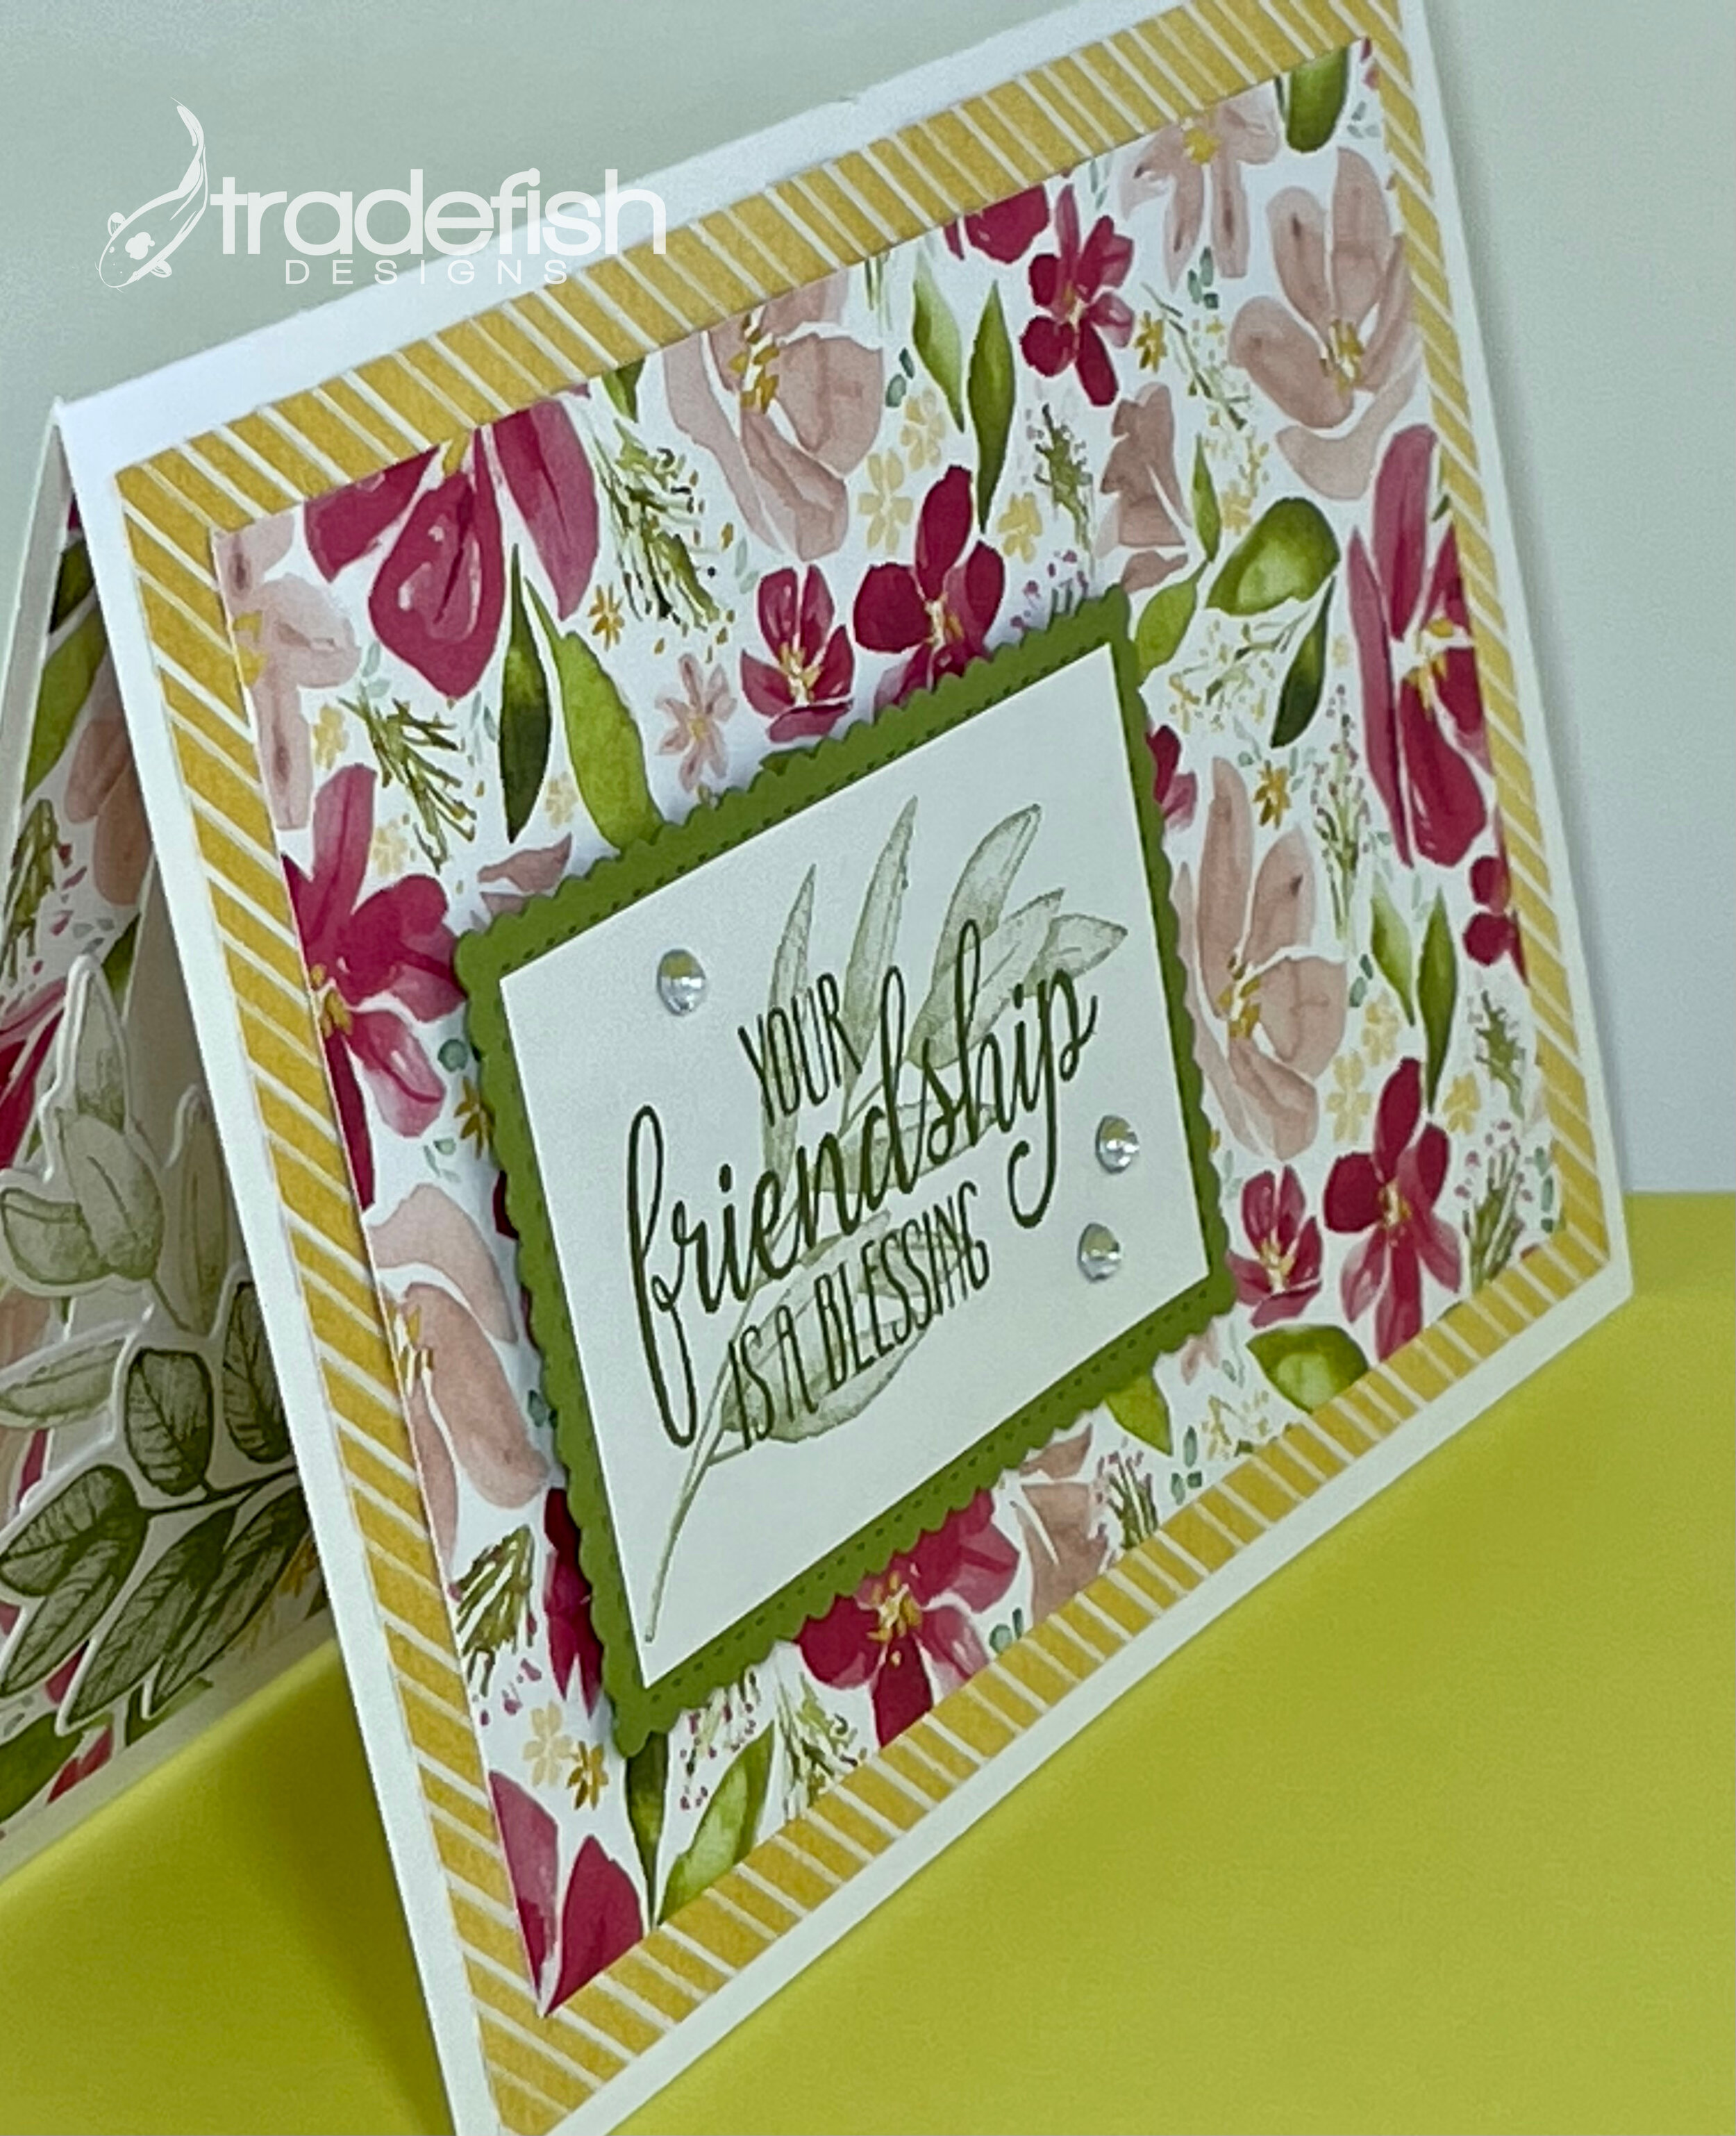
October 8, 2021 - May Your Birthday Be Memorable

A birthday card featuring the Timeless Tropical stamp set from Stampin’ Up.

Birthday Wishes1 (7).jpg
Technique: Alcohol Markers

Technique: Alcohol Markers

Birthday Wishes1 (4).jpg
No naked envelopes!

No naked envelopes!

Supplies used:

Stamps: Timeless Tropical (SU)

Ink: Old Olive, Pool Party (SU) and Memento Tuxedo Black

Paper: Tropical Oasis, Pool Party and Old Olive (SU), white

Tools/Markers: Real Red, Mango Melody and Daffodil Delight Stampin’ Blends (SU)

Embellishments: Noble Peacock Rhinestones (SU)

Keep it crafty!

Keep it crafty!

October 6, 2021....Birthday Wishes

Birthday card featuring the Fancy Phrases stamp set bu Stampin’ Up

Birthday Wishes1.jpg
Technique: Embossing

Technique: Embossing

Birthday Wishes1 (2).jpg

Supplies used:

Stamps: Fancy Phrases (SU)

Ink: Night of Navy (SU)

Paper: Night of Navy, Poppy Parade, Balmy Blue, Flirty Flamingo (SU), White

Dies: Tasteful Labels (SU)

Tools/Punch: Scalloped and Label Me Fancy (SU)

Tools/Embossing Folder: Scripty and Subtle (SU)

Embellishments: Basic Rhinestone (SU)

Keep it crafty!

Keep it crafty!

October 4, 2021 - Happy Birthday

Birthday card featuring Here’s a Card stamp set by Stampin’ Up.

No naked envelopes!

No naked envelopes!

birthday 1 b0.jpg
birthday 1 c0.jpg

Supplies used:

Stamps: Here’s a Card (SU)

Ink: Night of Navy (SU)

Paper: Country Club DSP, Night of Navy (SU)

Tools (Punches): Label Me Fancy, Label Me Lovely (SU)

Embellishments: Clear Epoxy Drops (SU)

Keep it crafty!

Keep it crafty!

Sending positive thoughts with flowers

Here’s a simple way to tone down some very busy designer paper. I added two blocks of sold cardstock in complementary colors. The sunflower is a die cut which is then cut in half and layered over the Just Jade cardstock.

No naked envelopes!

No naked envelopes!

The second piece of solid cardstock has the sentiment. By placing both the die and the sentiment in the middle it breaks up the busy daisy pattern paper.

Love some epoxy drops!

Love some epoxy drops!

I always try to pull something from the front of the card to the inside of the card. Here I used the same stamp set to add a colorful image with a sentiment over the top. The contrast between the busy front and the quieter inside is fun for the eyes.

Daisy 20 (1).jpg

Supplies used: All supplies are Stampin’ Up

Stamps: Positive Thoughts

Ink: Early Espresso, Bumblebee

Paper: Whisper White, Early Espresso, Just Jade, Ornate Gardens DSP

Dies: Stitched Rectangles

Embellishments: Epoxy Drops

A tropical hello!

One of my favorite colors from Stampin’ Up was Pretty Peacock. It was an In-Color which lasted only two years (and has since retired) but I used as much as I would with this card. I tried to fill this card with texture even though there’s not a lot of dimension. I created the texture with the designer paper and embossing the colored cardstock. The stitching in the nested label dies also adds a bit of texture.

Hello 10.jpg
Hello 20.jpg

Supplies used: All supplies from Stampin’ Up.

Stamps: Timeless Tropical

Ink: Pretty Peacock

Paper: Whisper White, Pretty Peacock & Tropical Oasis DSP

Dies: Nested Labels

Embossing Folder: Subtle

Embellishments: Noble Peacock Rhinestones

A crafty hello!

A crafty hello!

Using a cute tag...and a corner punch.

This card project involves using some cute inspirational tags I received with an online order and using an old punch - a corner rounder to bring a simple card to life. These cards are clean and simple. The first card has the tag popped up for dimension with a few gold glitter enamel dots.

IMG_6852.JPG

The close up shows off the embellishments and the dimension of the tag. I love the soft greens with the gold.

IMG_6853.JPG

This card keeps most of the same color scheme but shifts to silver with the rhinestones (with a pop of Cinnamon Cider paper). I added a bit of dimension by adding the embossing to the Mint Macaron paper. I also decided to minic the shape of the tag in the card base by using my Corner Chomper to round off each corner.

IMG_6854.jpg

The close up gives you a good look at the Tasteful Textile embossing folder. It’s very subtle but still impactful. Next time you get a cute inspiration tag on a gift or in packaging consider using up cycling it in a card and share with someone.

IMG_6855.JPG

I hope you enjoyed these simple cards using some cute tags!

Supplies used:

Paper: Very Vanilla, Mint Macaron, Just Jade, So Saffron, and Cinnamon Cider (SU)

Embellishments: Basic Rhinestones & Gold Glitter Enamel Dots (SU)

Embossing Folder: Tasteful Textiles (SU)

Tools: Corner Chomper (WRMK)

Misc: tags from Erin Condren (EC)

Koi Fish from logo.png

Your Friendship Is A Blessing

Don’t be afraid to mix patterns. This card takes a coordinated suite of paper and brings a floral and diagonal stripe together. You make sure you combine a a busy pattern with a not-so-busy pattern. Here, the color yellow ties the two prints together. The diagonal stripes complement the busy floral pattern.

Card 1.jpg

Second generation stamping. You can use the same color and stamp it twice (without reinking) to get the effect of two different colors. Here, the sentiment is the first generation (darkest) and the leaves behind it are the second generation of the same color making it appear lighter. It offers a great effect while also tying the leave image into the designer background paper.

The power of odd numbers and triangles. I always work in uneven numbers as it is more pleasing to the eye. You would think even numbers would feel more balanced but it doesn’t. I always need to add just one more. I also use an imaginary triangle shape when laying down embellishments, like these rhinestones, because it keeps your eyes moving around the card. It doesn’t need to be a perfect triangle, in fact, I find the more unusual the triangular formation the more interesting the effect.

Don’t forget the inside. Sometimes I do a little and sometimes I do a lot on the inside. If you have extra paper that matches why not consider filling in more of the card and add interest to the white space. Here I also add some die cut leaves to coordinate with the stamped images on the front of the card.

Card 4.jpg

What about the envelope? You don’t have to settle for just a plan boring envelope. You can stamp a coordinating image on the front or use some extra coordinating paper and cover the flap on the envelope. If you do add paper to the envelope make sure it is stuck in place firmly as it will often go through machines at the post office and you don’t want it to get stuck and damage the envelope and risk the card not being delivered.

Card 50.jpg

I hope you enjoyed this card and maybe use some of my tips on your own cards. Happy crafting friends!

Supplies: (All supplies Stampin’ Up unless otherwise stated)

Stamps: So Sentimental, Forever Fern

Ink: Old Olive

Paper: Best Dressed DSP, Old Olive & Pear Pizzaz

Dies: Stitched So Sweetly, Forever Fern

Embellishments: Rhinestones

DESIGN: 20200628

Koi Fish from logo.png

It's been a while...you are so Special

I have been off the blogging scene for a while now but I would like to work my way back. I have a serious backlog of cards to post. I think I will post every other day for a while to clear out my cards. I hope you enjoy them!

Card front.

I used a couple of older techniques on this card. The first one was making my own background paper using the Veramark inkpad. It’s a great way to stamp images on paper using an “clear” ink that give you the look of a watermark.

Close up of front of card.

Close up of front of card.

This card uses an old technique of torn edges with the Rococo Rose paper layered in between background paper made with stamps from the Tasteful Touches stamp set. This close up gives you a great look at the sentiment on the die cut with the nice stitching around the edge.

Angle shot.

Angle shot.

The angle shot shows off the dimension in the card with the added embellishments. It also gives you a sneak peak at the surprise inside.

Inside of card.

Inside of card.

I always try to make sure that there is something inside the card that pulls from the front of the card. Sometimes it’s stamp and sometimes it’s coordinated paper.

Supplies include: (All items below are from Stampin’ Up)

Stamps: Tasteful Touches

Ink: Rococo Rose, Versamark & Memento Tuxedo Black

Paper: Bumblebee, Rococo Rose, Cinnamon Cider & Whisper White

Dies: Tasteful Labels

Blends: Mint Macaron and Daffodil Delight

Embellishments: Epoxy Drops

You are so special!

You are so special!

Thinking of You This Season - Holiday Card

Today’s card is a Christmas card using the Winter Woods stamps and the coordinating In The Woods dies from Stampin’ Up.

Thinking of U Season main.JPG

The angle shows the dimension you get from the tree and the background embossing. Mixing all the layers gives the card depth. Plus I like to add a little bling with the gold glitter enamel gems,

Thinking of U Season Angle.JPG

Don’t forget to decorate the inside of the card. I used the coordinating designer series paper and stamped the pine tree off the side to allow for space for a holiday message.

Thinking of U Season inside.JPG

I hope you enjoyed my card today. If you are interested in any of the items I used in this project please check out the Product List below. Keep it crafty friends!

Keep it crafty peeps!

Keep it crafty peeps!